Category: Light meals

  • The Ultimate 15-Minute Brunch: Crispy Bacon & Egg Smoosh

    The Ultimate 15-Minute Brunch: Crispy Bacon & Egg Smoosh

    Are you looking for a breakfast or brunch recipe that is incredibly satisfying, packed with flavor, but comes together in just 15 minutes? Look no further.
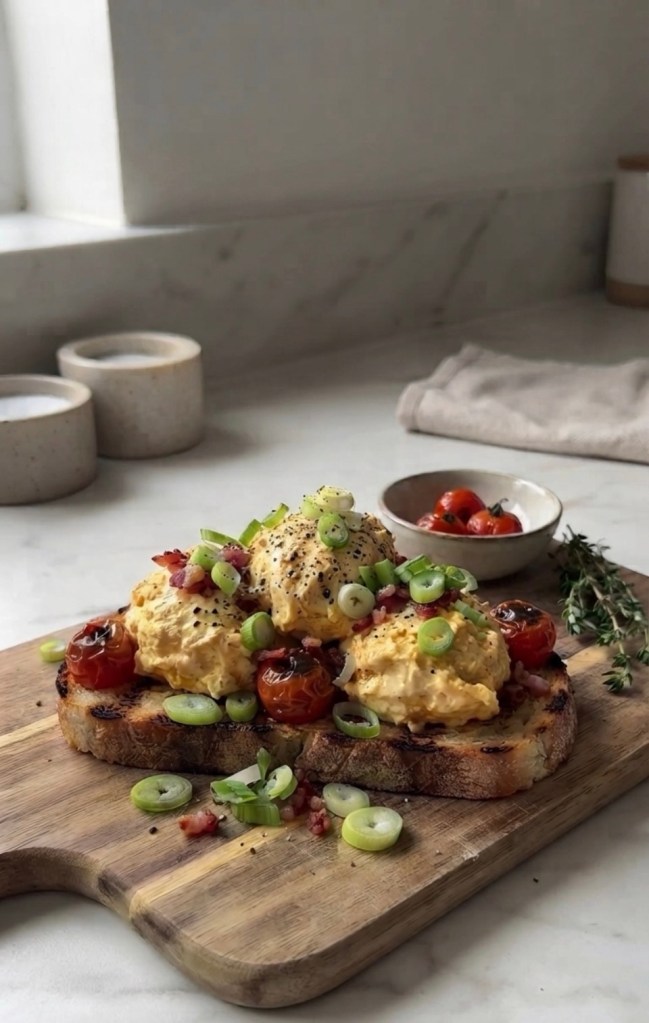
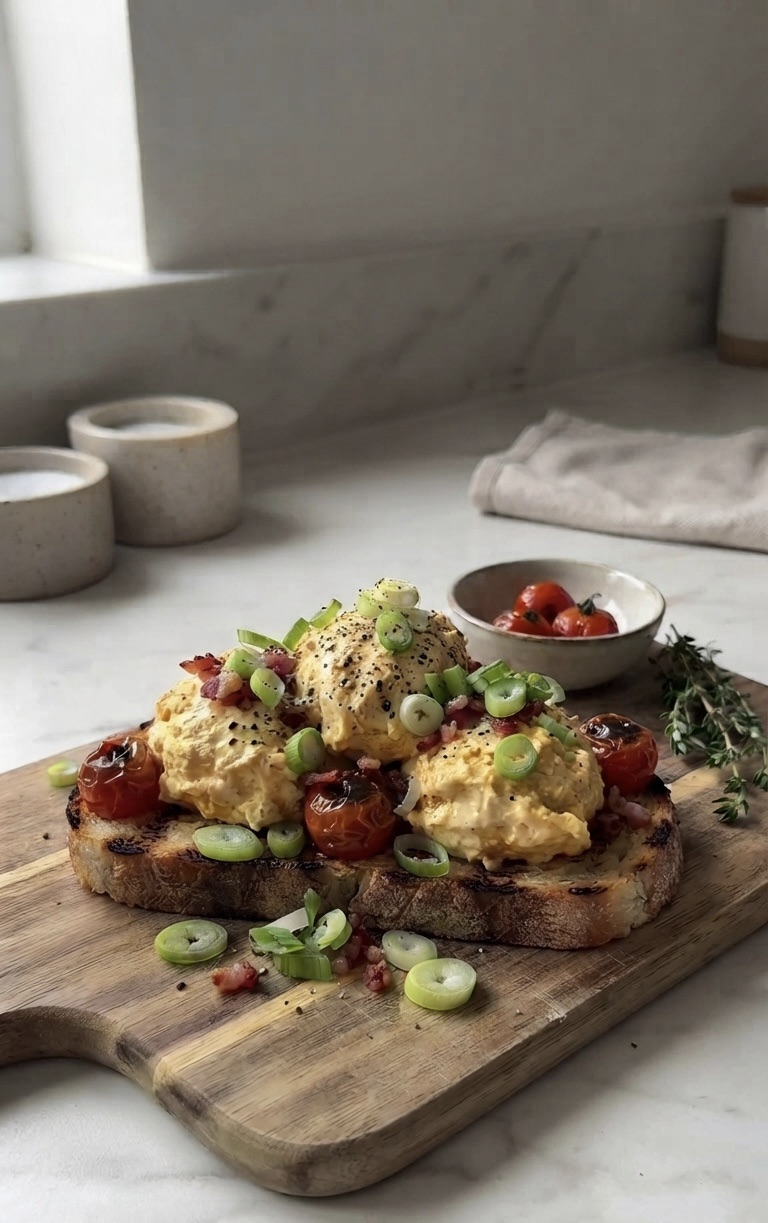
    Say hello to the Crispy Bacon & Egg Smoosh.

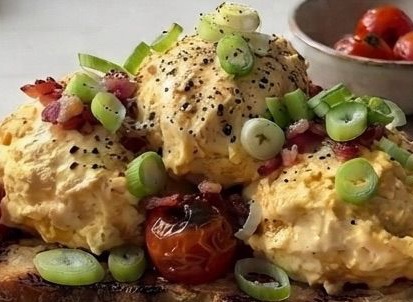
    This recipe takes the classic components of a cooked breakfast—eggs, bacon, tomatoes, and toast—and elevates them into something creamy, crunchy, and completely addictive. The “smoosh” itself is a warm, savory mash of roasted cherry tomatoes, light cream cheese, and tangy feta, folded together with crispy bacon bits and chopped hard-boiled eggs.

    It’s the perfect savory indulgence for a slow weekend morning or a quick, protein-packed weekday lunch.

    Here is how to make it.

    📸 Ingredients: The Line-Up

    Before you start, let’s get everything organized. This recipe is all about having your components ready to go.
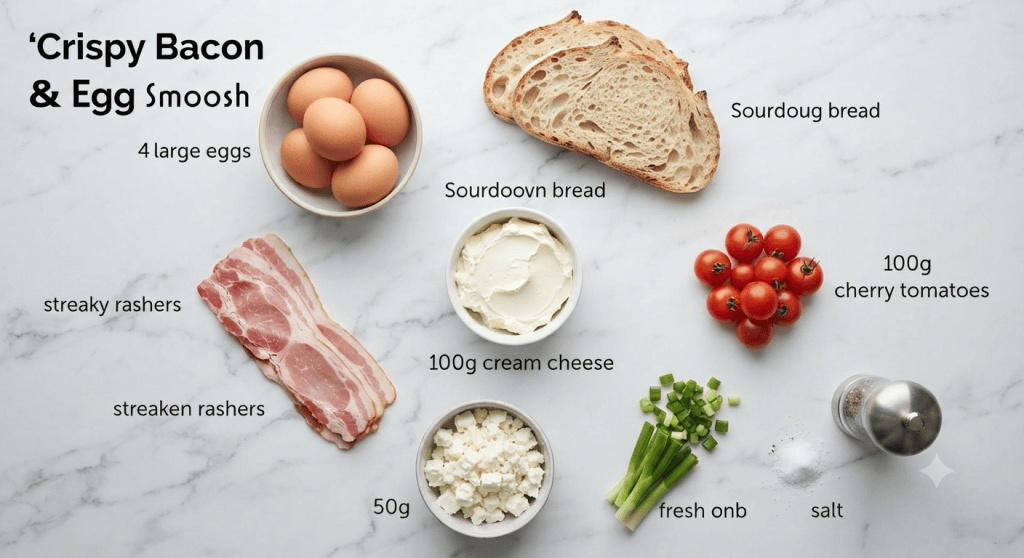
     2 thick slices of Sourdough bread (or your favorite crusty bread)

     4 large Eggs

     4 rashers of Streaky Bacon

     100g Light Cream Cheese

     50g Feta cheese, crumbled

     100g Cherry Tomatoes

     2 Spring Onions, finely chopped

     Salt and freshly cracked Black Pepper

     Optional: A drizzle of olive oil for roasting and fresh thyme for garnish

    👩‍🍳 The Method: Step-by-Step

    Prep Time: 5 minutes | Cook Time: 15 minutes | Yields: 2 servings

    Step 1: Roast the Tomatoes and Bacon

    Preheat your oven to 200°C (400°F). On a small baking tray, toss the cherry tomatoes with a tiny drizzle of olive oil and a pinch of salt. Lay the streaky bacon rashers flat on the same tray (or a separate one if crowded).

    Roast for 10–12 minutes, or until the tomatoes are blistered and bursting, and the bacon is perfectly crispy.

    Step 2: Cook the Eggs

    While the bacon and tomatoes are in the oven, boil your eggs to your liking. For this recipe, a hard-boiled egg (cooked for 10 minutes) works best to provide texture. Once cooked, plunge them into an ice bath to cool rapidly, then peel and roughly chop them.

    Step 3: Make the “Smoosh”

    This is the magic moment. In a medium-sized bowl, add the hot, roasted cherry tomatoes straight from the oven (include all the flavorful juices from the pan!). Add the light cream cheese and crumbled feta.

    Using a fork, mash everything together vigorously. The heat from the tomatoes will melt the cheeses, creating a warm, creamy base.

    Next, fold in the chopped, hard-boiled eggs and crumble in the crispy bacon. Don’t over-mix here; you want distinct chunks of bacon and egg. Season generously with salt and plenty of cracked black pepper.

    Step 4: Toast and Assemble

    Toast your thick-cut sourdough until it is deep golden brown and audibly crispy.

    Generously pile the warm “smoosh” mixture onto the toast. It should be mounded high and heavy.

    Step 5: Garnish and Serve

    Top the entire creation with a mountain of freshly chopped spring onions for a sharp, fresh bite. Add an extra sprinkle of black pepper and a small sprig of fresh thyme, if using.

    Serve immediately, while it’s still warm.
    💡 Tips for Success

     Don’t drain the tomatoes: When you mash the roasted tomatoes, make sure to include all the lovely liquid from the baking tray. It provides essential flavor and moisture for the “smoosh.”

     Bread choice matters: Use a sturdy bread like sourdough, ciabatta, or a seeded bloomer. You need a strong base to hold the hearty topping without getting soggy.

     Make it spicy: If you like heat, add a pinch of red pepper flakes or a dash of hot sauce into the “smoosh” mixture.

    This Crispy Bacon & Egg Smoosh is destined to become a new favorite in your house. If you make it, let us know in the comments below!
  • Brunch Like Hailey Bieber: Lighter Pizza Toast With A Protein Twist

    Brunch Like Hailey Bieber: Lighter Pizza Toast With A Protein Twist


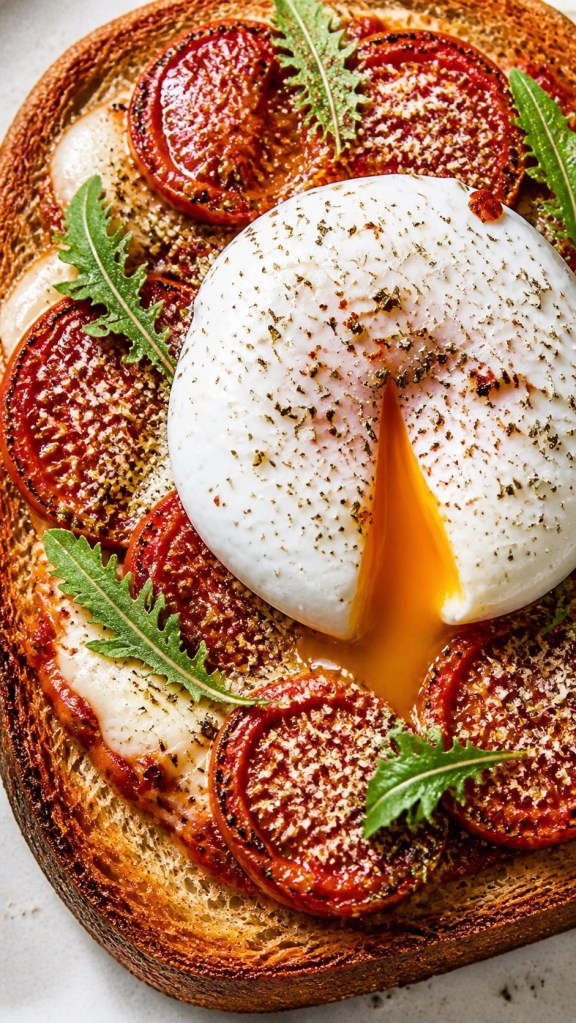
    If you’ve been anywhere near food TikTok over the last couple of years, you’ve probably seen Hailey Bieber’s famous pizza toast doing the rounds. It’s buttery sourdough, burrata, tomatoes, parmesan, truffle oil – basically everything you’d expect from a celebrity brunch at home.
    I love the idea, but I also like my brunch to actually keep me going – ideally without blowing my calories for the entire day. So this is my lighter, more balanced version: still indulgent and “celeby”, but around 450 calories with a decent hit of protein from the egg and cheese.

    It’s perfect for a slow weekend brunch, or a “treat but not too extra” weekday brunch if you work from home.

    Hailey‑Inspired Pizza Brunch Toast (Around 450 Calories)
    Serves: 1
    Time: 15–20 minutes
    Approx. per serving: around 450 kcal, with a good mix of protein, carbs and fats (will vary depending on your bread and cheese)
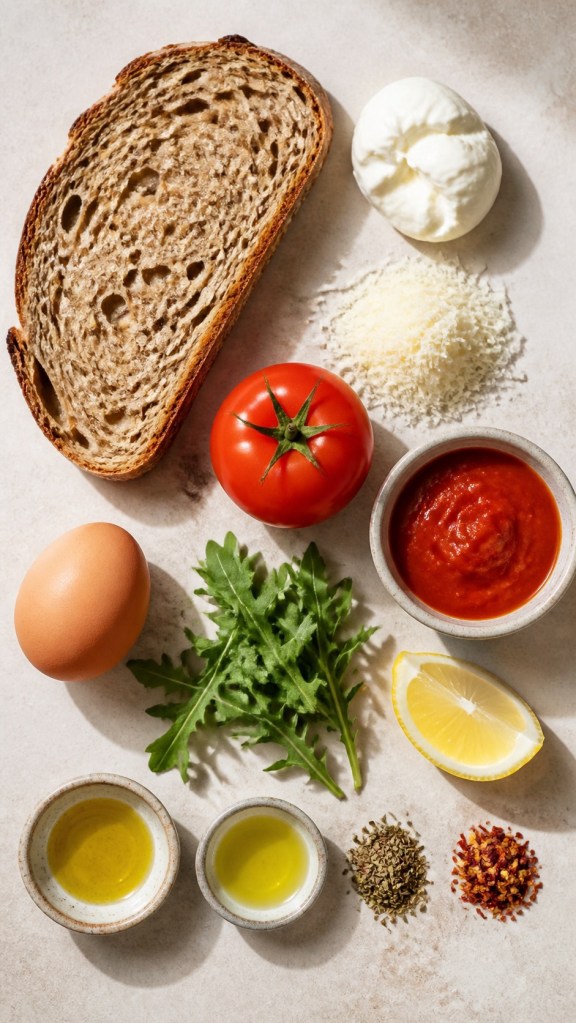
    Ingredients


    Toast base
    • 1 medium slice wholemeal or seeded sourdough (about 40 g / 1.4 oz)
    • ½ teaspoon butter or olive spread (2–3 g)
    • ½ teaspoon truffle oil (optional, but very “celebrity”)
    • Pinch of salt
    Tomato layer
    • 1 medium ripe tomato, thinly sliced
    • 1 teaspoon extra‑virgin olive oil (5 ml)
    • Squeeze of lemon juice
    • Pinch of salt
    • Pinch of dried oregano or Italian herbs
    Cheese and “pizza” toppings
    • 30 g burrata or fresh mozzarella, torn (just over 1 oz)
    • 2 tablespoons marinara sauce or herby passata (about 30 ml)
    • 1 tablespoon finely grated parmesan (about 5 g)
    • Pinch of dried oregano
    • Pinch of chilli flakes
    Brunch protein and greens (my twist)
    • 1 medium egg (poached or fried in spray oil)

    • Small handful rocket or fresh basil leaves

    Method

    1. Marinate the tomatoes
      Slice your tomato and lay the slices in a small dish. Drizzle over the olive oil, a squeeze of lemon juice, a pinch of salt, and a little dried oregano or Italian herbs. Gently toss and leave them to marinate while you sort out the toast – even 5–10 minutes makes a difference.
    2. Toast the bread
      Lightly spread both sides of your sourdough with the butter or olive spread. Drizzle one side with the truffle oil and add a tiny pinch of salt.
      Heat a non‑stick pan over medium heat and toast the bread on both sides until golden and crisp. You want it sturdy enough to hold all the toppings without going soggy.
    3. Build the pizza toast
      Transfer the toasted bread to a small baking tray.
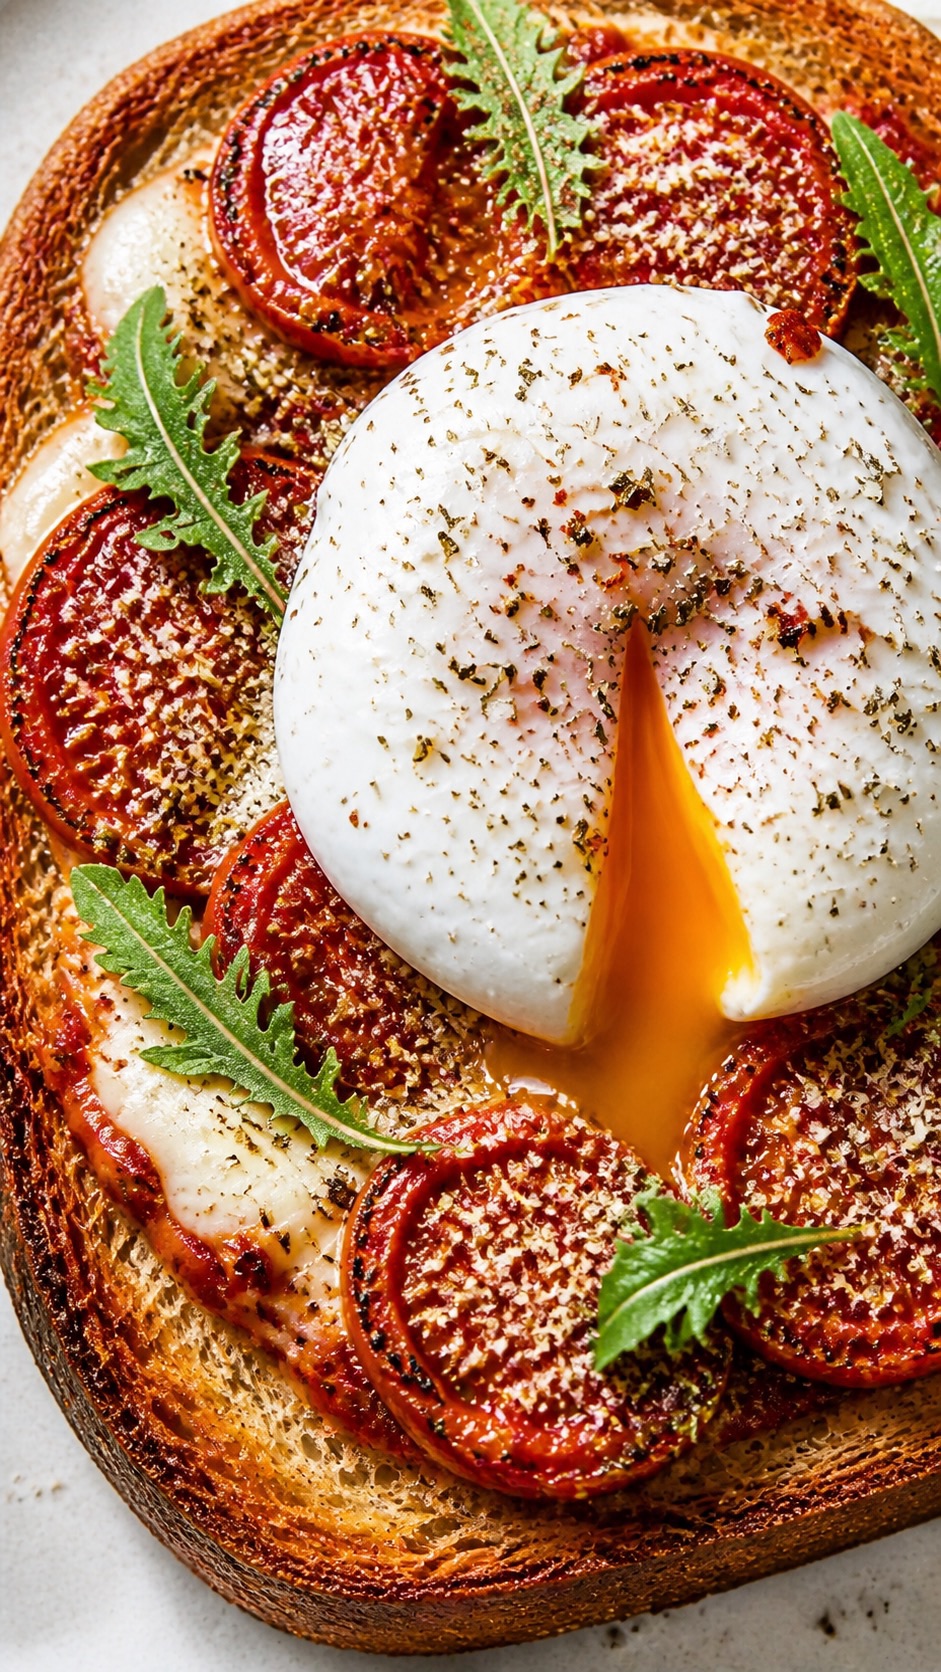
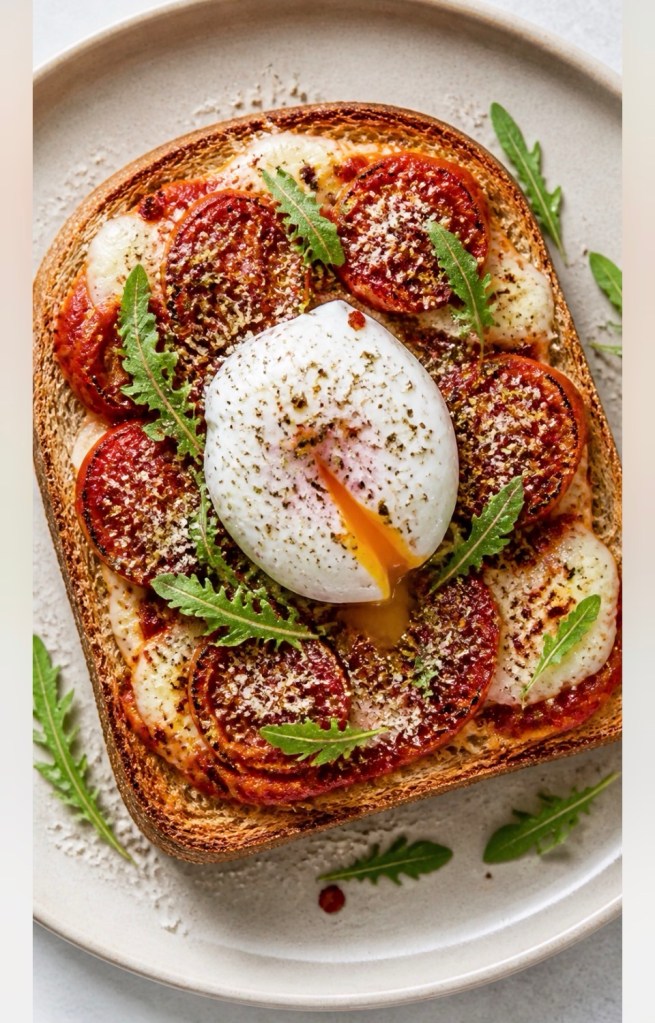
      Tear the burrata or mozzarella over the top of the toast. Layer the marinated tomato slices on top of the cheese and drizzle over any leftover marinade from the bowl. This adds loads of flavour without extra effort.
    4. Grill until melty
      Preheat your grill (broiler) to medium‑high, or use a hot oven (around 180–200 °C / 350–400 °F).
      Pop the tray under the grill for a few minutes, until the cheese is soft and beginning to melt and the edges of the toast are even more crisp. Keep an eye on it – it can go from perfect to burnt quite quickly.
    5. Add the pizza toppings
      Warm the marinara or passata in a small pan or the microwave.
      Spoon the sauce over the cheesy toast, then sprinkle with the parmesan, a little more dried oregano and a pinch of chilli flakes.
      Return the toast to the grill for 1–2 minutes, just until the parmesan melts and the top looks bubbling and irresistible.
    6. Finish with egg and greens
      While the toast is under the grill, cook your egg. I like it poached with a runny yolk, but you can fry it in a little spray oil if that’s easier.

    Place the egg on top of the pizza toast and scatter over the rocket or basil leaves. Slice into the yolk and let it run into the sauce and cheese – that’s your perfect brunch moment right there.

    How “health‑ified” is this version?
    The original pizza toast recipe is very generous with butter, oil and cheese. By slightly shrinking the bread slice, dialling down the fat, and keeping the egg for protein, this version sits closer to the 450 calorie mark for one serving, while still feeling like a proper treat.
    You’ve still got:
    • Carbs for energy from the sourdough and tomato
    • Protein from the egg and cheese
    • Fats from the oils and cheese to keep you satisfied
    • A bit of fibre from the wholemeal/seeded bread, tomato and rocket

    For the most accurate numbers, plug the exact ingredients and brands you use into your usual tracker (NutraCheck, MyFitnessPal, Cronometer etc.), as calories can vary a lot between breads and cheeses.

    Serving and variations
    • Add more protein: Use two eggs instead of one, or add a few slices of turkey, chicken or smoked salmon on the side.
    • Make it veggie‑heavy: Add a layer of wilted spinach or a few thin courgette ribbons under the cheese.
    • Go dairy‑lighter: Swap burrata for a lighter mozzarella, or use a reduced‑fat cheese and keep the parmesan as your flavour punch.
    • Make it truffle‑free: If you’re not a fan of truffle, skip the truffle oil and just use a little extra olive oil.
    If you make this, I’d love to know – are you team classic breakfast or team “celebrity brunch toast” now? Tag me on social or leave a comment with your tweaks and toppings.

  • Rihanna’s 5‑Minute Chickpea Salad (UK & US Measurements)

    Rihanna’s 5‑Minute Chickpea Salad (UK & US Measurements)

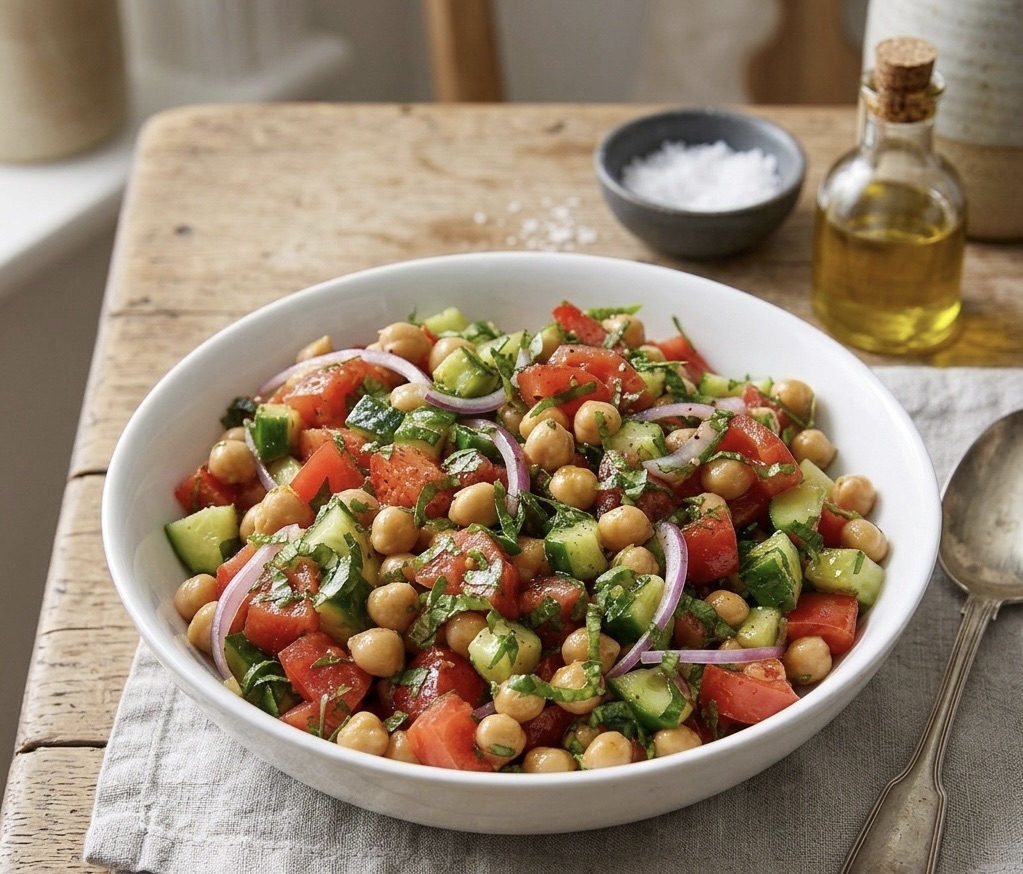
    Rihanna’s 5‑Minute Chickpea Salad (Perfect For Heatwave Days)
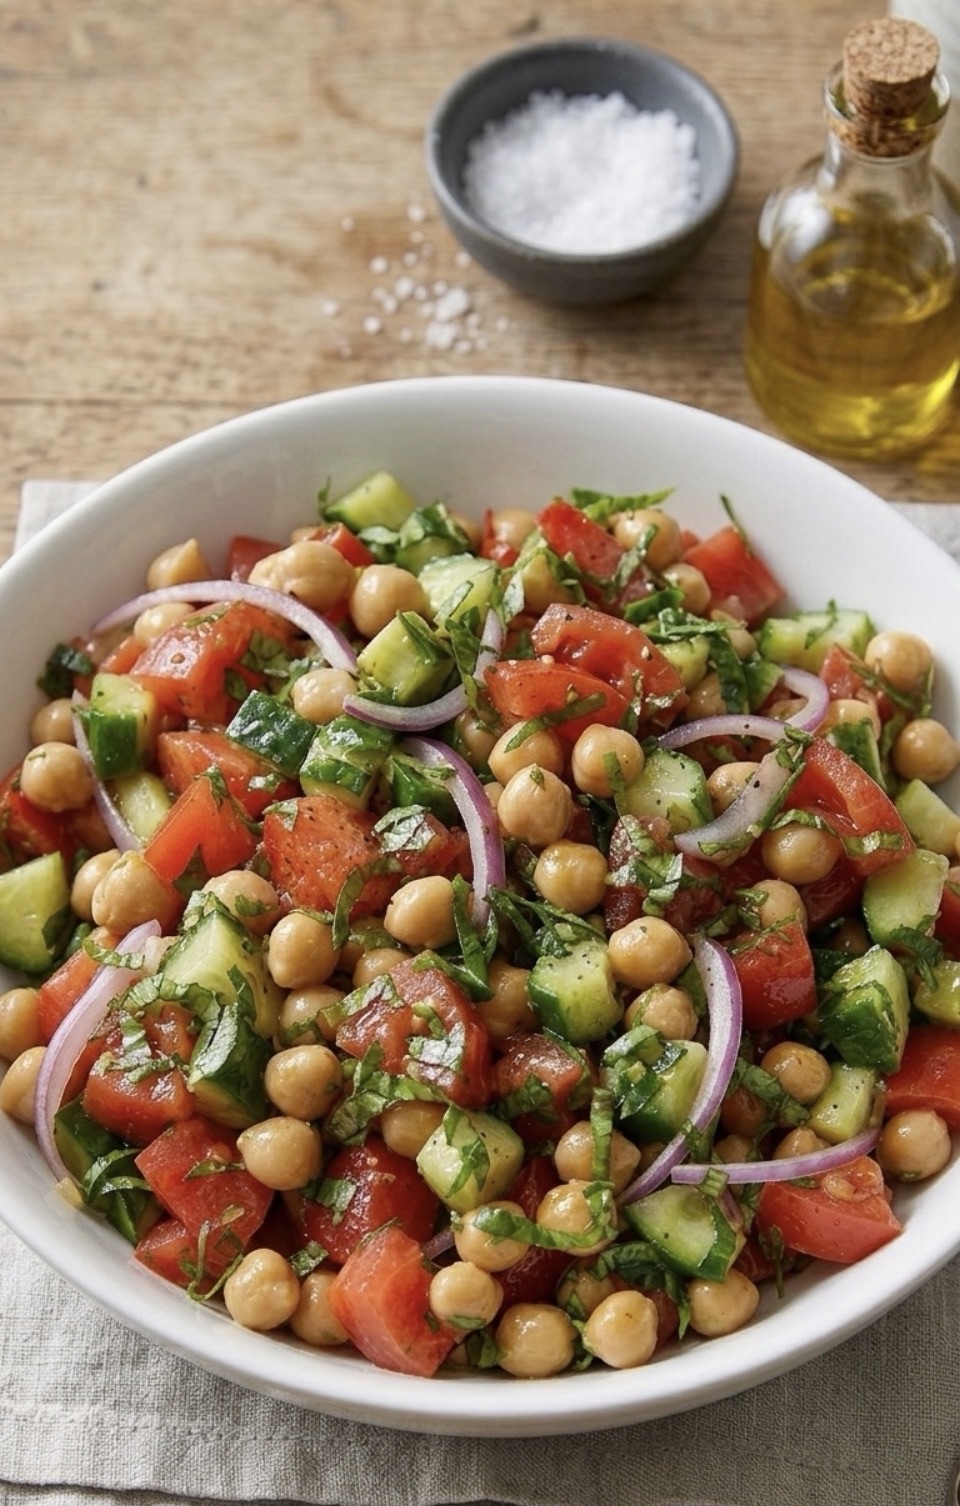
    When the weather is warm and you do not want to turn the oven on, this Rihanna-inspired chickpea salad is the perfect solution. It is fresh, light, high in fibre and ready in about five minutes – ideal for quick lunches, busy evenings or a no-fuss desk meal.

    I have adapted the recipe so it works for both UK and US readers, combining tin and can measurements in one place. The ingredients are very simple supermarket staples, but the basil, lemon and a touch of chilli keep it feeling bright and a little bit special.

    Why you will love this Rihanna-inspired salad
    • No cooking – everything is simply chopped and tossed together.
    • Budget friendly – mostly tinned and basic fresh produce.
    • High fibre and naturally vegetarian, with easy dairy-free options.

    • Scales up beautifully for meal prep or sharing.

    Ingredients (UK & US combined)
    Serves 2–3 as a main, 3–4 as a side.
    • 1 tin / can chickpeas (400g / 15 oz), drained and rinsed
    • 1 medium cucumber, diced
    • 2 medium tomatoes, diced
    • ¼ small red onion, finely sliced
    • Small handful fresh basil, chopped
    • 1 tbsp extra virgin / extra-virgin olive oil
    • Juice of ½ lemon
    • 1 tbsp red wine vinegar (or apple cider vinegar)
    • Salt and black pepper, to taste
    • Pinch chilli flakes / red pepper flakes (optional)
    Optional toppings for extra protein and creaminess:

    • 2 tbsp crumbled feta cheese or a spoonful of Greek yoghurt / yogurt

    Method

    1. Drain and rinse the chickpeas, then tip them into a large mixing bowl.
    2. Dice the cucumber and tomatoes, and finely slice the red onion. Add everything to the bowl with the chickpeas.
    3. Chop the basil and add it to the salad.
    4. In the same bowl, drizzle over the olive oil, squeeze in the lemon juice and add the vinegar. Season generously with salt, black pepper and a pinch of chilli or red pepper flakes if you like a little heat.
    5. Toss everything together until the chickpeas and vegetables are well coated in the dressing. Taste and adjust the seasoning – add more lemon or salt if needed.
    6. Serve immediately, or chill in the fridge for 20–30 minutes to let the flavours mingle.

    If you are using feta or Greek yoghurt, add it just before serving so it stays fresh and creamy.

    Helpful swaps and variations
    This salad is easy to tweak to suit what you have at home.
    • No basil: Use parsley, coriander/cilantro or a mix of dried herbs.
    • Dairy-free / vegan: Skip the feta or yoghurt and add extra chickpeas or diced avocado.
    • No vinegar: Use a little extra lemon juice and a pinch of sugar to balance the acidity.
    • Extra crunch: Add a handful of chopped nuts or seeds just before serving.

    You can also turn this into a more filling meal by serving it with toasted pitta bread / pita bread or spooning it over leafy greens.

    How to store Rihanna’s chickpea salad

    Store any leftovers in an airtight container in the fridge. The salad will keep well for up to 2 days, although the fresh herbs are best on the first day. If it tastes a little flat after chilling, simply add an extra squeeze of lemon and a small pinch of salt before serving.

    Bringing this salad to TikTok

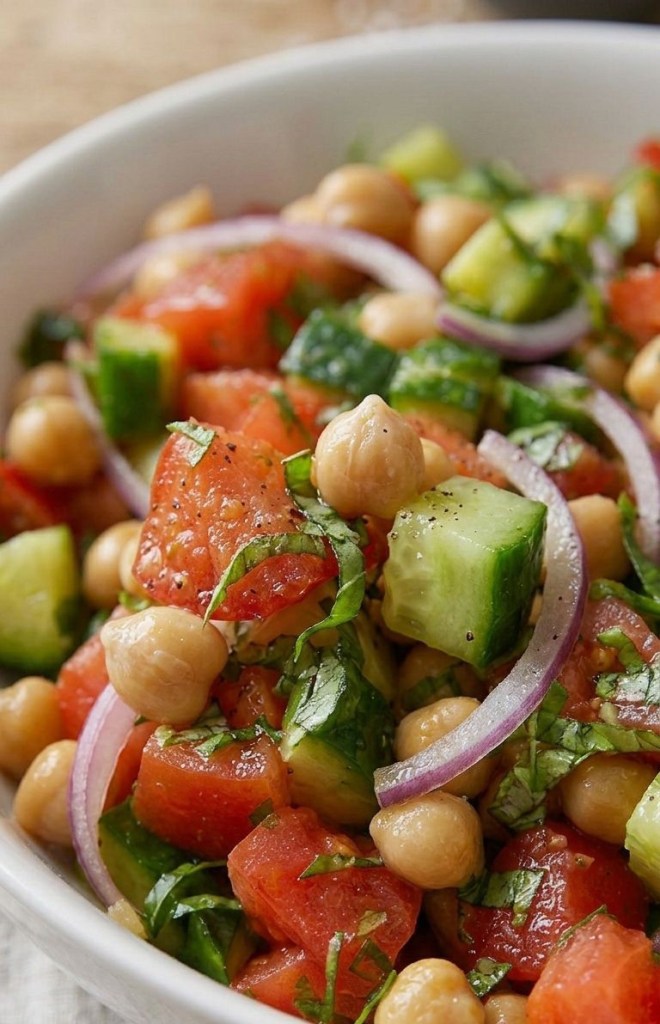
    This recipe works beautifully for short-form video. The colourful chickpeas, cucumber, tomatoes and basil look fantastic on camera, and the no-cook method means you can film it quickly. If you share it on TikTok or Instagram, tag me so I can see your version of Rihanna’s chickpea salad.

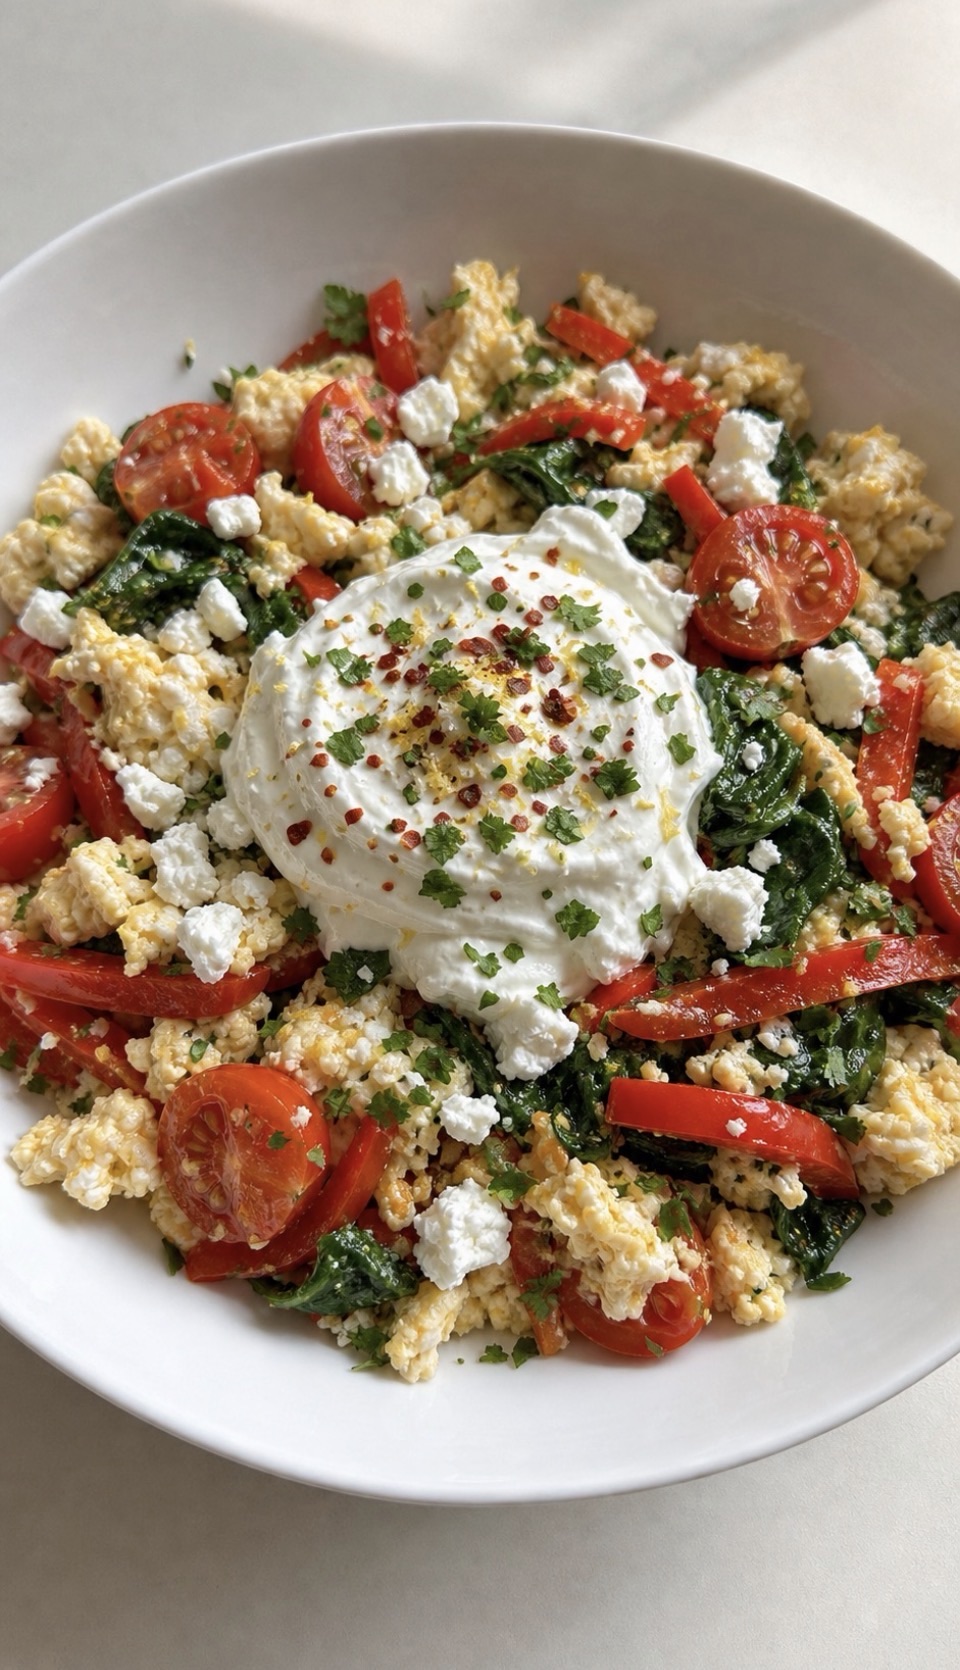
  • Mediterranean Egg White Protein Bowl (Light, High Protein & Ready in 10 Minutes)

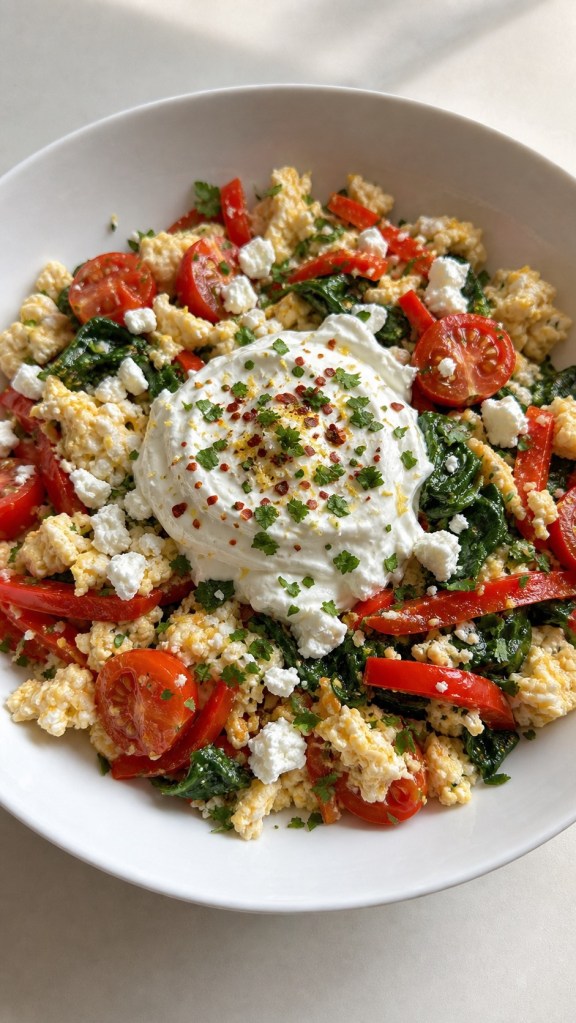
    Mediterranean Egg White Protein Bowl (Light, High Protein & Ready in 10 Minutes)


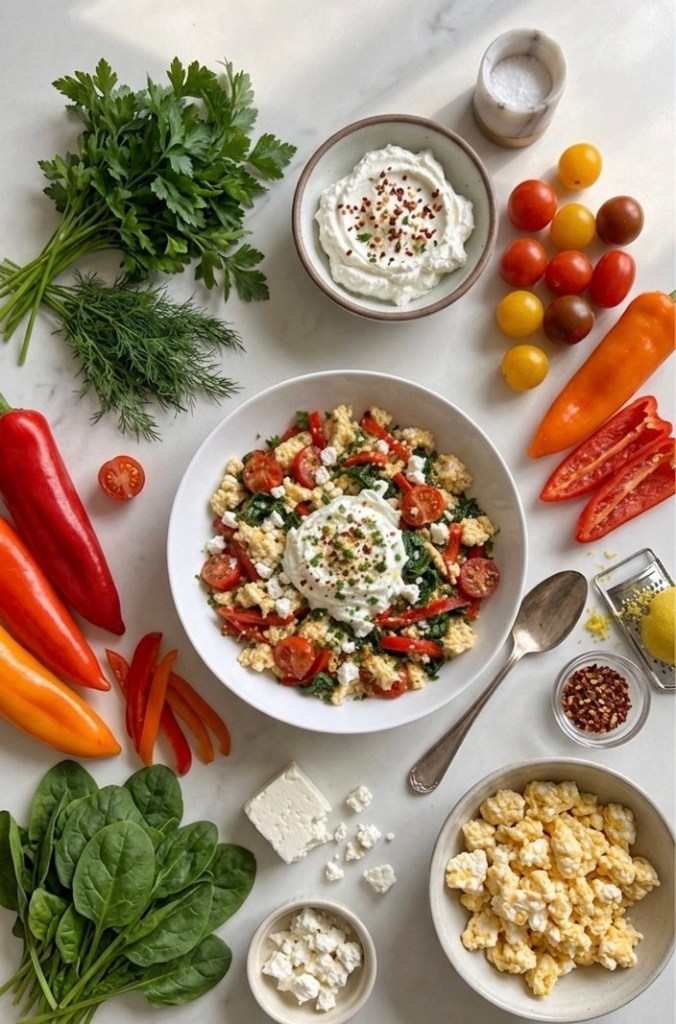
    If you’re bored of plain scrambled eggs but still want a high‑protein start to the day, this Mediterranean egg white bowl is a simple upgrade. It’s full of colourful vegetables, uses mostly egg whites for a lighter feel, and finishes with a creamy Greek yoghurt dollop that makes it feel like a café‑style brunch at home.

    The best part is how quickly it comes together. From chopping your veg to sitting down with your bowl, you’re looking at about 10 minutes, and you’ll get roughly 32–35g of protein depending on how much feta and yoghurt you use

    Protein breakdown (approx.)
    Exact numbers will vary slightly based on brands, but here’s a rough guide using common UK values:
    • 1 whole medium egg – about 6 g protein
    • 2 medium egg whites – about 7–8 g protein
    • 40 g light feta – about 7 g protein
    • 80 g thick Greek yoghurt – about 8–9 g protein

    That gives you around 28–30 g protein before any extras. Add an extra egg white or a little more yoghurt and you’re comfortably in the 32–35 g range.

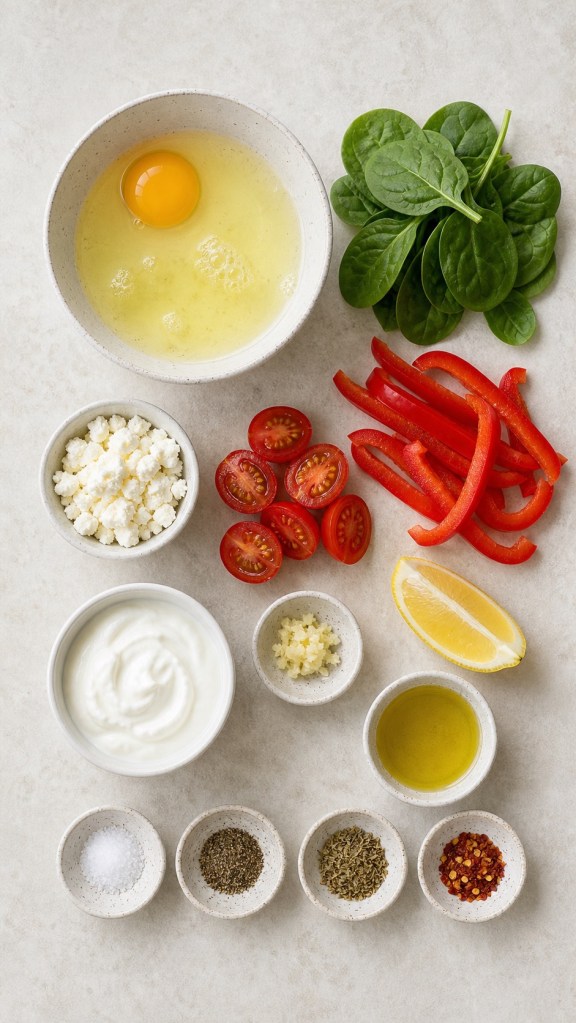
    Ingredients (serves 1)


    • 1 whole egg
    • 2–3 egg whites
    • 1 tsp olive oil
    • ½ red pepper, thinly sliced
    • 40 g baby spinach
    • 3–4 cherry tomatoes, halved
    • 40 g light feta, crumbled
    • 80 g thick Greek yoghurt
    • ½ small garlic clove, very finely grated or crushed
    • Squeeze of lemon juice
    • Salt and black pepper
    • Pinch dried oregano
    • Pinch chilli flakes
    • Fresh parsley, chopped, to finish

    • Optional: 1 small wholemeal pitta or slice of toast on the side

    Method

    1. Make the yoghurt topping.
      In a small bowl, stir together the Greek yoghurt, grated garlic, lemon juice and a tiny pinch of salt. Adjust to taste and set aside while you cook everything else.
    2. Cook the vegetables.
      Heat the olive oil in a non‑stick pan over medium heat. Add the sliced red pepper and cook for 2–3 minutes until starting to soften. Tip in the spinach and cherry tomatoes with a pinch of salt and pepper, and cook until the spinach is just wilted.
    3. Scramble the eggs.
      In a jug or small bowl, whisk together the whole egg and egg whites with a pinch of salt, pepper and the dried oregano. Pour the eggs over the vegetables in the pan and gently scramble, pushing the mixture from the edges into the centre until the eggs are just set but still soft and glossy.
    4. Assemble your bowl.
      Spoon the egg and vegetable mixture into a wide, shallow bowl. Crumble the feta over the top. Add a generous dollop of your garlicky yoghurt to the centre and finish with chilli flakes and chopped parsley.
    5. Serve and enjoy.

    Eat as it is for a lighter bowl, or add a small wholemeal pitta or slice of toast on the side if you need a little extra energy.

    Tips, swaps and variations
    • Make it even higher protein: Add an extra egg white, a bit more yoghurt, or swap the feta for cottage cheese to boost the protein while keeping things light.
    • Keep it mild: Skip the chilli flakes if you don’t like heat and use only a tiny amount of garlic in the yoghurt.
    • Meal prep friendly: Chop your peppers and tomatoes the night before so you only need to cook and scramble in the morning. The whole bowl still tastes best freshly made, but the prep work will be done.
    • Add legumes: For extra fibre and staying power, stir in a spoonful of cooked chickpeas or white beans with the veggies before adding the eggs.


    This kind of breakfast is ideal if you want something that feels fresh and light but still keeps you full well into the morning. It fits easily into a Mediterranean‑style way of eating, with plenty of veg, healthy fats and satisfying protein in each bowl.

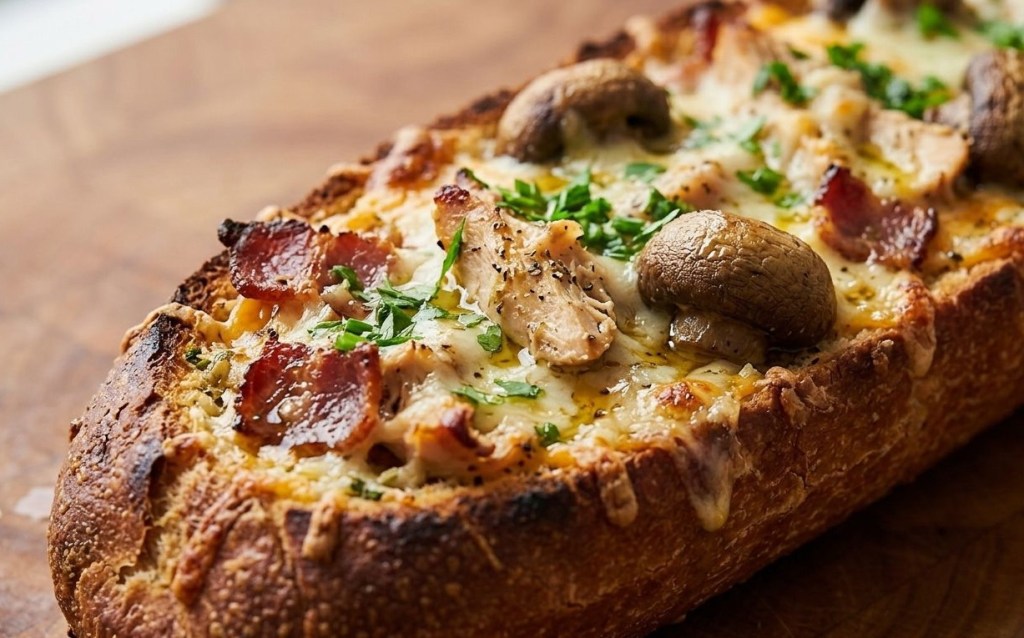
  • Comfort Food Hack: Loaded Chicken, Bacon & Mushroom Garlic Bread

    Comfort Food Hack: Loaded Chicken, Bacon & Mushroom Garlic Bread

    Let’s be honest: sometimes, you just need dinner to be a hug in edible form. You’ve had a long week, you’re craving something indulgent, and the idea of a complicated multi-step recipe is just not happening.

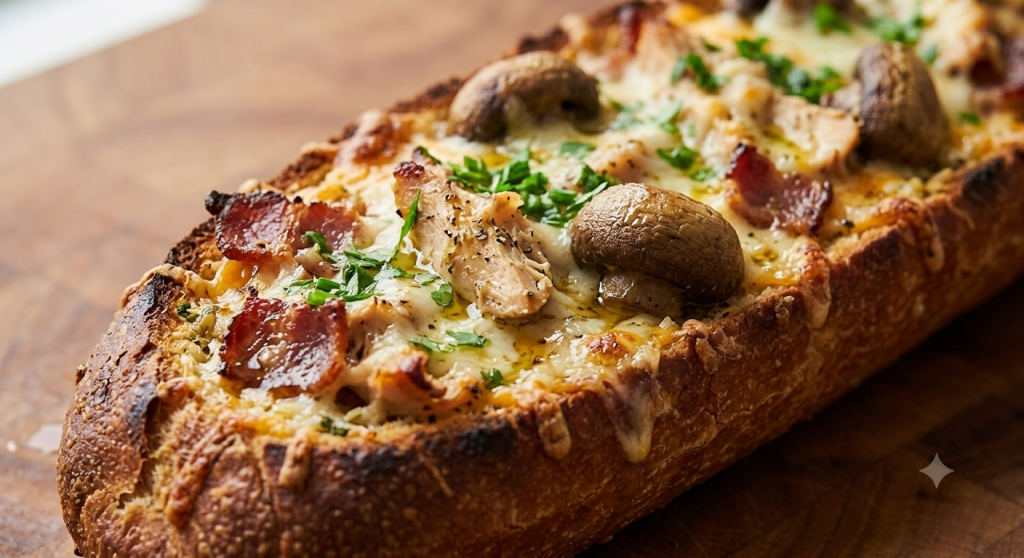
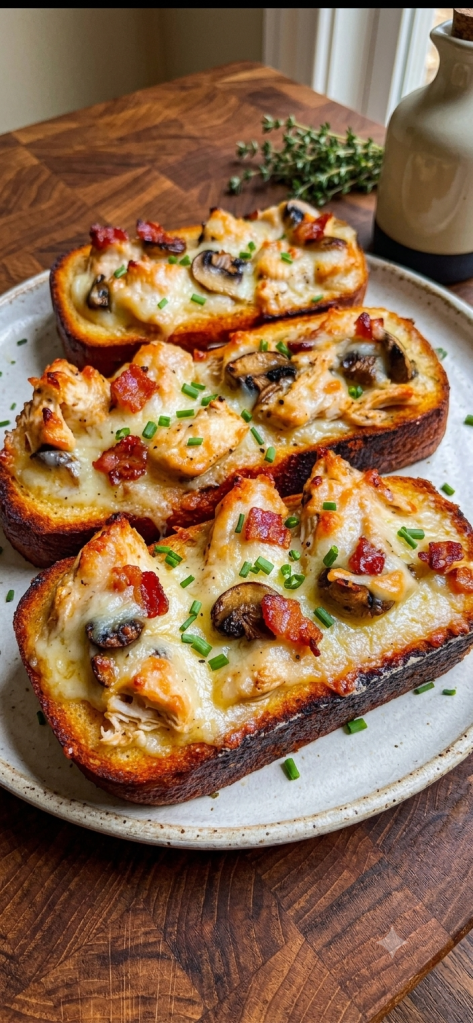
    Enter the Loaded Chicken, Bacon & Mushroom Garlic Bread.

    This isn’t just a side dish; it’s a full-blown “fakeaway” masterpiece. It’s creamy, it’s crispy, it’s ridiculously cheesy, and—best of all—it takes just 30 minutes from start to finish. Whether you’re feeding a hungry family or just want a lazy Friday night treat, this recipe is about to become your new kitchen staple.

    Why You’ll Love It

     Minimal Effort: It uses a store-bought French loaf, so you don’t have to worry about dough rising times.

     The Texture: You get the crunch of the toasted bread, the creaminess of the chicken mixture, and the salty bite of crispy bacon.

     Customizable: Want it spicier? Add some chilli flakes. Want more greens? Throw in some spinach.

    The Recipe: Loaded Garlic Bread Supreme

    Prep time: 15 mins | Cook time: 15 mins | Total time: 30 mins

    Oven: 200°C (Fan) / Gas Mark 6

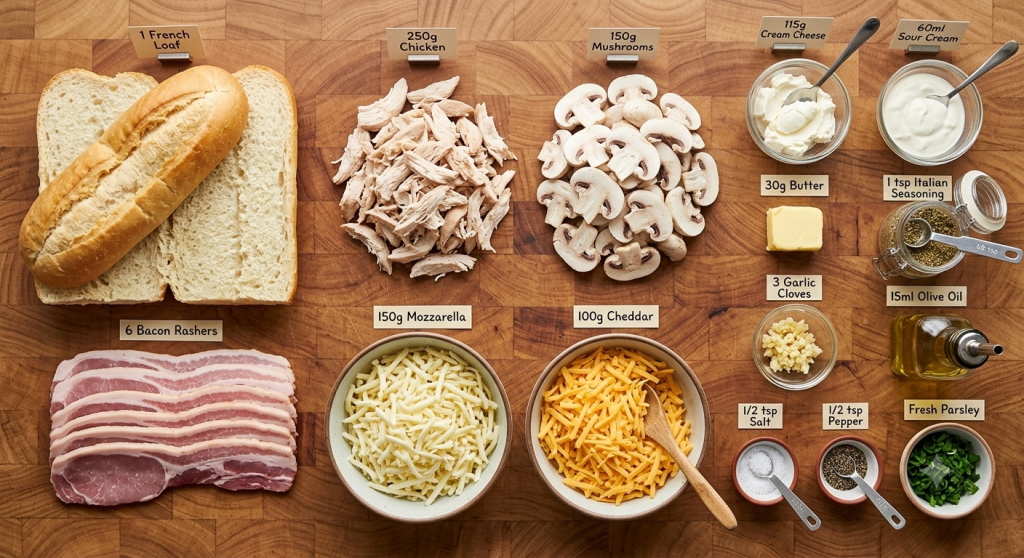
    What You’ll Need

     1 large French bread loaf (halved lengthwise)

     250g cooked chicken breast, shredded

     6 slices bacon, cooked and crumbled

     150g mushrooms, sliced

     30g butter

     3 cloves garlic, minced

     115g cream cheese, softened

     60ml sour cream

     1 tsp Italian seasoning

     1/2 tsp salt

     1/2 tsp black pepper

     150g mozzarella cheese, shredded

     100g cheddar cheese, shredded

     15g fresh parsley, chopped

     15ml olive oil

    Step-by-Step Method

    1. Sauté the Magic:

    Start by heating your olive oil and butter in a skillet over medium heat. Toss in those sliced mushrooms and cook them until they’re golden brown—about 5-6 minutes. Stir in your minced garlic for the last 30 seconds until it smells incredible, then take it off the heat.

    2. Mix the Goodness:

    In a large mixing bowl, combine your softened cream cheese, sour cream, Italian seasoning, salt, and black pepper. Give it a good whisk until it’s smooth. Now, fold in your shredded chicken, crumbled bacon, the sautéed mushrooms, and exactly half of your mozzarella and cheddar.

    3. Assemble & Bake:

    Place your French bread halves on a baking sheet. Spread that chicken and cream cheese mixture evenly over the bread. Sprinkle the remaining mozzarella and cheddar over the top (the more cheese, the better, right?). Pop it in the oven for 12–15 minutes until it’s bubbly, golden, and looking absolutely irresistible.

    4. The Finishing Touch:

    Pull it out of the oven, garnish with a generous sprinkle of fresh parsley, and slice it up. Serve it while it’s hot and gooey!

    Pro-Tips for Success

     Don’t skip the butter: Sautéing the mushrooms in butter gives them a much deeper flavour than oil alone.

     The Bread: Use a crusty French stick rather than a soft supermarket baguette if you can—it holds up much better under the weight of the toppings.

     Make it ahead: You can mix the chicken, bacon, and cheese mixture up to a few hours in advance. Just keep it in the fridge until you’re ready to assemble and bake!

    Have you tried this recipe yet? Let me know in the comments how it turned out, or tag me in your photos on socials! I’d love to see your creations.

    Happy cooking!

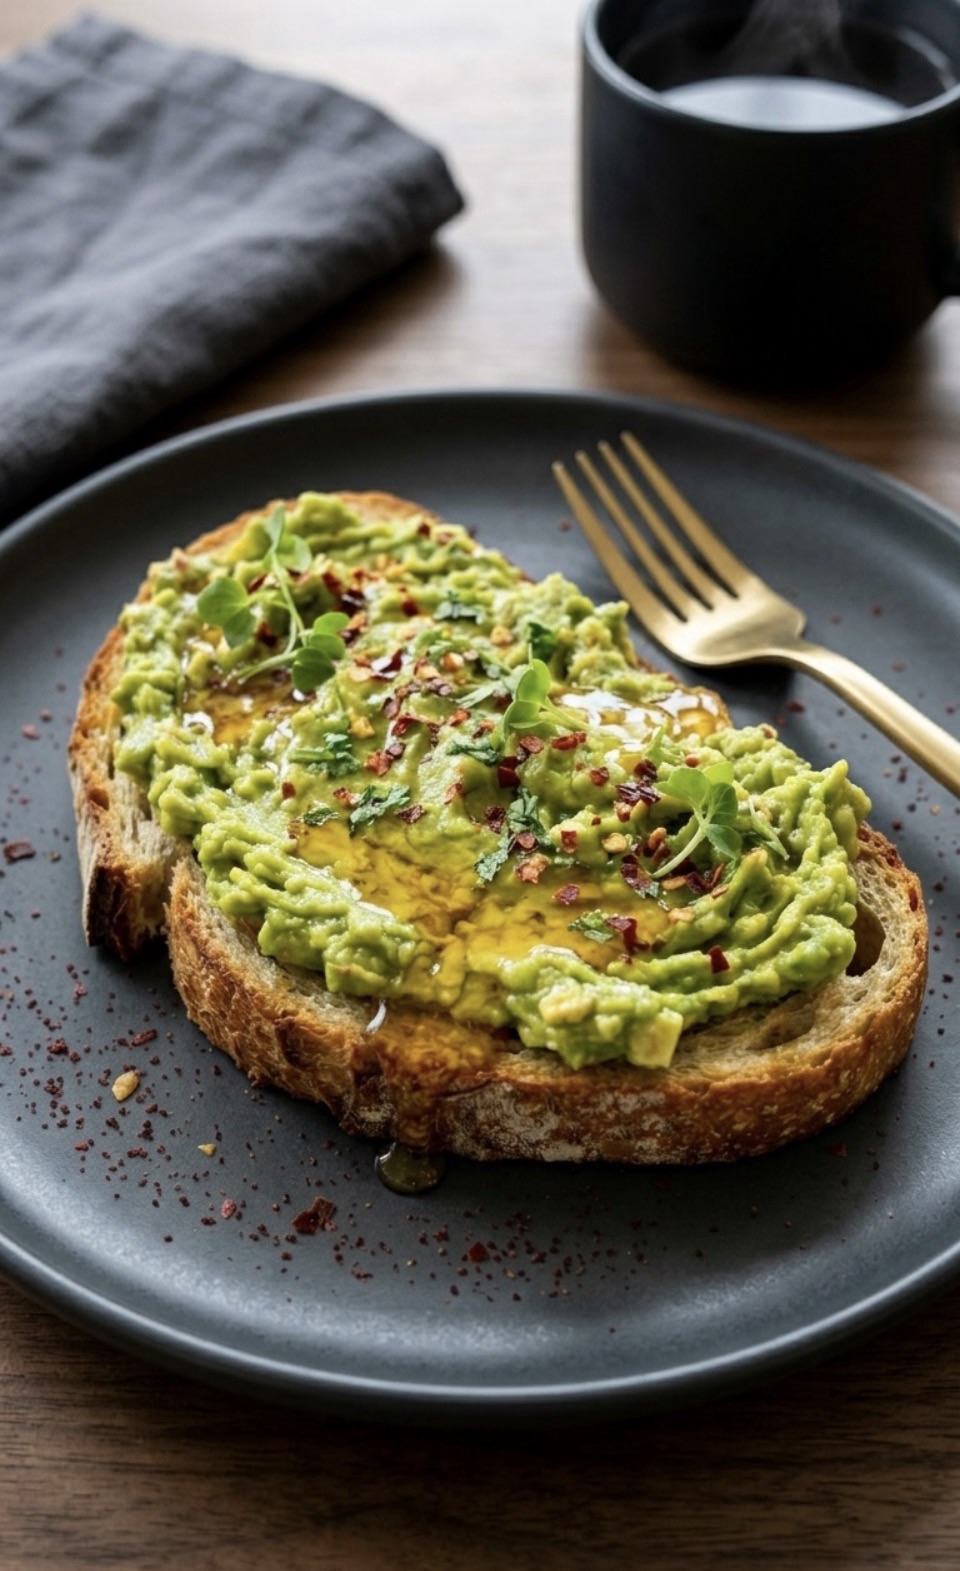
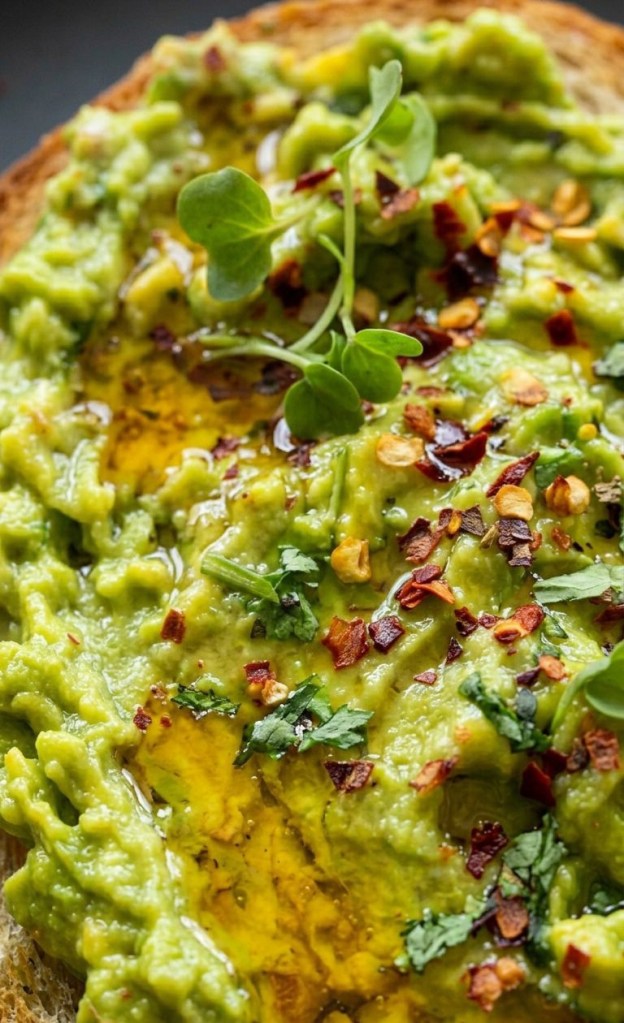
  • The Sweet & Spicy Hack You Didn’t Know You Needed: Avocado Toast

    The Sweet & Spicy Hack You Didn’t Know You Needed: Avocado Toast

    We’ve all seen the trend. Every brunch spot on the planet serves some version of avocado toast, and by now, it’s a staple in almost every home kitchen. But lately, I’ve been experimenting with ways to take this classic breakfast to the next level.

    If you are looking for a way to break out of your morning routine rut, look no further than the sweet and spicy combo that has been making waves online.

    The Secret Ingredient

    You might think I’m crazy, but the secret to elevating your avocado toast is honey.

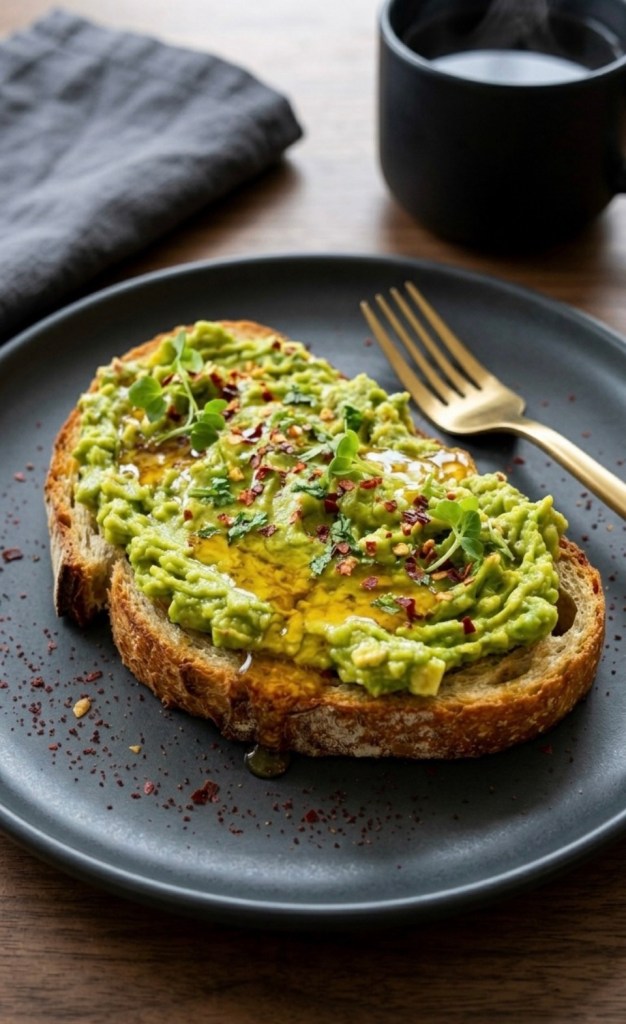
    Yes, you read that right. Drizzling a high-quality, raw honey over your savory avocado adds a depth of flavor that is genuinely transformative. When you pair that sweetness with the heat of red pepper flakes and the creaminess of ripe avocado, you get a perfect balance that hits every taste bud.

    How to Recreate It

    This isn’t a complex recipe; it’s a simple upgrade that takes less than five minutes.

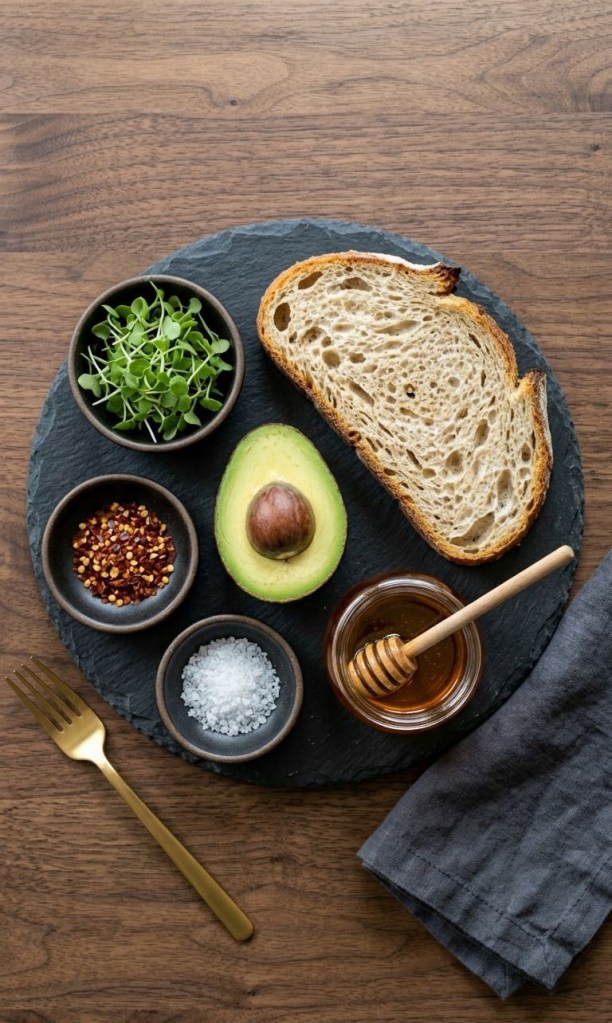
     The Bread: Start with a thick, rustic slice of sourdough. You want something with enough structural integrity to hold the toppings and a bit of crunch to contrast with the creamy avocado.

     The Mash: Don’t overthink this. Mash your avocado directly onto the warm toast with a fork. Leave it a little chunky—it provides a better texture.

     The Seasoning: A generous pinch of sea salt and red pepper flakes is non-negotiable. The salt brings out the fat in the avocado, while the flakes provide that necessary kick.

     The Finish: Drizzle your honey in a light, even motion. If you want to be extra fancy, add a few microgreens on top for a pop of color and freshness.

    Why It Works

    It sounds strange, but the interplay between sweet and spicy is a classic culinary technique. Just like salt and caramel or spicy chocolate, the honey highlights the earthiness of the avocado without overwhelming it.

    The next time you’re rushing through your morning routine, take two extra minutes to try this. It’s a small change that makes breakfast feel like a deliberate, elevated experience.

    Are you brave enough to try this combo, or are you a savory-only purist? Let me know in the comments below!