If you love a Crunchie bar and you’re a sucker for a proper, old‑school chocolate mousse, this dessert is going to be dangerous. It’s rich and velvety, with golden honeycomb pieces running through the mousse and piled high on top – basically a Crunchie bar in dessert form. The best bit? You can either make your own honeycomb (it’s much easier than it sounds) or cheat and use smashed‑up Crunchies if you’re short on time or just can’t be bothered to boil sugar.
This is one of those puddings that looks seriously impressive in little glasses or one big sharing dish, but the method itself is very straightforward. You make the honeycomb (or open some Crunchie wrappers – no judgement), whisk up a classic chocolate mousse, fold it all together, then let the fridge do the work. Perfect for when you want something that feels “restaurant dessert” without actually doing anything too cheffy.
What You’ll Need
For the honeycomb (or use Crunchies)
• 100 g caster sugar
• 3 tbsp golden syrup
• 1 tsp bicarbonate of soda
OR: skip all of that and just use a few smashed‑up Crunchie bars instead – so easy and still delicious.
For the mousse
• 100 g milk chocolate, in pieces
• 150 g dark chocolate, in pieces
• 50 g unsalted butter, plus a bit extra for greasing a tray
• 6 large eggs, separated (yolks in one bowl, whites in another)
You’ll also need:
• A large non‑stick saucepan
• A greased non‑stick baking tray (if making honeycomb)
• A heatproof bowl
• An electric whisk or hand whisk
• 6 small dessert glasses or one larger serving dish
Step 1 – Make the Honeycomb (or Cheat!)
If you’re going the “proper” route:
Grease a non‑stick baking tray with a little butter and have it ready by the hob.
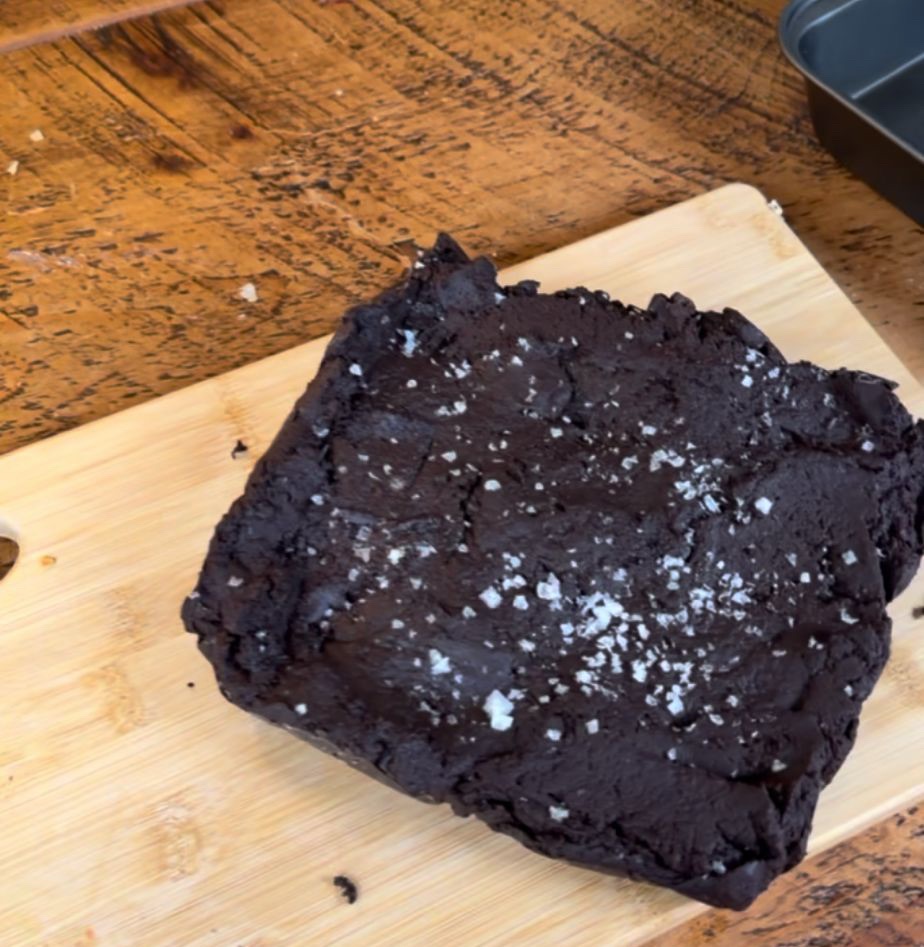
Add the caster sugar and golden syrup to a large non‑stick saucepan and put it over a low heat. Let the sugar slowly dissolve – you can gently swirl the pan, but don’t stir too enthusiastically.

Turn the heat up and let it bubble away until it turns a deep golden colour. Keep an eye on it – you want that rich caramel shade, not burnt.
Take the pan off the heat, quickly add the bicarbonate of soda and stir. The mixture will puff up like mad – that’s your honeycomb forming.
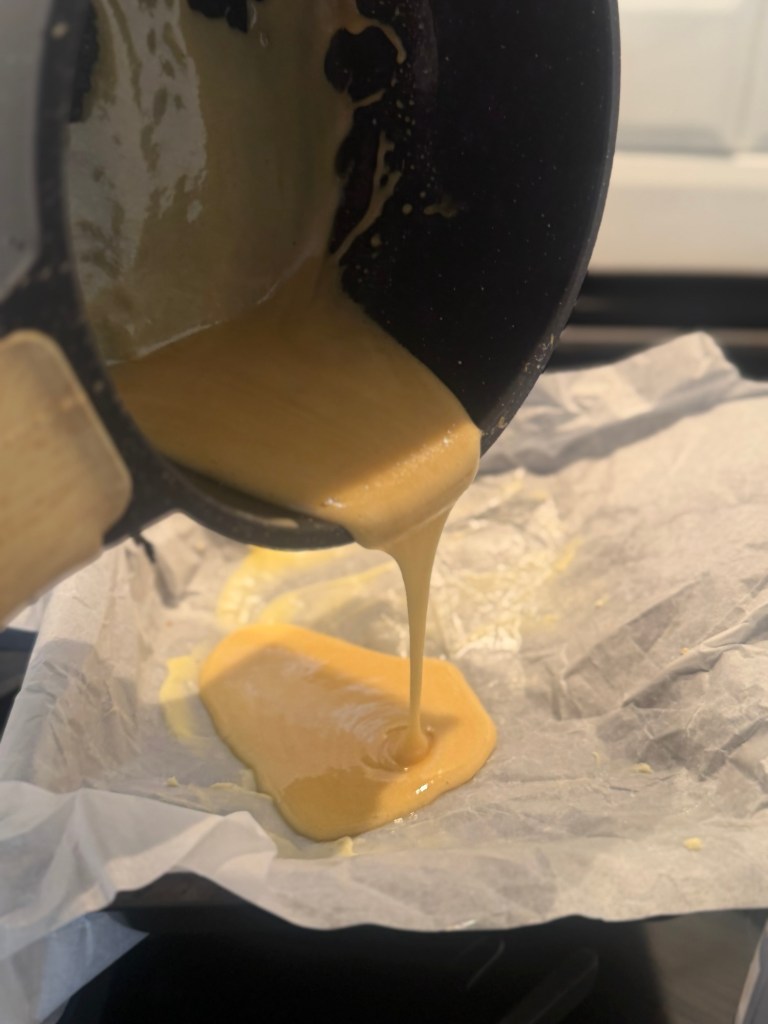
Immediately pour it onto the greased tray and leave it to spread and cool completely.
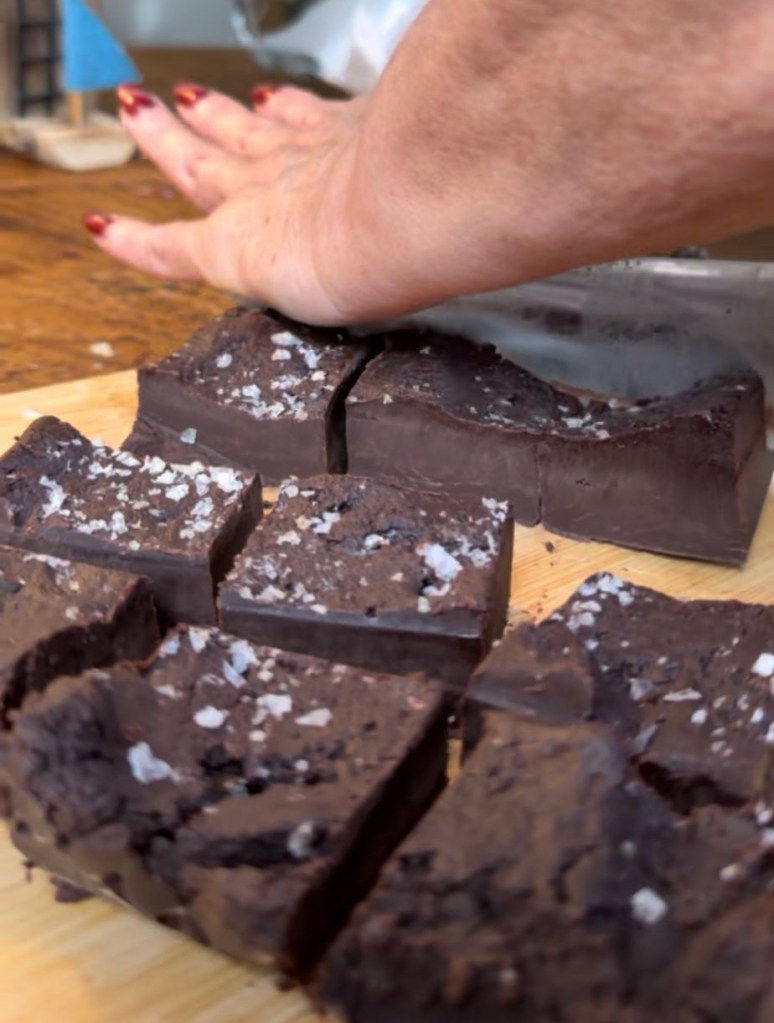
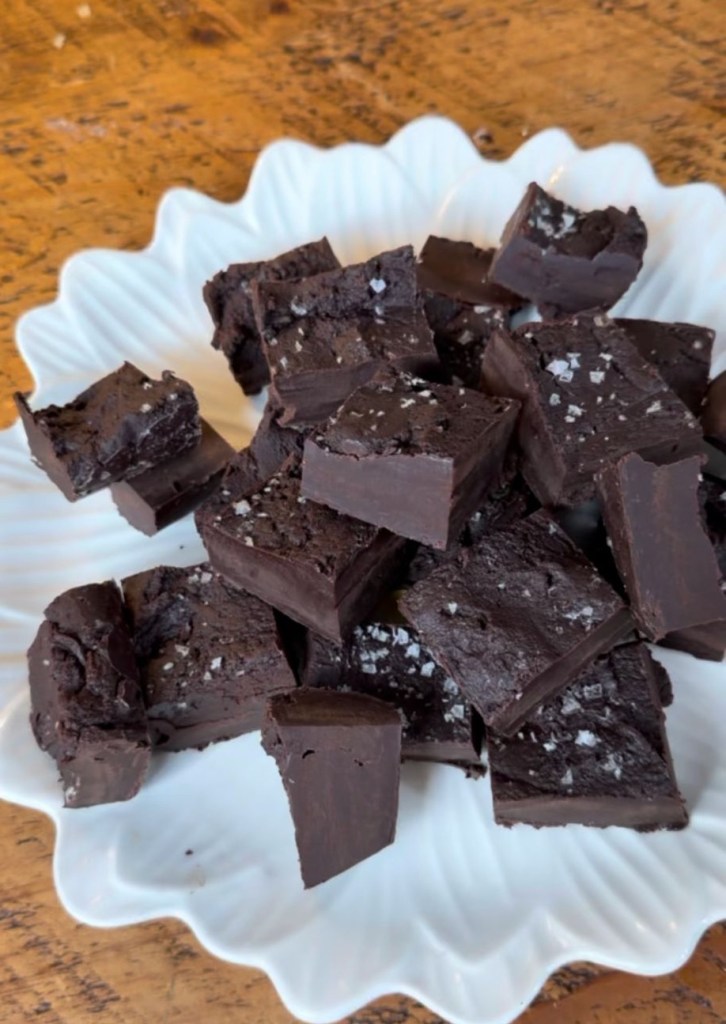
Once it’s cold and hard, break it into chunks – some big shards, some smaller bits.
If you’re in a rush (or just fancy the shortcut):
• Grab a few Crunchie bars, pop them in a food bag and bash with a rolling pin until you’ve got a mixture of crumbs and chunky pieces.
• Set aside a good handful of the nicest bits for topping and keep the rest ready to fold into the mousse.
Step 2 – Make the Chocolate Mousse
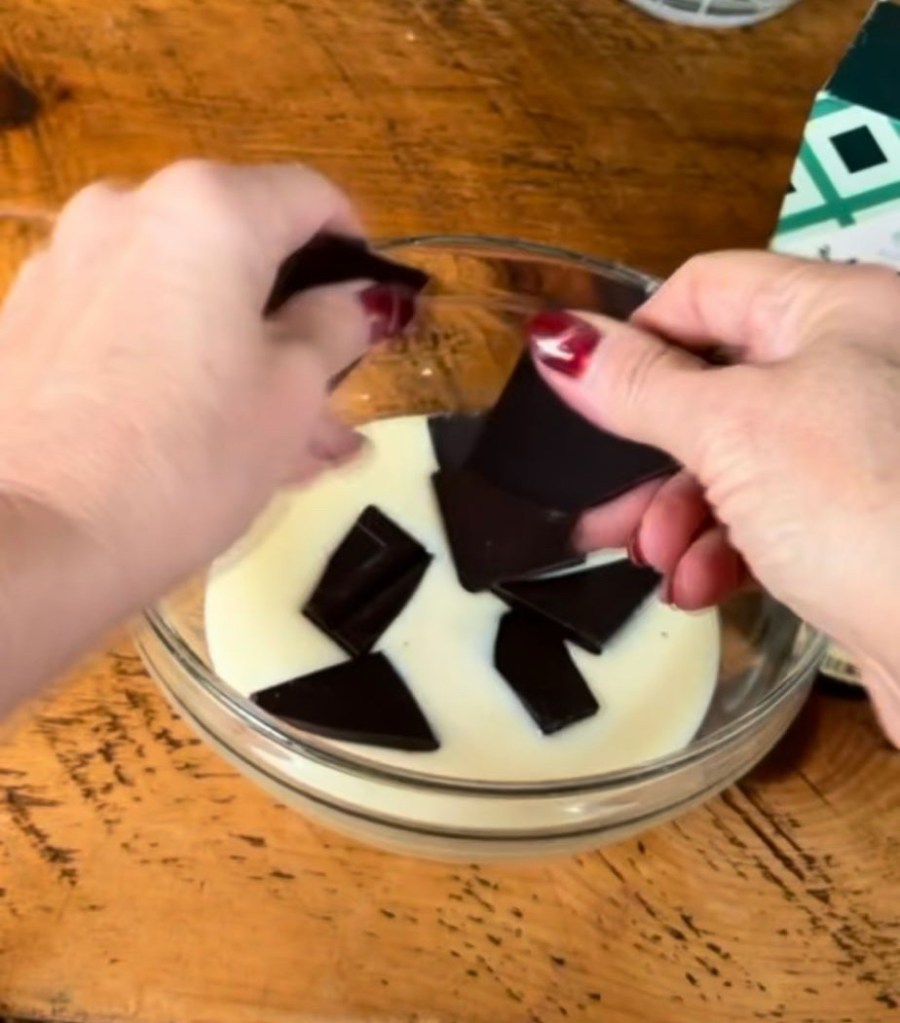
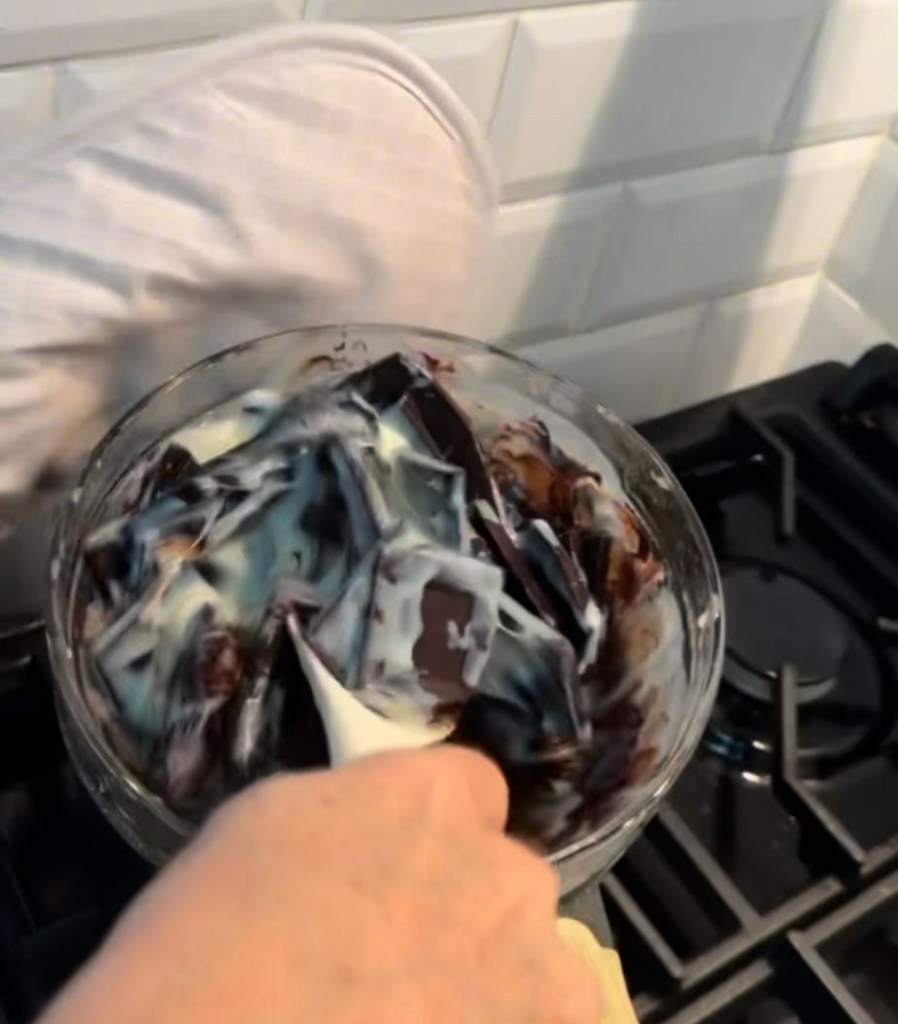
Put the milk chocolate, dark chocolate and 50 g butter into a heatproof bowl.
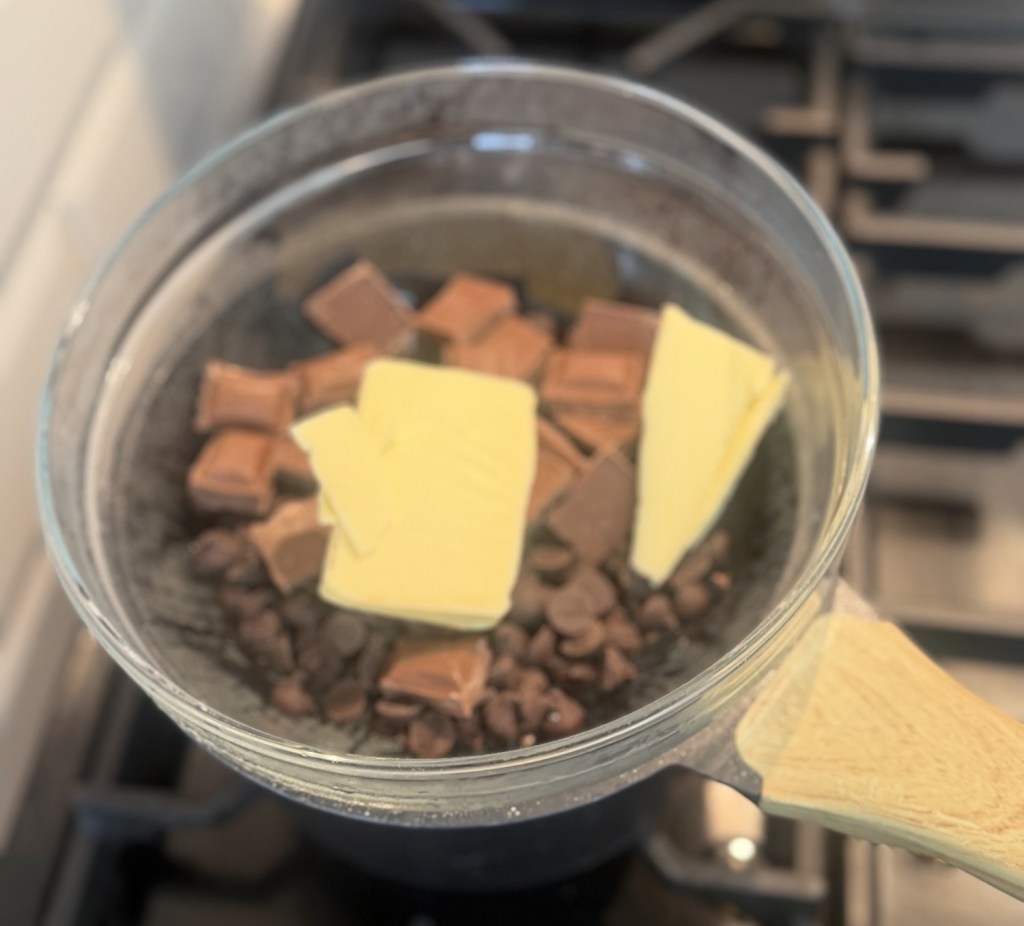
Sit the bowl over a pan of barely simmering water, making sure the base doesn’t actually touch the water. Let everything melt gently, stirring occasionally, until smooth and glossy.
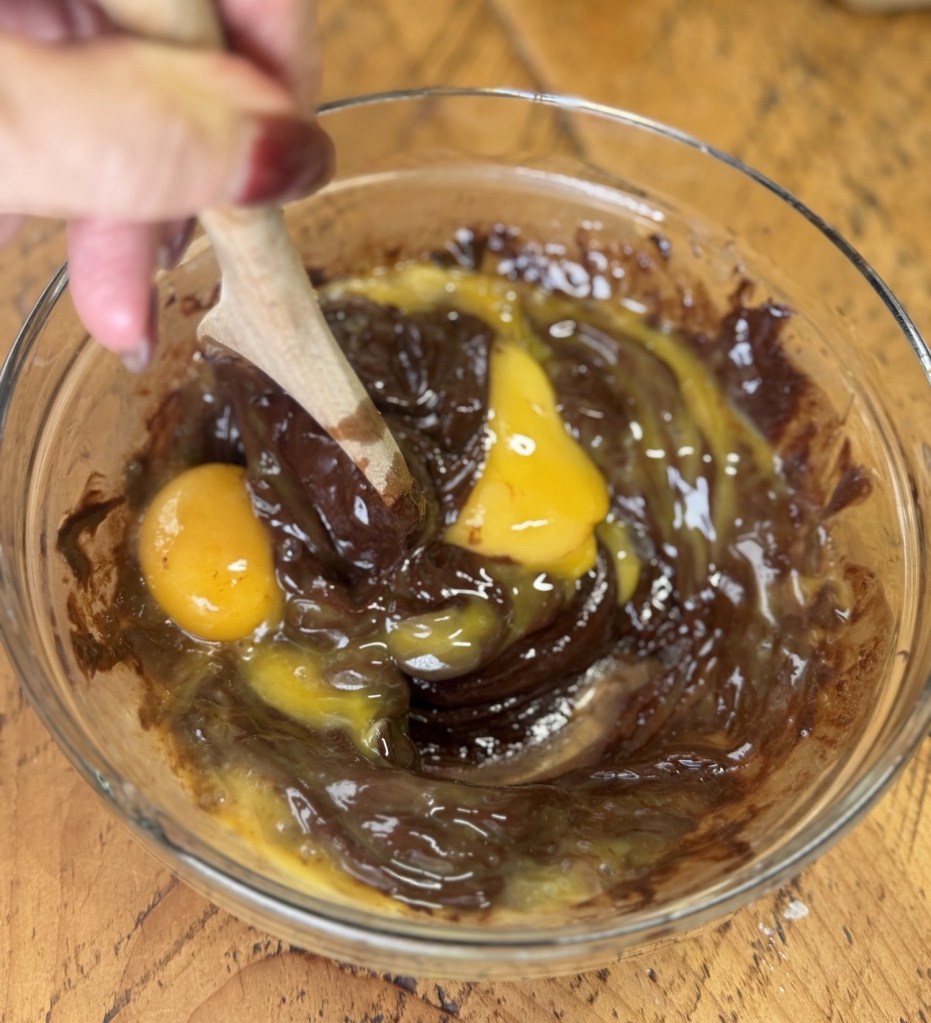
Take the bowl off the heat and leave the chocolate mixture to cool slightly – it should be warm, not hot, so it doesn’t cook the egg yolks.
Step 3
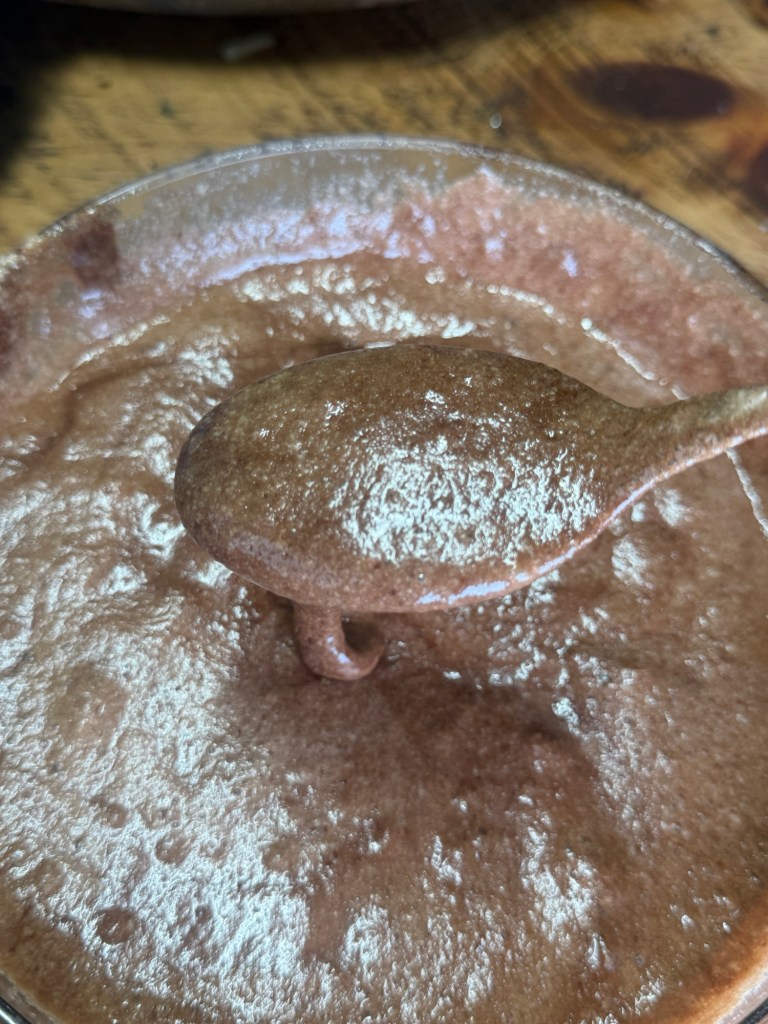
Stir the egg yolks into the chocolate mixture until it’s all silky and combined.
Whisk the Egg Whites
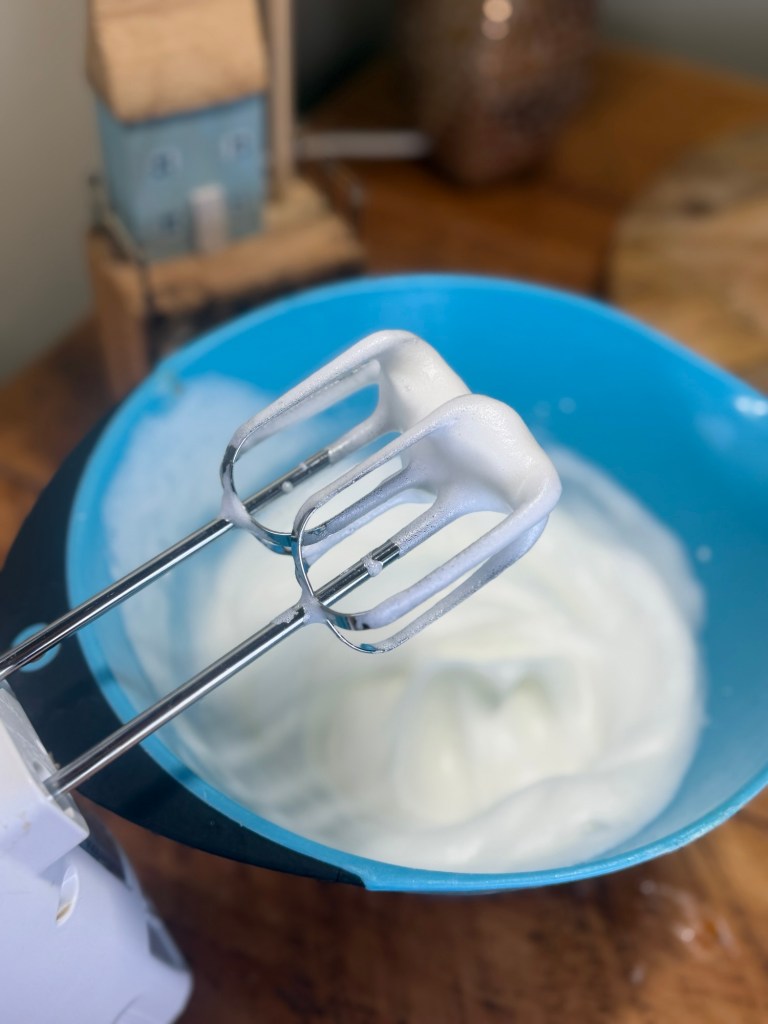
In a clean bowl, whisk the egg whites until they form soft peaks.
Keep whisking until they’re thick and hold their shape – you want them nice and airy, as this is what gives the mousse its light, cloud‑like texture.
Step 4 – Fold Everything Together
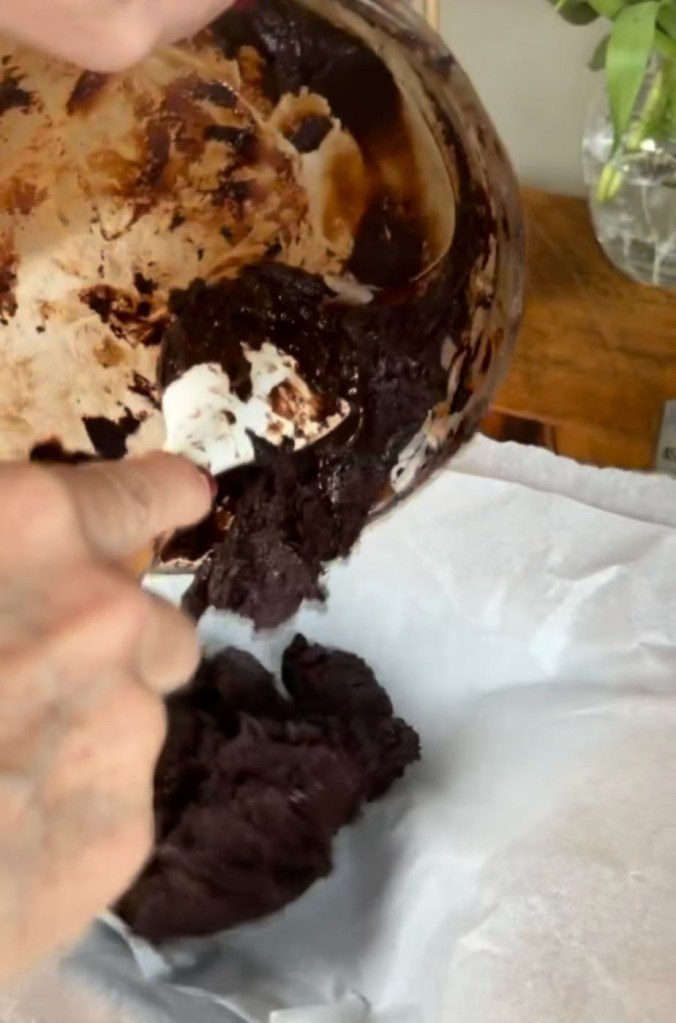
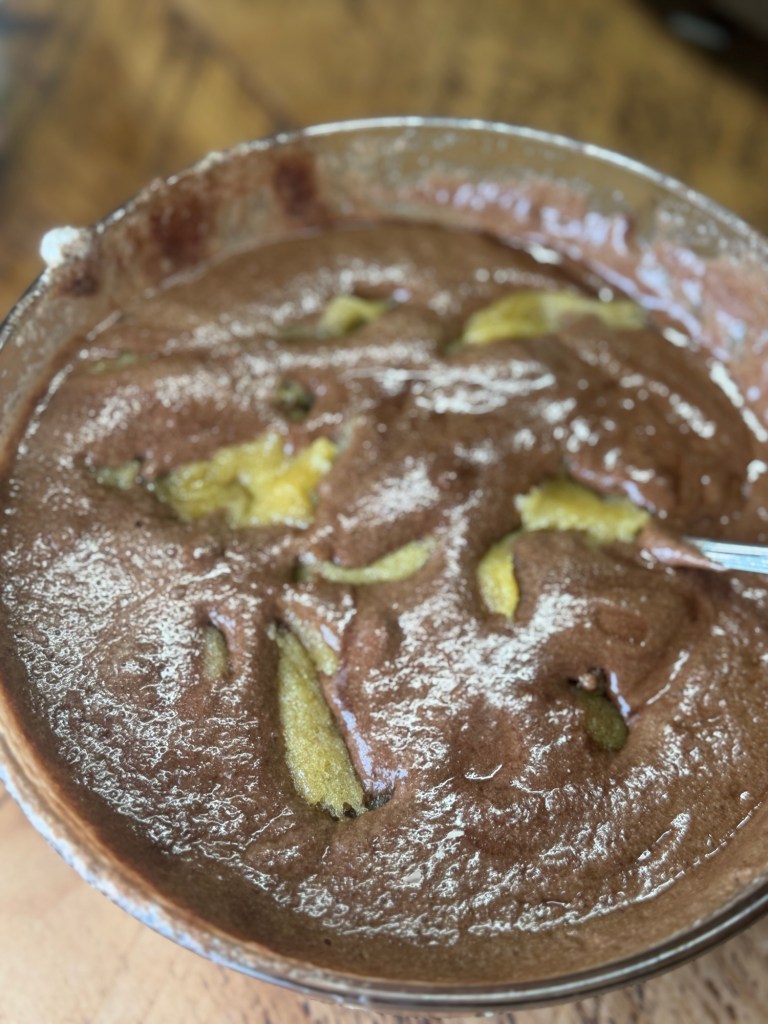
Add a spoonful of the whisked egg whites to the chocolate mixture and fold it through to loosen it.
Gently fold in the rest of the egg whites in two or three batches. Use a soft “figure‑of‑eight” motion with a spatula and take your time – you’re trying to keep as much air in the mixture as possible.
Now for the good bit:
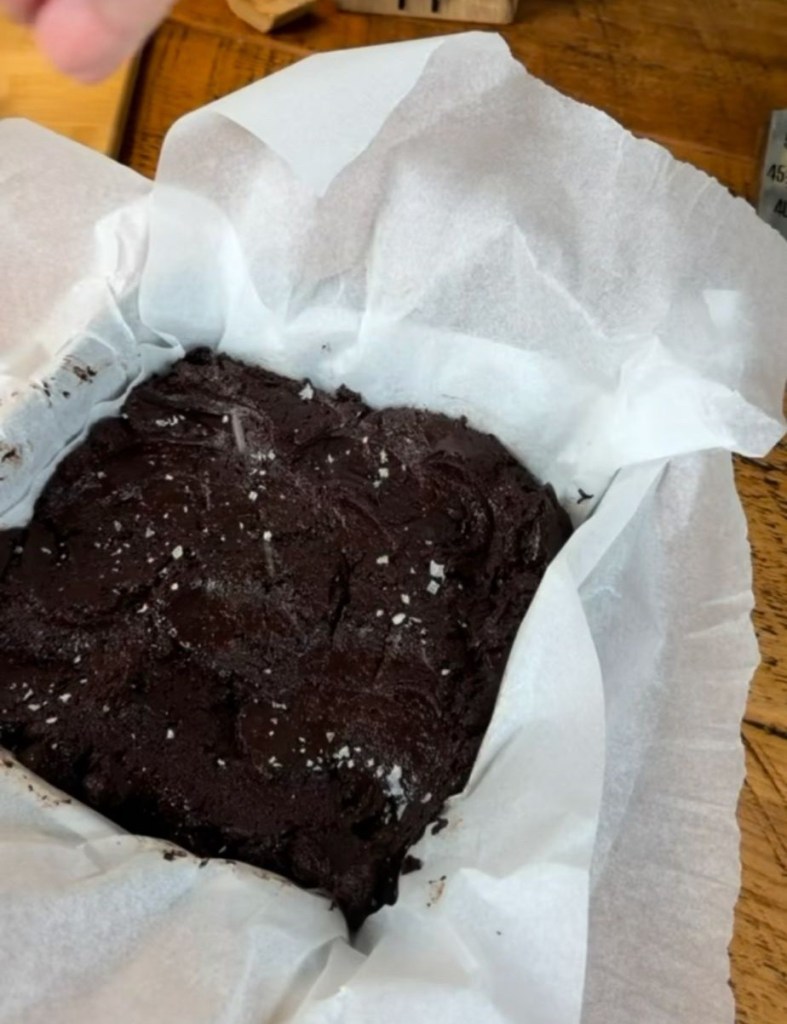
Sprinkle in plenty of honeycomb chunks (or your bashed‑up Crunchies) and fold very lightly so they’re rippled through the mousse. You want little pockets of crunch rather than disappearing it completely.
Step 5 – Chill and Serve
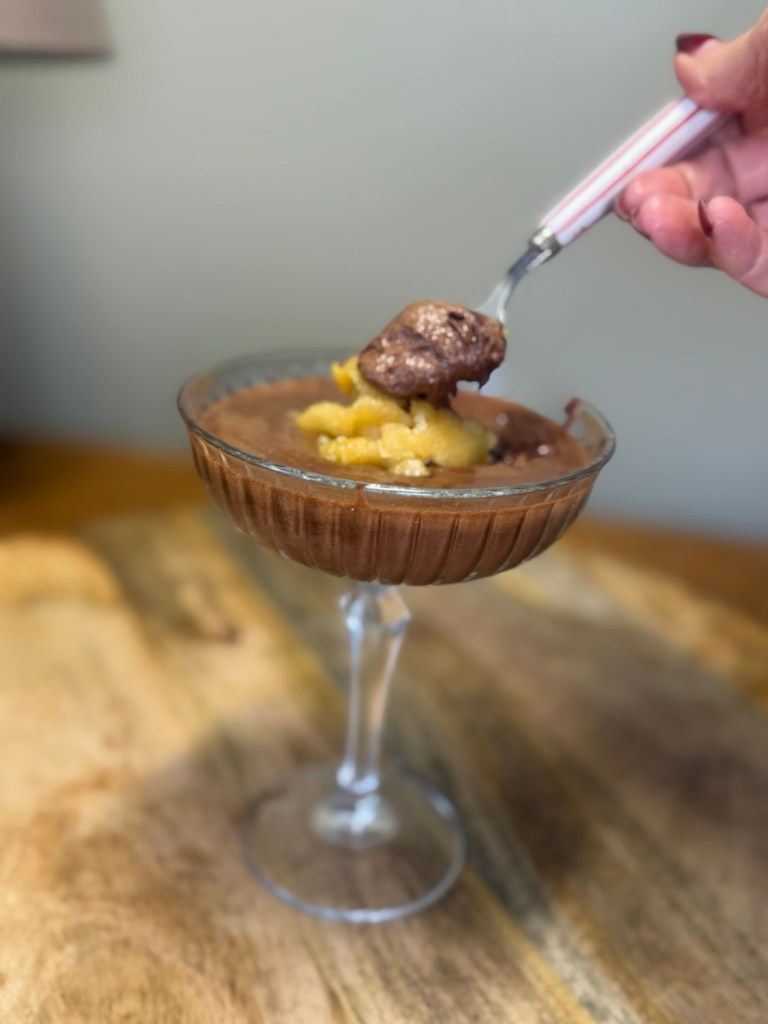
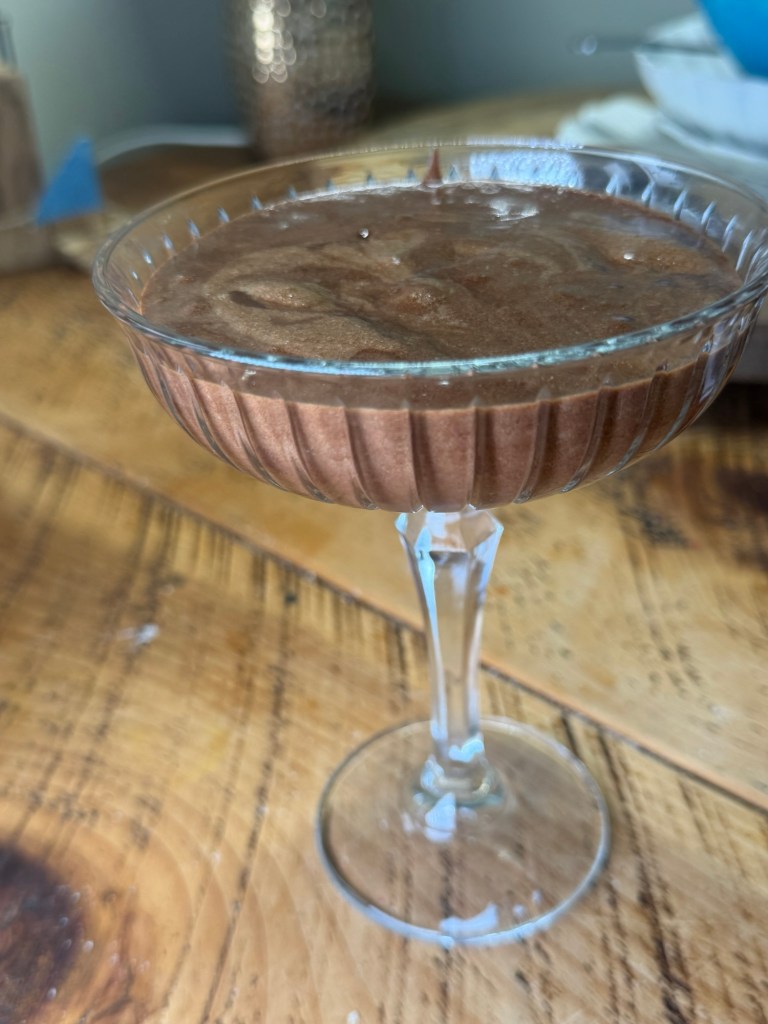
Spoon the mousse into your dessert glasses or one big serving dish.
Chill in the fridge for a couple of hours, or until softly set and wobbly. You can easily make this earlier in the day – ideal for stress‑free entertaining.
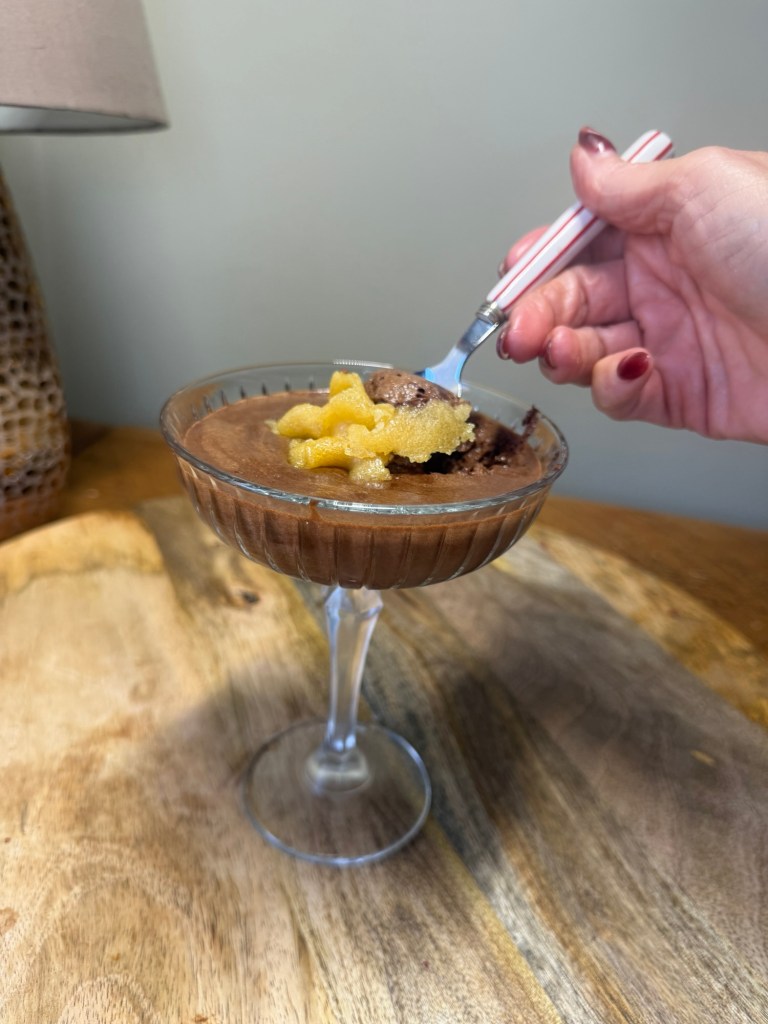
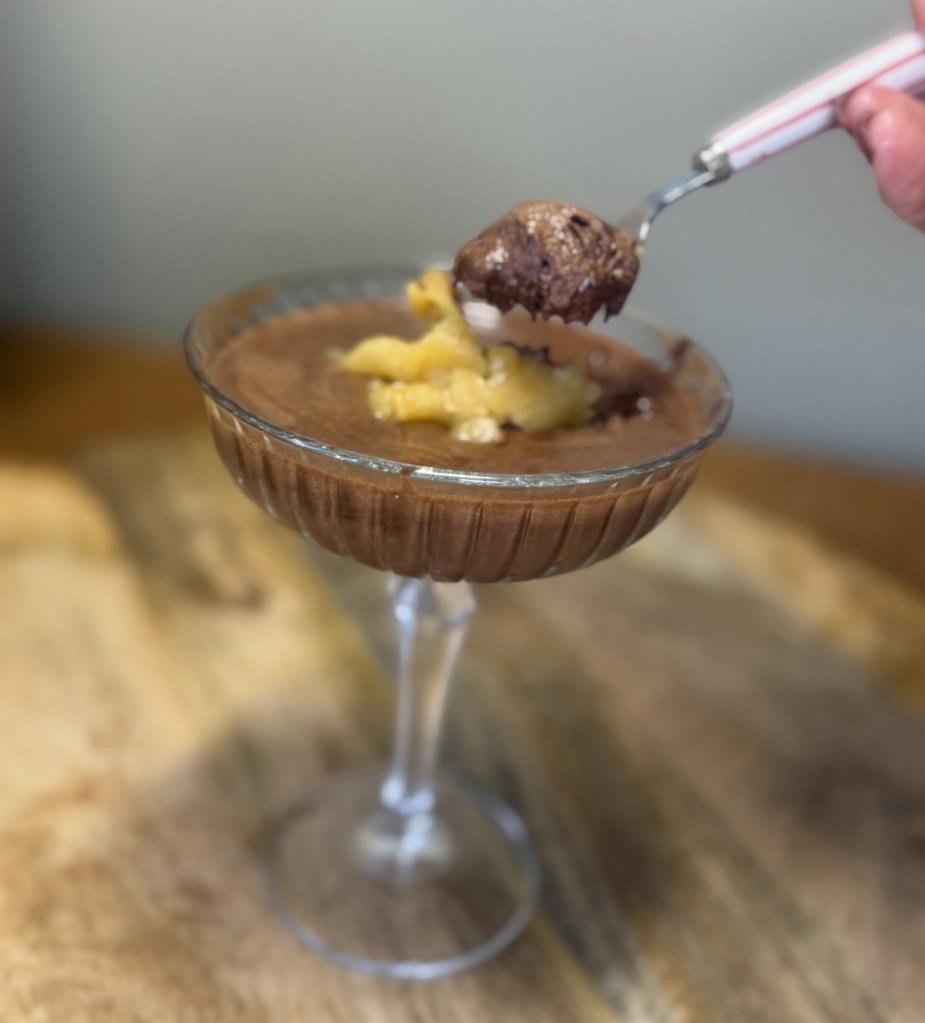
Just before serving, pile more honeycomb shards or Crunchie pieces on top so they stay nice and crunchy.
Serve as is, or add a little blob of softly whipped cream and maybe a few berries if you want something to cut through the richness. It’s one of those puddings where everyone goes quiet for a minute when they take the first spoonful – always a good sign.
You can absolutely make the “lazy” version your default: smashed Crunchie bars folded through a silky chocolate mousse, with extra on top. It’s quick, it’s nostalgic, and it tastes like you’ve smashed together your favourite chocolate bar and a fancy restaurant dessert – in the best possible way.