If you’re anything like me, you’re constantly looking for a snack that hits that perfect sweet spot—something chewy, satisfying, and filling enough to keep you going until your next meal.
The problem? So many “healthy” store-bought bars are packed with hidden sugars and processed syrups.
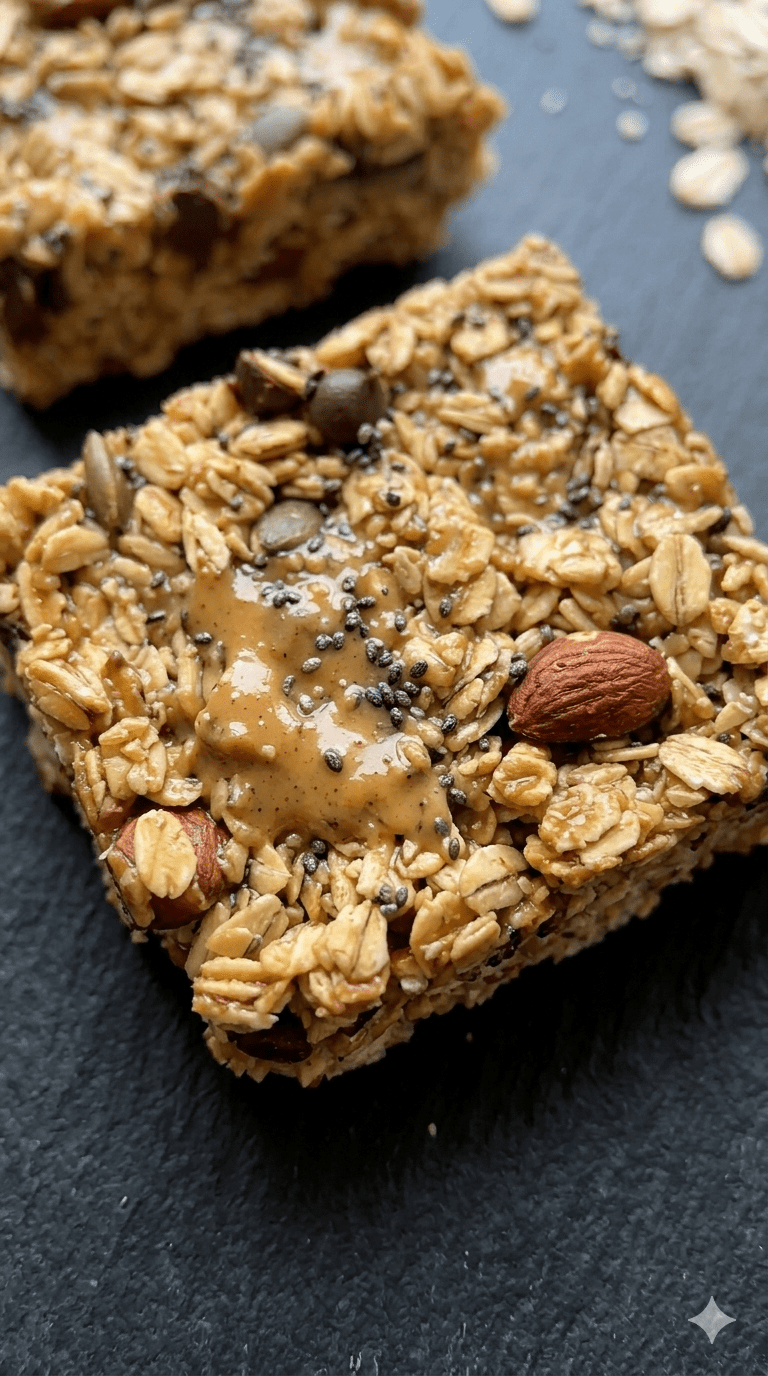
That is why I’ve been making these Nut Butter Energy Bars on repeat lately. They use natural nut butter as a binder, meaning you get a dose of healthy fats and protein without the refined sugar crash. Plus, they take less than 25 minutes from start to finish!
Why You’ll Love These
Simple Ingredients: You likely already have most of these in your pantry.
Highly Customizable: Switch up the nuts, seeds, or add-ins based on what you have on hand.
Meal Prep Friendly: They hold up perfectly for the week—just grab and go.
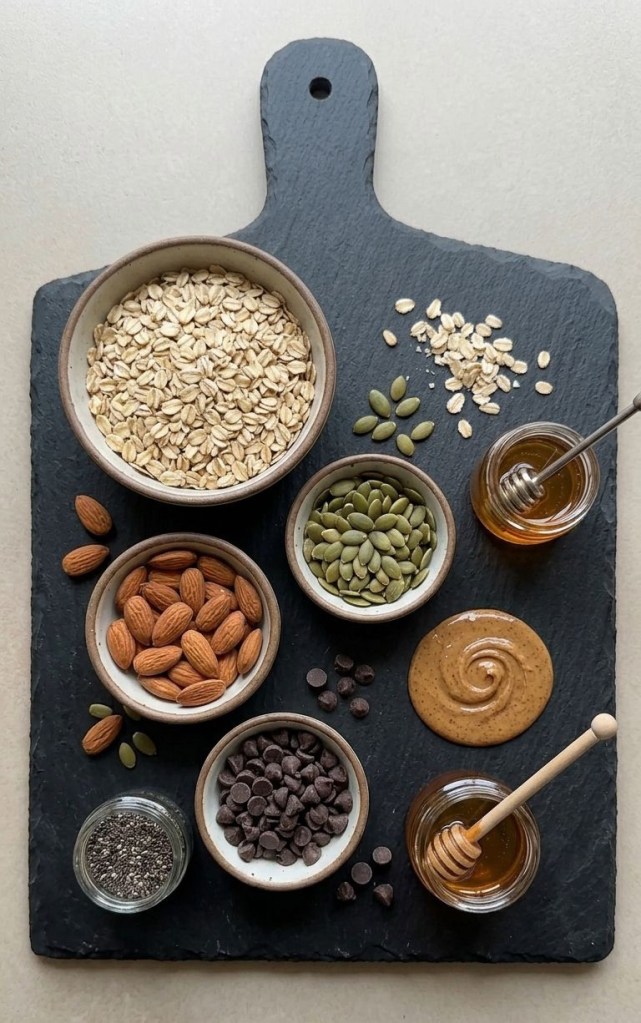
Ingredients
250g Rolled oats
180g Natural peanut butter (ensure it’s the runny kind with no added palm oil)
80g Maple syrup or honey
60g Melted coconut oil
1 tsp Vanilla extract
1/2 tsp Sea salt
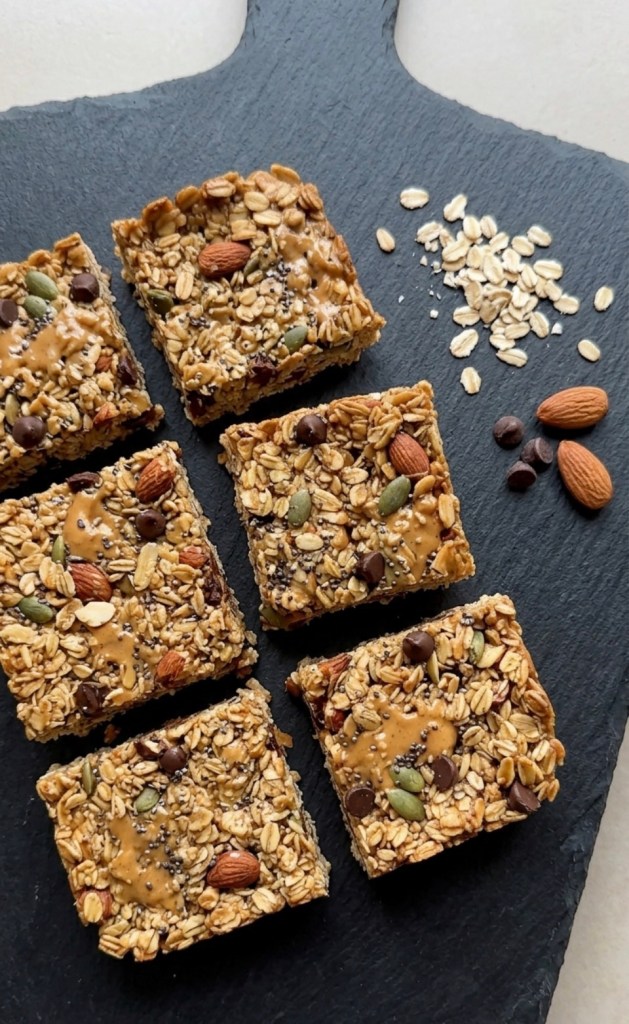
Optional: 50g dark chocolate chips, almonds, or pumpkin seeds for extra texture
Method
1 Prep: Preheat your oven to 175°C (155°C fan). Line an 8×8-inch baking dish with parchment paper, leaving a little overhang on the sides so you can lift the bars out easily later.
2 Combine Wet Ingredients: In a large bowl, whisk together the peanut butter, maple syrup, coconut oil, vanilla, and salt until smooth.
3 Mix: Fold in the oats and any optional add-ins (like chocolate chips or seeds). Stir until every oat is evenly coated in the nut butter mixture.
4 The Secret Step: Transfer the mixture to your baking dish. Use the back of a flat-bottomed glass or a metal spatula to press the mixture down firmly. This is the key to getting a dense, chewy bar that doesn’t crumble!
5 Bake: Bake for 18–22 minutes. The edges should look golden brown, even if the center still feels slightly soft.
6 Cool & Slice: Let the bars cool completely in the tin on a wire rack. For the best result, chill them in the fridge for 30 minutes before slicing into squares.
Tips for Success
Nut Butter Swaps: You can easily swap the peanut butter for almond or cashew butter. Almond butter offers a slightly more earthy, sophisticated profile.
Storage: Keep these in an airtight container at room temperature for up to 5 days. If you’ve made a double batch, you can freeze them for up to 3 months.
Have you tried making these? Tag me in your photos or let me know in the comments which nut butter you chose!
Let’s be real—we’ve all had those days where the last thing you want to do is spend an hour standing over the stove. You’re tired, you’re hungry, and you want something that tastes like it came from a nice restaurant, not a packet.
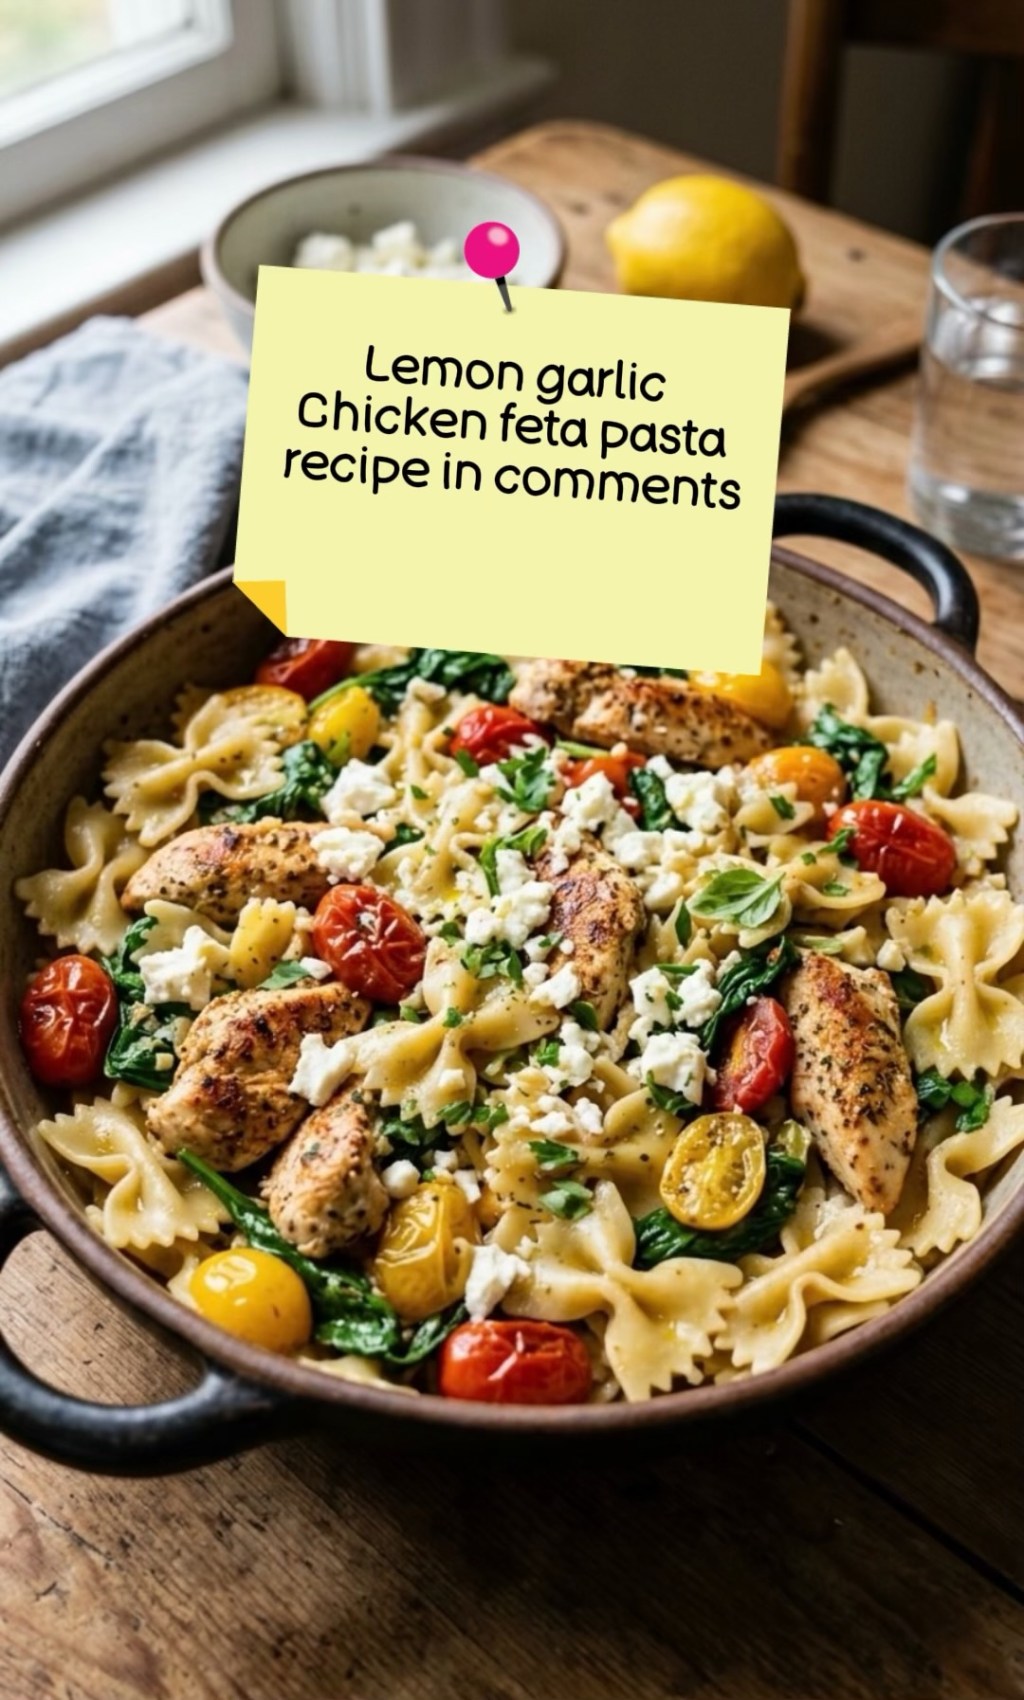
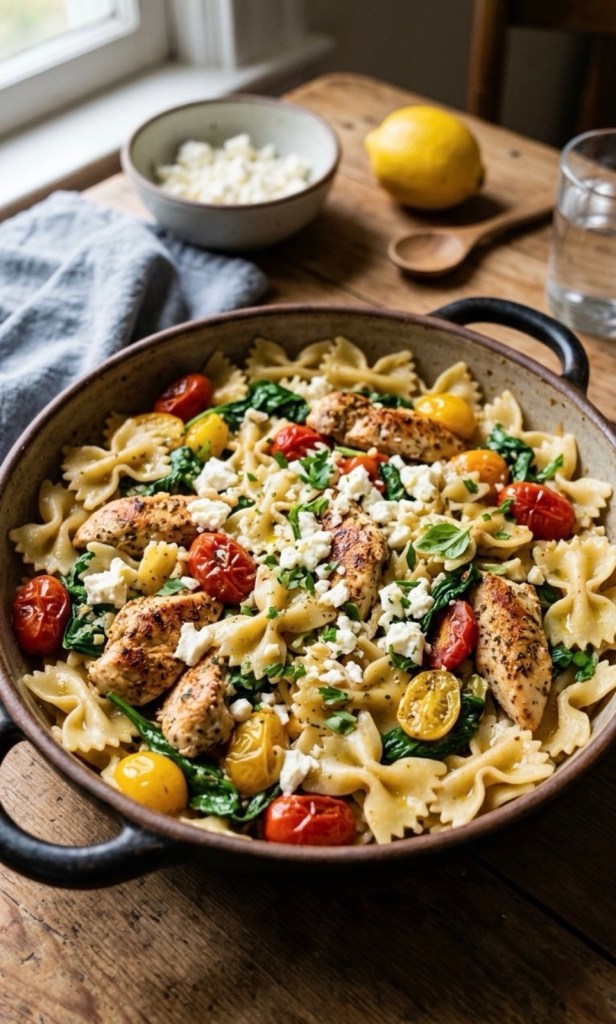
Well, I’ve got the perfect solution for you. This Lemon Garlic Feta Pasta with Chicken is my absolute go-to when I want something indulgent, fresh, and genuinely quick to put together. It’s vibrant, it’s garlicky, and that feta sauce? Honestly, it’s life-changing.
Why You’ll Love It
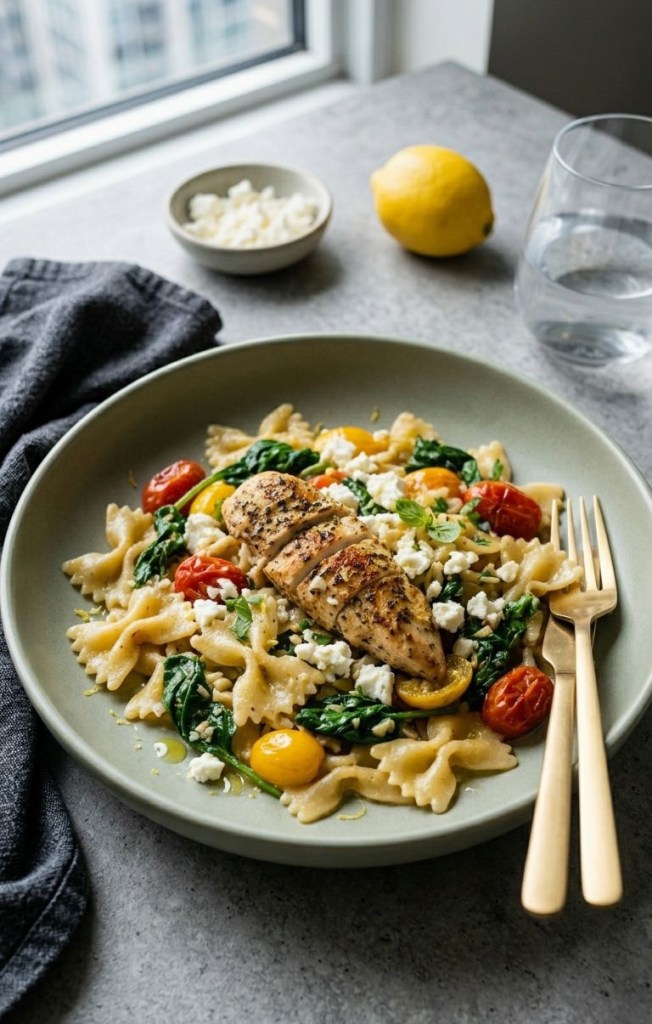
The magic here is in the simplicity. You’re using fresh ingredients that pack a massive punch. The combination of sweet-roasted tomatoes, tangy feta, and bright lemon juice creates this incredibly silky, light sauce that coats the farfalle perfectly without feeling heavy. Plus, using chicken fillets makes it super filling for a proper tea.
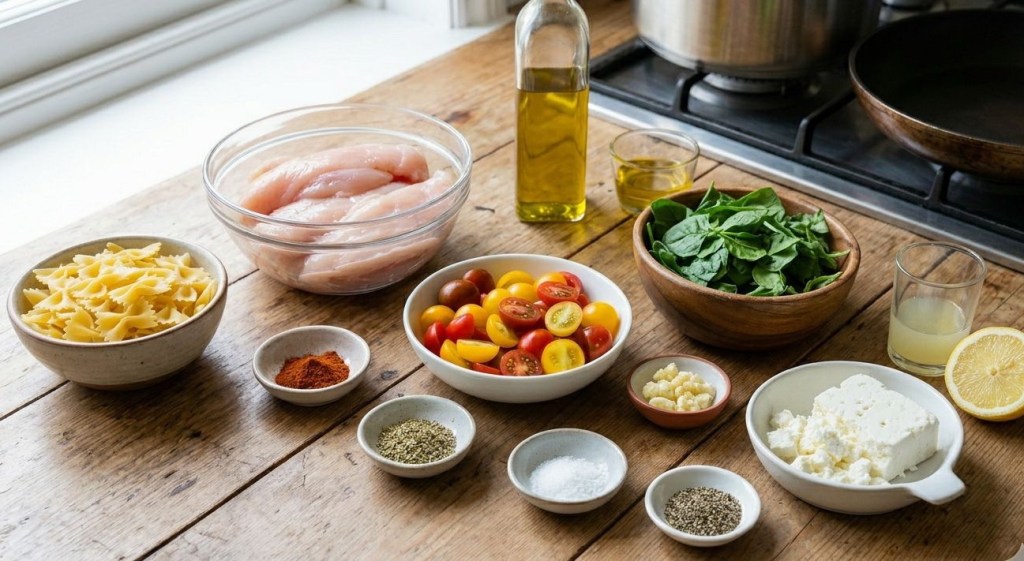
Ingredients You’ll Need
225g Farfalle (bow-tie) pasta: It holds onto the sauce beautifully.
680g Chicken fillets: Sliced into bite-sized strips so they cook fast and stay tender.
225g Cherry tomatoes: Grab a mix of red and yellow for a lovely pop of colour!
140g Fresh spinach: For that hit of greenery.
170g Feta cheese: Crumbled. This is the star of the show.
5 Cloves of garlic: Don’t be shy—mince them up well!
3 tbsp Freshly squeezed lemon juice: Essential for that zesty kick.
Seasoning: Smoked paprika, Italian seasoning, sea salt, and black pepper.
Olive oil: For cooking everything to perfection.
Let’s Get Cooking!
1. Pasta First
Get a big pot of water boiling, salt it like you mean it, and drop in your farfalle. Cook it according to the pack instructions until it’s perfectly al dente. Drain it, but maybe keep a tiny splash of that pasta water just in case you want your sauce a little looser later.
2. The Chicken
While the pasta is bubbling away, grab your chicken fillets. Slice them into strips, season them up with the smoked paprika, Italian seasoning, salt, and pepper. Get a large skillet nice and hot with 2 tablespoons of olive oil, and sear those strips until they’re golden brown and cooked through (roughly 10–15 minutes). Once they’re done, move them to a plate for a moment.
3. The Veggie Base
In that same pan—don’t clean it, all those chicken juices are pure flavour!—add your last tablespoon of oil, the halved cherry tomatoes, and the minced garlic. Cook these for about 2 minutes. You want the tomatoes to soften just enough to release their juices; this is going to be the base of your sauce. Throw in the spinach and stir it until it’s just wilted.
4. Bring It All Together
Toss your cooked pasta into the pan with the veggies. Pour in that fresh lemon juice and shower everything with the crumbled feta. Give it a good, hearty stir for about a minute. The feta will start to soften and melt into the lemon and tomato juices, turning into a creamy, dreamy sauce. Finally, fold the chicken back in to reheat it gently.
Final Thoughts
This dish is honestly the definition of “minimal effort, maximum reward.” It’s fresh enough for a sunny evening but comforting enough for those chillier UK nights.
Pro-tip: If you like it extra silky, a small drizzle of extra virgin olive oil right before serving really elevates it.
Have you tried this recipe yet? Drop a comment below and let me know how it went—I love hearing your tweaks and variations! Happy cooking!
Let’s be completely real for a second: weeknights can be absolute chaos. By the time 6 PM rolls around, the last thing anyone wants to do is spend hours standing over a hot stove or chopping a million different ingredients.
But at the same time, a sad piece of toast or another takeaway order just isn’t going to cut it.
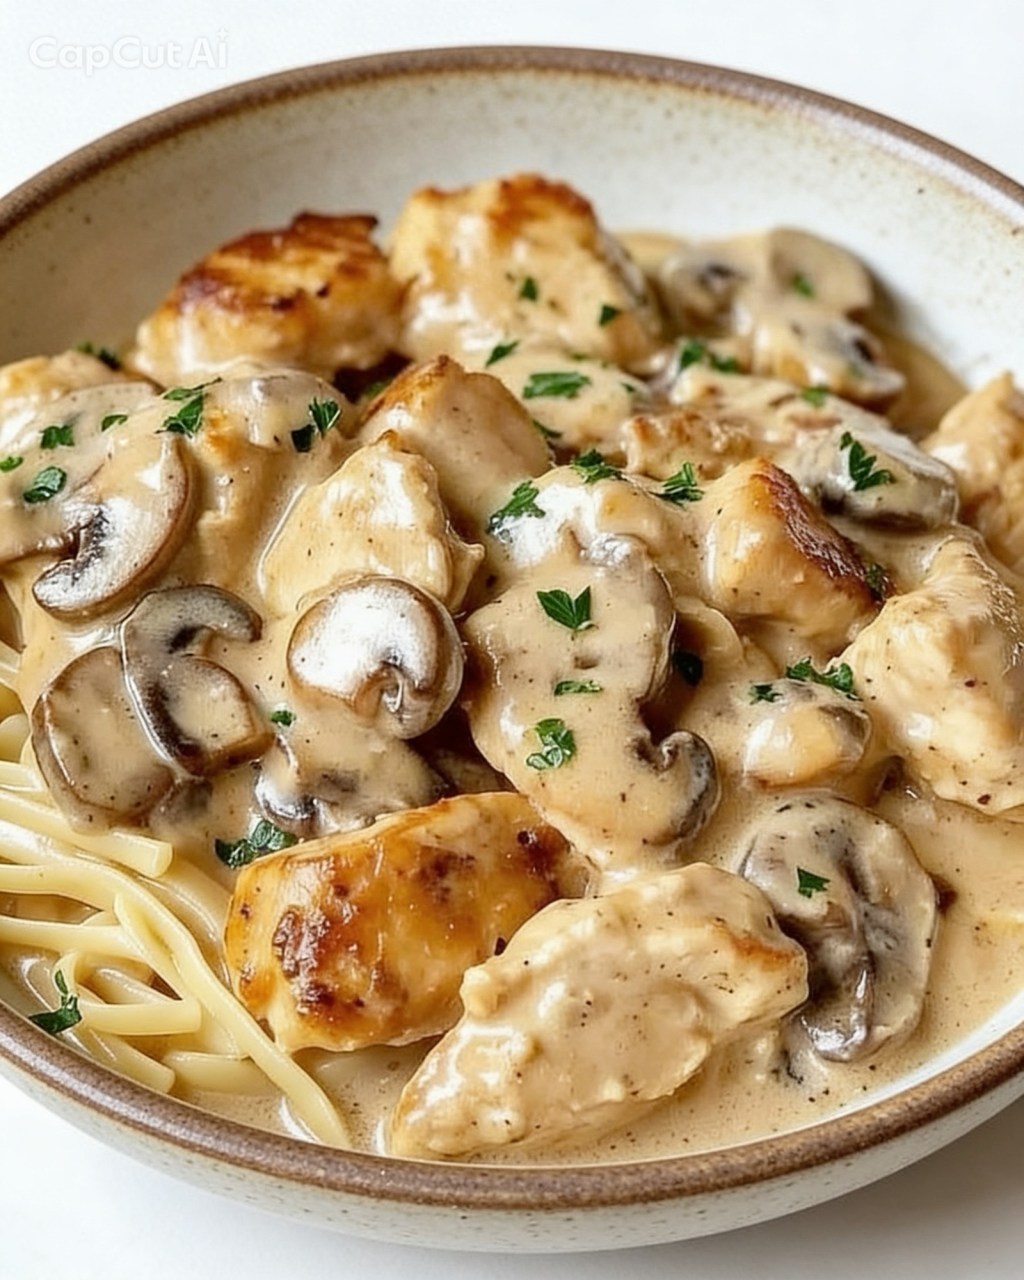
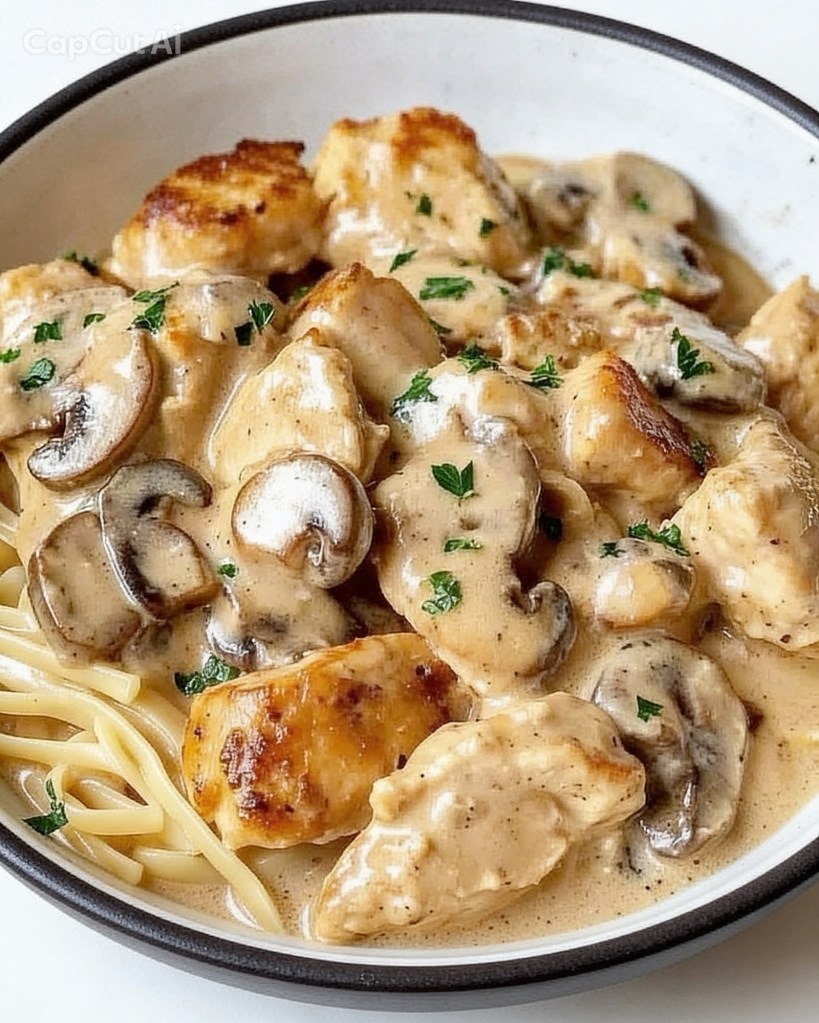
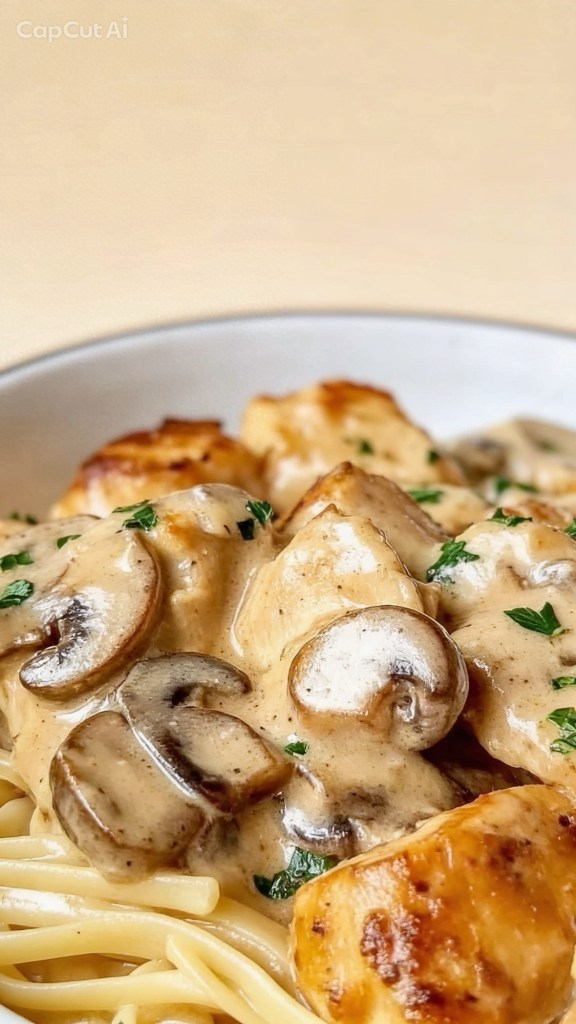
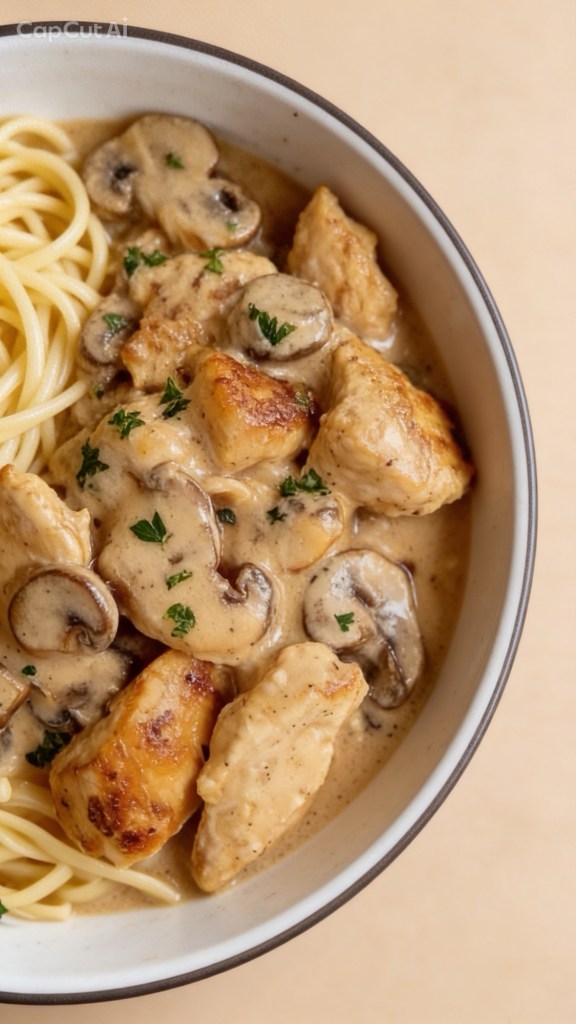
Enter this Creamy Chicken and Mushroom Stroganoff. It is pure comfort food in a pan, it takes exactly 30 minutes from start to finish, and it tastes like you’ve been letting it simmer all afternoon.
The Great Cream Debate: Double Cream vs. Sour Cream
Before we get into the kitchen, we need to have a quick chat about the dairy.
In the UK, a lot of us grew up eating stroganoff made with heavy double cream. It’s rich, it’s luxurious, and it rarely splits when you heat it up.
However, if you want a truly authentic, traditional Eastern European flavour, swap out that double cream for sour cream. The natural tang of sour cream cuts through the richness of the chicken and mushrooms beautifully, creating a much brighter, complex sauce.
Top Tip for using Sour Cream: Sour cream has a lower fat content than double cream, which means it can curdle if it gets too hot. To avoid this, turn the heat right down to a low simmer before stirring it in, and never let the sauce boil once it’s added!
The Ingredients You’ll Need
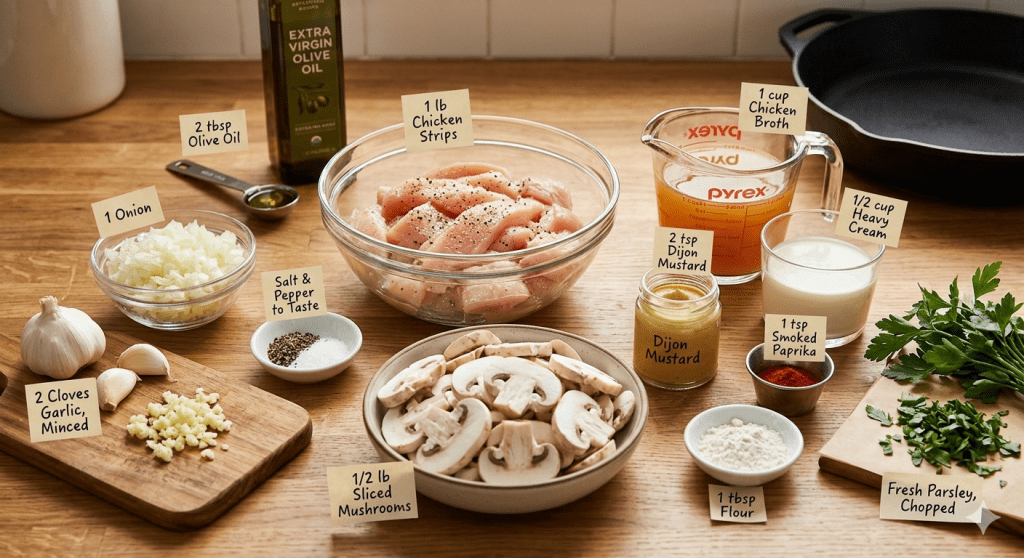
Here is your shopping list for 4 generous servings. We are keeping it simple with standard UK supermarket staples:
450g Chicken Breast: Cut into bite-sized strips. (You can use chicken thighs if you prefer a juicier meat!)
2 tbsp Olive Oil: Divided, for frying.
1 Onion: Finely chopped.
2 Garlic Cloves: Minced.
250g Mushrooms: Sliced. Chestnut mushrooms work brilliantly here for extra flavour.
1 tbsp Plain Flour: This is our secret weapon to thicken the sauce perfectly.
240ml Chicken Stock: Made with a high-quality stock cube or pot.
120ml Double Cream: (Or sour cream, if you’re going for that authentic tang!)
2 tsp Dijon Mustard: Don’t skip this—it gives the sauce its signature kick.
1 tsp Smoked Paprika: For warmth and a gorgeous golden hue.
Salt and Pepper: To taste.
Fresh Parsley: Roughly chopped, to make it look pretty at the end.
Step-by-Step Method
This recipe moves quickly once it starts, so it’s a good idea to have all your ingredients chopped and ready to go before you turn on the hob.
Step 1: Sear the Chicken (5-7 mins)
Heat 1 tablespoon of olive oil in a large frying pan over a medium-high heat. Toss in your chicken strips, season generously with salt and pepper, and fry until they are golden brown on all sides. Don’t worry if they aren’t cooked 100% the way through yet—they will finish cooking in the sauce later. Remove them from the pan and set aside on a plate.
Step 2: Sauté the Veggies (9 mins)
Turn the heat down to medium and add the remaining tablespoon of olive oil to the same pan. Throw in the chopped onion and sauté for about 4 minutes until soft and translucent. Next, add the garlic and your sliced mushrooms. Cook for another 5 minutes until the mushrooms have released their moisture and turned a lovely deep brown.
Step 3: Build the Sauce Base (1-2 mins)
Sprinkle the plain flour directly over the mushroom and onion mixture. Stir it constantly for about a minute to cook out the raw flour taste. Now, slowly pour in the chicken stock a little bit at a time, whisking or stirring continuously. You’ll see the liquid bubble up and transform into a smooth, thick gravy.
Step 4: Simmer and Meld (5-7 mins)
Turn the heat down to a gentle simmer. Stir in your double cream (or sour cream), Dijon mustard, and smoked paprika until the sauce is completely uniform. Slide the cooked chicken and any resting juices back into the pan. Let everything bubble away gently for 5 to 7 minutes until the chicken is tender and cooked through, and the sauce is thick enough to coat the back of a spoon.
What to Serve with Chicken Stroganoff
Honestly, you can’t go wrong here, but depending on your mood, here are the three best vessels for soaking up that incredible sauce:
1 A Bed of Egg Noodles or Tagliatelle: The classic choice. The wide pasta shapes catch the mushroom pieces perfectly.
2 Fluffy White Rice: Great for an easy weeknight option, as the rice absorbs the cream sauce like a sponge.
3 A Massive Scoop of Buttery Mashed Potato: If you want ultimate comfort food, this is the winner.
Got leftovers? Keep them in an airtight container in the fridge for up to 3 days. Just reheat gently on the hob, adding a splash of milk or stock if the sauce has thickened up too much in the fridge.
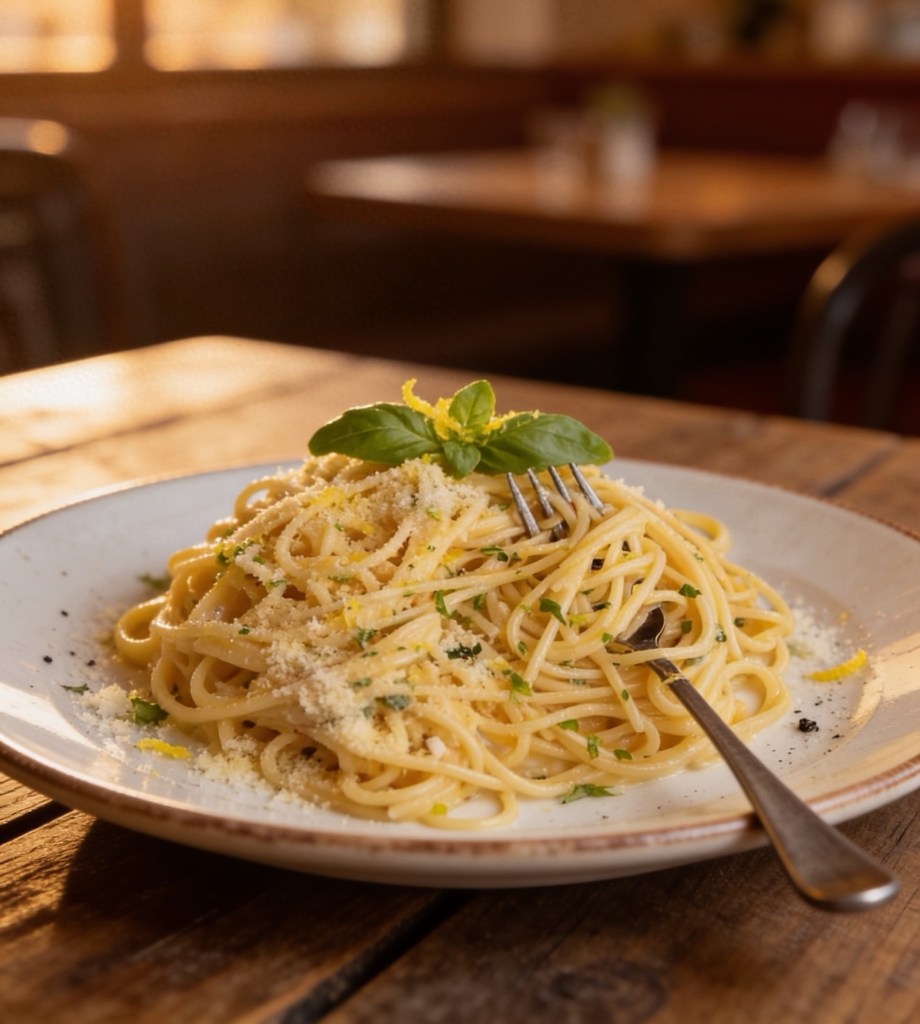
Some nights you just want something quick, comforting and a bit special without spending ages in the kitchen. That’s cwhere this lemon butter parmesan pasta comes in. It’s bright, buttery, garlicky and on the table in about 15 minutes, so it’s perfect for busy weeknights or those evenings when you can’t be bothered but still fancy a nice tea. It’s made with simple cupboard and fridge bits – pasta, butter, garlic, lemon and parmesan – but it feels like a proper “restaurant at home” dinner. You can keep it exactly as it is for a meat‑free meal, or add cooked chicken, prawns or a handful of peas if you want to bulk it out a bit more.
If you’ve seen lemon pasta all over TikTok and wondered if it’s actually worth trying, this is a really easy place to start. Everything happens in one pan plus your pasta pot, and a bit of that starchy pasta water helps create the silkiest, glossiest sauce without needing loads of cream.
Ingredients Serves 2–3 • 200 g pasta (spaghetti, tagliatelle or any long pasta) • 2 tbsp butter • 1 tbsp olive oil • 3 garlic cloves, finely chopped or crushed • Zest of 1 lemon • Juice of 1/2–1 lemon (to taste) • 30–40 g grated Parmesan or Grana Padano • Salt and black pepper • A ladle of pasta water (from the pan)
• Fresh basil or parsley to serve (optional)
Method
Cook the pasta Bring a large pan of salted water to the boil and cook the pasta according to the packet instructions until al dente. Before you drain it, scoop out a mugful of the starchy pasta water and set it aside.
Start the sauce While the pasta cooks, add the butter and olive oil to a large frying pan or shallow casserole over a low–medium heat. Let the butter melt gently into the oil.
Add garlic and lemon zest Stir in the chopped garlic and cook for about a minute until fragrant. You want it soft and smelling amazing rather than browned or crispy. Add the lemon zest and stir it through the butter mixture.
Bring the pasta and sauce together Add the drained pasta straight into the pan with the lemon butter and garlic. Pour in a small splash of the pasta water and toss everything together so the pasta is nicely coated.
Add cheese off the heat Take the pan off the heat, then sprinkle over the grated Parmesan. Toss well so the cheese melts into the lemony butter and pasta water, turning into a silky, glossy sauce. Add extra splashes of pasta water as needed until it looks creamy and coats the pasta nicely.
Season and adjust the lemon Squeeze in the juice of half a lemon, give it a taste and add more lemon if you like it extra zingy. Season with a good twist of black pepper and a little salt if it needs it (remember the Parmesan is already salty).
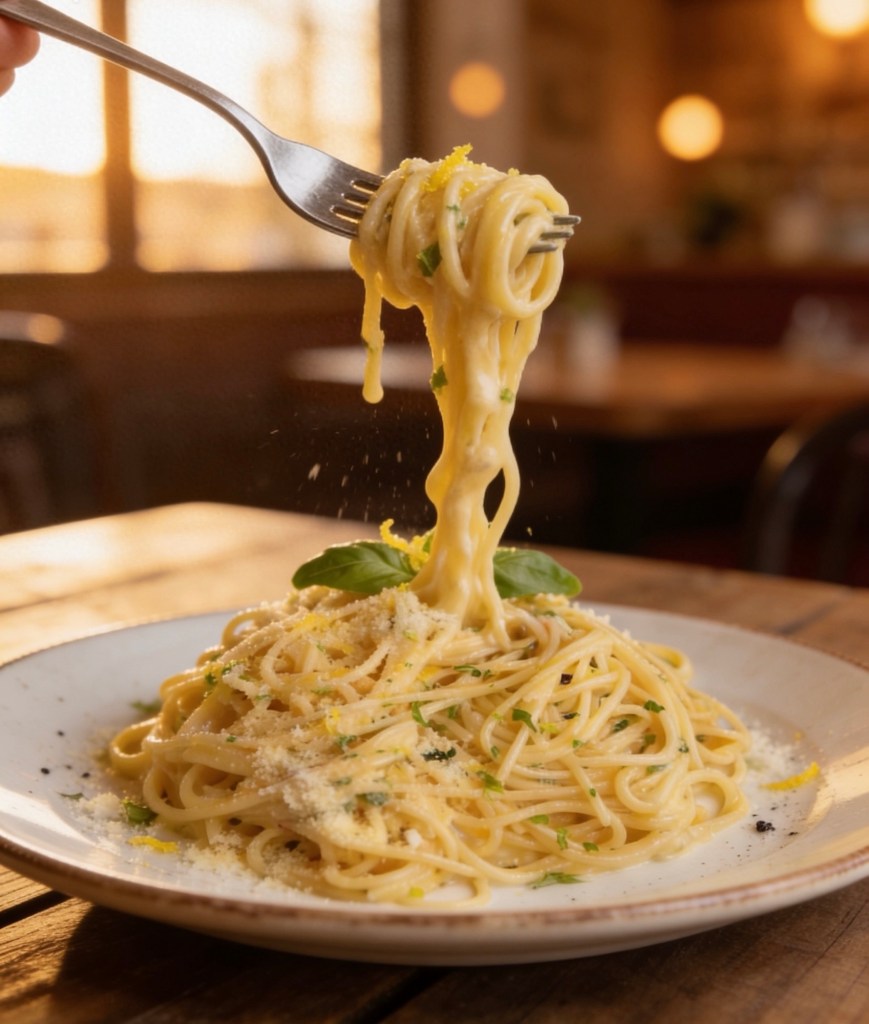
Finish and serve
Finish with a handful of chopped basil or parsley and a bit more Parmesan on top. Serve straight away while it’s hot and glossy.
Tips and Variations • Make it extra creamy: Stir in a spoonful of cream cheese or mascarpone with the Parmesan if you want a richer sauce. • Add protein: Toss through some cooked chicken, prawns or crispy bacon at the end to make it more filling. • Keep it budget‑friendly: Swap Parmesan for a basic hard cheese and use whatever pasta you have in the cupboard – it will still work.
• For garlic lovers: Add an extra clove or two of garlic or a pinch of garlic granules at the end for more punch.
How to Serve This lemon butter parmesan pasta is lovely on its own in a big bowl, but it also works really well with a simple green salad or some garlic bread on the side. It’s the kind of easy, cosy meal you can throw together after a long day, but it still feels like a bit of a treat. If you do make it, let me know how you get on and what you’d rate it out of 10 – especially if you’ve spotted it on my TikTok and come over here for the full recipe.
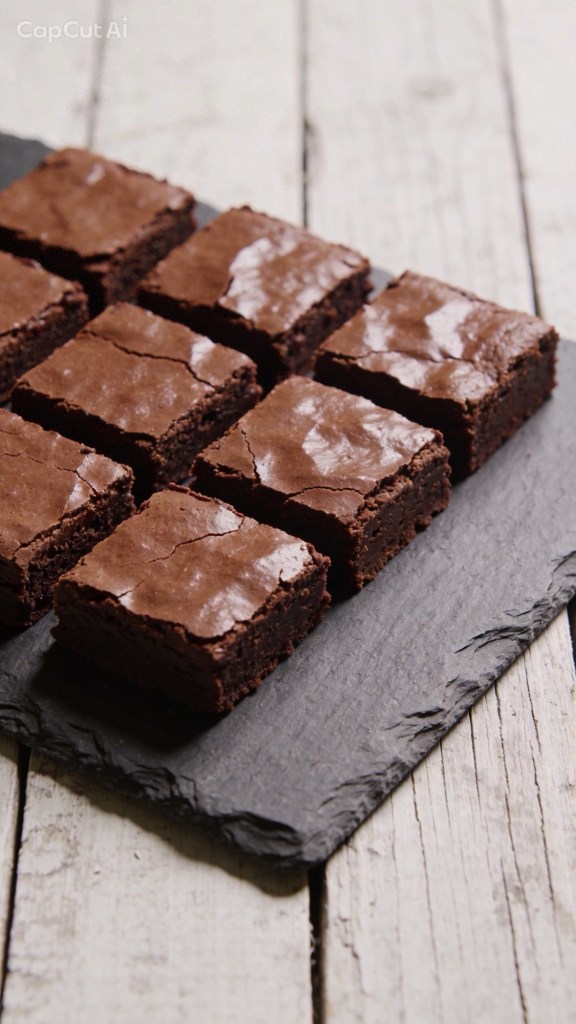
If you are looking for a brownie that is thin, cakey, or has a messy, liquid-caramel center that pools all over your plate, you’ve come to the wrong place.
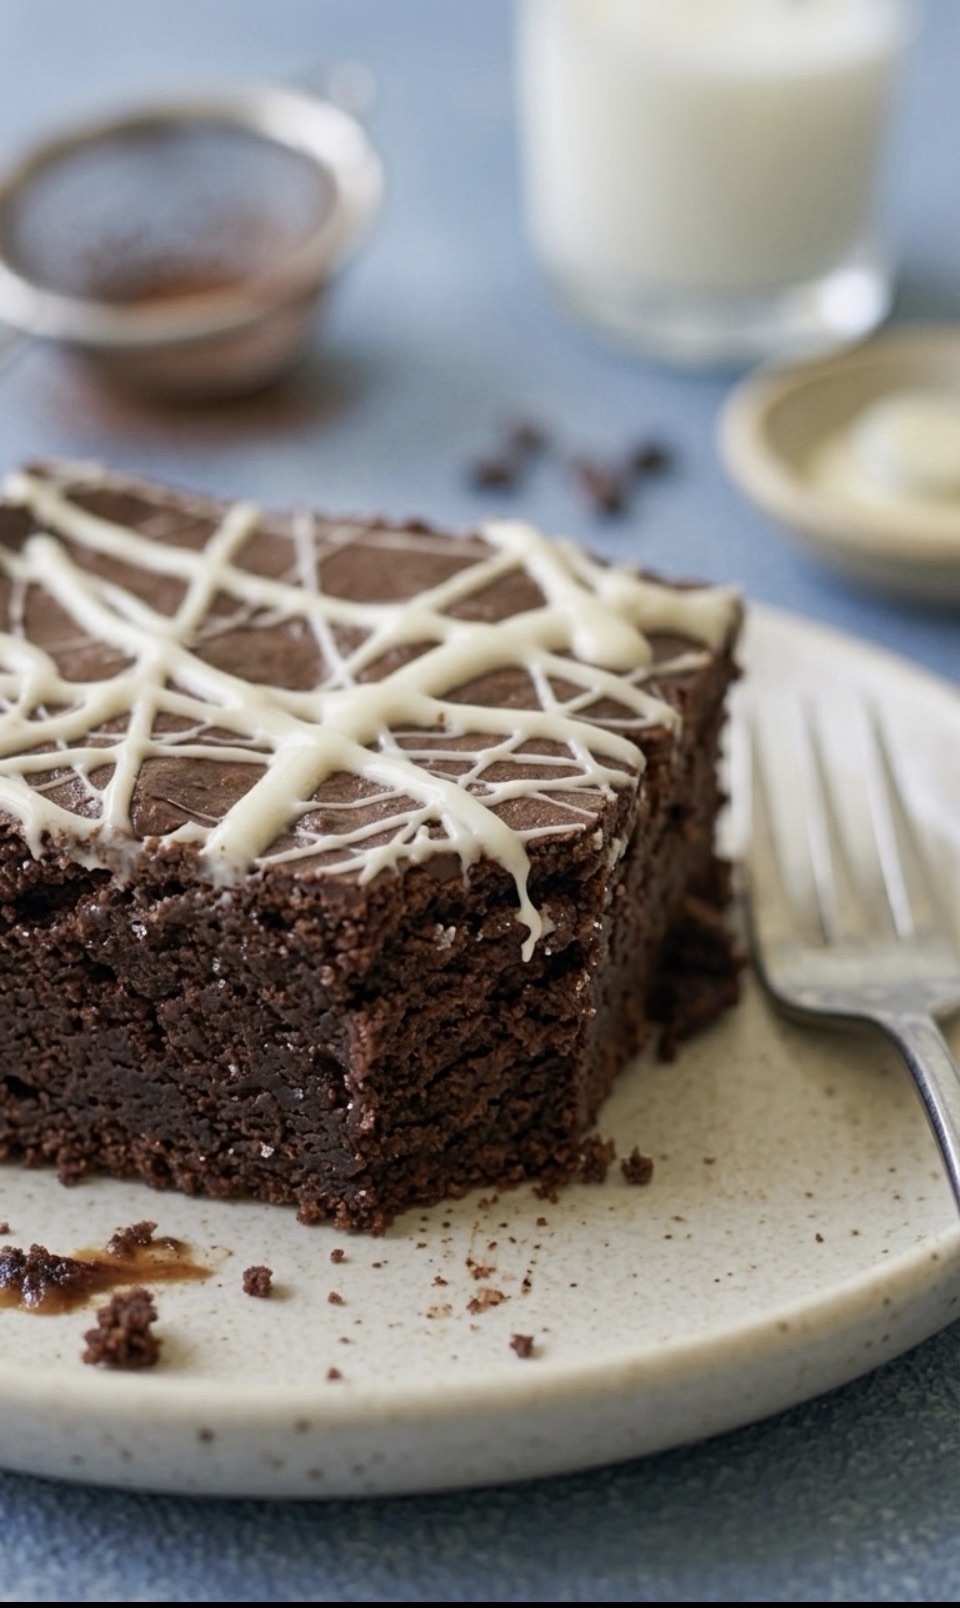
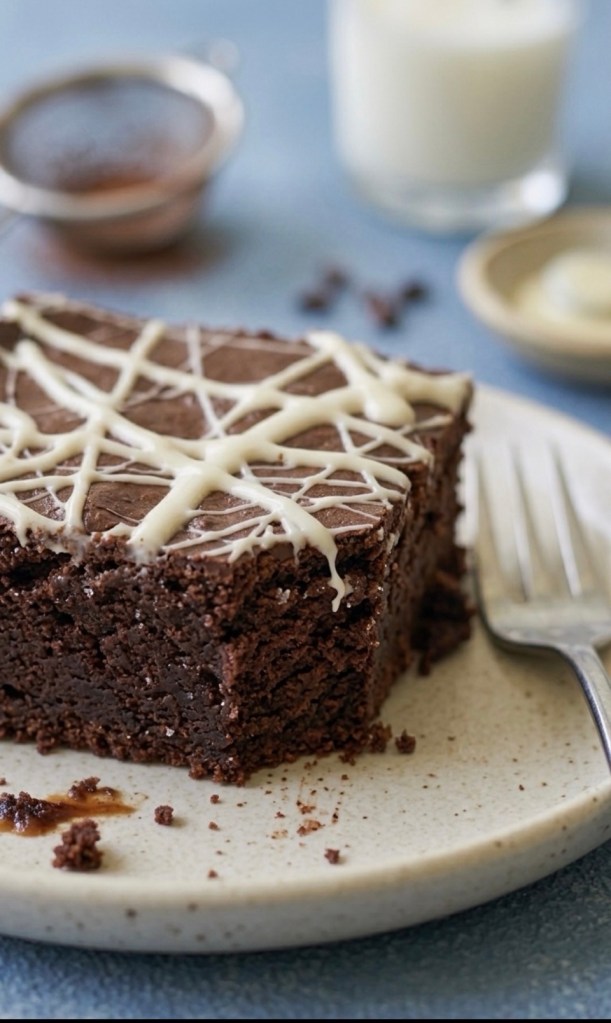
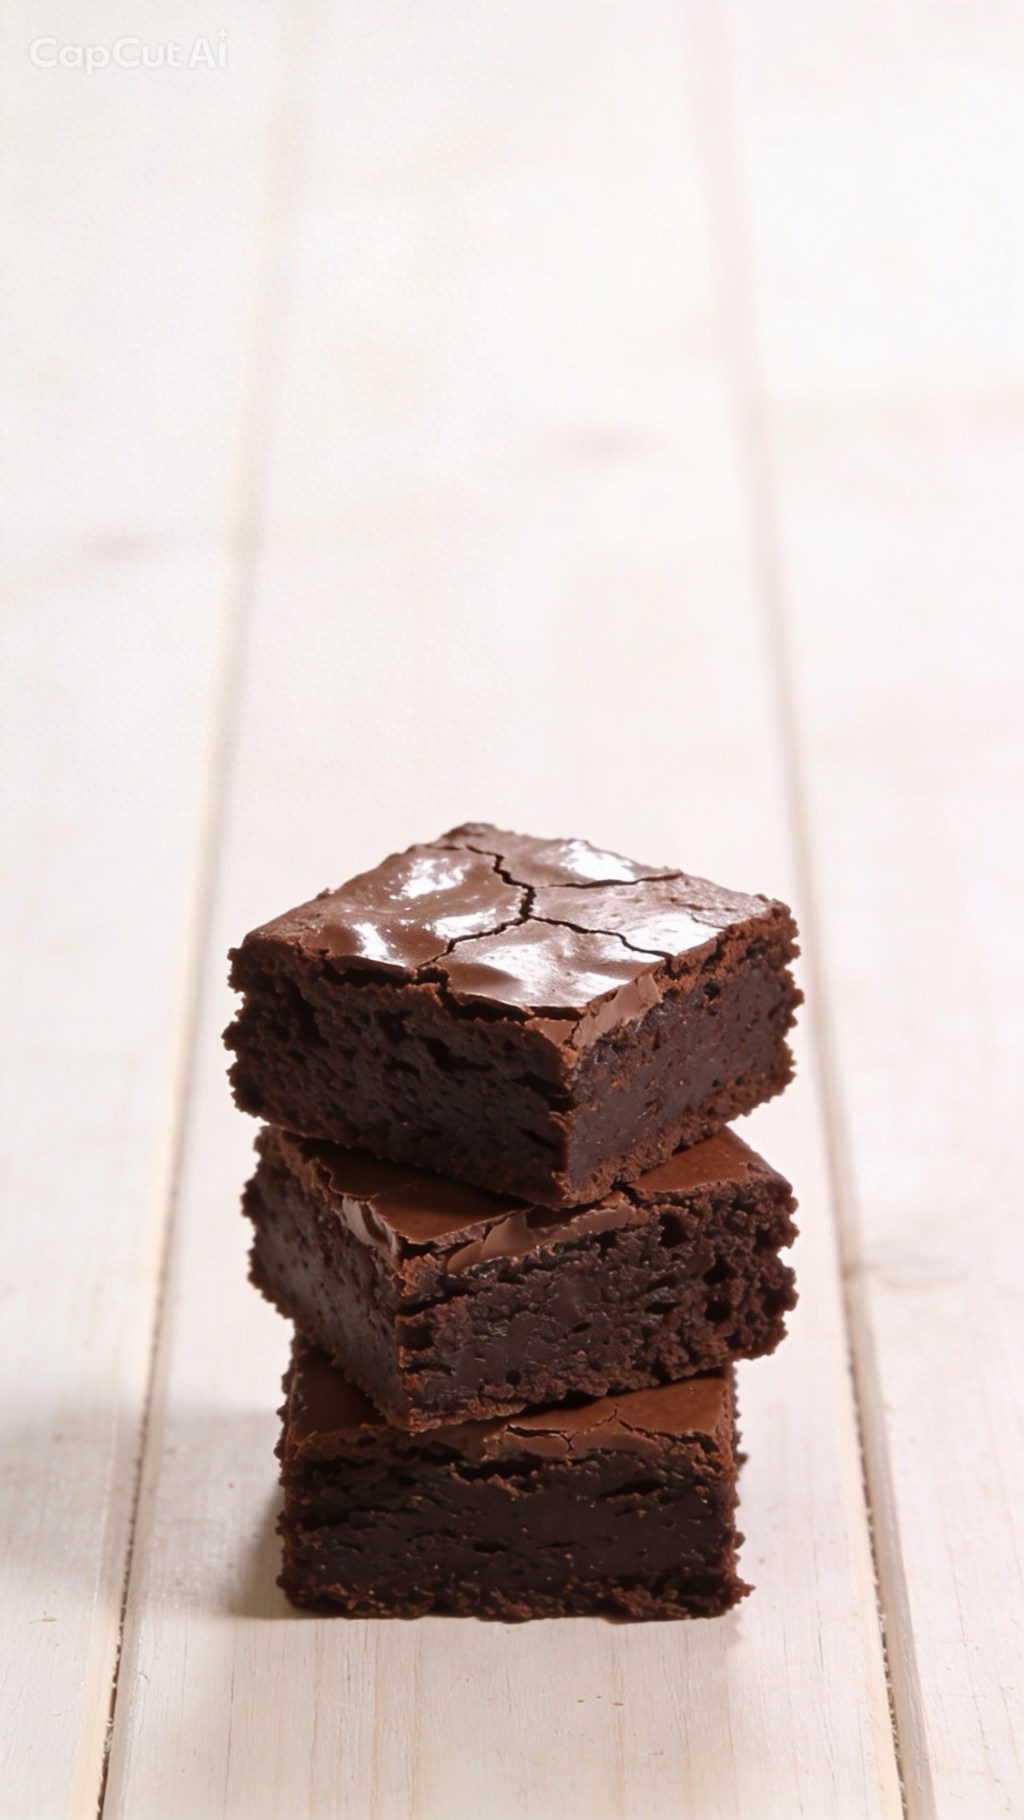
These are the ultimate fudgy salted caramel brownies. They are dense, incredibly rich, intensely chocolatey, and feature a layer of homemade salted caramel that bakes directly into the brownie crumb. The result? A perfectly chewy, cohesive bite that doesn’t collapse into a puddle. Finished with a striking white chocolate spiderweb drizzle, these brownies look like they walked straight out of a luxury bakery window.
Whether you’re baking for a weekend treat or looking to impress on social media, this foolproof recipe delivers every single time.
Why You Will Love This Recipe
The Perfect Texture: No cakey layers here. Thanks to a high ratio of chocolate and butter to flour, these brownies are dense, fudgy, and satisfyingly chewy.
Baked-In Caramel: Instead of a runny, messy middle, the homemade caramel merges with the batter during baking to create an ultra-decadent, chewy caramel layer.
Striking Presentation: The intricate white chocolate drizzle contrasts beautifully with the dark chocolate crust, making it highly photogenic (and even more delicious).
The Secret to Fudgy Brownies
The secret to achieving that coveted, dense, crinkle-top brownie lies in how you handle the eggs and sugar. Whisking the eggs and sugars together until they are pale, thick, and fluffy creates a stable foam. When the warm, melted chocolate and butter are folded in, this foam rises slightly in the oven and creates that delicate, glossy paper-crust on top, while keeping the inside perfectly fudgy.
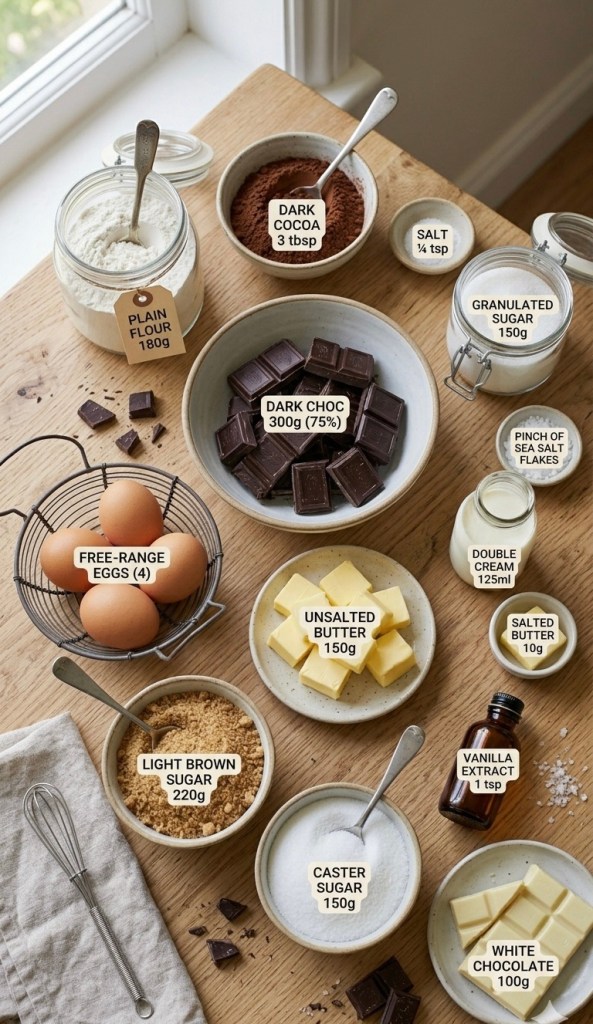
Ingredients You’ll Need
For the Salted Caramel Filling
150g (5½ oz) Granulated sugar
Pinch of Sea salt flakes
125ml (4 fl oz) Double cream
10g (¼ oz) Salted butter, softened
For the Fudgy Brownie Batter
300g (10½ oz) Dark chocolate (minimum 65-75% cocoa solids)
150g (5½ oz) Unsalted butter
4 Free-range eggs (room temperature)
220g (8 oz) Light brown sugar
150g (5½ oz) Caster sugar
1 tsp Vanilla extract
180g (6¼ oz) Plain flour
3 tbsp Cocoa powder
¼ tsp Salt
To Decorate
100g (3½ oz) Good-quality white chocolate
Step-by-Step Instructions
Step 1: Prepare the Homemade Salted Caramel
1 Place the granulated sugar in a clean, dry saucepan over medium heat. Allow the sugar to melt completely. Do not stir the sugar with a spoon; instead, gently swirl the pan occasionally to ensure it melts evenly.
2 Watch closely until the melted sugar turns a deep, golden amber color.
3 Immediately remove the pan from the heat. Carefully whisk in the softened salted butter and a generous pinch of sea salt.
4 Slowly pour in the double cream while whisking continuously. The mixture will bubble up rapidly, so be cautious. Keep whisking until the caramel is completely smooth and glossy. Pour it into a heatproof bowl and set it aside to cool to room temperature.
Step 2: Melt the Chocolate and Butter
1 Preheat your oven to 180°C / 160°C fan / Gas Mark 4. Line a 20cm (8-inch) square baking tin with baking parchment, leaving a bit of overhang on the sides for easy removal later.
2 Roughly chop the dark chocolate and dice the unsalted butter. Place them together in a heatproof bowl set over a pan of gently simmering water (making sure the bottom of the bowl doesn’t touch the water).
3 Stir occasionally until completely melted and smooth. Remove the bowl from the heat and allow it to cool slightly while you prepare the rest of the batter.
Step 3: Whisk the Egg and Sugar Base
1 In a large mixing bowl (or the bowl of a stand mixer fitted with the whisk attachment), combine the 4 free-range eggs, light brown sugar, caster sugar, and vanilla extract.
2 Whisk vigorously on medium-high speed for about 3 to 5 minutes. The mixture should become pale, thick, and visibly expanded in volume. When you lift the whisk, it should leave a distinct trail (or ribbon) on the surface for a few seconds.
Step 4: Combine and Bake
1 Gently pour the melted chocolate and butter mixture into the whisked egg base. Use a rubber spatula to gently fold the mixture together until just combined, taking care not to knock too much air out of the batter.
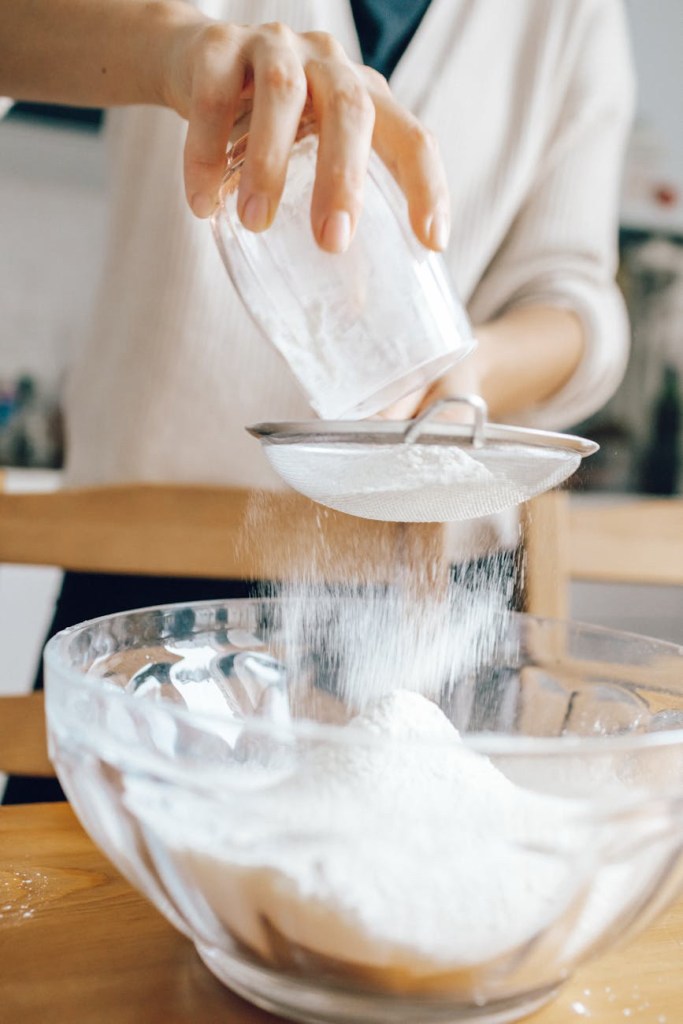
2 Sift the plain flour, cocoa powder, and ¼ teaspoon of salt directly into the bowl. Fold gently until no pockets of dry flour remain.
3 Pour exactly half of the brownie batter into your prepared baking tin and smooth it into an even layer.
4 Take your cooled salted caramel and drizzle it uniformly over the batter layer.
5 Carefully spoon the remaining brownie batter over the caramel layer. Use a spatula to gently smooth it out to the edges, sealing the caramel inside.
6 Bake in the preheated oven for 25 to 30 minutes. When done, the edges should be completely set, but the center should still have a very slight, gentle wobble.
Step 5: Cool and Decorate
1 Remove the tin from the oven and place it on a wire rack. Let the brownies cool completely in the tin. As they cool, the center will firm up into a dense, fudgy masterpiece.
2 Once cooled, use the parchment paper overhang to lift the brownie block out of the tin.
3 Break the white chocolate into a microwave-safe bowl and melt it in 20-second bursts, stirring between each, until completely smooth.
4 Pour the melted white chocolate into a piping bag (or use a spoon) and drizzle it back and forth across the top of the brownie block in an intricate, intersecting web pattern.
5 Allow the white chocolate decoration to set completely before using a sharp, warm knife to slice into clean squares.
Top Baker’s Tips for Success
Don’t Overbake: Brownies continue cooking in the hot tin even after they are removed from the oven. If a toothpick inserted into the center comes out completely clean, they are overbaked. You want a few moist crumbs attached to the tester!
Room Temperature Eggs: Cold eggs can shock the melted chocolate mixture and cause it to seize or clump. Ensure your eggs are at room temperature before you begin.
Clean Slices: For perfectly clean, bakery-style squares, place the cooled, decorated brownie block into the fridge for 30 minutes before slicing. Wipe your knife blade with a hot, damp cloth between every single cut.
How to Store Your Brownies
Keep your brownies in an airtight container at room temperature for up to 4 days, or in the refrigerator for up to a week. If you prefer them ultra-chewy, eat them straight from the fridge! They also freeze beautifully—simply wrap individual squares tightly in plastic wrap and freeze for up to 3 months.
We’ve all been there. It’s 9 PM on a rainy Tuesday, the work emails won’t stop pinging, and your brain is screaming for something sweet, warm, and comforting. When life gets a bit too chaotic, some people meditate, others go for a brisk run, and a few light scented candles.
Me? I put on my comfiest trackies, head straight to the kitchen, and grab a jar of hazelnut spread.
What started as a viral TikTok meme—the ultimate “what do we do when we’re stressed?” joke—has officially become my holy grail baking recipe. Let’s be honest: standing over a warm oven and eating gooey chocolate straight from the baking tin might actually be the cheapest form of self-care available.
If you have a jar of Nutella, a couple of eggs, and a scoop of flour in your cupboard, you are exactly 20 minutes away from chocolate heaven. Here is why this recipe works, the science behind it, and how to nail it on your very first try.
The Secret Science: Why 3 Ingredients Actually Work
Usually, baking is a strict science experiment. If you forget the baking powder, mess up the sugar ratio, or use the wrong type of fat, your bake is ruined. You’re usually left hunting through the cupboards for golden syrup, cocoa powder, and blocks of expensive baking chocolate.
This recipe completely throws the traditional rulebook out the window. Why? Because the clever scientists at Ferrero have already done the hard work for you.
• The Nutella: Think of Nutella not just as a topping, but as your primary baking base. It is already packed with cocoa for flavour, sugar for sweetness, and palm oil/hazelnut fats for moisture. It replaces the butter, sugar, and cocoa powder of a traditional brownie in one single scoop.
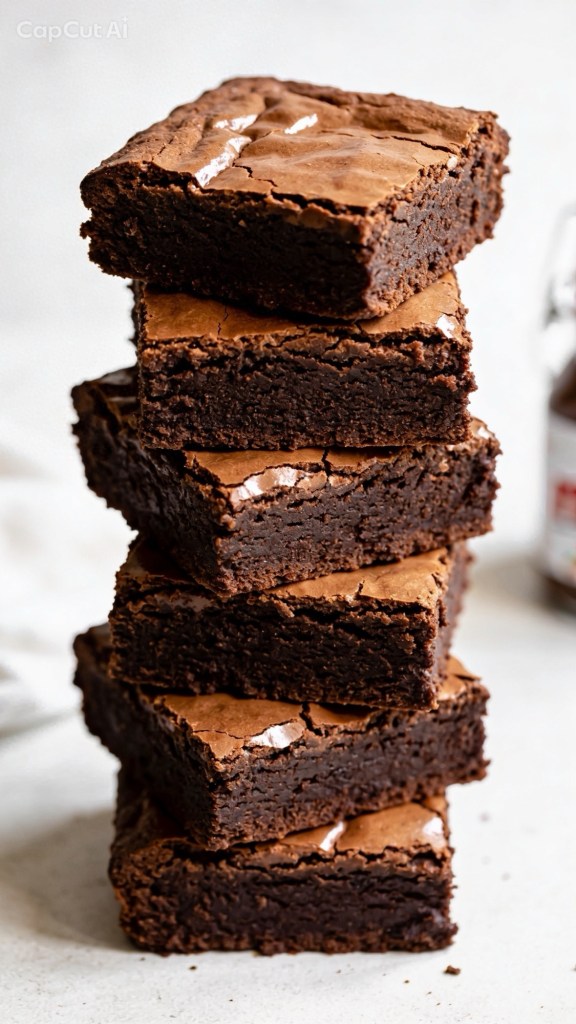
• The Eggs: Eggs are the magicians of this recipe. They provide the structure, the rise, and—most importantly—that highly coveted, shiny, papery crinkle-top that separates a mediocre brownie from an elite one.
• The Plain Flour: A tiny amount of plain flour binds everything together. Because we aren’t using raising agents (like self-raising flour or baking powder), the dense properties of plain flour keep the texture beautifully fudgy rather than cake-like.
No fancy equipment, no waiting for butter to soften on the counter for hours, and practically zero washing up. It is pure kitchen efficiency.
The Recipe: Fudgy Nutella Brownies
Ingredients
• Nutella: 280g (Roughly one standard small jar. Ensure it’s at room temperature so it mixes easily.)
• Eggs: 2 Large (Use free-range, room-temperature eggs for the best rise.)
• Plain Flour: 65g (Standard plain white flour – do not use self-raising!)
Step-by-Step Method
1. Prep Your Station
Before you do anything else, preheat your oven to 180°C (160°C fan/Gas Mark 4). Line a small square baking tin (around 8×8 inches or 20×20 cm) with baking parchment.
Top Tip: Leave a bit of parchment overhang on the sides. This creates “handles” so you can easily lift the brownie block out of the tin later without it breaking apart.
2. Whisk the Base
In a medium-sized mixing bowl, crack in your two large eggs and add the 280g of Nutella. Grab a whisk and go to town. At first, it might look a bit split, lumpy, or strange as the cold eggs hit the thick spread. Keep whisking for about a minute! Suddenly, it will transform into a beautifully smooth, glossy, and thick chocolate batter.
3. Fold, Don’t Stir
Sift your 65g of plain flour into the bowl. Put the whisk away and grab a silicone spatula or a wooden spoon. Gently fold the flour into the chocolate mixture using a figure-of-eight motion just until the white streaks disappear.
The Golden Rule: Stop mixing the second the flour is incorporated! If you overmix the batter, you will develop the gluten in the flour. This turns your dense, fudgy brownies into a tough, bready cake—and nobody wants a bready brownie.
4. Into the Oven
Pour the batter into your lined tin. It will be quite thick and sticky, so use your spatula to smooth it out into the corners. Pop it into the middle shelf of the oven and bake for 15 to 20 minutes.
The Ultimate Brownie Test: Fudgy vs. Overbaked
How do you know when they are perfectly done?
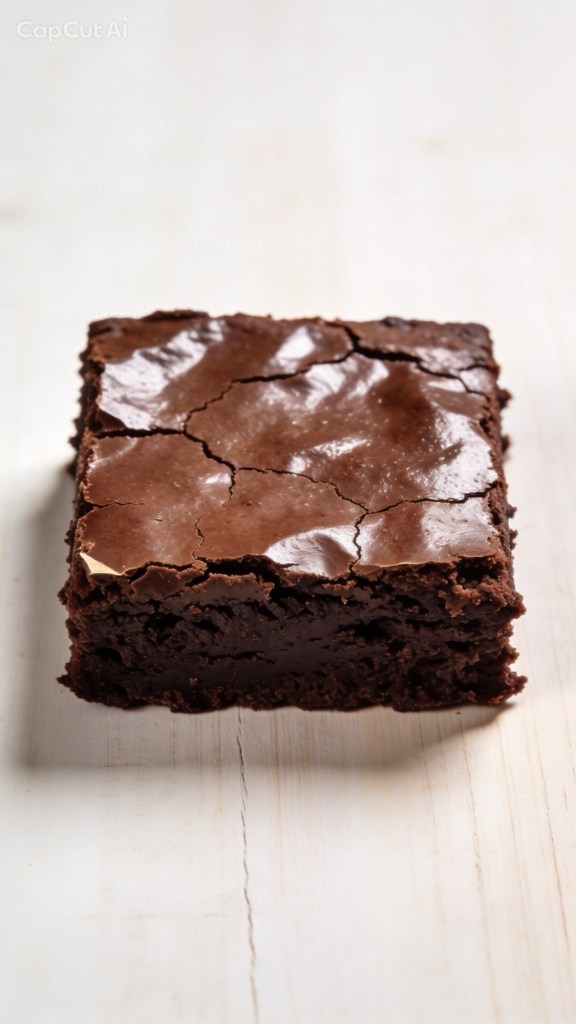
You want the edges to look set and matte, and the top should have that gorgeous, paper-like crinkle. However, if you gently shake the tin, the very centre should still have a tiny bit of a wobble.
If you insert a toothpick or skewer into the centre, it should not come out completely clean. It should have a few moist, sticky crumbs attached to it. If the skewer comes out completely dry, you’ve overbaked them into a cake. Pull them out early—they will continue to firm up as they cool down in the hot tin!
Variations to Try (If You’re Feeling Fancy)
While the 3-ingredient version is perfect on its own, it also acts as a brilliant blank canvas. If you want to level up your bake next time, try folding in these extras right before baking:
• The Sweet & Salty: Add a generous pinch of flaky sea salt (like Maldon) over the top right before it goes in the oven.
• The Crunch: Fold in 50g of chopped, toasted hazelnuts to mimic the inside of a Ferrero Rocher.
• The Ultimate Chocolate Fix: Toss in a handful of white or milk chocolate chips for a bit of texture.
How to Serve
If you possess an incredible amount of self-control, let the brownies cool completely in the tin for about 20–30 minutes, slice them into neat squares, and serve them alongside a scoop of vanilla bean ice cream or a hot cup of tea.
If you’re having one of those weeks? Forget the knife. Grab a spoon, sit yourself down on the kitchen floor, and eat them warm and gooey straight out of the tin. We completely support your journey.
Have you tried the 3-ingredient Nutella brownie trend yet, or are you skeptical that a recipe this simple can actually taste good? Let me know in the comments below if you’re team fudgy or team cakey!
There is comfort food, and then there is comfort food. If you’re tired of the same old standard weeknight casseroles, it’s time to give your dinner routine a serious upgrade
.
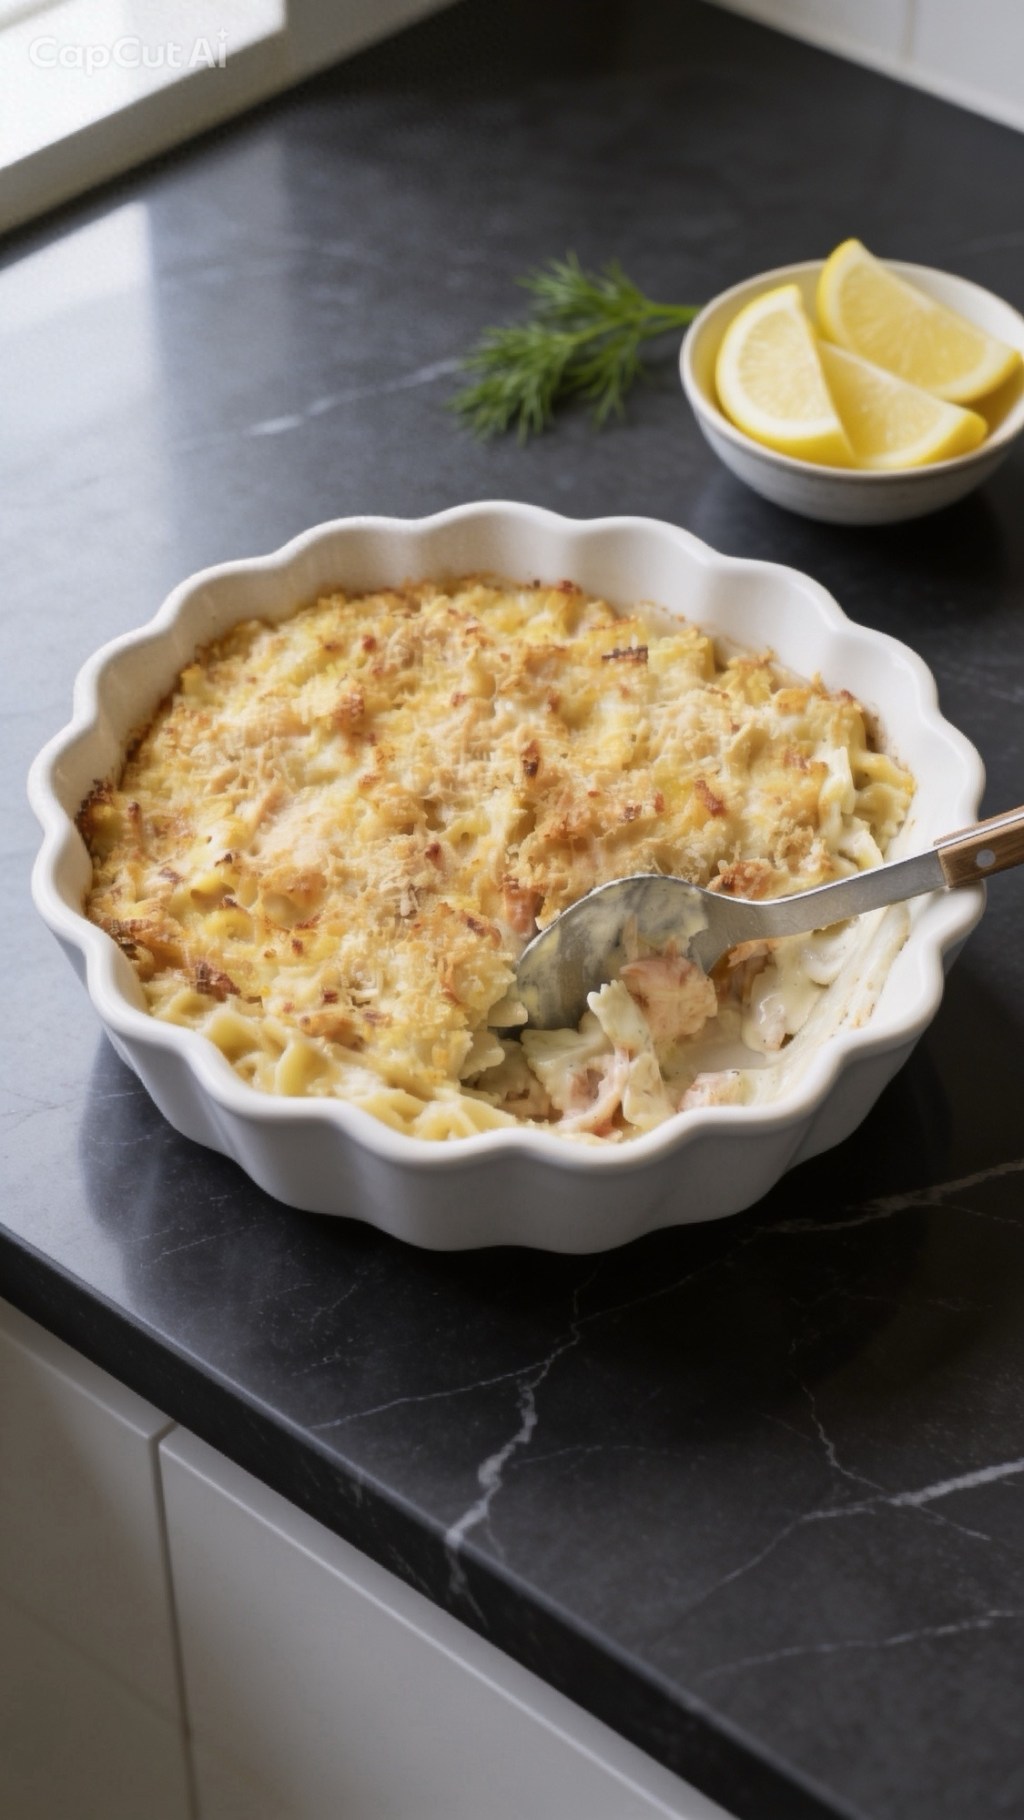
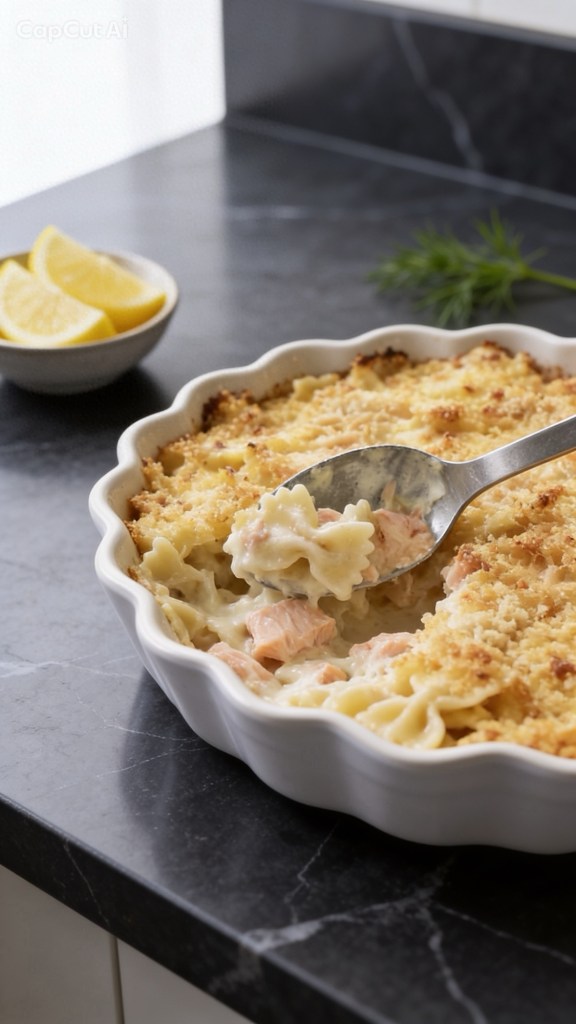
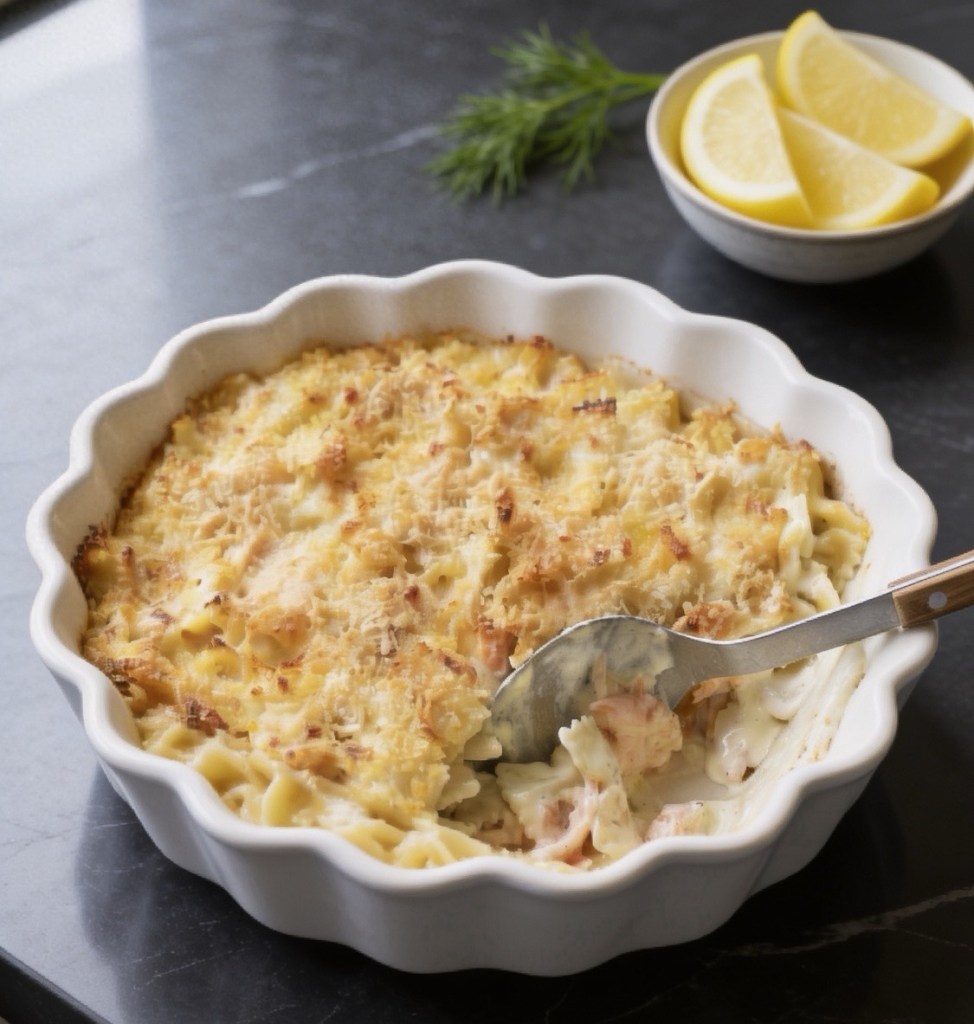
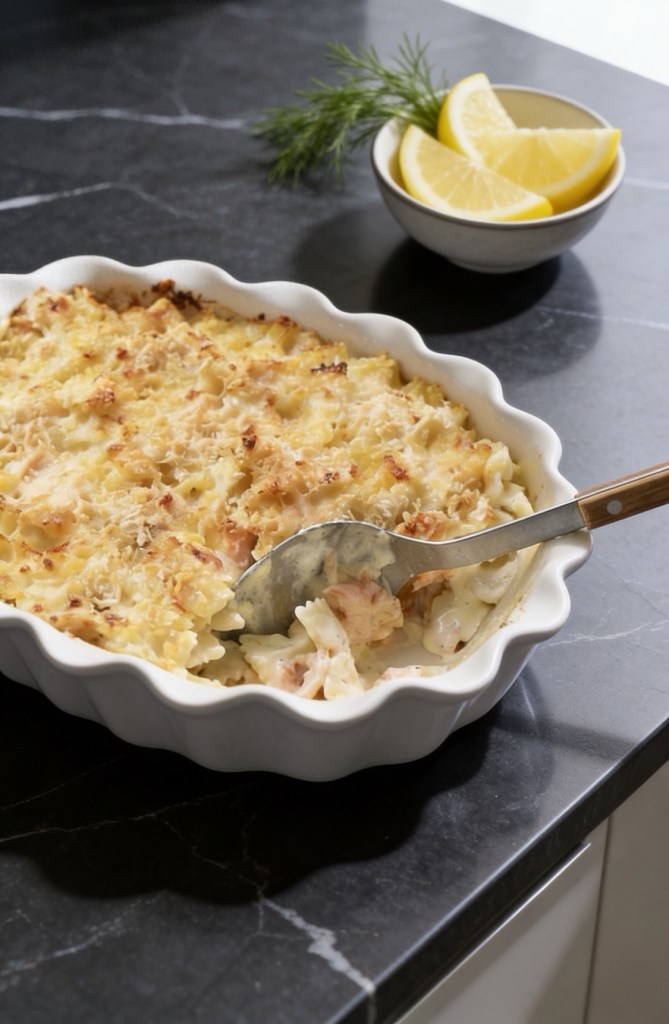
Enter the Smoked Salmon Pasta Bake.
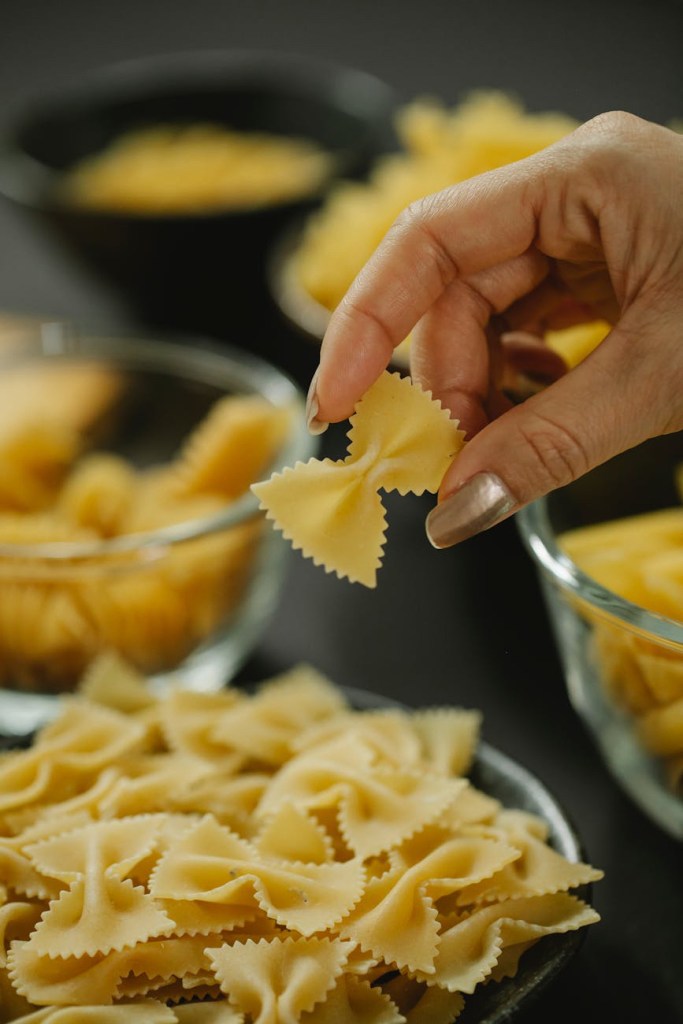
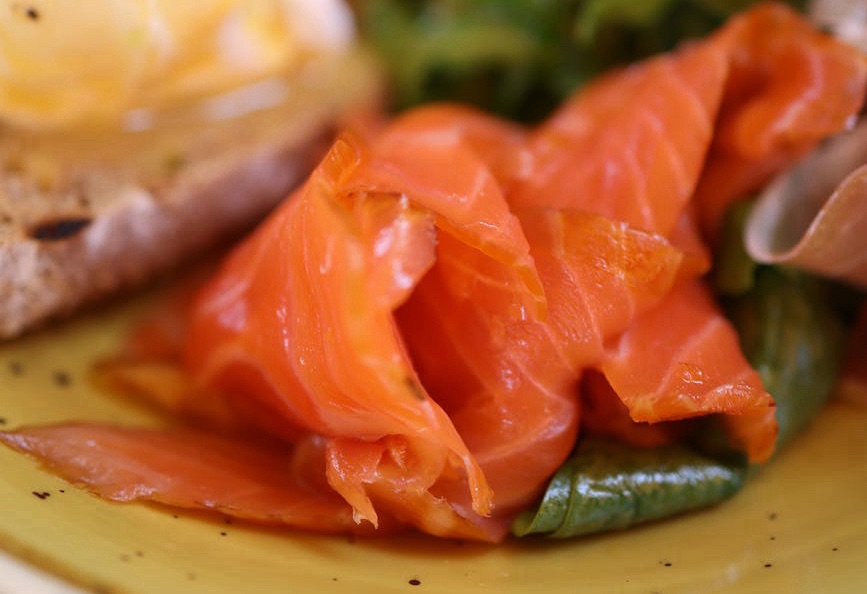
Imagine tender farfalle pasta coated in a velvety, nutmeg-infused béchamel sauce, layered with rich strips of smoked salmon, and blanketed under a bubbling, golden crust of Gruyère and Parmesan cheese. It’s decadent, incredibly savory, and feels like a restaurant-quality meal made right in your own kitchen.
Let’s dive into how to make this ultimate cozy dinner.
Why You’ll Love This Recipe
The Flavor Combo: Smoked salmon and rich, nutty Gruyère cheese are a match made in culinary heaven.
That Béchamel Sauce: Forget jarred sauces. This scratch-made white sauce elevates the dish to a whole new level.
Texture Goals: The combination of soft pasta, tender salmon, and a crispy breadcrumb topping gives you the perfect bite every single time.
Ingredients You’ll Need
Here is everything you need to grab from the shop. Ingredient Amount (Metric) Amount (Imperial) Full-fat milk 750ml 1¼ pints Unsalted butter (plus extra for greasing) 120g 4½oz Plain flour 50g 1¾oz Dried pasta (Farfalle works best!) 300g 10½oz Smoked salmon (cut into strips) 250g 9oz Gruyère cheese (grated) 250g 9oz Parmesan cheese (grated) 75g 2½oz Dried breadcrumbs 3 tbsp 3 tbsp Freshly grated nutmeg, salt, & pepper To taste To taste
Step-by-Step Instructions
1. Prep and Warm the Milk
Preheat your oven to 200°C / 180°C Fan / Gas 6. Grease a large gratin dish with a little bit of butter. In a small saucepan, slowly bring your milk to a gentle simmer, then remove from heat.
2. Whip Up the Béchamel Sauce
Over very low heat, melt half of your butter (60g) in a heavy-bottomed saucepan. Stir in the flour with a wooden spoon and cook, stirring constantly, until it turns just golden but not brown.
Remove the pan from the heat. Add the warm milk just a few tablespoonfuls at a time, whisking vigorously after each addition until completely smooth. Season with salt, pepper, and a generous pinch of fresh nutmeg. Return to the heat and slowly bring to a boil, stirring constantly until thickened.
3. Cook the Pasta
Boil your pasta in a large pot of salted water according to the packet instructions (aim for al dente, as it will cook more in the oven). Drain the pasta and immediately toss it with half of the remaining butter pieces so it doesn’t stick.
4. Layer It Up!
Now for the fun part. Grab your greased baking dish and layer everything like a lasagna:
Base: Spoon 2–3 tbsp of béchamel into the dish.
Layer 1: Top with a third of the pasta, half the salmon, and half the Gruyère. Sprinkle with a bit of Parmesan and breadcrumbs.
Layer 2: Spread over some more béchamel, half of the remaining pasta, and all of the remaining salmon and Gruyère.
Top Layer: Add the final bit of pasta, cover completely with the rest of the béchamel, and sprinkle the remaining Parmesan and breadcrumbs. Dot the very top with your last few pieces of butter.
5. Bake to Golden Perfection
Pop it in the oven for 20–30 minutes. You’re looking for bubbling edges and a gorgeous, crispy, golden crust on top.
Chef’s Tip: Let the dish rest for 2–3 minutes after pulling it out of the oven. This allows the sauce to settle so you get clean, beautiful scoops when serving!
Recipe Variations & Substitutions
The Pasta: While farfalle (bow-tie pasta) is the absolute best shape for catching pockets of cheese and salmon, you can easily substitute penne, rigatoni, or fusilli.
The Cheese: If you can’t find Gruyère, a high-quality sharp white Cheddar or Fontina cheese makes a fantastic swap.
Add Greens: Want some veggies? Toss a handful of fresh baby spinach or frozen peas into the hot pasta right before layering.
Print or Save This Recipe!
If you made this Cheesy Smoked Salmon Pasta Bake, let me know how it turned out! Drop a comment below, rate the recipe, and don’t forget to tag me in your food photos on Instagram
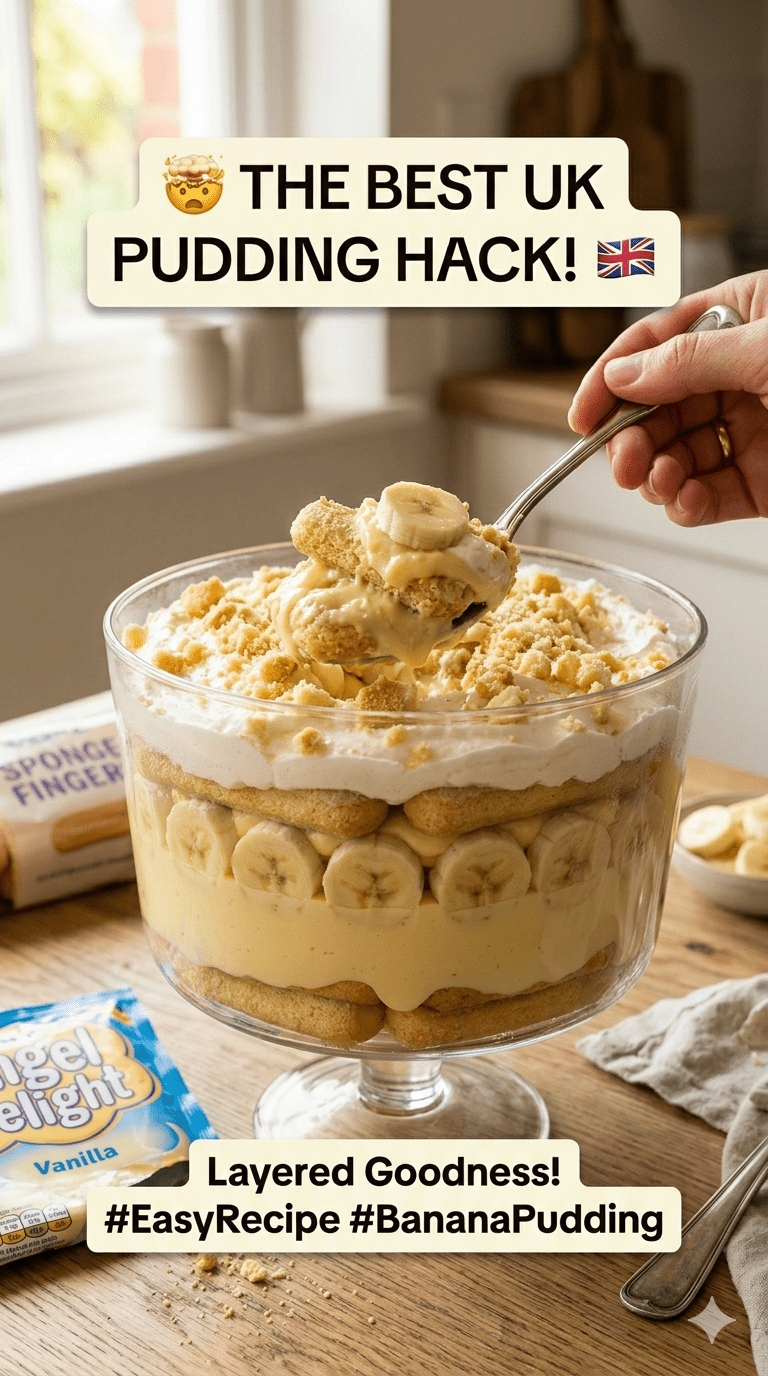
You cannot visit New York City without trying the legendary Magnolia Bakery banana pudding. It is the definition of comfort food—creamy, light, and perfectly layered with soft, cake-like biscuits and ripe fruit.
But let’s be real: sourcing the classic ingredients (looking at you, Nilla Wafers) in UK supermarkets is either impossible or unbelievably expensive. Until now.
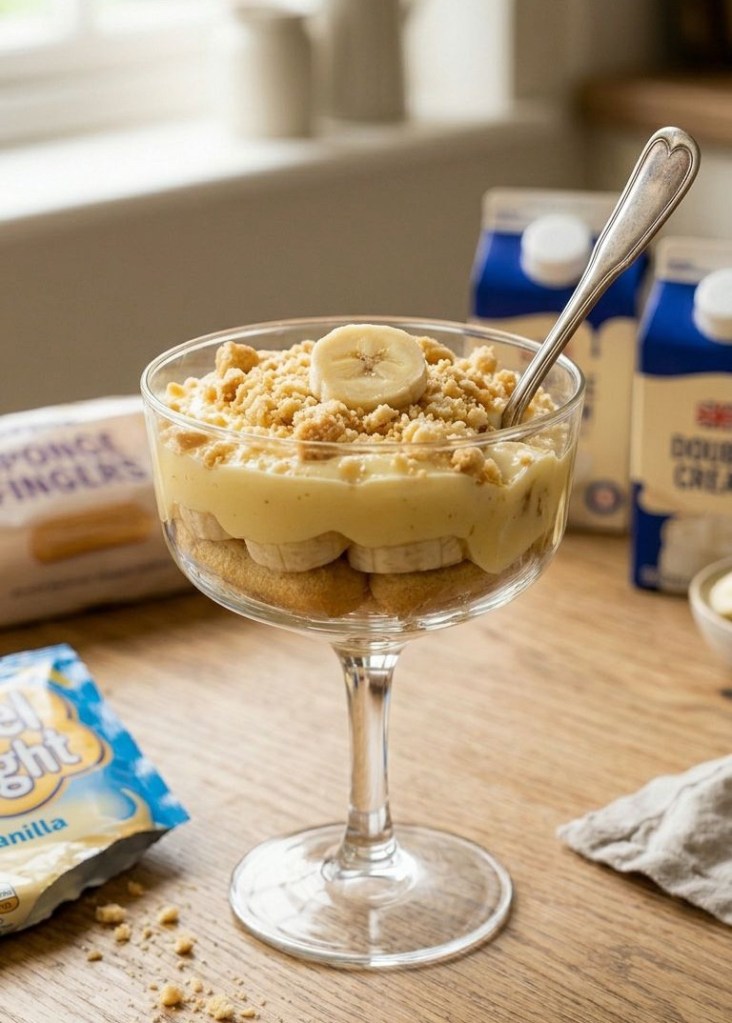
If you love easy no-bake desserts UK style, this recipe hack is for you. We have completely adapted the famous Magnolia Bakery banana pudding UK recipe to use affordable, accessible ingredients found in any British supermarket. The secret? We swap vanilla instant pudding for classic Vanilla Angel Delight recipes and dense American whipping cream for rich, thick double cream.
The result? It might actually be better than the original NYC classic. Here is how to make it.
Why This UK Version Works So Well (Textural Advantages!)
The magic of the original NYC recipe relies on the Nilla Wafers absorbing moisture until they soften into a cake-like layer. British “vanilla wafers” (the layered, crispy kind) dissolve instantly into mush when mixed with liquid.
Our solution is sponge finger dessert hacks (often sold as boudoir biscuits or ladyfingers). Because sponge fingers are thicker, they absorb the liquid beautifully over a longer period, creating distinct, soft, pillowy layers that maintain their structure. The result is a richer dessert with an incredible melt-in-your-mouth texture.
Combine this with the nostalgia-inducing thick set of two sachets of Vanilla Angel Delight, and you have an elite dessert.
The Essential UK Ingredient Kit
You will need:
1 tin (397g) Condensed Milk (e.g., Nestlé Carnation)
355ml Ice-Cold Water (Ensure it is very cold, using ice cubes if needed)
2 sachets (59g each) Vanilla Angel Delight (This doubles the set for a perfect texture)
600ml Double Cream
1 pack Sponge Fingers (Boudoir biscuits, usually 200g–250g)
5–6 Ripe Bananas, sliced
Simple Equipment
1 Large Mixing Bowl
1 Smaller Bowl
A Balloon Whisk (for Angel Delight base)
A Stand Mixer or Electric Hand Whisk (for Double Cream)
A Flexible Rubber Spatula (essential for folding gently)
A Large Serving Dish, Casserole Dish, or Trifle Bowl
Step-by-Step Method (The UK Adaptation)
1. Build the Angel Delight base
In a large bowl, whisk the Sweetened Condensed Milk and ice-cold water together until completely uniform. Once combined, pour in both sachets of Vanilla Angel Delight. Whisk vigorously for about 2 minutes until the mixture is smooth and entirely free of clumps. Cover the bowl and chill it in the fridge for 3 to 4 hours (or overnight) until completely set and firm. Do not skip this step!
2. Prepare the Double Cream
In a separate clean bowl, use your electric mixer to whisk the cold double cream. You need to whisk until stiff peaks form (meaning the cream holds its shape securely when you lift the beaters). Double cream sets much faster than US whipping cream, so watch it closely! Keep it velvety; do not over-whip or it will turn dense and grainy.
3. Master the Gentle Fold
Retrieve your set Angel Delight mixture from the fridge. Using a large rubber spatula, add a few spoonfuls of the whipped double cream to the vanilla base and fold them in gently by scraping the bottom and turning the mixture over itself. Slowly add the remaining cream and continue to fold slowly. Take your time so you do not knock the air out; mix only until the mixture is a uniform, cloud-like mousse with no streaks of cream.
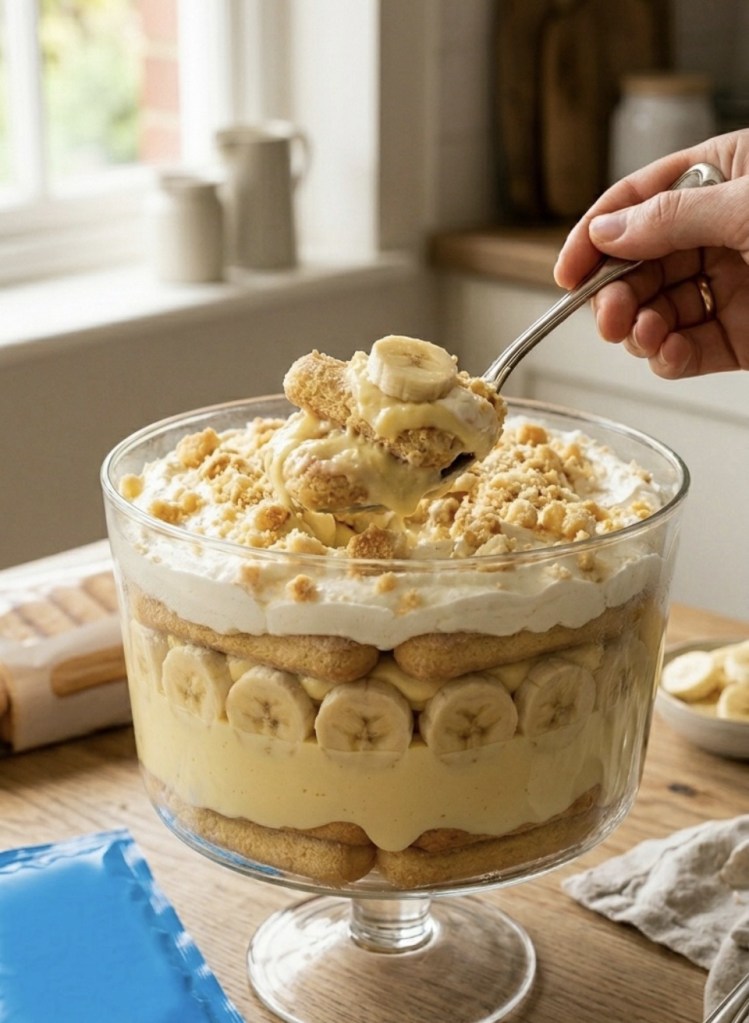
4. Assemble the Layers
Grab your large dish (a glass trifle bowl looks stunning). Lay down a solid layer of Sponge Fingers at the bottom, breaking them to fit snugly. Top with a dense layer of sliced bananas, then spread over one-third of your cream/pudding mixture. Repeat this pattern (biscuits, fruit, cream) 2 to 3 times, ensuring your final top layer is a smooth spreading of the cream.
5. The Crucial Final Set and Garnish
Finish by crushing any remaining Sponge Fingers into coarse crumbs and scattering them generously over the top. Cover the entire dish tightly with cling film and place it in the fridge. Because sponge fingers are substantial, they need a good 4 to 6 hours (ideally overnight) to draw moisture and soften properly into that signature cake-like texture.
Important Tips for the Perfect Pudding
Chilling is Mandatory: The final overnight set is essential for the sponge finger conversion. If you serve too early, the biscuits will still be crunchy.
Watch the Double Cream: It whips extremely fast compared to US whipping cream. Keep your eye on it so it stays smooth and pillowy.
Ideal Consumption Time: The pudding is best consumed within 12–16 hours of assembly, once the biscuits have hit that perfect cake-like softness.
What should we “British-ify” next?
We hope you enjoy this easy conversion! What classic American or international dessert should we adapt for UK supermarket shelves next? Let us know in the comments below, or share your results by tagging us in your photos! 🇬🇧✨
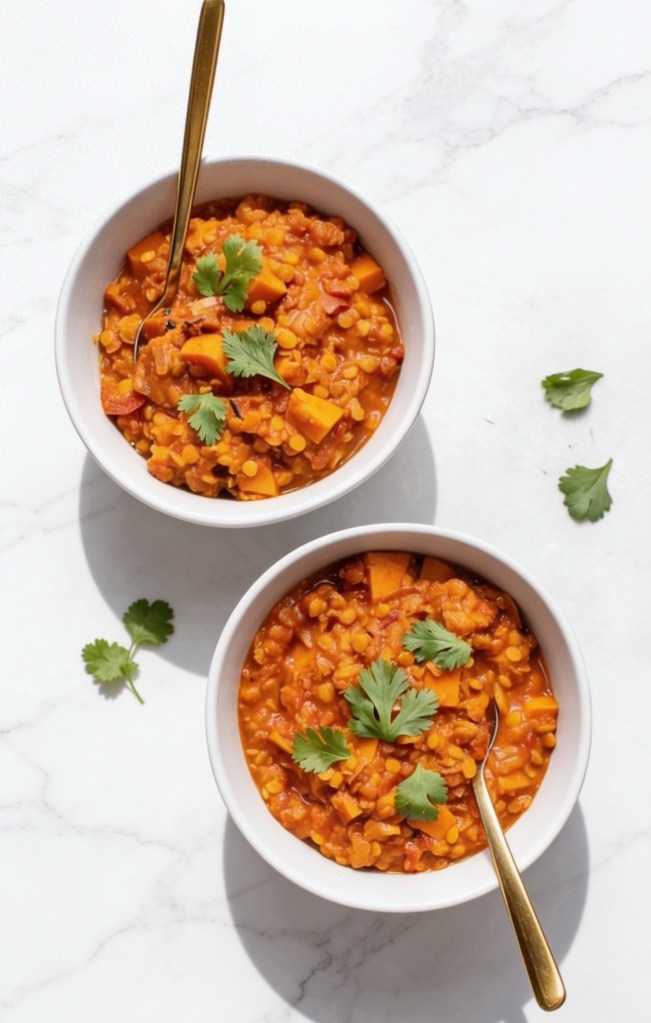
If you’ve come across my latest TikTok photo, you already know we are looking at pure comfort in a bowl.
Let’s be honest: weeknight dinners need to hit three specific criteria. They need to be incredibly fast, they need to use up the bits and bobs left in the kitchen cupboard, and they need to taste like a restaurant-quality meal.
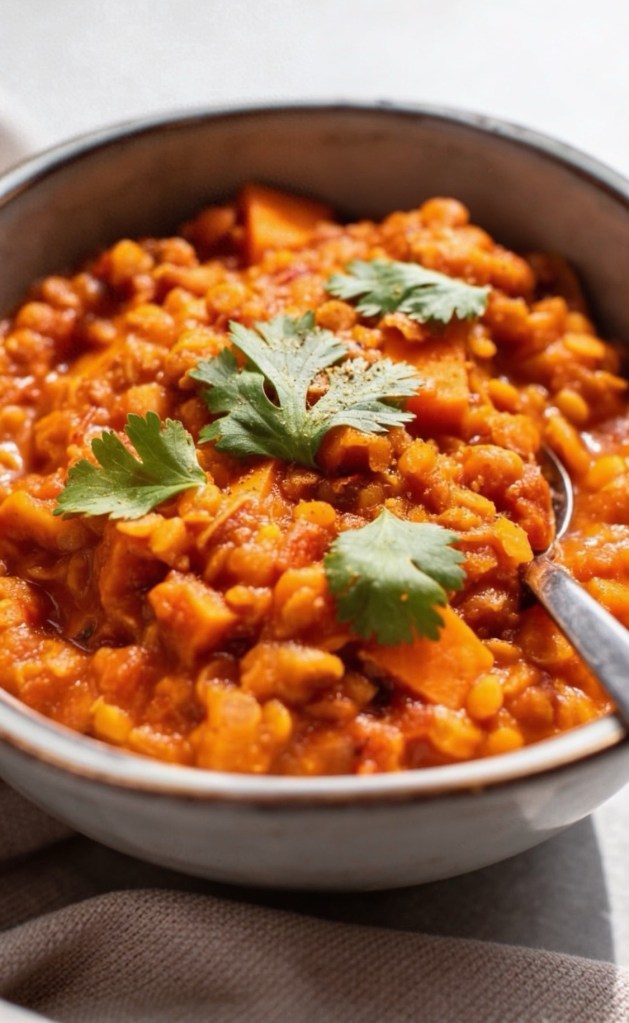
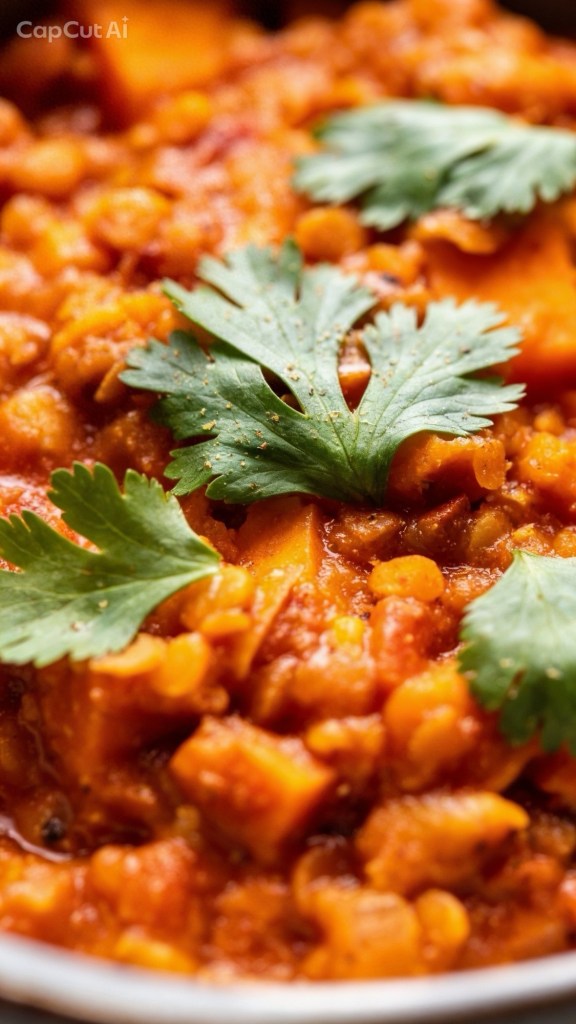
This Sweet Potato, Lentil and Peanut Butter Dahl checks every single box. It’s entirely plant-based, packed with protein, and has a velvety, glossy texture that will make you want to lick the bowl clean.
Why Peanut Butter in a Dahl?
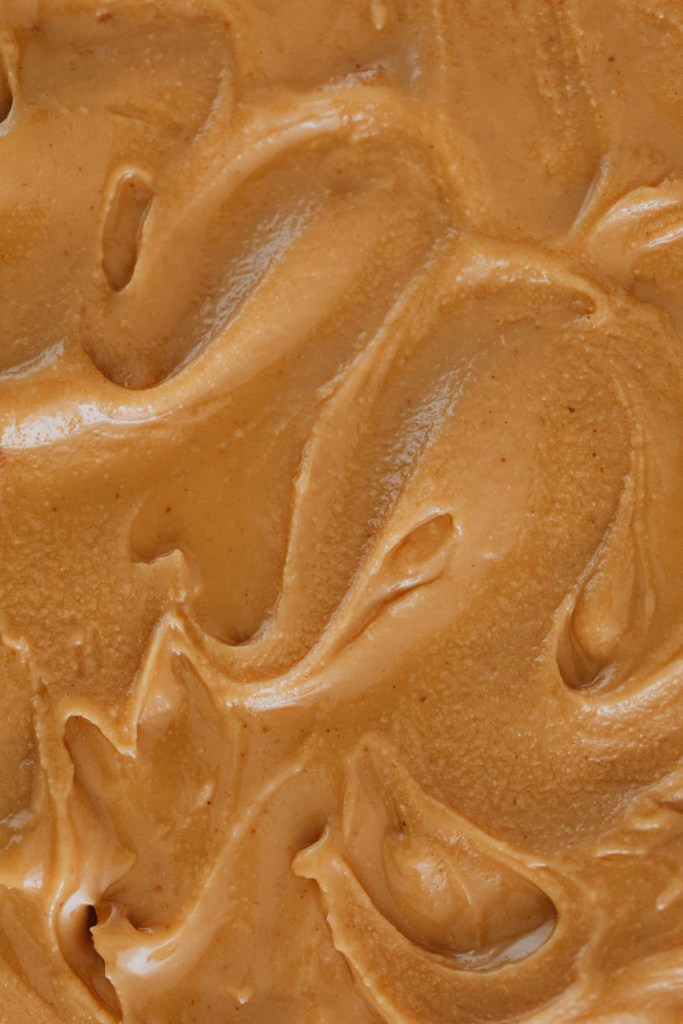
If you haven’t tried adding peanut butter to your lentil dishes yet, prepare to have your mind blown. Much like the viral Turkish eggs trend that layers rich fats with vibrant spices, smooth peanut butter acts as the ultimate shortcut to luxury.
It melts directly into the spiced coconut milk, creating an instant, thick glaze that perfectly balances the natural sweetness of the potatoes and the earthy tone of the red lentils. It adds a deep, savory umami flavor that makes this dish feel incredibly indulgent without needing any heavy dairy.
The Line-Up (Ingredients)
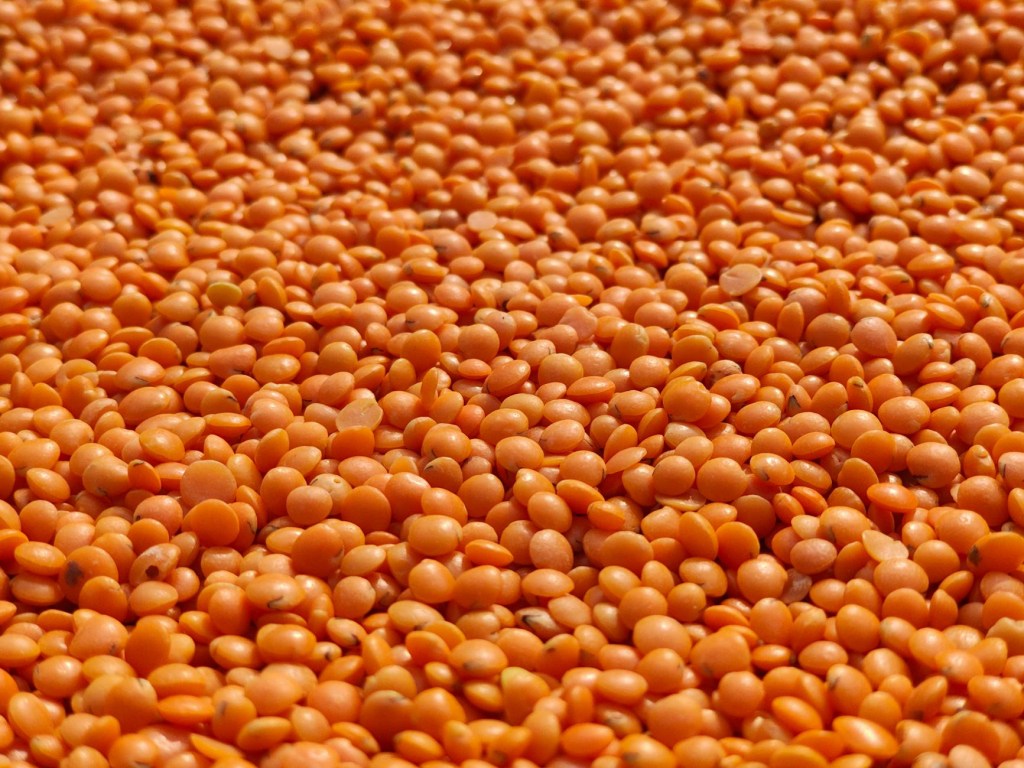
Here is everything you’ll need to grab from the cupboard. Note: Red lentils are essential here because they break down beautifully to create that signature thick texture—don’t swap them for green or brown lentils!
• 1 large Sweet potato: Peeled and finely cubed. (The smaller you chop them, the faster they cook!)
• 200g Red lentils: Thoroughly rinsed.
• 3 tbsp Smooth peanut butter: Go for a good quality one if you can, but any smooth variety works.
• 1 tin (400ml) Coconut milk: Full-fat gives the best texture, but light works too.
• 500ml Vegetable stock: Made with one stock cube.
• 1 Onion: Finely chopped.
• 3 cloves Garlic: Minced or grated.
• 1 tbsp Fresh ginger: Grated.
• 1 tbsp Curry powder & 1/2 tsp Turmeric: For that gorgeous golden hue and warmth.
• 1 tbsp Rapeseed or coconut oil: For frying.
• Juice of 1/2 a lime: Don’t skip this! The acidity cuts beautifully through the rich peanut butter.
Step-by-Step Method
1. Build the Aromatic Base
Heat your oil in a large, deep pan over a medium heat on the hob. Toss in your chopped onion, garlic, and ginger. Sauté these for about 3 minutes until they soften and your kitchen smells absolutely incredible.
2. Toast the Spices
Add the curry powder and turmeric directly into the pan with the onions. Stir them around for about 60 seconds. Toasting the dry spices in the hot oil wakes up the flavors and creates a beautiful golden base.
3. Simmer to Perfection
Throw in your cubed sweet potatoes and rinsed red lentils, giving them a good stir so they are entirely coated in the spice mix. Pour over the tin of coconut milk and the vegetable stock. Bring the whole thing to a boil, then turn the heat down to a gentle simmer. Pop a lid on and let it bubble away for 15 to 20 minutes, or until the lentils are completely soft and the sweet potatoes are fork-tender.
4. The Magic Ingredient
Take the lid off. Now for the best part: drop in your 3 tablespoons of smooth peanut butter. Stir it through and watch as it melts into the bubbling dahl, instantly transforming the sauce into a glossy, luxurious velvet.
Top Tip: Take your wooden spoon and mash a few of the cooked sweet potato chunks against the side of the pan. This releases their starches and makes the dahl even thicker and creamier.
5. The Finishing Touches
Take the pan off the heat and squeeze in the fresh lime juice. Ladle the hot dahl into wide bowls and garnish with a splash of extra coconut milk, plenty of fresh coriander, and some crushed peanuts for that essential crunch.
How to Serve It
This dahl is practically made for dipping. Fire up some garlic naan bread or flaky parathas to scoop it all up. If you want a more substantial meal, it pairs beautifully over a bed of fluffy basmati rice.
If you give this a go, let me know in the comments below! Did you stick to the naan bread, or did you go down the rice route?
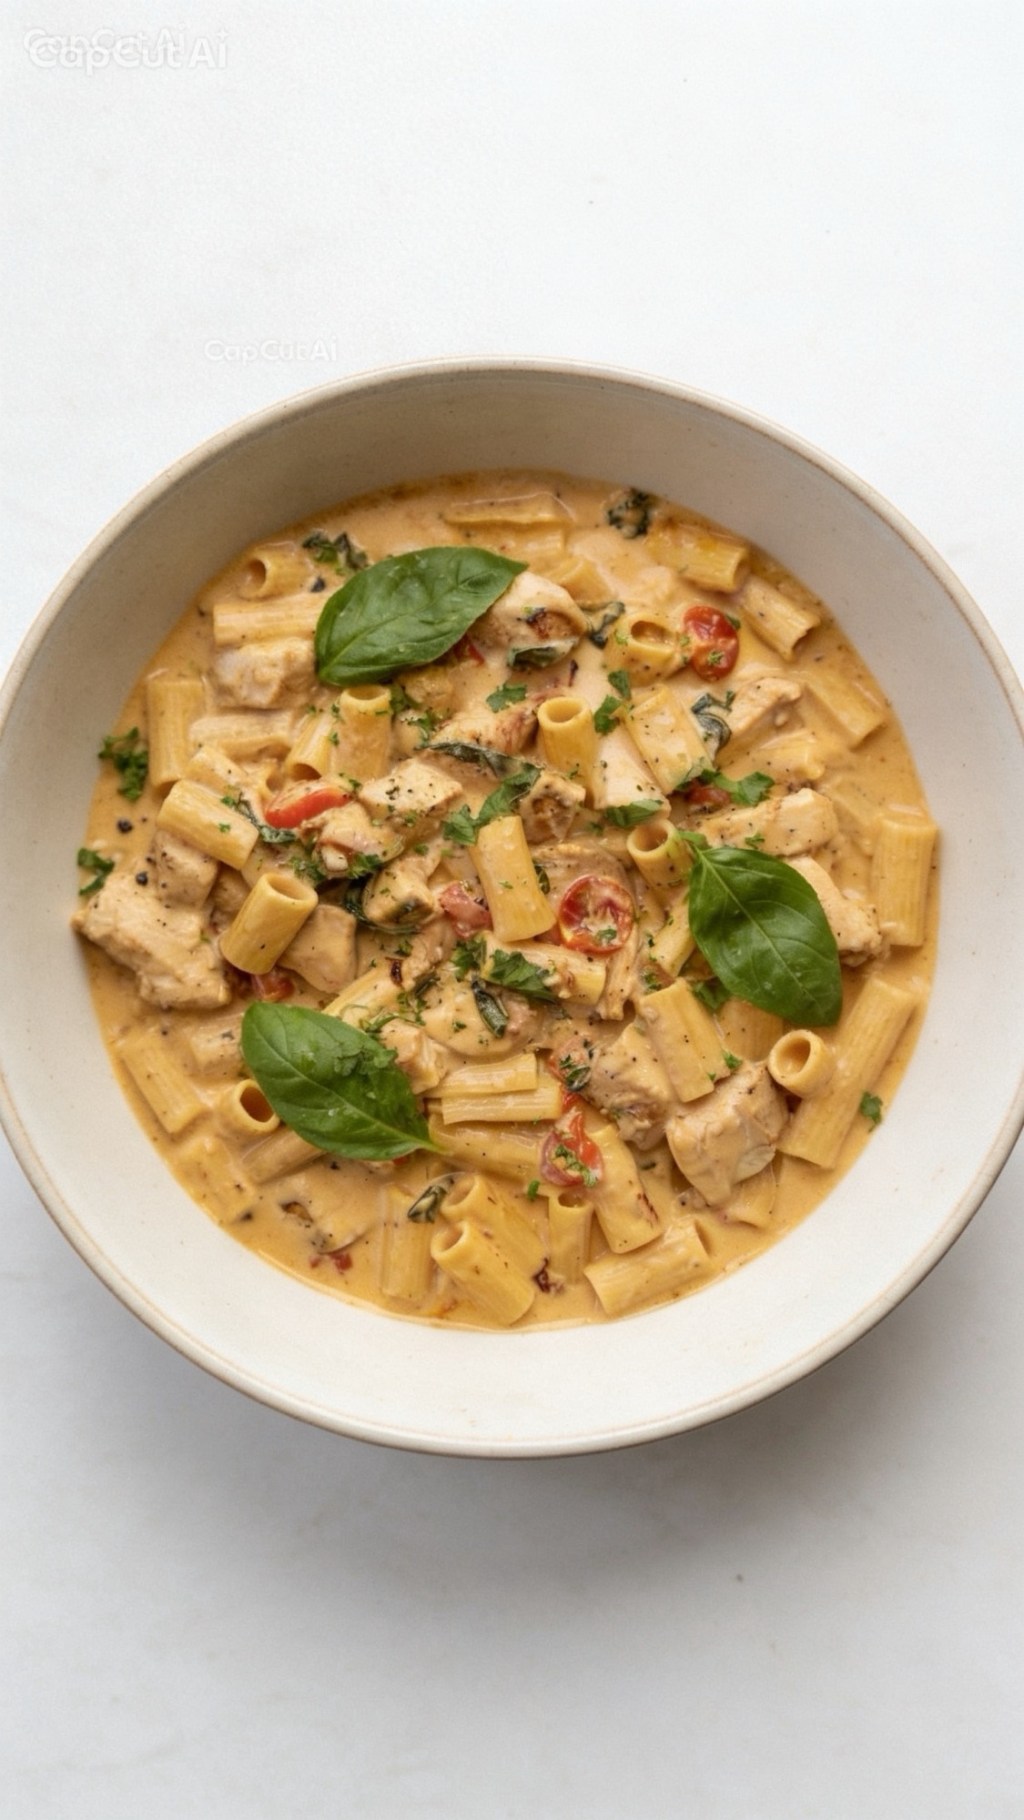
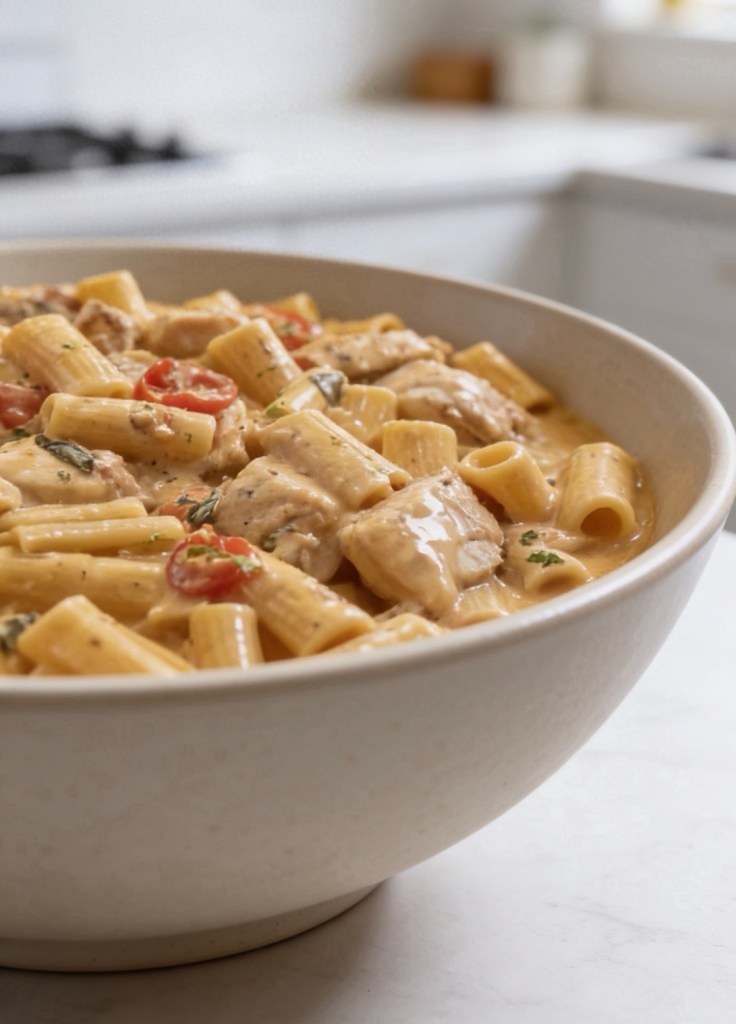
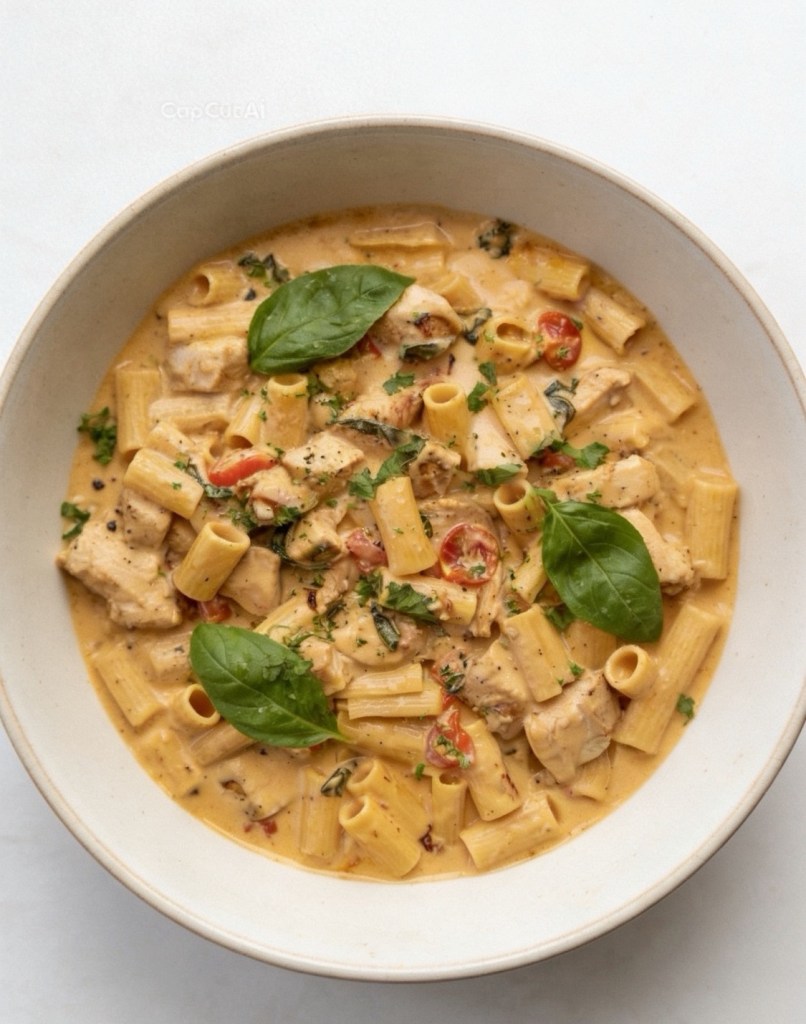
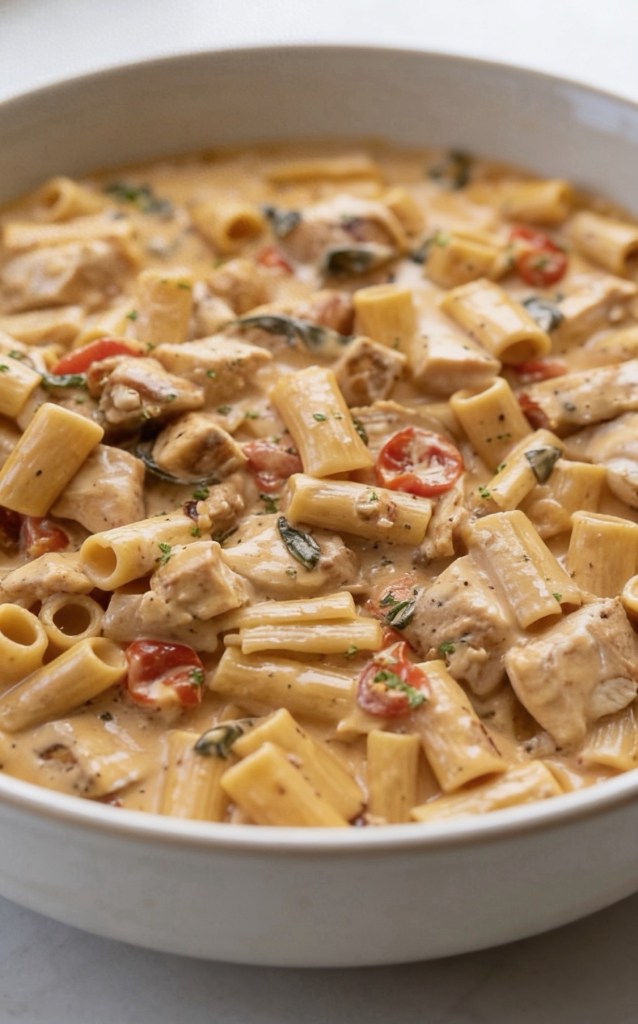
Do you ever have one of those nights where you want a restaurant-quality dinner, but you absolutely do not have the energy for restaurant-quality effort? Enter this Creamy Tuscan Chicken Pasta.
Packed with juicy chicken, tangy sun-dried tomatoes, and fresh spinach tossed in a rich, velvety Parmesan sauce, this dish tastes like it simmered for hours. The best part? It goes from prep to plate in just 20 minutes.
Whether you’re looking to shake up your midweek meal rotation or need an effortless date-night dinner, this recipe hits the comfort food jackpot. Here is exactly how to make it using standard UK measurements.
What You’ll Need (Ingredients)
Before you hit the kitchen, gather these simple ingredients. Everything can be easily found at your local UK supermarket:
• 340g penne pasta: Holds onto the creamy sauce perfectly, but rigatoni or fusilli work great too.
• 450g chicken breasts: Sliced into thin strips so they cook quickly and stay tender.
• 2 tbsp olive oil: For searing the chicken and building the base of the sauce.
• 3 garlic cloves: Minced.
• 150g sun-dried tomatoes: Chopped. These add a rich, sweet, and tangy punch to balance the cream.
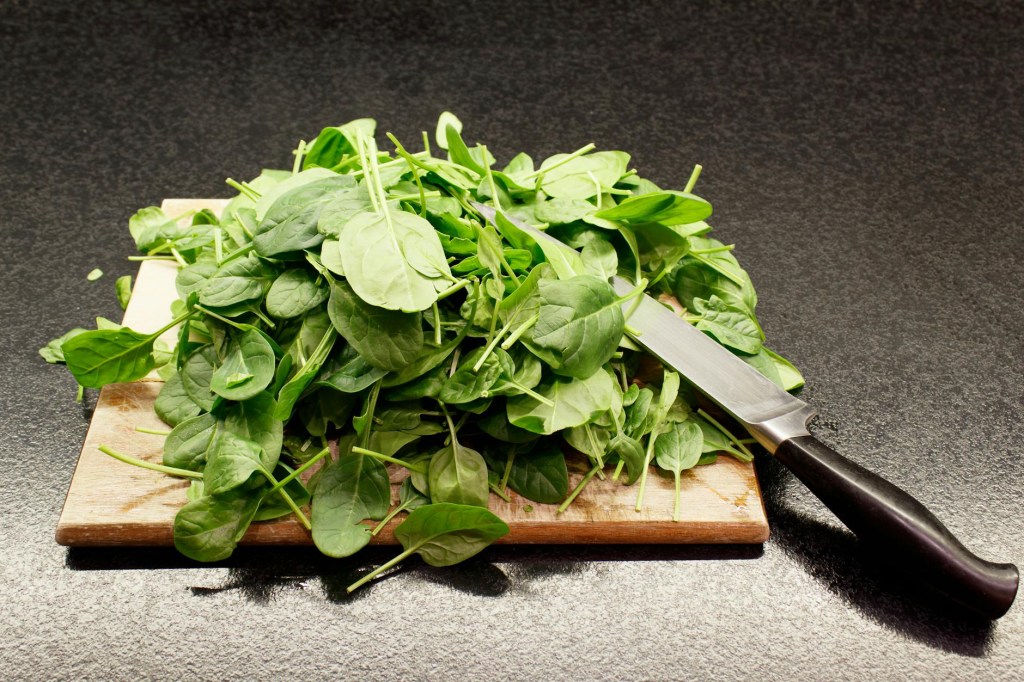
• 60g baby spinach: Adds a pop of colour and a bit of freshness.
• 240ml double cream: The ultimate base for a glossy, luxurious sauce.
• 240ml chicken stock: Balances the richness of the cream.
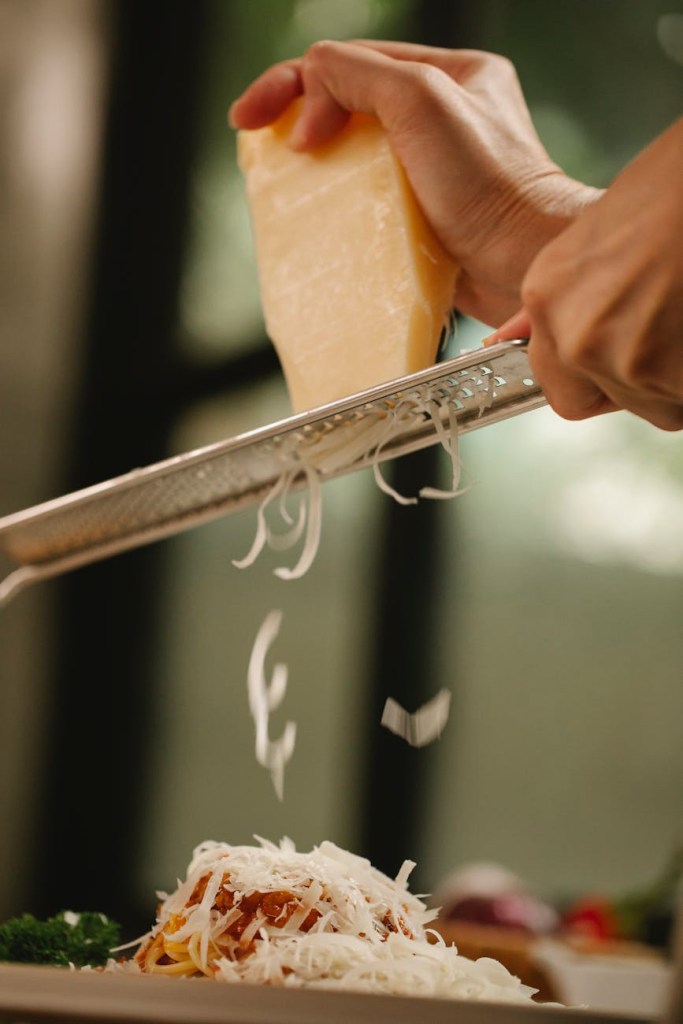
• 90g grated Parmesan cheese: Freshly grated melts the smoothest.
• 1 tsp Italian seasoning: A classic herb blend to season the chicken.
• 1/2 tsp dried chilli flakes (optional): For a subtle, warming kick.
• Salt and black pepper: To taste.
Step-by-Step Method
1. Cook the Pasta
Bring a large pot of salted water to a rolling boil and cook your 340g of penne pasta according to the packet instructions until it’s al dente (cooked through but still holding a bit of a bite). Drain the pasta and set it aside.
2. Sear the Chicken
Season your sliced chicken breasts generously with salt, pepper, and the teaspoon of Italian seasoning. Heat 2 tablespoons of olive oil in a large frying pan over a medium-high heat. Add the chicken strips and sear them for 5–6 minutes, tossing occasionally, until they are beautifully golden and completely cooked through. Remove the chicken from the pan and pop it onto a plate for later.
3. Build the Creamy Base
Don’t clean out the pan—those browned bits left behind mean extra flavour! Turn the heat down to medium and toss in your 3 minced garlic cloves and 150g of chopped sun-dried tomatoes. Fry for about 1 minute until fragrant, being careful not to let the garlic burn. Next, pour in 240ml of chicken stock and 240ml of double cream. Bring the mixture to a gentle simmer and let it bubble away for 3 minutes to reduce and thicken slightly.
4. Wilt the Spinach and Melt the Cheese
Stir 90g of grated Parmesan and 60g of baby spinach into the simmering sauce. Keep stirring for a minute or two until the cheese has completely melted into the cream and the spinach has wilted. If you like a little heat, stir your chilli flakes in now.
5. Toss it All Together
Return the cooked chicken and the drained penne pasta to the pan. Toss everything together vigorously for a minute or two until the pasta is completely coated in that glossy, velvety sauce and everything is piping hot.
Top Tips for Success
• Don’t Overcook the Garlic: Garlic burns quickly and can turn bitter. Make sure your pan has cooled down slightly from cooking the chicken before you toss it in, and only fry it for a minute before hitting it with the liquids.
• Switch Up the Protein: If you don’t fancy chicken, this recipe works beautifully with prawns, or you can add some fried pancetta along with the garlic for an extra layer of depth.
• Make it Vegetarian: Simply skip the chicken, swap the chicken stock for vegetable stock, and throw in some sliced mushrooms or artichoke hearts instead.
Give it a Try!
This Creamy Tuscan Chicken Pasta is guaranteed to please everyone at the dinner table. If you make this recipe, I’d love to hear how it turned out!
Leave a comment below, let me know if you made any tweaks, and don’t forget to tag me on TikTok if you filmed your creation! Happy cooking!