Tag: #dessert

  • The ULTIMATE UK Magnolia Bakery Banana Pudding Hack! (Easy No-Bake Recipe)

    The ULTIMATE UK Magnolia Bakery Banana Pudding Hack! (Easy No-Bake Recipe)

    You cannot visit New York City without trying the legendary Magnolia Bakery banana pudding. It is the definition of comfort food—creamy, light, and perfectly layered with soft, cake-like biscuits and ripe fruit.

    But let’s be real: sourcing the classic ingredients (looking at you, Nilla Wafers) in UK supermarkets is either impossible or unbelievably expensive. Until now.

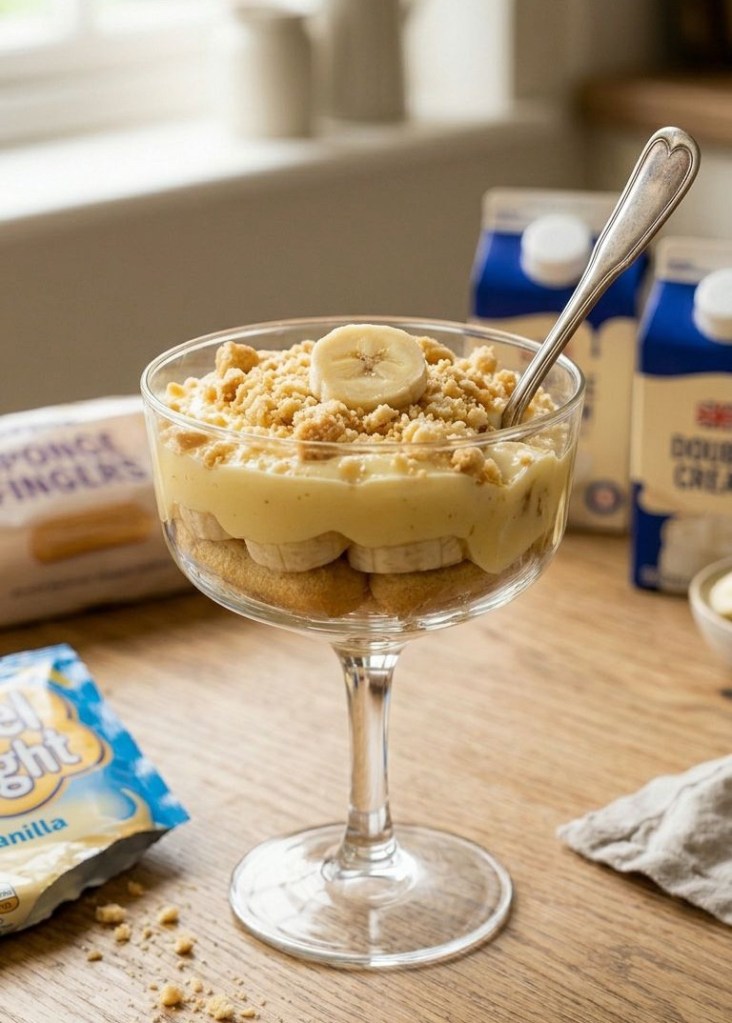
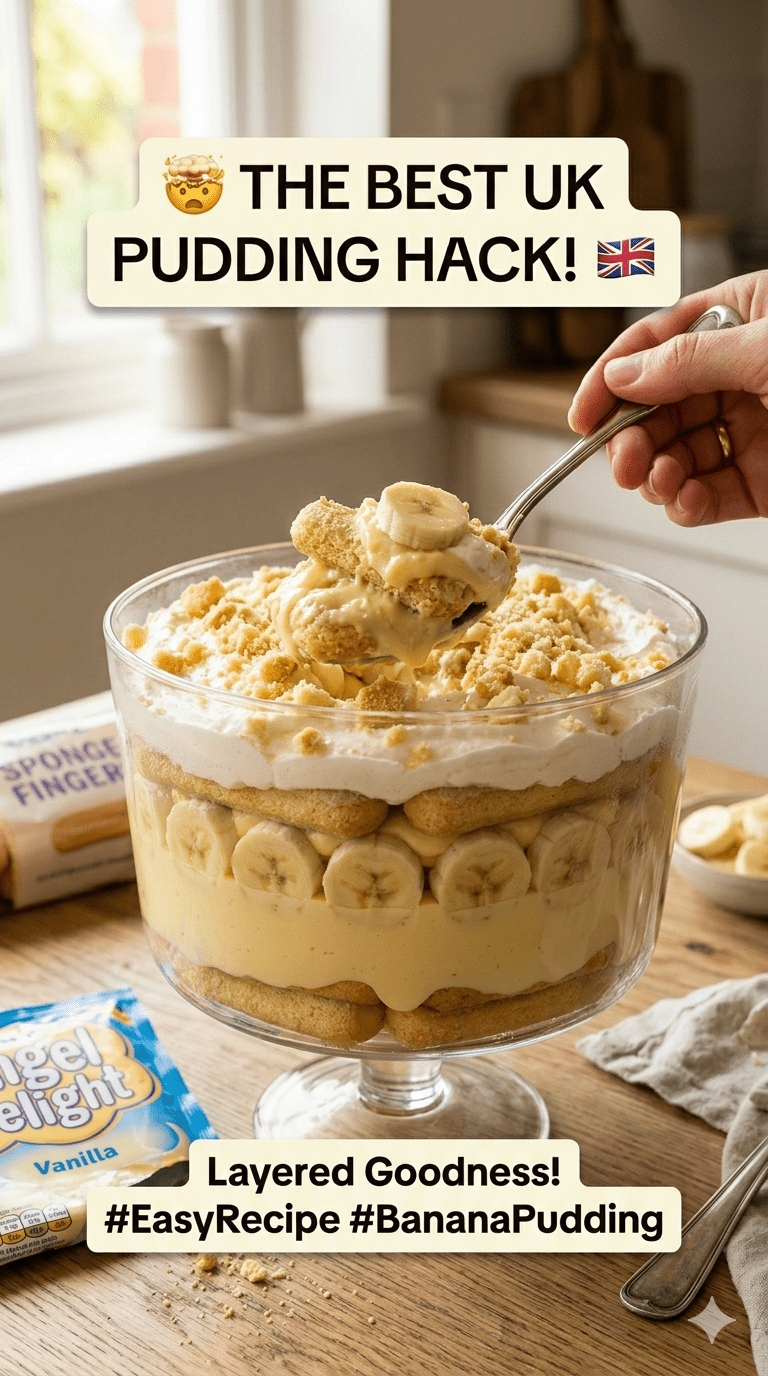
    If you love easy no-bake desserts UK style, this recipe hack is for you. We have completely adapted the famous Magnolia Bakery banana pudding UK recipe to use affordable, accessible ingredients found in any British supermarket. The secret? We swap vanilla instant pudding for classic Vanilla Angel Delight recipes and dense American whipping cream for rich, thick double cream.

    The result? It might actually be better than the original NYC classic. Here is how to make it.

    Why This UK Version Works So Well (Textural Advantages!)

    The magic of the original NYC recipe relies on the Nilla Wafers absorbing moisture until they soften into a cake-like layer. British “vanilla wafers” (the layered, crispy kind) dissolve instantly into mush when mixed with liquid.

    Our solution is sponge finger dessert hacks (often sold as boudoir biscuits or ladyfingers). Because sponge fingers are thicker, they absorb the liquid beautifully over a longer period, creating distinct, soft, pillowy layers that maintain their structure. The result is a richer dessert with an incredible melt-in-your-mouth texture.

    Combine this with the nostalgia-inducing thick set of two sachets of Vanilla Angel Delight, and you have an elite dessert.

    The Essential UK Ingredient Kit

    You will need:

     1 tin (397g) Condensed Milk (e.g., Nestlé Carnation)

     355ml Ice-Cold Water (Ensure it is very cold, using ice cubes if needed)

     2 sachets (59g each) Vanilla Angel Delight (This doubles the set for a perfect texture)

     600ml Double Cream

     1 pack Sponge Fingers (Boudoir biscuits, usually 200g–250g)

     5–6 Ripe Bananas, sliced

    Simple Equipment

     1 Large Mixing Bowl

     1 Smaller Bowl

     A Balloon Whisk (for Angel Delight base)

     A Stand Mixer or Electric Hand Whisk (for Double Cream)

     A Flexible Rubber Spatula (essential for folding gently)

     A Large Serving Dish, Casserole Dish, or Trifle Bowl

    Step-by-Step Method (The UK Adaptation)

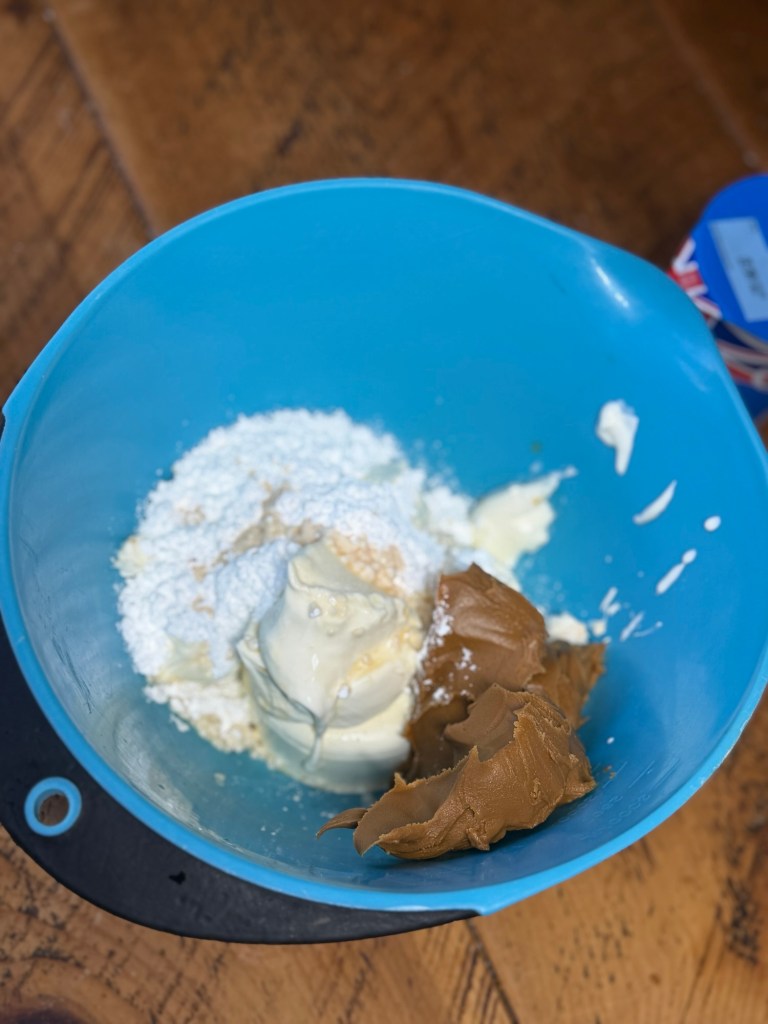
    1. Build the Angel Delight base

    In a large bowl, whisk the Sweetened Condensed Milk and ice-cold water together until completely uniform. Once combined, pour in both sachets of Vanilla Angel Delight. Whisk vigorously for about 2 minutes until the mixture is smooth and entirely free of clumps. Cover the bowl and chill it in the fridge for 3 to 4 hours (or overnight) until completely set and firm. Do not skip this step!

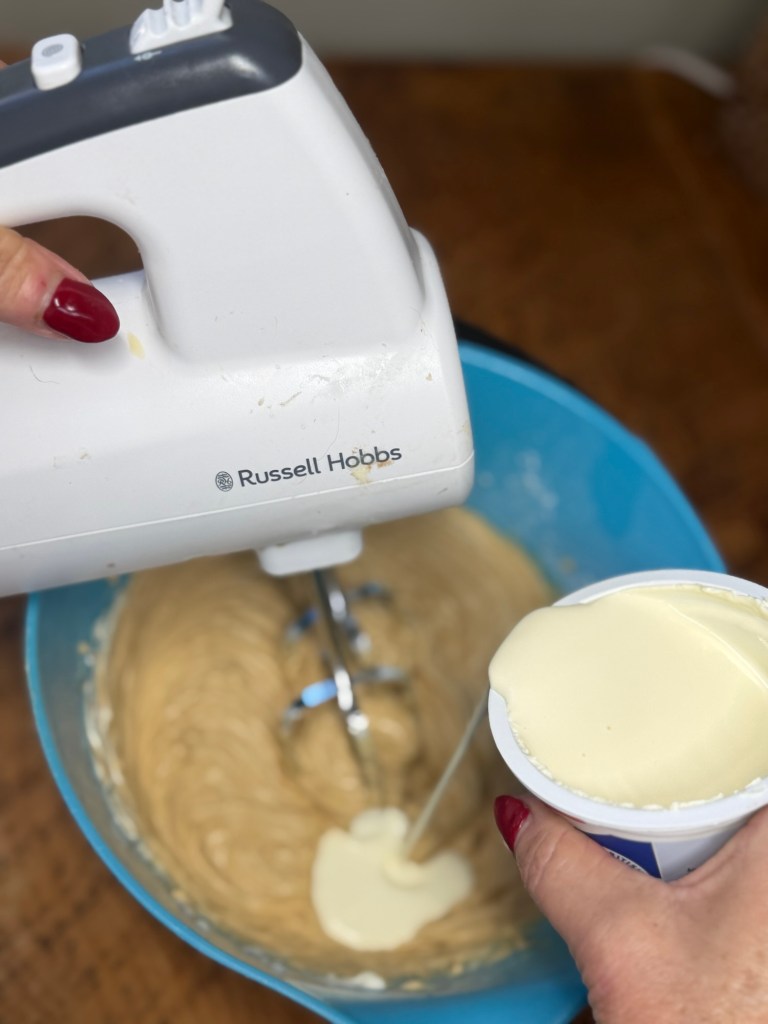
    2. Prepare the Double Cream

    In a separate clean bowl, use your electric mixer to whisk the cold double cream. You need to whisk until stiff peaks form (meaning the cream holds its shape securely when you lift the beaters). Double cream sets much faster than US whipping cream, so watch it closely! Keep it velvety; do not over-whip or it will turn dense and grainy.

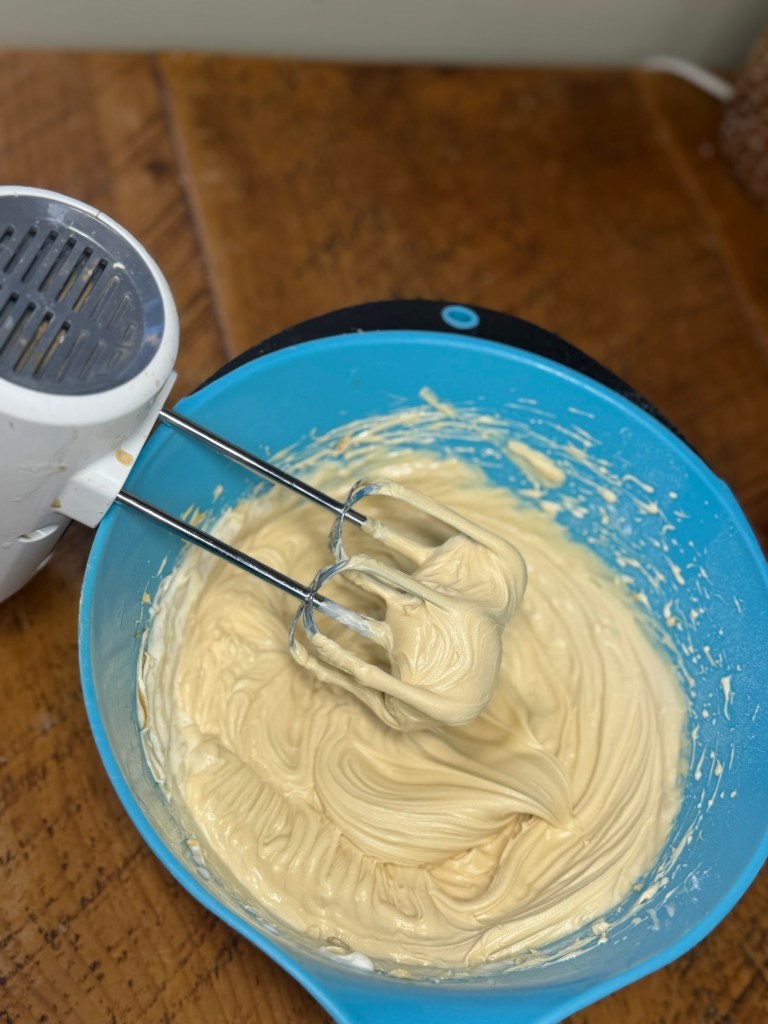
    3. Master the Gentle Fold

    Retrieve your set Angel Delight mixture from the fridge. Using a large rubber spatula, add a few spoonfuls of the whipped double cream to the vanilla base and fold them in gently by scraping the bottom and turning the mixture over itself. Slowly add the remaining cream and continue to fold slowly. Take your time so you do not knock the air out; mix only until the mixture is a uniform, cloud-like mousse with no streaks of cream.

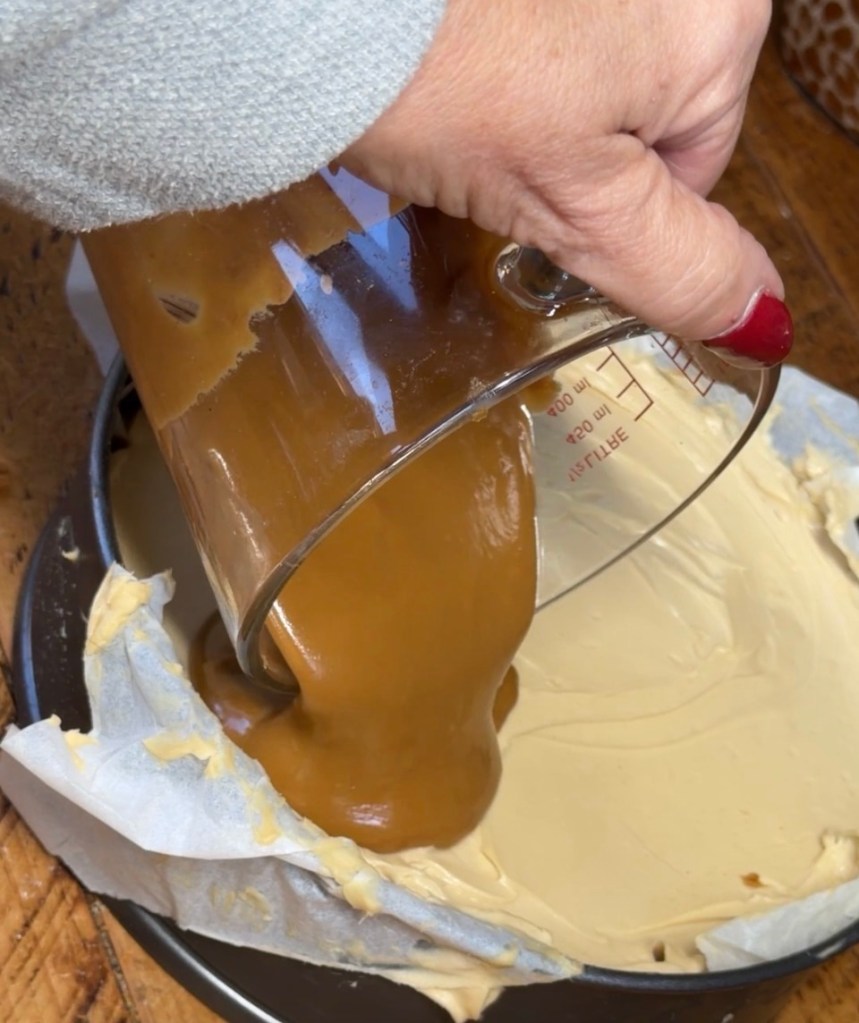
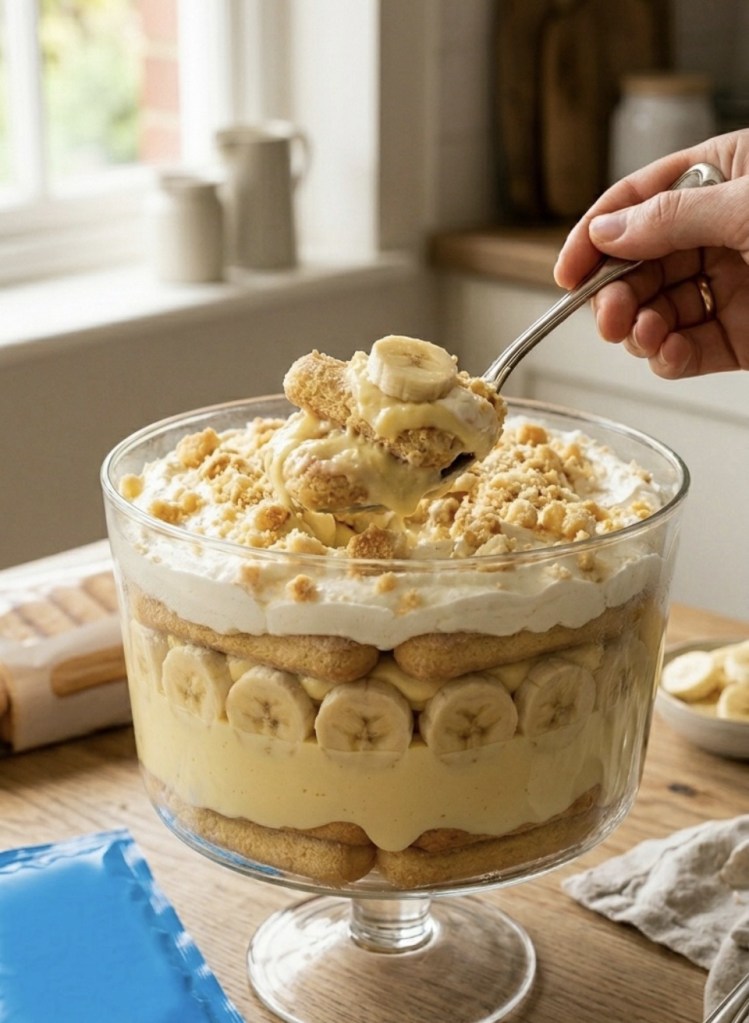
    4. Assemble the Layers

    Grab your large dish (a glass trifle bowl looks stunning). Lay down a solid layer of Sponge Fingers at the bottom, breaking them to fit snugly. Top with a dense layer of sliced bananas, then spread over one-third of your cream/pudding mixture. Repeat this pattern (biscuits, fruit, cream) 2 to 3 times, ensuring your final top layer is a smooth spreading of the cream.

    5. The Crucial Final Set and Garnish

    Finish by crushing any remaining Sponge Fingers into coarse crumbs and scattering them generously over the top. Cover the entire dish tightly with cling film and place it in the fridge. Because sponge fingers are substantial, they need a good 4 to 6 hours (ideally overnight) to draw moisture and soften properly into that signature cake-like texture.

    Important Tips for the Perfect Pudding

     Chilling is Mandatory: The final overnight set is essential for the sponge finger conversion. If you serve too early, the biscuits will still be crunchy.

     Watch the Double Cream: It whips extremely fast compared to US whipping cream. Keep your eye on it so it stays smooth and pillowy.

     Ideal Consumption Time: The pudding is best consumed within 12–16 hours of assembly, once the biscuits have hit that perfect cake-like softness.

    What should we “British-ify” next?

    We hope you enjoy this easy conversion! What classic American or international dessert should we adapt for UK supermarket shelves next? Let us know in the comments below, or share your results by tagging us in your photos! 🇬🇧✨

  • The Red Velvet Renaissance: A Proper British Traybake (With a Secret Science Twist!) 🍰

    The Red Velvet Renaissance: A Proper British Traybake (With a Secret Science Twist!) 🍰

    Let’s be honest—Red Velvet is a cake that often gets a bad reputation. Too many people think it’s just a chocolate cake with a bottle of red dye thrown in. But a proper Red Velvet is a masterpiece of baking chemistry. It’s tangy, incredibly light, and has a unique “velvet” crumb that sets it apart from any other sponge.

    If you’ve struggled with dry cakes or a “muddy” colour in the past, this one-tin traybake is about to change your kitchen game.

    The “Velvet” Secret: Chemistry in a Tin 🧪

    The magic of this recipe lies in the reaction between 1 Tbsp white wine vinegar and 1 tsp bicarbonate of soda. When you mix these right at the end, they fizz up, creating tiny air bubbles that give the sponge its iconic, tight-but-fluffy texture.

    Combined with 200ml of buttermilk, you get a sponge that stays moist for days and has that signature subtle tang that balances the sweetness.

    The Pro-Secret: Sugarflair Velvet Red 🎨

    We’ve all been there—using an entire bottle of supermarket liquid colouring only to end up with a cake that looks maroon or, worse, brown. For this recipe, we are using 1–3 tsp of Sugarflair Velvet Red paste.

    https://amzn.to/4u2kHNt

    Because it’s a concentrated paste, it delivers a deep, dramatic crimson without adding extra liquid to your batter. You can easily find it online, and it is worth every penny for that professional bakery finish.

    The Topping: Cream Cheese Perfection 🥯

    The frosting is the crowning glory. To get it perfect every time:

    • Temperature Matters: Ensure your 100g of butter and 250g of full-fat cream cheese are at room temperature. Cold cheese leads to lumps!

    • The Method: Whisk the butter and 100g of icing sugar until pale and fluffy first. Only then do you fold in the cream cheese. If you over-beat it, the icing can turn runny, so keep it brief!

    The Ingredients

    For the Sponge:

    • 250g unsalted butter, softened

    • 250g caster sugar

    • 4 medium eggs

    • 200ml buttermilk

    • 275g self-raising flour

    • 50g cocoa powder

    • 1–3 tsp Sugarflair Velvet Red paste (available online)

    • 1 Tbsp white wine vinegar

    • 1 tsp bicarbonate of soda

    For the Icing:

    • 100g unsalted butter, softened

    • 100g icing sugar, sifted

    • 250g full-fat cream cheese (room temperature)

    • Red sprinkles (optional)

    Step-by-Step Directions

    1. Prep the Tin: Preheat your oven to 180°C (160°C fan). Grease and line a roughly 20 x 30cm baking tin with baking parchment.

    2. Cream the Base: In a large bowl, whisk the 250g butter and 250g caster sugar until pale and fluffy.

    3. Mix the Wet & Dry: In a jug, whisk the eggs and buttermilk. Sift your 275g self-raising flour and 50g cocoa into a separate bowl.

    4. Combine: Add 1/3 of the egg mix to the butter, then 1/3 of the flour. Repeat until incorporated. Beat in your Sugarflair paste until you hit that gorgeous red shade.

    5. The Fizz: Quickly mix the vinegar and bicarb in a small cup. Pour the fizzing mix into the batter, beat it in quickly, and get it straight into the tin.

    6. Bake: Bake for 45 minutes or until a skewer inserted into the centre comes out clean. Let it cool completely in the tin.

    7. The Frosting: Whisk the 100g butter and 100g icing sugar until light. Gently beat in the 250g cream cheese just until combined.

    8. Finish: Spread thick over the cooled sponge, add sprinkles, and cut into 16 generous squares.

    So, there you have it—the only Red Velvet recipe you’ll ever need in your baking arsenal! Honestly, once you’ve seen that vinegar and bicarb work their magic and tasted that silkier-than-silk cream cheese frosting, there’s no going back. It’s the perfect bake for when you want something that looks incredibly impressive but actually lets you keep your cool in the kitchen.

    If you do give it a whirl, please tag me in your photos or leave a comment below—I’d love to see your crimson masterpieces! Now, if you’ll excuse me, I have some “quality control” testing to do with a cuppa and a very large square of cake. Happy baking, everyone! 🍰✨

  • The Ultimate No-Bake Biscoff Tiramisu: A Caramelized Twist on an Italian Classic

    The Ultimate No-Bake Biscoff Tiramisu: A Caramelized Twist on an Italian Classic

    Hey everyone! If you’re anything like me, your love for Biscoff is less of a “preference” and more of a “personality trait.” We’ve all been there—standing in the kitchen with a jar of cookie butter and a spoon, wondering how something can taste that good. Well, today I am sharing something that is quite literally the dessert of my dreams.

    We’re taking that classic, velvety Italian vibe we all love and giving it a major, caramelized glow-up. Forget ladyfingers—we are using those iconic spiced Lotus biscuits. And instead of just plain cream? We’re folding in a massive amount of Biscoff spread to create a cloud-like mousse that is completely irresistible.

    The best part? It is entirely no-bake. That means you get to serve up a high-end, contemporary dessert that looks like it came from a chic bistro without ever touching your oven. It’s the perfect “wow-factor” dish for dinner parties, but easy enough to whip up on a lazy Sunday afternoon.

    Why This Recipe Works

    The secret is all in the “double-dunk.” By stacking two cookies together before hitting the espresso, you create a substantial, cake-like base that absorbs the coffee perfectly without turning into mush. When you let it sit overnight, the cookies soften into the cream, creating those beautiful, clean layers you see in the photos.

    Trust me, once you try the combination of bitter espresso, spiced cinnamon cookies, and silky mascarpone, you’ll never go back to the traditional version again.

    Scroll down to grab the recipe, and let’s get layering!

    The Recipe

    Ingredients

    • 600g Biscoff Cookies: Plus an extra 10–15 cookies for that all-important crunchy topping.

    • 400g Mascarpone Cheese: Ensure it’s at room temperature for the smoothest mix.

    • 200g Double Cream: Cold from the fridge to help it whip up thick.

    • 300g Biscoff Spread: Smooth or crunchy—both work, but smooth gives that silky finish.

    • 1 tsp Vanilla Extract: To round out the sweetness.

    • 300ml Cold Espresso: Strong coffee is key to balancing the sweetness of the biscuits.

    Method

    1. Prep the Biscoff Cream

    In a large mixing bowl, combine your mascarpone, double cream, Biscoff spread, and vanilla extract. Using a hand mixer on medium-high speed, beat the mixture until it is thick, smooth, and holds its shape. Be careful not to over-whip, but you want it sturdy enough to layer.

    2. The Espresso Soak

    Pour your cold espresso into a wide, shallow bowl. Take two Biscoff cookies and stack them directly on top of each other. Quickly dip them into the coffee—it should be a lightning-fast “in and out” to prevent them from becoming soggy and breaking apart.

    3. Build the Foundation

    Place the soaked cookie pairs into the bottom of a square 8×8″ dish, lining them up until the base is completely covered.

    4. Layering the Dream

    Spread exactly 1/3 of your mascarpone/Biscoff mixture over the first layer of cookies, smoothing it out with the back of a spoon or an offset spatula. Repeat the process two more times: cookie layer, cream layer, cookie layer, cream layer.

    5. The Finishing Touch

    Take your extra cookies and crush them into fine crumbs (a food processor or a rolling pin and a freezer bag works perfectly!). Sprinkle them generously over the top of the Tiramisu until you have a beautiful, even orange-gold crust.

    6. The Big Chill

    Cover the dish tightly with cling film and place it in the fridge. It needs at least 3–4 hours to set, but for the absolute best results (and the cleanest slices!), leave it overnight. This allows the coffee to fully penetrate the cookies and the flavors to meld together.

    Whether you’re serving this up at a chic dinner party or just treating yourself to a well-deserved slice on a Tuesday night, this Biscoff Tiramisu is guaranteed to disappear in seconds. There is something so incredibly satisfying about that first scoop through the silky cream and coffee-soaked biscuits. I honestly can’t wait for you guys to try it! If you do whip this up, make sure to tag me in your photos—seeing your creations is literally the highlight of my day. Happy “baking” (or lack thereof!), and I’ll see you in the next one!

  • The Ultimate Mashup: Banoffee Millionaire’s Shortbread

    The Ultimate Mashup: Banoffee Millionaire’s Shortbread

    If you can’t decide between a classic Banoffee Pie and the rich, decadent layers of a Millionaire’s Shortbread, I have some very good news: you don’t have to.

    This Banoffee Millionaire’s Shortbread takes everything you love about both desserts and stacks them into one incredible bite. We’re talking a buttery shortbread base, a layer of fresh sliced bananas, a deep fudge-like caramel, and a marbled chocolate topping that looks professional but is secretly so easy to do.

    The Shopping List

    The Base

    • 250g Shortbread Biscuits: Crushed into fine crumbs.

    • 55g Butter: Melted to bind it all together.

    The Filling

    • 150g Dark Brown Soft Sugar: This gives the caramel a deeper, toffee-like flavor.

    • 150g Butter: For that silky texture.

    • 397g Can Condensed Milk: The secret to perfect “no-fail” caramel.

    • 2 Bananas: Ripe but firm works best here.

    The Topping

    • 200g Dark Chocolate: To balance the sweetness of the caramel.

    • 55g White Chocolate: For that beautiful marbled effect.

    Step-by-Step Instructions

    1. The Foundation

    Start by combining your crushed shortbread and the 55g of melted butter. Press this firmly into a 20cm square tin lined with parchment paper. You want it packed tight so it doesn’t crumble when you slice it later! Pop that in the fridge for 20 minutes to firm up.

    2. The Caramel Layer

    In a non-stick pan, gently melt the sugar and the remaining 150g of butter. Once smooth, pour in the condensed milk. Now, turn up the heat and bring it to a rapid boil, stirring constantly (don’t walk away, or it’ll catch!). Cook for about a minute until it thickens and turns a gorgeous amber color.

    3. The Banoffee Secret

    While the caramel is slightly cooling, slice your bananas and layer them evenly across your chilled biscuit base. Pour that warm caramel directly over the bananas, smoothing it out to the edges. Let it cool, then chill in the fridge until it’s fully set.

    4. The Marbled Finish

    Melt your dark and white chocolates in separate bowls. Pour the dark chocolate over the set caramel layer. While it’s still wet, drop spoonfuls of the white chocolate on top. Use a skewer or a small spoon to gently swirl them together to create a marble pattern.

    5. The Perfect Slice

    Once the chocolate is set, remove the block from the tin. To get those clean, “bakery-style” edges, dip your knife in hot water, wipe it dry, and slice through the chocolate while the blade is still warm.

    Why This Works

    The dark brown sugar in the caramel mimics the flavor of a traditional Banoffee “Dulce de Leche,” while the fresh bananas add a soft texture that breaks up the richness of the chocolate. It’s the perfect treat for a weekend bake or a crowd-pleasing party tray.

    Did you make this? Tag me in your photos!

  • The No-Bake Biscoff Cheesecake Everyone Will Ask For

    The No-Bake Biscoff Cheesecake Everyone Will Ask For

    There are some desserts that look like you’ve gone to loads of effort, when really the fridge has done most of the work. This no-bake Biscoff cheesecake is exactly that kind of pudding.

    It’s creamy, rich, caramel-biscuity and just a little bit over the top in the best way. The base is made with crushed Biscoff biscuits and melted butter, the filling is soft and mousse-like with plenty of Biscoff spread, and the top has that glossy melted Biscoff finish that makes it look properly special.
    This is the sort of dessert I’d make the night before people are coming round, then feel very smug about the next day. No oven, no gelatine, no complicated steps. Just mix, chill and decorate.


    Why You’ll Love This Recipe


    This cheesecake is perfect if you want something impressive but easy. It slices beautifully once chilled, it tastes like a caramel biscuit dream, and it’s a lovely make-ahead dessert for birthdays, family meals, Sunday lunch or Christmas buffets.
    It’s also one of those recipes that people always ask about. If you put this on the table, someone will want the recipe before they’ve even finished their slice.

    Ingredients

    For the base
    • 250g Biscoff biscuits
    • 100g unsalted butter, melted

    For the cheesecake filling


    • 500g full-fat cream cheese
    • 300ml double cream
    • 100g icing sugar
    • 1 tsp vanilla extract
    • 200g Biscoff spread


    For the topping

    • 150g Biscoff spread
    • 4 to 6 Biscoff biscuits, crushed
    • Optional: whipped cream, extra biscuits or mini Biscoff biscuits for decorating


    How to Make No-Bake Biscoff Cheesecake


    Start by lining the base of a 20cm springform tin with baking paper. This makes it much easier to remove the cheesecake later.


    Crush the Biscoff biscuits into fine crumbs. You can do this in a food processor, or pop them into a food bag and bash them with a rolling pin.

    Mix the crumbs with the melted butter until they look like wet sand.


    Press the biscuit mixture firmly into the base of the tin. I like to use the end of the rolling pin of the bottom of a glass to really compact it down. This helps the base hold together when you slice it.

    Pop it in the fridge while you make the filling.

    In a large bowl, beat together the cream cheese, icing sugar, vanilla extract and Biscoff spread until smooth.

    Add the double cream and whip until the mixture is thick and holds its shape.


    Spoon the filling over the chilled biscuit base and smooth the top.

    Cover and chill in the fridge for at least 6 hours, but overnight is best if you want neat, clean slices.


    For the topping, gently melt the Biscoff spread in the microwave for around 20 to 30 seconds until it’s pourable.

    Let it cool slightly, then pour it over the cheesecake.

    Sprinkle with crushed Biscoff biscuits and decorate however you like.


    Chill again for 30 minutes before slicing.


    My Best Tips


    Use full-fat cream cheese. The lighter versions can make the cheesecake too soft and it may not set properly.
    Make sure your double cream is cold before whipping. It thickens much better straight from the fridge.

    Don’t rush the chilling time. I know it’s tempting, but this cheesecake really does need time to firm up.


    For neat slices, dip a sharp knife in hot water, wipe it dry, then cut. Repeat between slices if you want it to look really tidy.


    How Long Does It Keep?

    This no-bake Biscoff cheesecake will keep in the fridge for up to 3 days. Keep it covered or in an airtight container so it stays fresh.
    I wouldn’t leave it out at room temperature for too long because of the cream cheese and double cream. Bring it out just before serving, then pop any leftovers back in the fridge.


    Can You Make It Ahead?


    Yes, and I actually recommend it. This cheesecake is best made the night before you need it. The texture firms up beautifully overnight and the flavour seems to get even better.

    You can add the melted Biscoff topping the night before too, or do that part on the day if you want it to look extra glossy and fresh.

    To me, this is the kind of dessert that feels like a proper little treat without needing hours in the kitchen. It’s creamy, cosy, sweet in all the right ways, and always feels a bit special when you bring it to the table. Whether you’re making it for family, friends, or just because you fancy something lovely in the fridge, this no-bake Biscoff cheesecake is one of those recipes you’ll come back to again and again.

    Shopping links

    Biscoff spread

    https://amzn.to/4cKFVta

    Biscoff biscuits

    https://amzn.to/3Peg3wP

    Vanilla essence https://amzn.to/4w1MpeT

    Springform tin

    https://amzn.to/4w7w3l2