Are you tired of the same old morning routine? If you’re looking to level up your breakfast game with something that feels like a café-style treat but is incredibly easy to make at home, you have come to the right place.
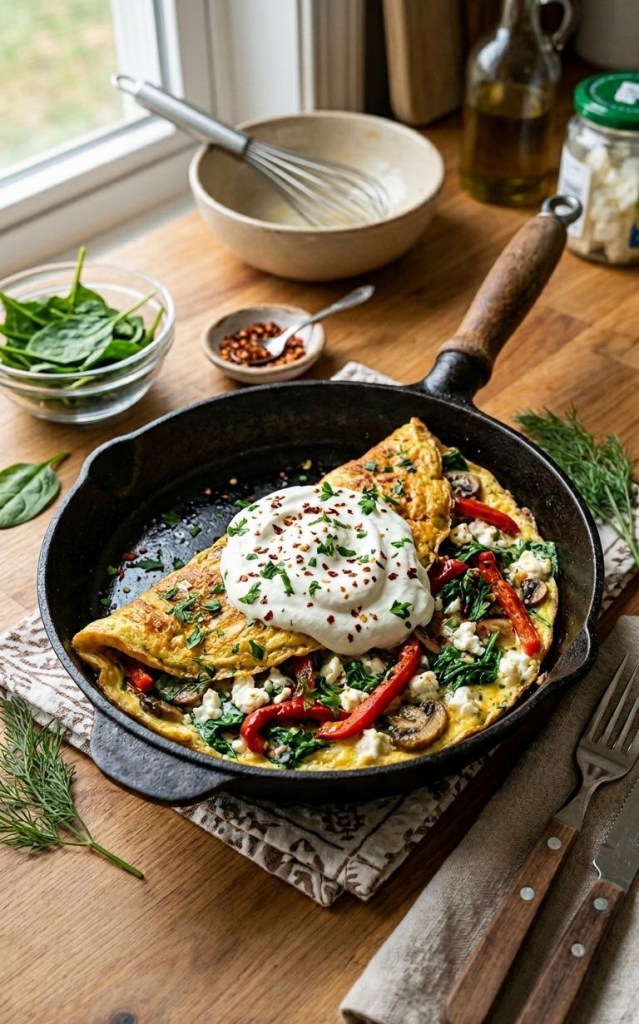
Today, we are talking about the Mediterranean Omelette with Whipped Greek Yogurt. It’s light, vibrant, and packed with enough protein to keep you satisfied all morning long.
Why You Need This in Your Life
Beyond the incredible flavour combination, this dish is a nutritional powerhouse. Thanks to the combination of eggs, creamy Greek yogurt, and tangy feta, each serving packs a serious punch—coming in at approximately 30g–35g of protein per portion. It’s the perfect way to hit your macros without sacrificing flavour.
The Recipe
Serves 1
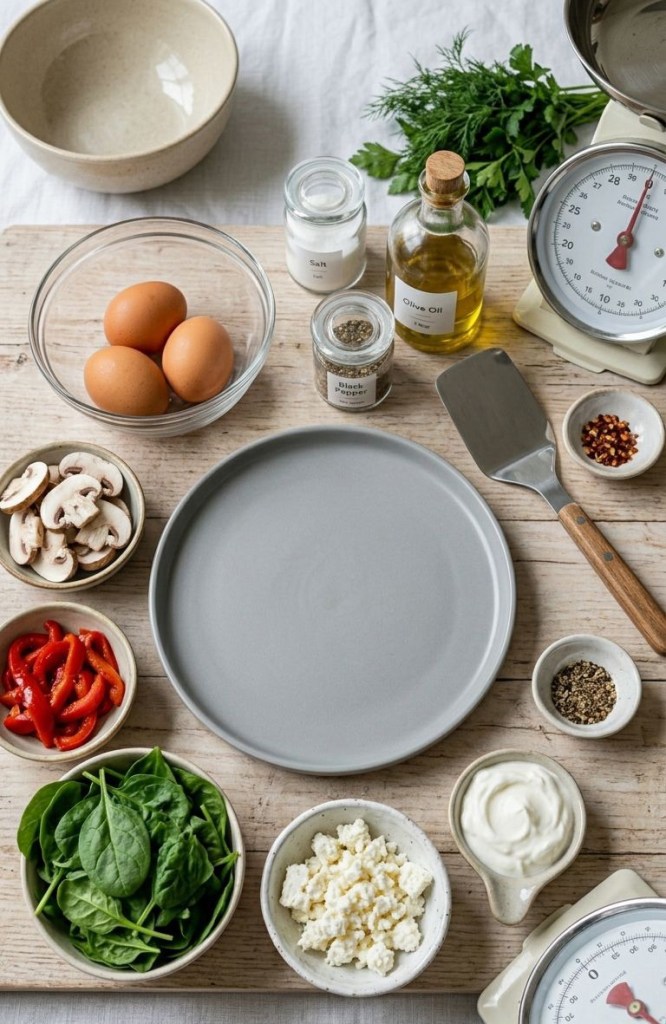
Ingredients
3 large eggs
1 tbsp olive oil (for frying)
A handful of fresh spinach
50g roasted red peppers, sliced
50g chestnut mushrooms, sliced
30g feta cheese, crumbled
2 tbsp thick Greek yogurt (for the topping)
A handful of fresh herbs (dill or parsley work beautifully)
A pinch of chilli flakes
Salt and black pepper to taste
Instructions
1 Whisk: In a small bowl, whisk your eggs with a pinch of salt and pepper until smooth.
2 Sauté: Heat the olive oil in a non-stick pan over medium heat. Add the mushrooms and roasted peppers, cooking until they start to soften. Toss in the spinach and cook until just wilted.
3 Cook: Pour the whisked eggs into the pan over the vegetables. Let them set slightly.
4 Add the Feta: Once the edges start to set, sprinkle the crumbled feta over one half of the omelette.
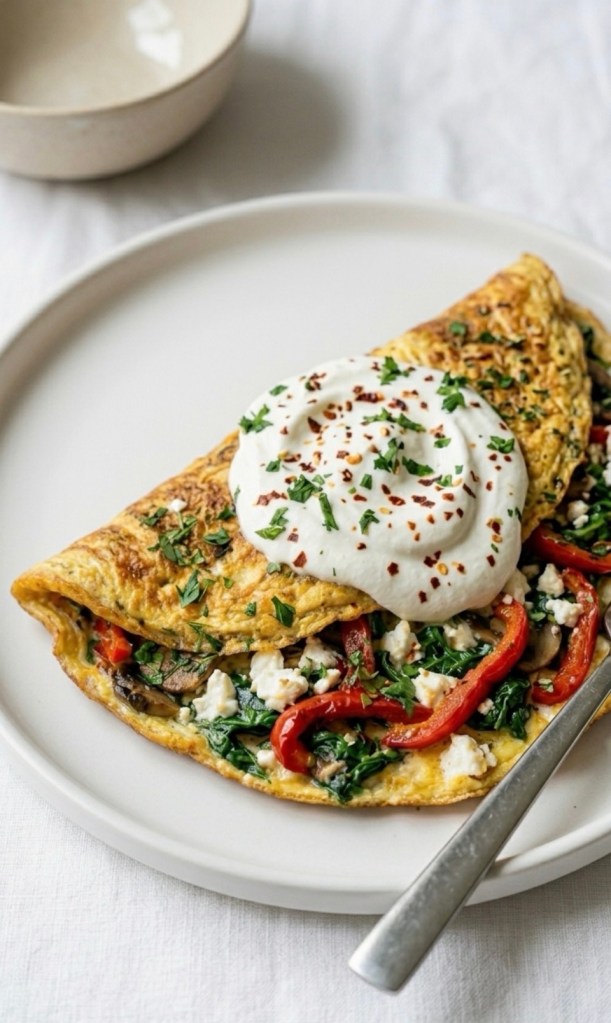
5 Fold & Serve: Gently fold the omelette over. Slide it onto your plate, top it with a generous dollop of cold, whipped Greek yogurt, fresh herbs, and a final dusting of chilli flakes for a little kick.
Pro-Tips for Success
Don’t overcook the eggs: For the best texture, remove the pan from the heat while the top still looks slightly moist. The residual heat will finish the cooking process.
The Yogurt Trick: Use full-fat Greek yogurt for the creamiest topping. The cold, creamy yogurt against the warm, savoury omelette is a complete game-changer!
Have you tried adding Greek yogurt to your eggs before? Let me know in the comments below—I’d love to hear how you customise your brunch!
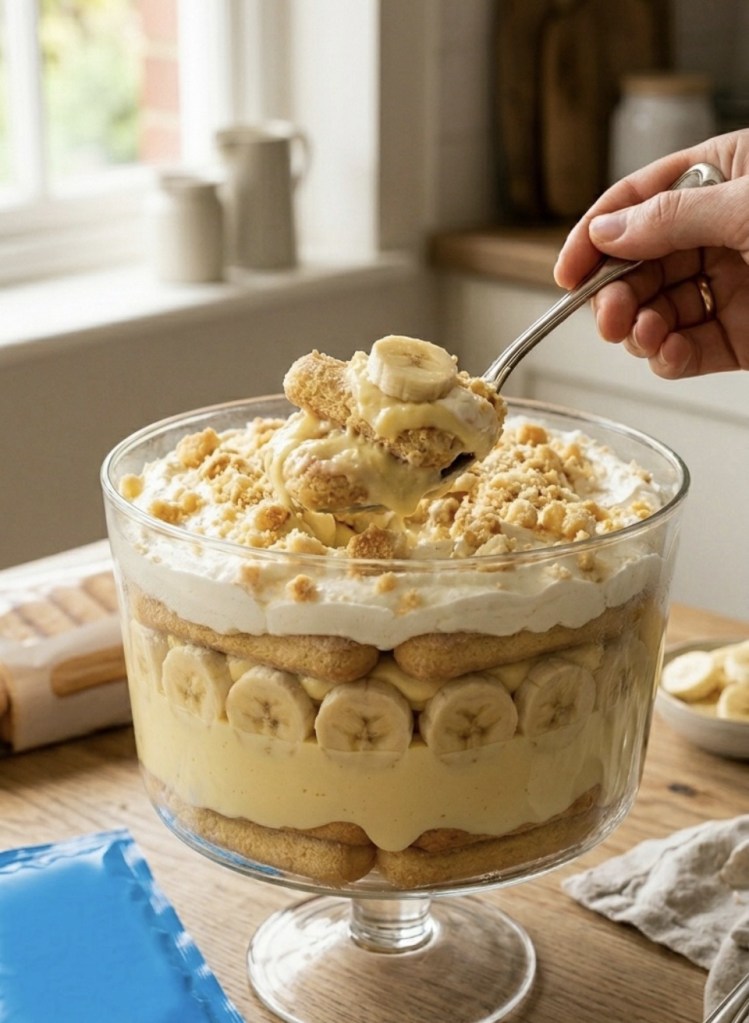
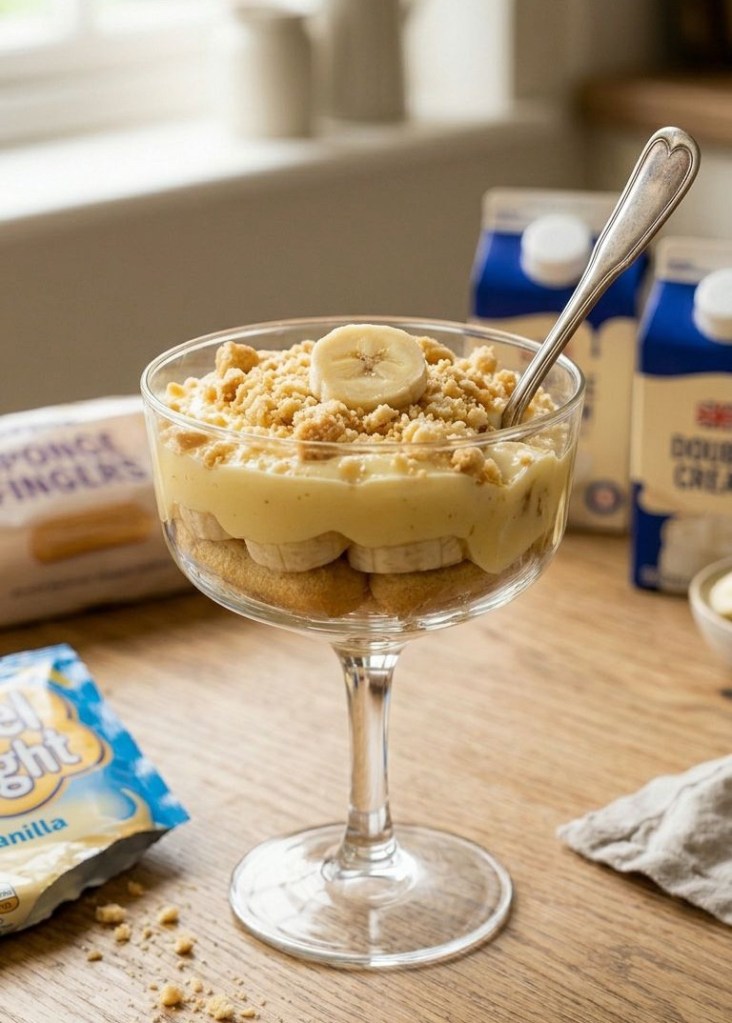
You cannot visit New York City without trying the legendary Magnolia Bakery banana pudding. It is the definition of comfort food—creamy, light, and perfectly layered with soft, cake-like biscuits and ripe fruit.
But let’s be real: sourcing the classic ingredients (looking at you, Nilla Wafers) in UK supermarkets is either impossible or unbelievably expensive. Until now.
If you love easy no-bake desserts UK style, this recipe hack is for you. We have completely adapted the famous Magnolia Bakery banana pudding UK recipe to use affordable, accessible ingredients found in any British supermarket. The secret? We swap vanilla instant pudding for classic Vanilla Angel Delight recipes and dense American whipping cream for rich, thick double cream.
The result? It might actually be better than the original NYC classic. Here is how to make it.
Why This UK Version Works So Well (Textural Advantages!)
The magic of the original NYC recipe relies on the Nilla Wafers absorbing moisture until they soften into a cake-like layer. British “vanilla wafers” (the layered, crispy kind) dissolve instantly into mush when mixed with liquid.
Our solution is sponge finger dessert hacks (often sold as boudoir biscuits or ladyfingers). Because sponge fingers are thicker, they absorb the liquid beautifully over a longer period, creating distinct, soft, pillowy layers that maintain their structure. The result is a richer dessert with an incredible melt-in-your-mouth texture.
Combine this with the nostalgia-inducing thick set of two sachets of Vanilla Angel Delight, and you have an elite dessert.
The Essential UK Ingredient Kit
You will need:
1 tin (397g) Condensed Milk (e.g., Nestlé Carnation)
355ml Ice-Cold Water (Ensure it is very cold, using ice cubes if needed)
2 sachets (59g each) Vanilla Angel Delight (This doubles the set for a perfect texture)
600ml Double Cream
1 pack Sponge Fingers (Boudoir biscuits, usually 200g–250g)
5–6 Ripe Bananas, sliced
Simple Equipment
1 Large Mixing Bowl
1 Smaller Bowl
A Balloon Whisk (for Angel Delight base)
A Stand Mixer or Electric Hand Whisk (for Double Cream)
A Flexible Rubber Spatula (essential for folding gently)
A Large Serving Dish, Casserole Dish, or Trifle Bowl
Step-by-Step Method (The UK Adaptation)
1. Build the Angel Delight base
In a large bowl, whisk the Sweetened Condensed Milk and ice-cold water together until completely uniform. Once combined, pour in both sachets of Vanilla Angel Delight. Whisk vigorously for about 2 minutes until the mixture is smooth and entirely free of clumps. Cover the bowl and chill it in the fridge for 3 to 4 hours (or overnight) until completely set and firm. Do not skip this step!
2. Prepare the Double Cream
In a separate clean bowl, use your electric mixer to whisk the cold double cream. You need to whisk until stiff peaks form (meaning the cream holds its shape securely when you lift the beaters). Double cream sets much faster than US whipping cream, so watch it closely! Keep it velvety; do not over-whip or it will turn dense and grainy.
3. Master the Gentle Fold
Retrieve your set Angel Delight mixture from the fridge. Using a large rubber spatula, add a few spoonfuls of the whipped double cream to the vanilla base and fold them in gently by scraping the bottom and turning the mixture over itself. Slowly add the remaining cream and continue to fold slowly. Take your time so you do not knock the air out; mix only until the mixture is a uniform, cloud-like mousse with no streaks of cream.
4. Assemble the Layers
Grab your large dish (a glass trifle bowl looks stunning). Lay down a solid layer of Sponge Fingers at the bottom, breaking them to fit snugly. Top with a dense layer of sliced bananas, then spread over one-third of your cream/pudding mixture. Repeat this pattern (biscuits, fruit, cream) 2 to 3 times, ensuring your final top layer is a smooth spreading of the cream.
5. The Crucial Final Set and Garnish
Finish by crushing any remaining Sponge Fingers into coarse crumbs and scattering them generously over the top. Cover the entire dish tightly with cling film and place it in the fridge. Because sponge fingers are substantial, they need a good 4 to 6 hours (ideally overnight) to draw moisture and soften properly into that signature cake-like texture.
Important Tips for the Perfect Pudding
Chilling is Mandatory: The final overnight set is essential for the sponge finger conversion. If you serve too early, the biscuits will still be crunchy.
Watch the Double Cream: It whips extremely fast compared to US whipping cream. Keep your eye on it so it stays smooth and pillowy.
Ideal Consumption Time: The pudding is best consumed within 12–16 hours of assembly, once the biscuits have hit that perfect cake-like softness.
What should we “British-ify” next?
We hope you enjoy this easy conversion! What classic American or international dessert should we adapt for UK supermarket shelves next? Let us know in the comments below, or share your results by tagging us in your photos! 🇬🇧✨
Let’s be honest: there’s nothing quite like a traybake to save a busy weeknight. I’ve been obsessed with this specific combo lately—it’s inspired by a classic recipe which is “ Pinterest-worthy” and made in my own kitchen.
The Secret is in the Sausage
If you want this dish to go from “standard midweek meal” to “gourmet comfort food,” don’t skimp on the sausages. I highly recommend using high meat content sausages (look for 85% meat or higher) from your local butcher or even more reasonable Lidl do some brilliant ones . Heck sausages are good too.
A proper Cumberland or a peppery Lincolnshire works beautifully here. Because we’re roasting them, cheaper sausages tend to shrink or release too much water; a high-quality banger stays juicy, holds its shape, and develops a gorgeous caramelised crust that flavours the entire tin.
The Double-Roast Technique
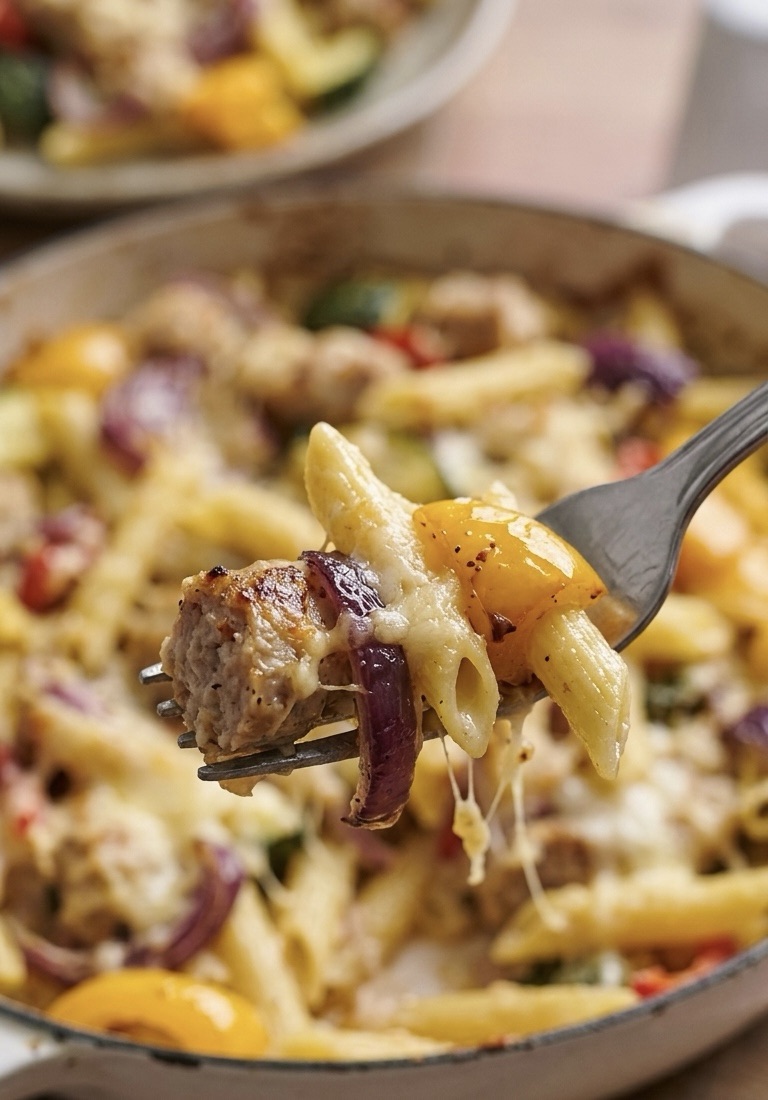
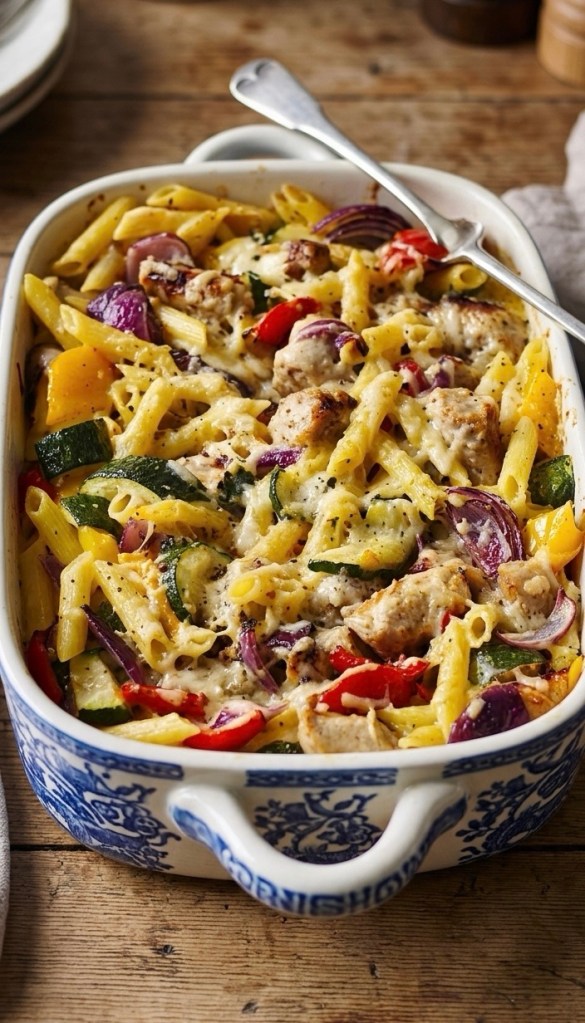
What makes this version a winner is the roasting process. Instead of just boiling everything, we’re roasting the peppers, courgettes, and red onions first to intensify their natural sweetness. Then, we toss in those chunky sausage pieces so they get lovely and browned while the veg finishes off.
While the oven is doing the heavy lifting, you just boil your penne until al dente, drain it, and then the magic happens. You toss the pasta directly into that hot roasting tin, letting it soak up the juices. Pour over the silky double cream, blanket the whole thing in a sharp, mature Cheddar, and give it one last blast in the oven.
The result? A colourful, quintessentially British “hug in a bowl” that looks like it took way more effort than it actually did.
The Recipe & Method
Prep time: 15 mins | Cook time: 40 mins | Serves: 4
Ingredients
• The Stars: 6-8 high meat content sausages (Cumberland or Lincolnshire are top-tier choices), cut into thick, chunky coins.
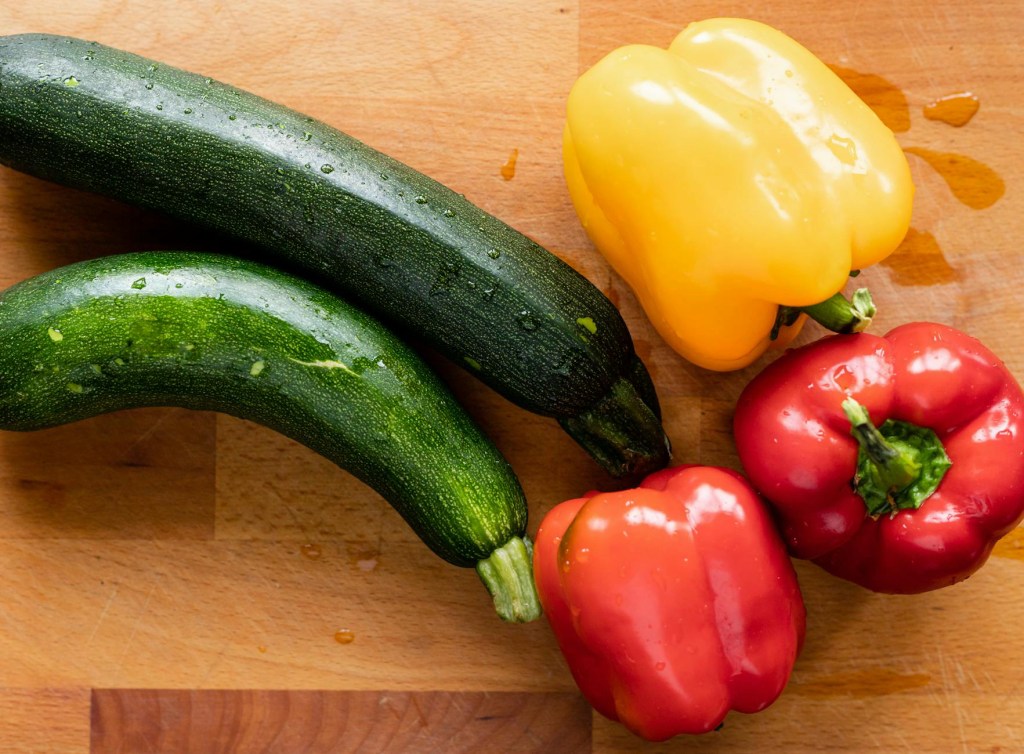
• The Veg: 1 large red onion (peeled and wedged), 1 large courgette (sliced into thick half-moons), and 2 mixed peppers (deseeded and chopped into 3cm chunks).
• The Pasta: 300g dried Penne pasta.
• The Sauce: 100ml Double cream (don’t use single, it’ll split!) and 1 tbsp olive oil.
• The Topping: 150g Mature Cheddar, freshly grated for the best melt.
• Seasoning: A generous pinch of sea salt and plenty of freshly ground black pepper.
Method
1. Prep the Heat: Crank your oven up to 220°C (200°C Fan / Gas 7). You want it hot so the veg roasts rather than steams.
2. The First Roast: Spread your chopped onion, peppers, and courgette in a large roasting tin. Drizzle with oil, season well, and toss. Roast for 10 minutes.
3. Sausage Time: Add your high-quality sausage chunks to the tin. Give it all a good stir to coat the sausages in those lovely veg juices. Roast for another 20 minutes until the sausages are golden-brown and cooked through.
4. Boil the Pasta: While the tin is sizzling, cook your penne in a large pan of salted boiling water for 10–12 minutes. You want it tender but with a slight bite. Drain well.
5. The Big Mix: Tip the drained pasta into the roasting tin. Pour over the double cream and toss everything together until every tube of pasta is glistening.
6. The Grand Finale: Scatter the grated Cheddar over the top. Return to the oven for a final 4–5 minutes until the cheese is bubbling, golden, and starting to brown at the edges.
Serve it straight from the dish with a side of garlic bread or a simple rocket salad. Perfect!
Let’s be honest for a second—is there anything actually better than a bubbling tray of cheesy potatoes? I don’t think so. Whether the British weather is doing its usual grey thing or you’ve just had one of those days at work, this Ham and Potato Bake is my absolute soul-soother.
It’s one of those “hug-in-a-bowl” meals that feels like home. It’s unpretentious, incredibly filling, and honestly? It’s even better the next day if you’re lucky enough to have leftovers.
A Little Secret for the Best Ham…
You don’t need to spend a fortune at a fancy deli for this. If you want a tip from me, head over to Lidl. Their Oaklands range for the veg is great, but their Dulano or Select and Better thick-cut honey roast ham is a total game-changer for this recipe. It’s salty, slightly sweet, and chunky enough that it doesn’t just disappear into the sauce.
What You’ll Need
The Filling:
• 1kg Maris Piper Potatoes: These are the kings of the potato world. They get lovely and fluffy in the sauce.
• 200g Cooked Ham: Grab a thick-cut pack from Lidl or Aldi are great and dice it into proper, bite-sized chunks.
• 1 Small Brown Onion: Finely diced (this adds that lovely sweetness to the base).
The Liquid Gold (The Sauce):
• 40g Unsalted Butter
• 3 tbsp Plain Flour
• 600ml Whole Milk: Go for full-fat if you’re feeling extra indulgent!
• 200g Extra Mature Cheddar: Grate it yourself, trust me. The pre-grated stuff has a dusty coating that stops it from melting perfectly.
• Seasoning: A good pinch of salt, plenty of cracked black pepper, and if you’re feeling fancy, a tiny dab of English mustard.
Let’s Get Cooking
1. Get Prepped
First things first, get your oven heating up to 180°C (160°C Fan). Find your favourite big baking dish and give it a quick rub with a bit of butter so nothing sticks to the corners. Peel and cube your potatoes into roughly 1.5cm pieces—don’t worry about being too perfect, rustic is better! Throw them in a bowl with your chunky Lidl ham.
2. The “Secret” Sauce
Melt your butter in a saucepan and gently soften the onion. Once it’s smelling amazing, stir in the flour. Cook it for a minute or so—you want it to look like a thick paste. Now, slowly—and I mean slowly—whisk in your milk. It takes a bit of elbow grease, but keep going until it’s smooth and thick.
3. Make it Cheesy
Take it off the heat and stir in about three-quarters of that cheddar. Watch it melt into that silky, creamy sauce. This is the part where I usually “quality control” a spoonful!
4. The Big Mix
Pour all that cheesy goodness over the potatoes and ham. Give it a really good stir so every single potato cube is smothered. Pour it into your dish, cover tightly with foil (this steams the potatoes to perfection), and pop it in the oven for one hour.
5. The Crispy Bit
Take the foil off, sprinkle over the rest of your cheese, and slide it under the grill for about 5 minutes. You’re looking for those gorgeous, slightly burnt “cheesy bubbles” on top.
A Quick Favour…
Try to let it sit for about 10 minutes before you dive in. I know, I know—it smells incredible and you’re hungry—but letting it rest helps the sauce thicken up so it wraps around the potatoes instead of running all over the plate.
Serve it with a big pile of buttery peas or just eat it on its own on the sofa. You deserve it.
Are you a “crispy edges” person or a “creamy middle” person? Let me know in the comments!
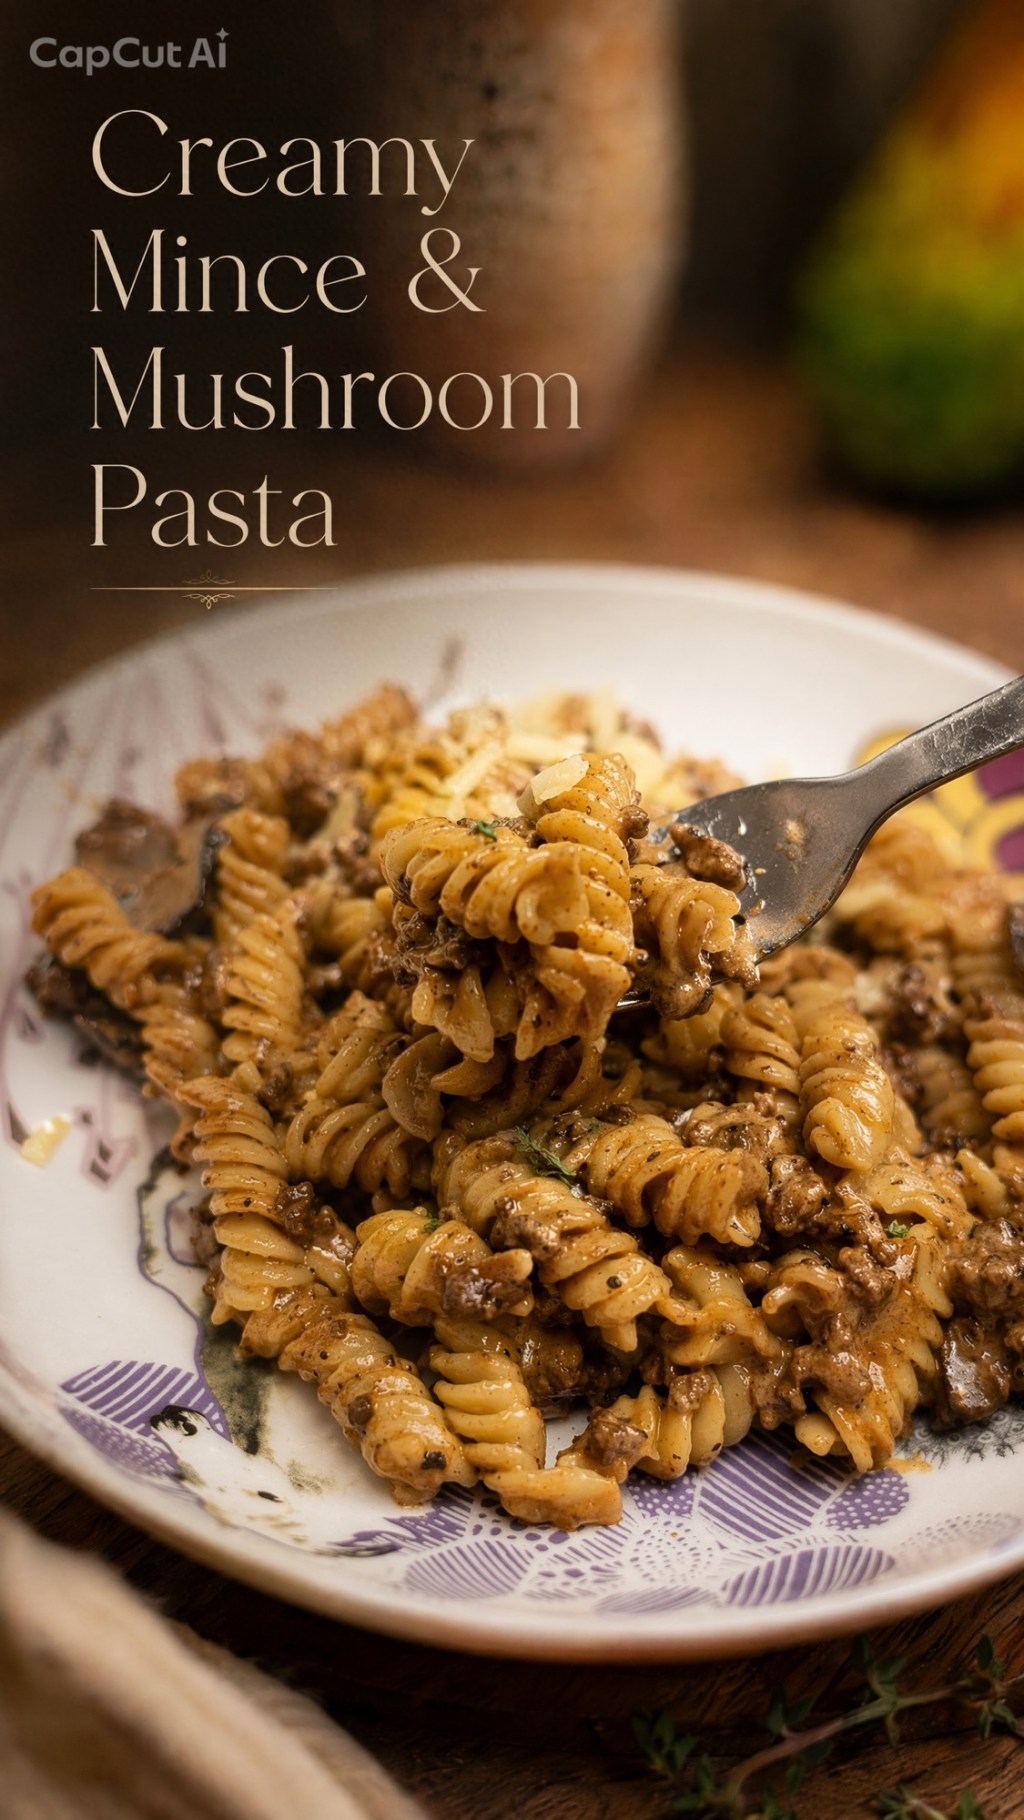
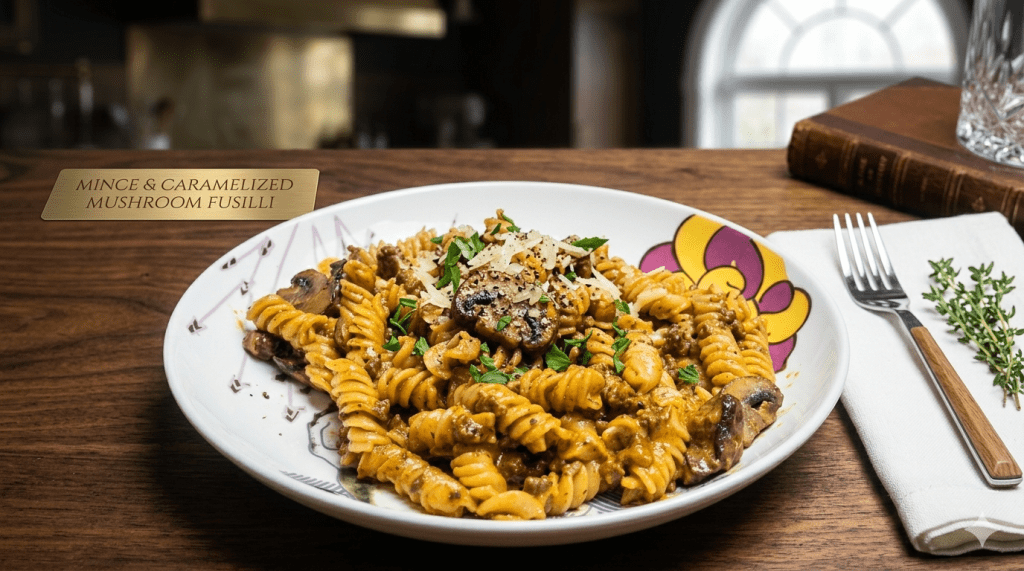
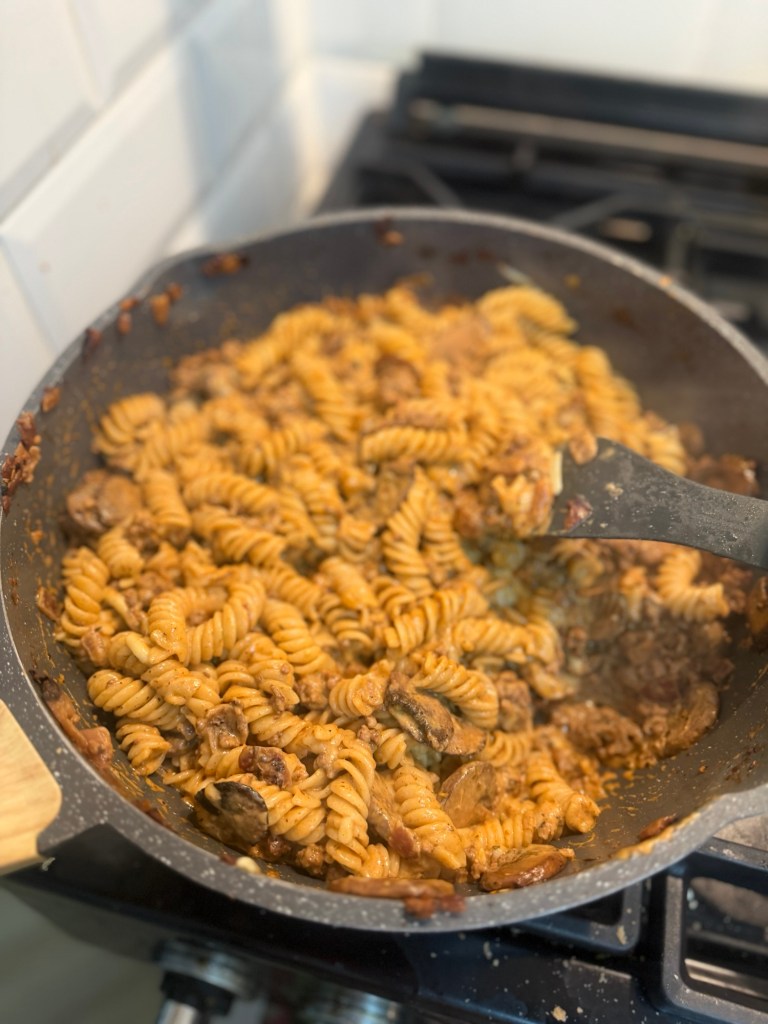
If you need a cosy, filling dinner that doesn’t take much thinking about, this creamy mince and mushroom pasta is a lovely one to keep up your sleeve. It’s rich, savoury, family-friendly, and made with simple ingredients you probably already have in the fridge or cupboard.
The mushrooms add extra flavour and make the sauce feel a bit more comforting, while the cream and cheese bring everything together into a silky, satisfying pasta dish. It’s perfect for a weeknight tea, especially when you’ve got a packet of mince and want something more exciting than the usual bolognese.
Ingredients Serves 4
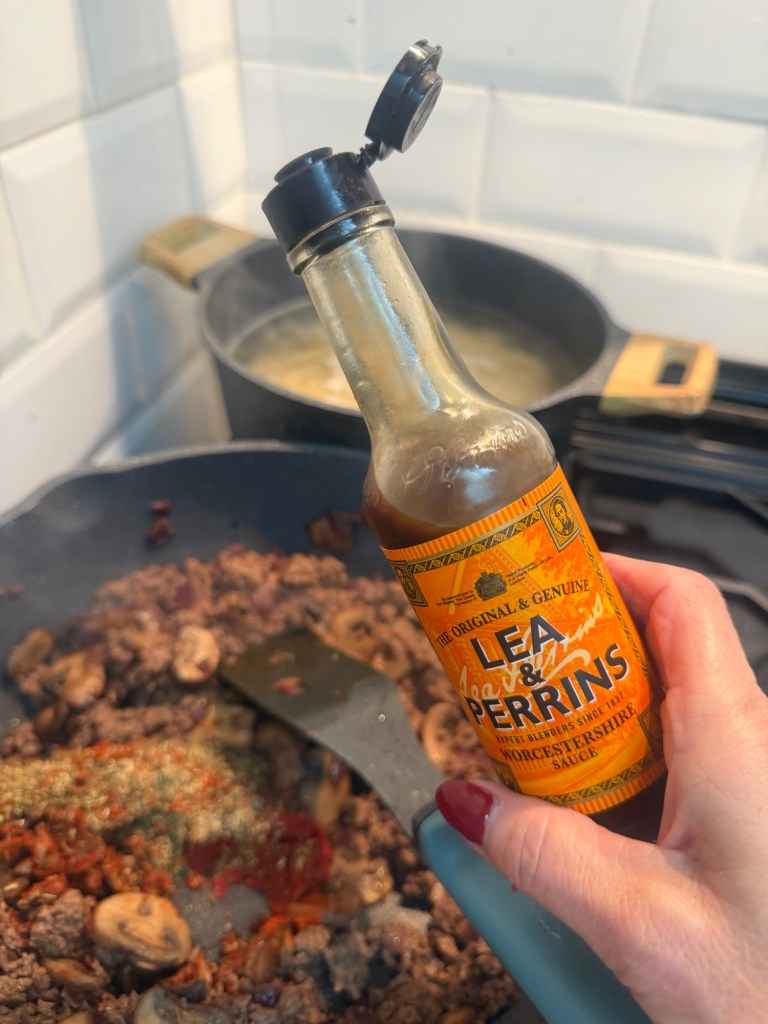
• 400g beef mince • 300g pasta, such as penne, fusilli, shells or rigatoni • 150g to 200g mushrooms, sliced • 1 onion, finely chopped • 2 garlic cloves, crushed or finely chopped • 1 tbsp tomato puree • 1 tsp paprika • 1 tsp mixed herbs or Italian herbs • 300ml beef stock • 150ml double cream or single cream • 75g grated cheddar or parmesan • 1 tbsp Worcestershire sauce, optional but tasty • Salt and black pepper • 1 tbsp oil for frying
Optional extras: • A handful of spinach • Frozen peas • Sweetcorn • Chilli flakes • Extra cheese for serving
Method
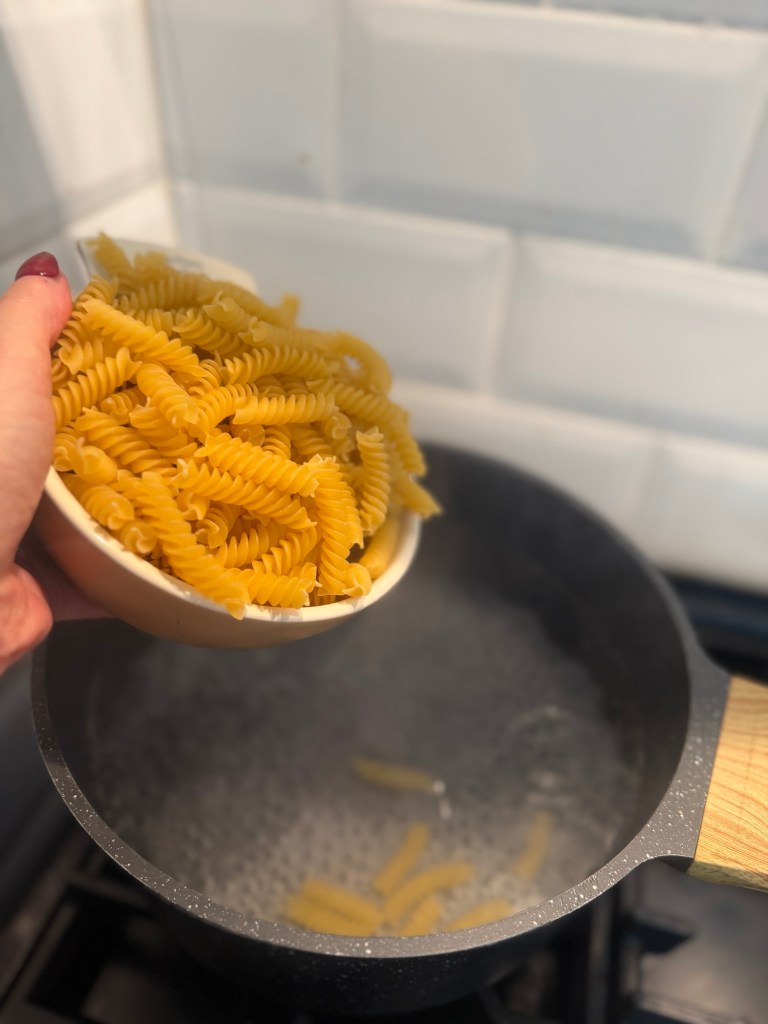
Bring a large pan of salted water to the boil and cook the pasta until just al dente.
Before draining, save a mug of pasta water. This is useful later if you want to loosen the sauce.
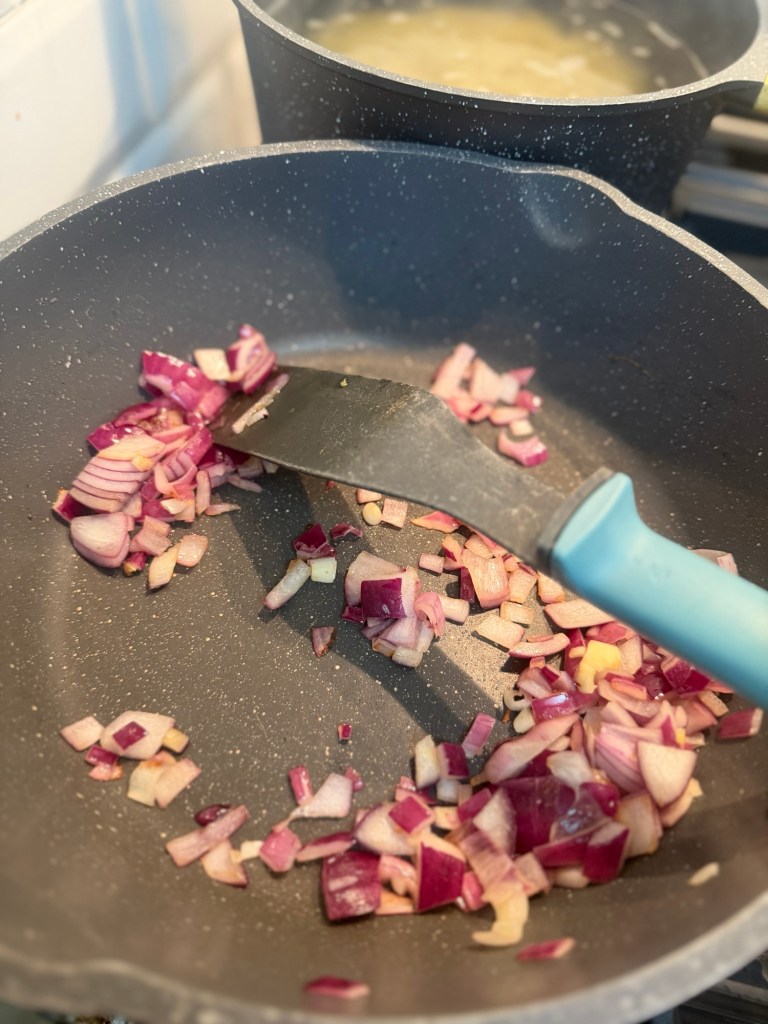
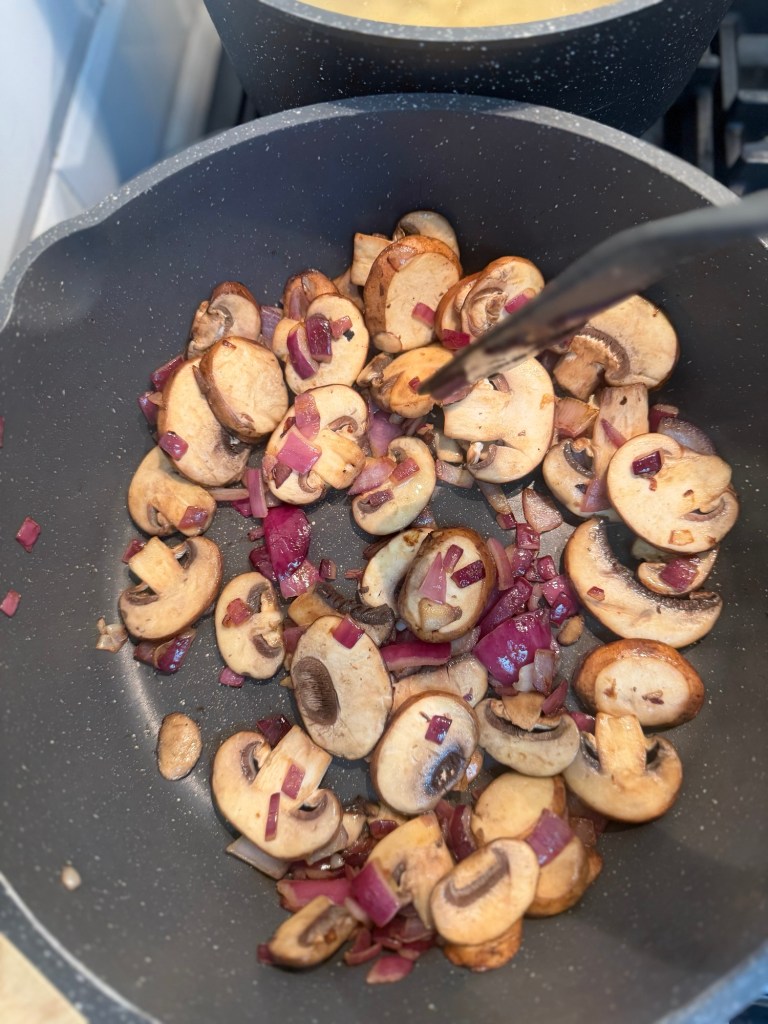
While the pasta is cooking, heat a little oil in a large frying pan over a medium heat. Add the chopped onion and cook for 3 to 4 minutes until softened.
Add the sliced mushrooms and fry for another 4 to 5 minutes. Let them cook down properly so they release their water and start to turn golden.
This gives the dish a deeper, more savoury flavour.
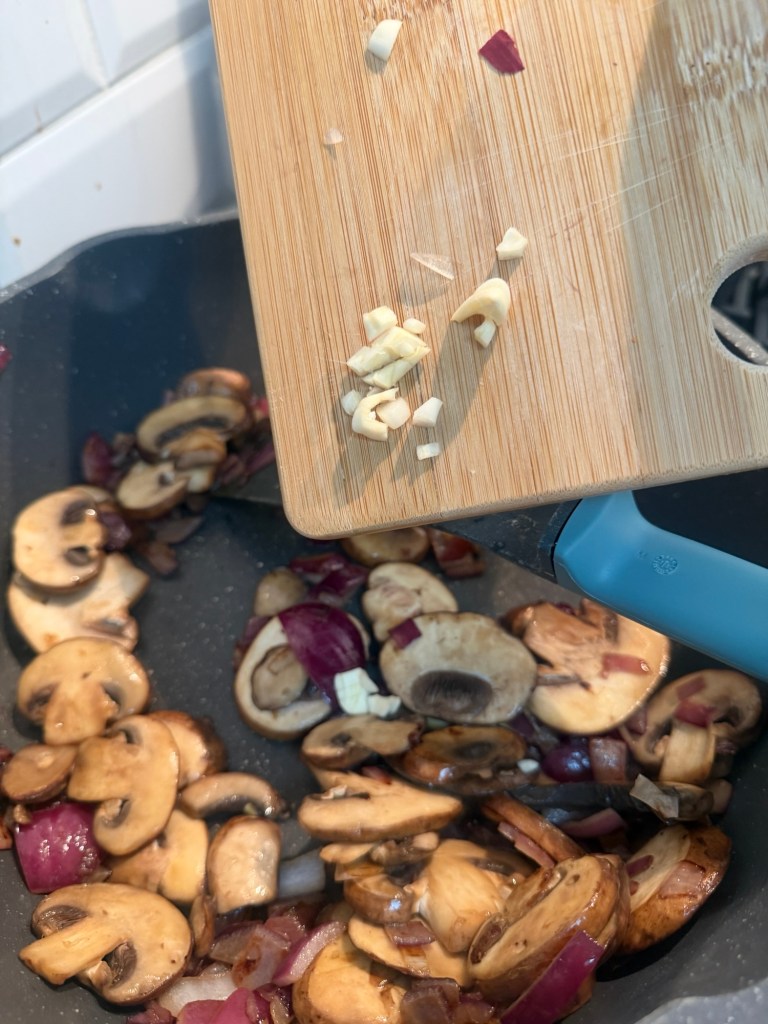
Stir in the garlic and cook for about 30 seconds, just until fragrant.
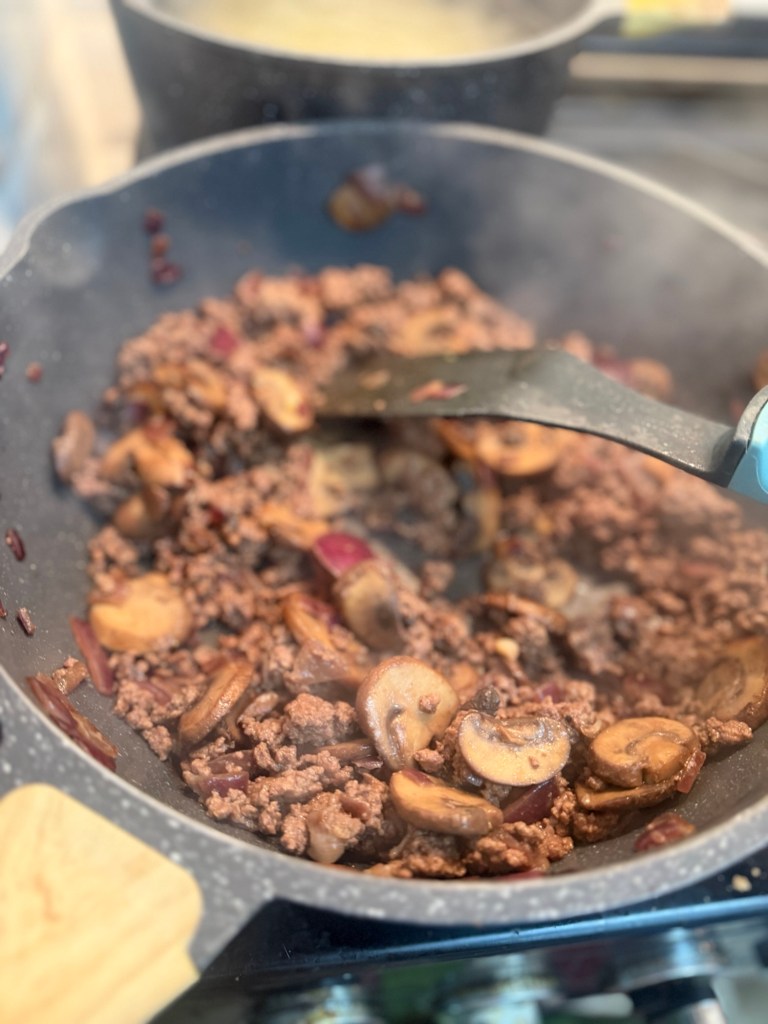
Add the beef mince and fry until browned, breaking it up with a spoon as it cooks. If there is a lot of excess fat, carefully drain some away.
Add the tomato puree,
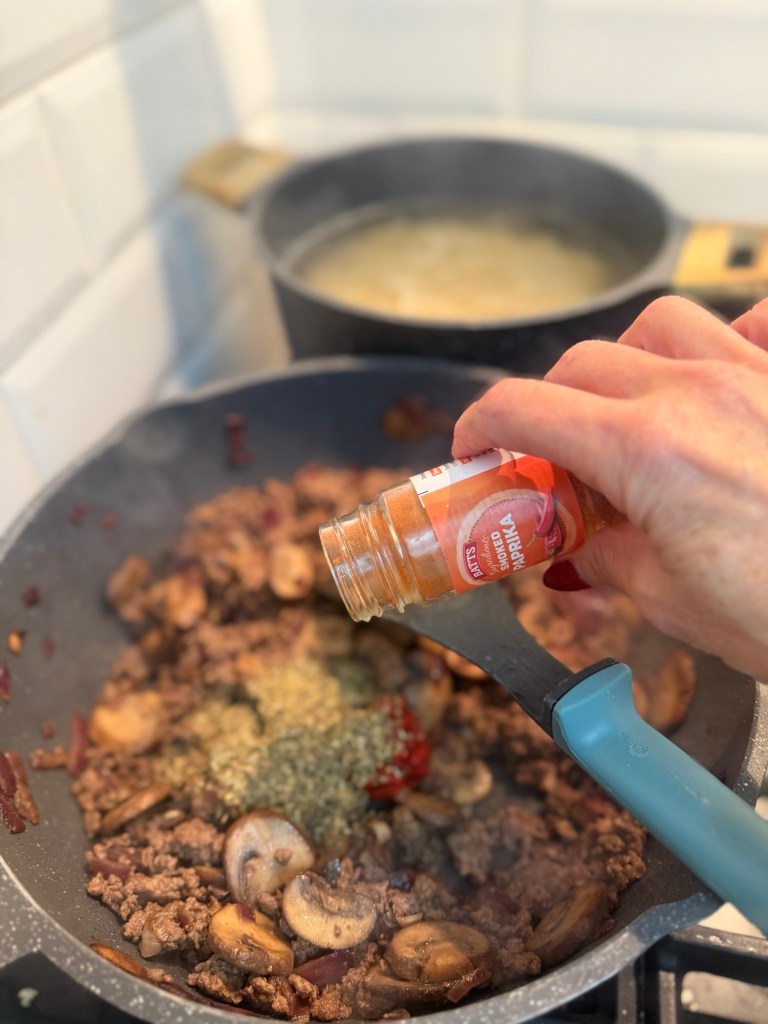
paprika,
mixed herbs,
Worcestershire sauce, salt and black pepper. Stir everything together and let it cook for 1 minute so the flavours can deepen.
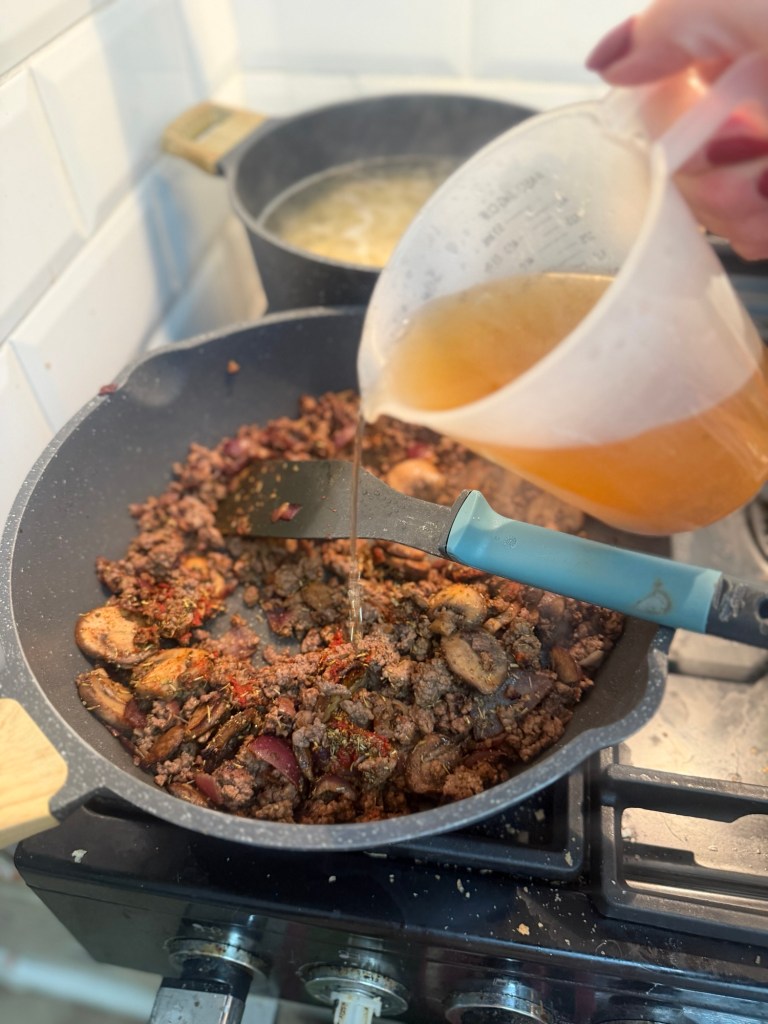
Pour in the beef stock and let it simmer for 5 to 8 minutes until slightly reduced.
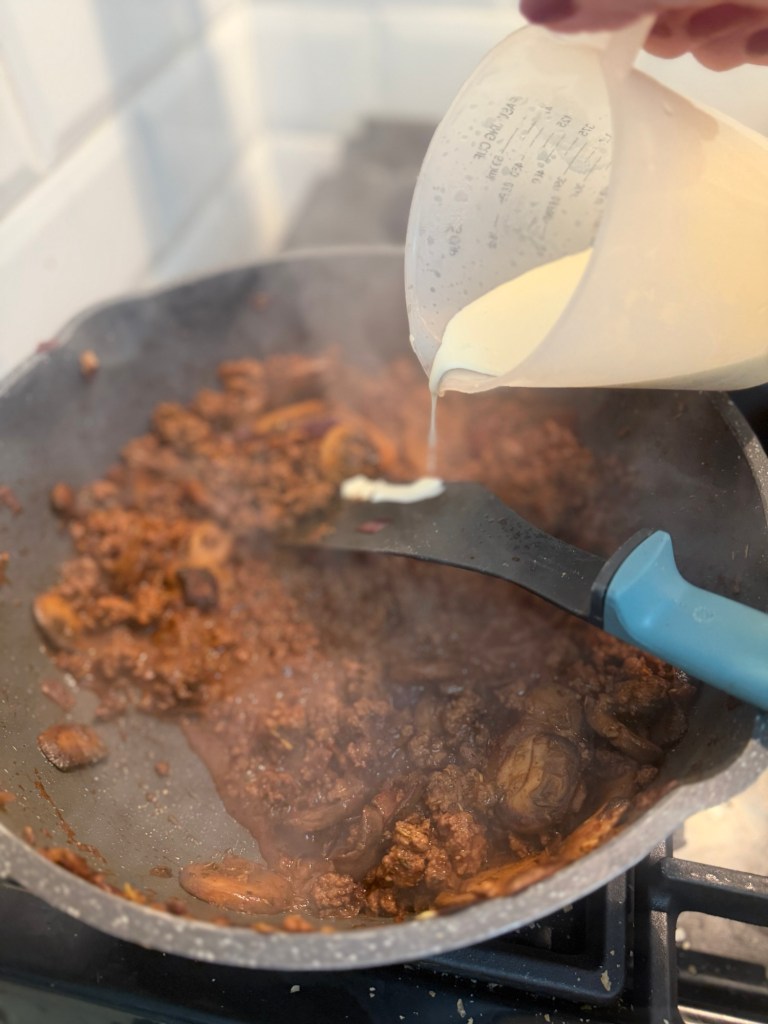
Lower the heat, then stir in the cream.
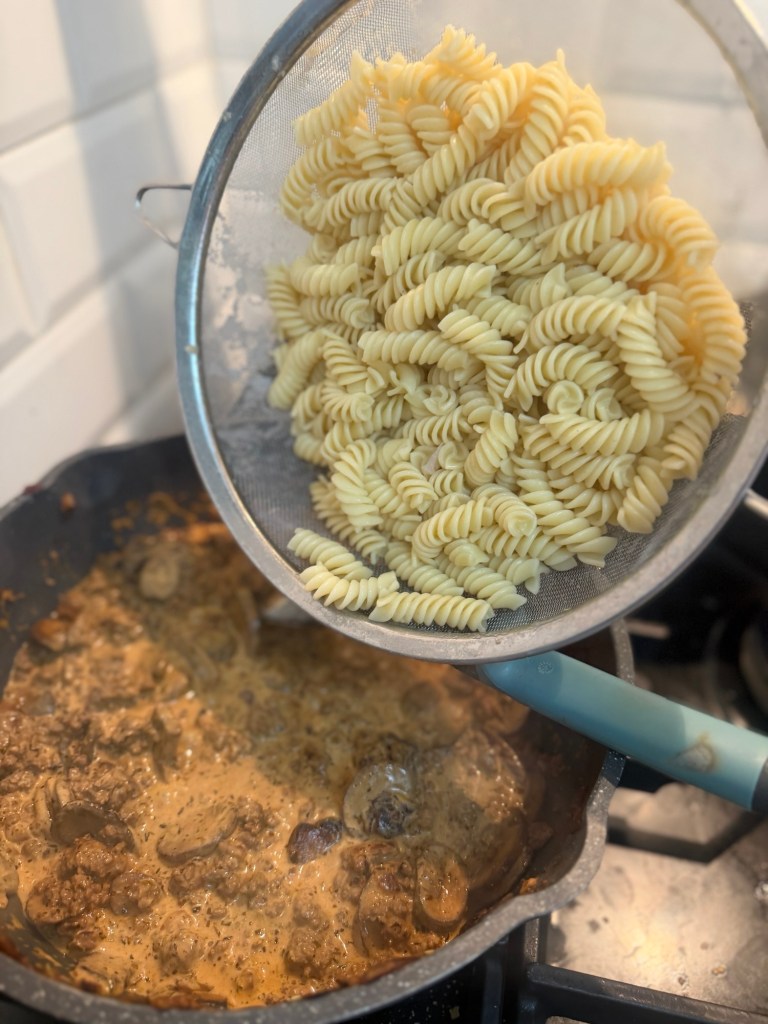
Add the cooked pasta to the pan and mix until everything is coated in the creamy sauce.
Stir through the grated cheese until melted.
If the sauce feels too thick, add a splash of the reserved pasta water until it’s just how you like it.
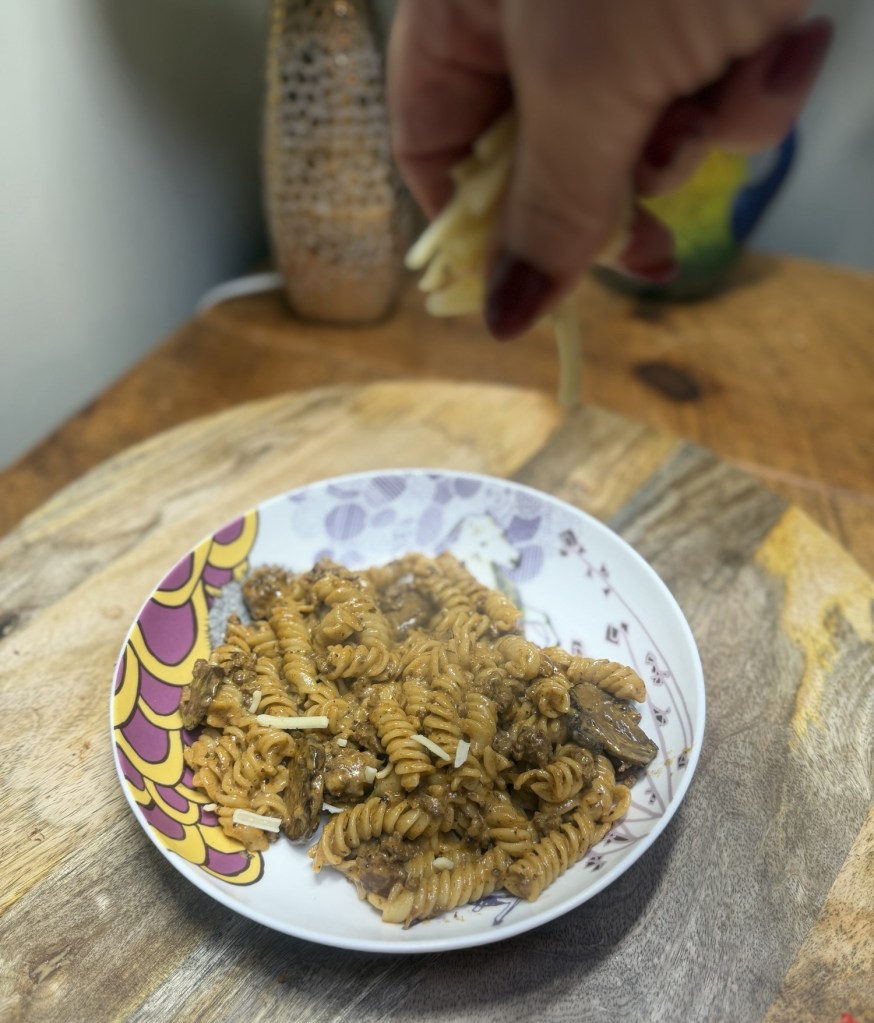
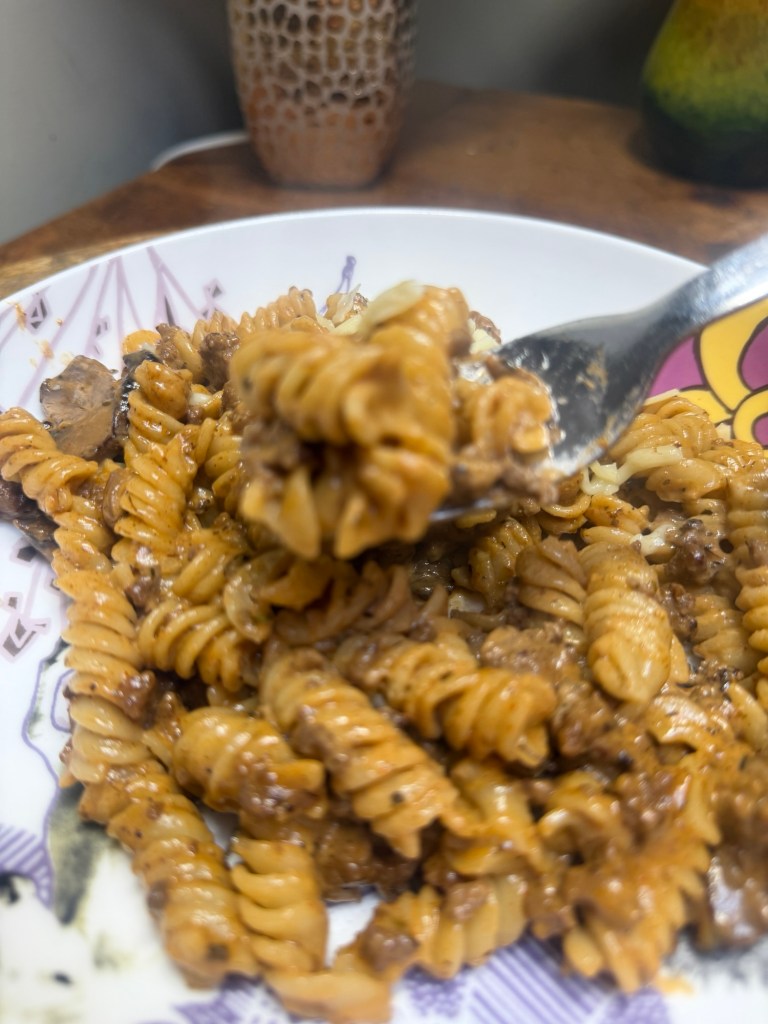
Taste and adjust the seasoning if needed. Serve hot with extra cheese, black pepper and a sprinkle of herbs if you fancy.
Tips
For a richer flavour, use chestnut mushrooms instead of white mushrooms. If you want to make it stretch further, add peas, spinach or sweetcorn near the end of cooking. This is also a great recipe for leftovers. Keep it in the fridge and reheat gently with a splash of milk or water to bring the creamy sauce back.
This creamy mince and mushroom pasta is the kind of easy, comforting meal that always goes down well. It’s simple enough for a busy weeknight, but still feels hearty and satisfying, with plenty of flavour from the mushrooms, garlic, herbs and creamy sauce.
Serve it with a little extra cheese on top and maybe some garlic bread on the side, and you’ve got a cosy homemade dinner that everyone will want again.
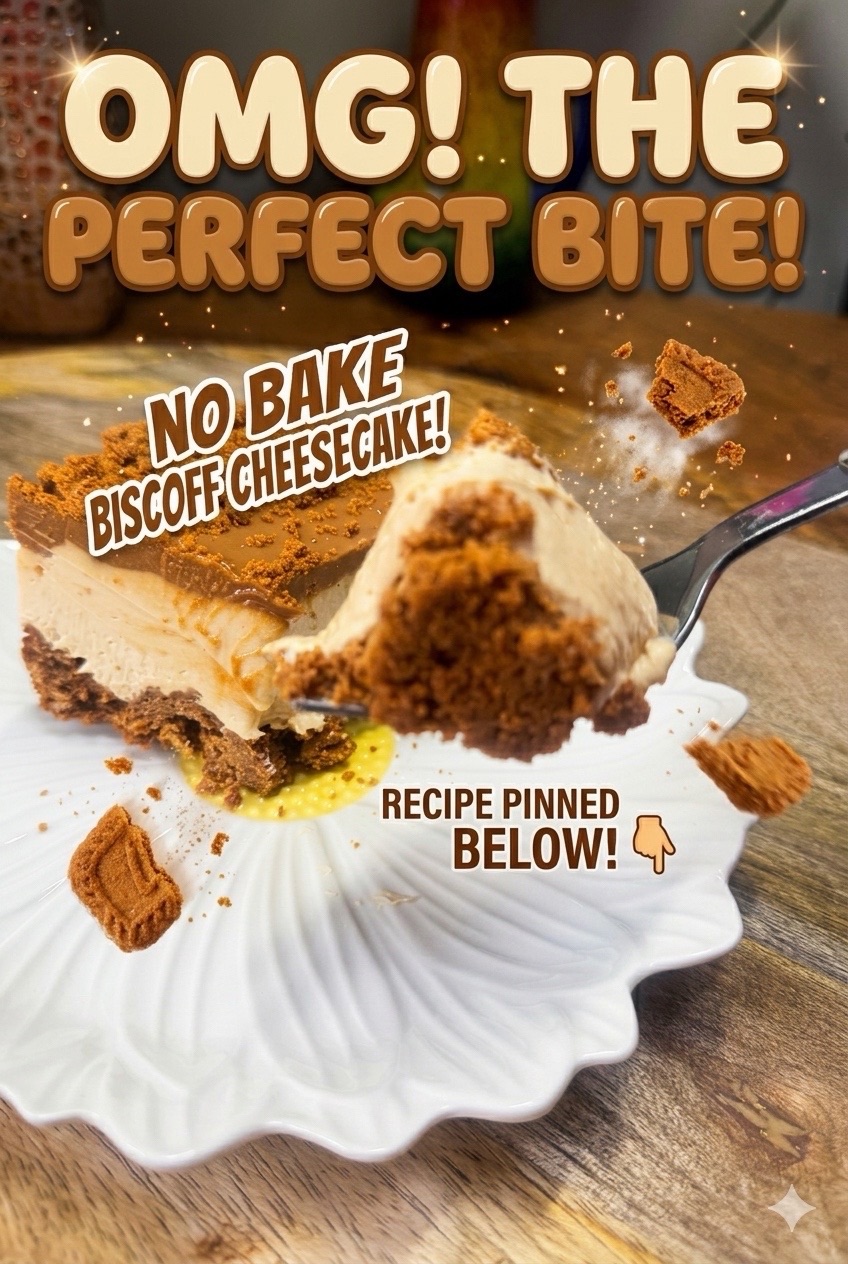
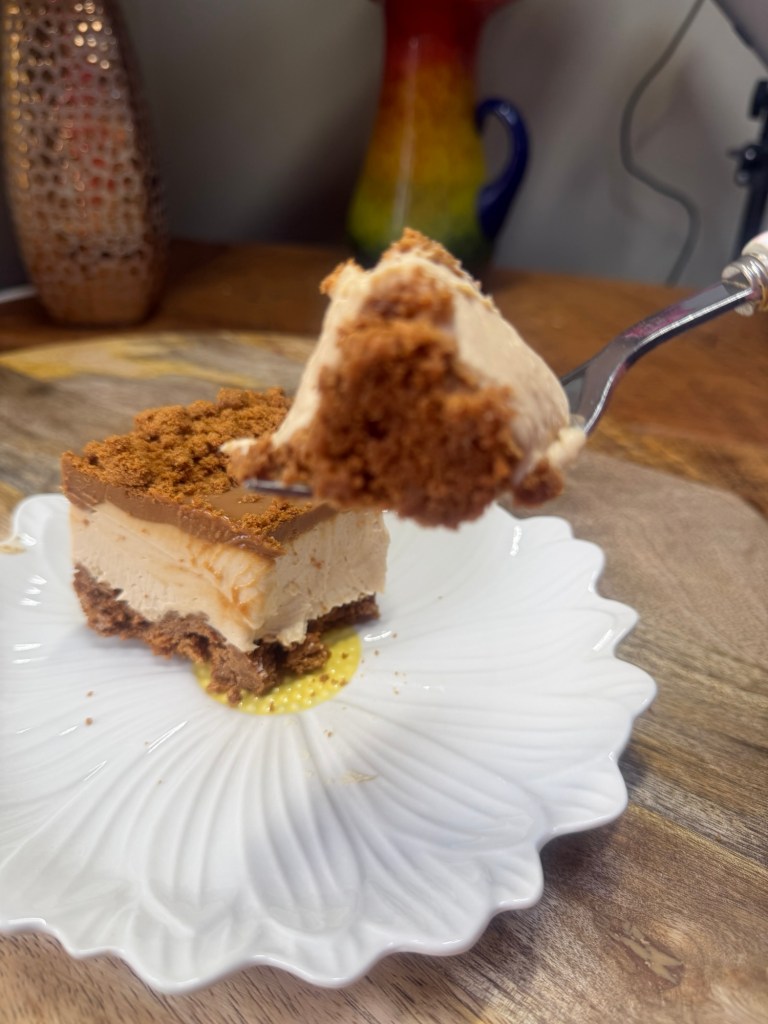
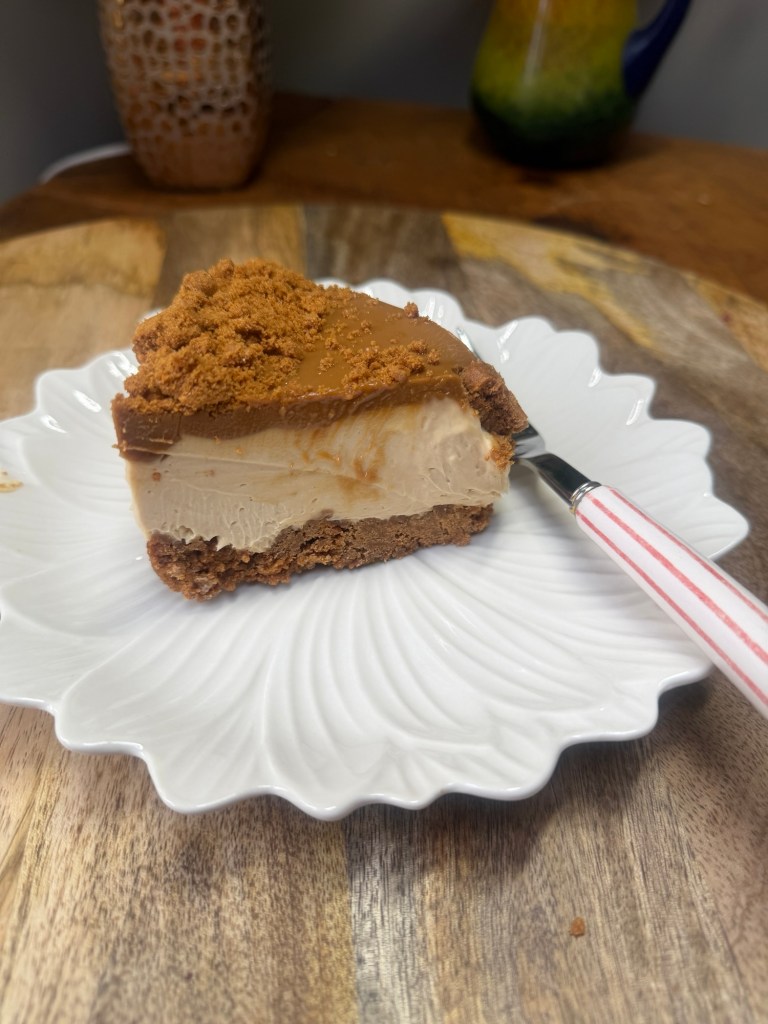
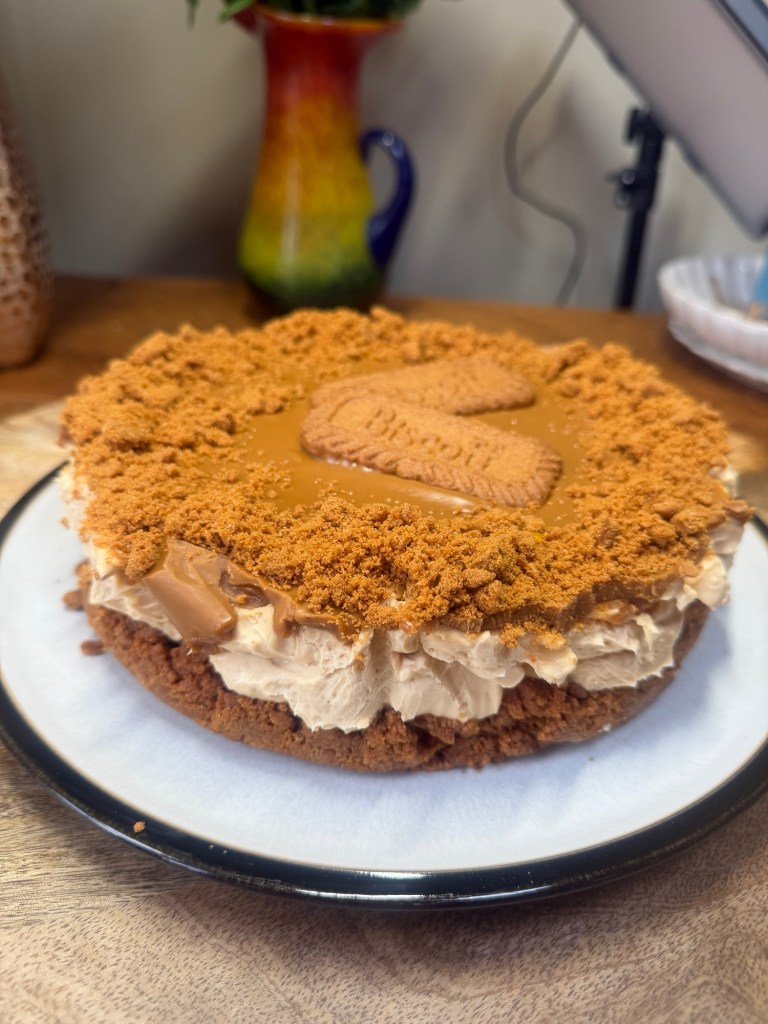
There are some desserts that look like you’ve gone to loads of effort, when really the fridge has done most of the work. This no-bake Biscoff cheesecake is exactly that kind of pudding.
It’s creamy, rich, caramel-biscuity and just a little bit over the top in the best way. The base is made with crushed Biscoff biscuits and melted butter, the filling is soft and mousse-like with plenty of Biscoff spread, and the top has that glossy melted Biscoff finish that makes it look properly special. This is the sort of dessert I’d make the night before people are coming round, then feel very smug about the next day. No oven, no gelatine, no complicated steps. Just mix, chill and decorate.
Why You’ll Love This Recipe
This cheesecake is perfect if you want something impressive but easy. It slices beautifully once chilled, it tastes like a caramel biscuit dream, and it’s a lovely make-ahead dessert for birthdays, family meals, Sunday lunch or Christmas buffets. It’s also one of those recipes that people always ask about. If you put this on the table, someone will want the recipe before they’ve even finished their slice.
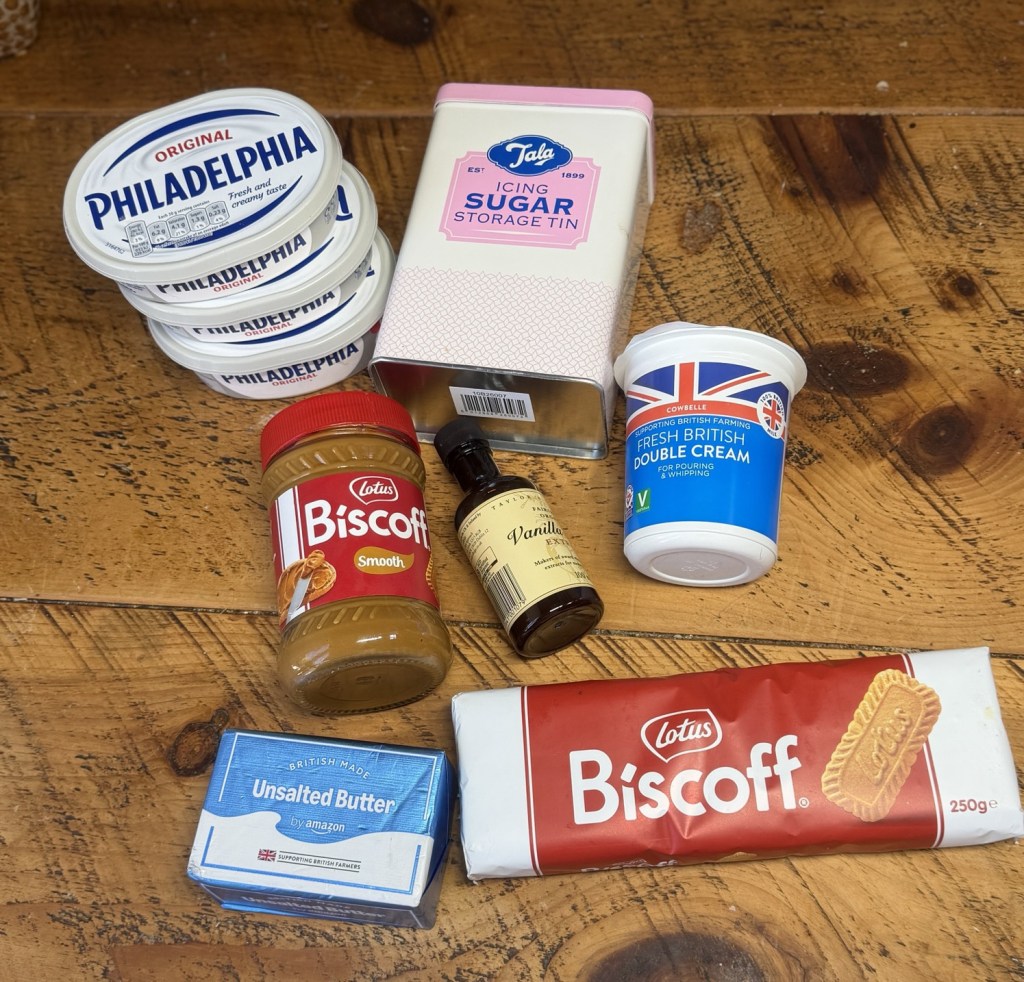
Ingredients
For the base • 250g Biscoff biscuits • 100g unsalted butter, melted
• 150g Biscoff spread • 4 to 6 Biscoff biscuits, crushed • Optional: whipped cream, extra biscuits or mini Biscoff biscuits for decorating
How to Make No-Bake Biscoff Cheesecake
Start by lining the base of a 20cm springform tin with baking paper. This makes it much easier to remove the cheesecake later.
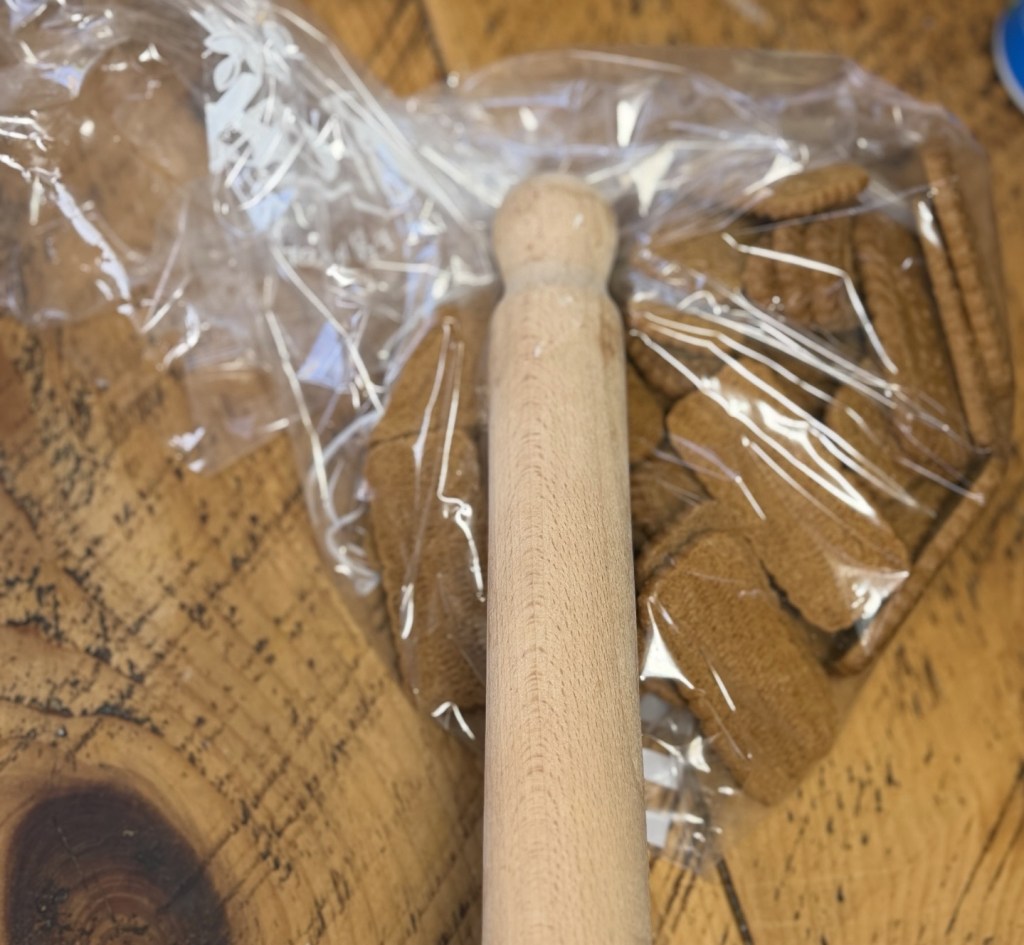
Crush the Biscoff biscuits into fine crumbs. You can do this in a food processor, or pop them into a food bag and bash them with a rolling pin.
Mix the crumbs with the melted butter until they look like wet sand.
Press the biscuit mixture firmly into the base of the tin. I like to use the end of the rolling pin of the bottom of a glass to really compact it down. This helps the base hold together when you slice it.
Pop it in the fridge while you make the filling.
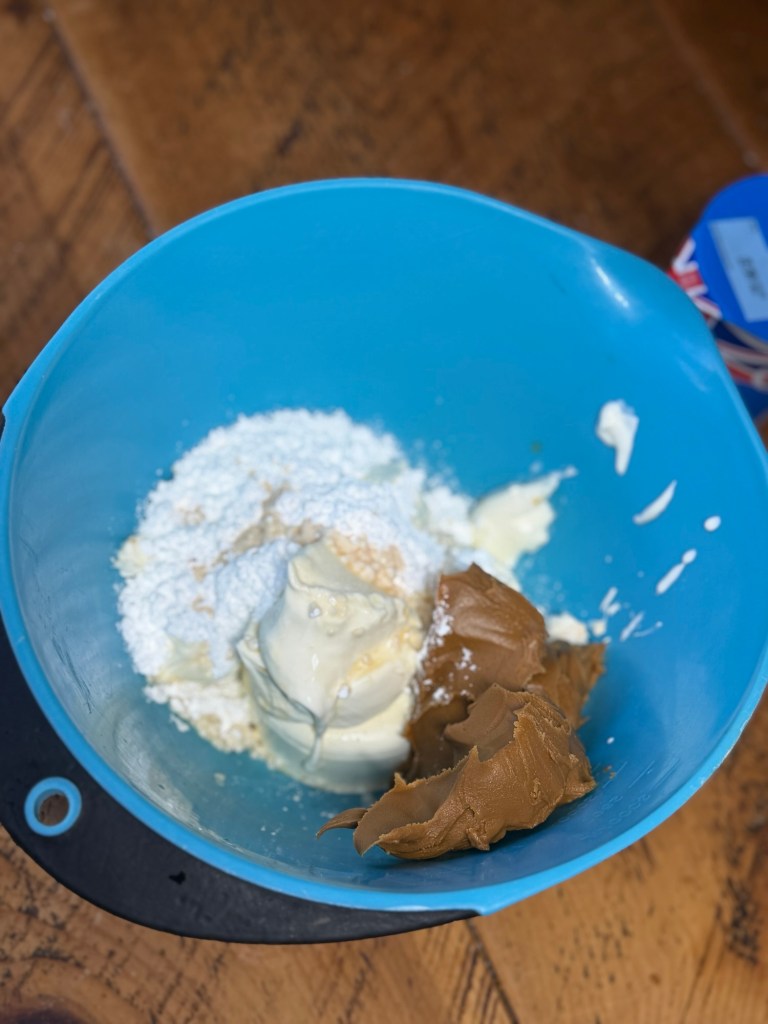
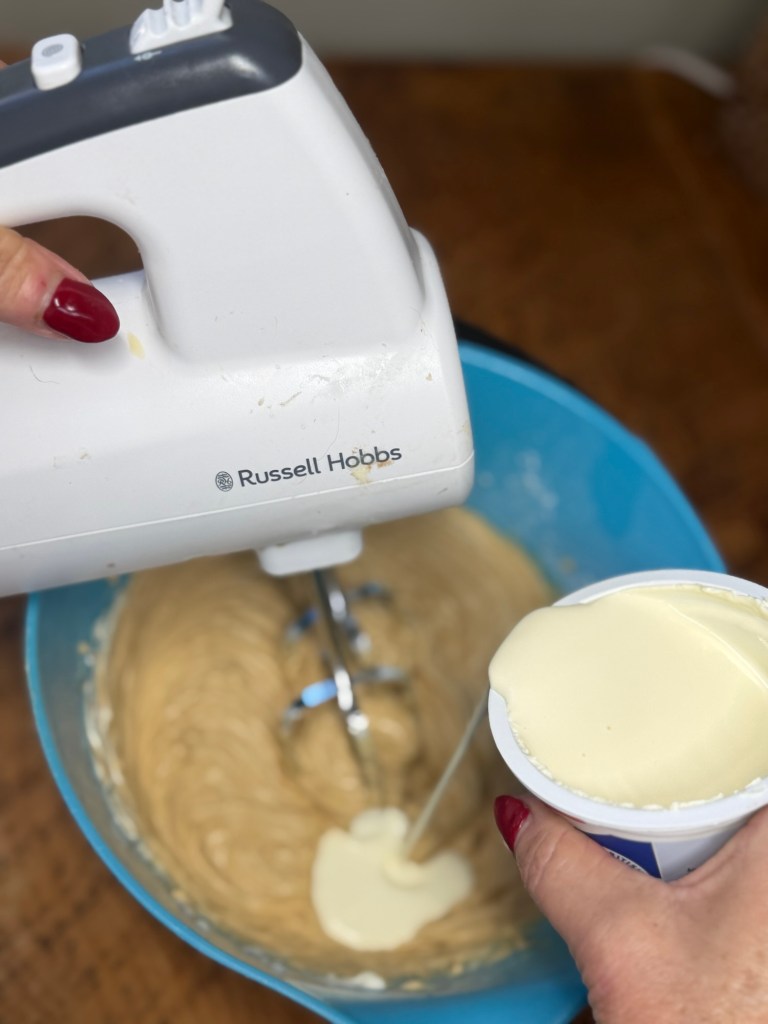
In a large bowl, beat together the cream cheese, icing sugar, vanilla extract and Biscoff spread until smooth.
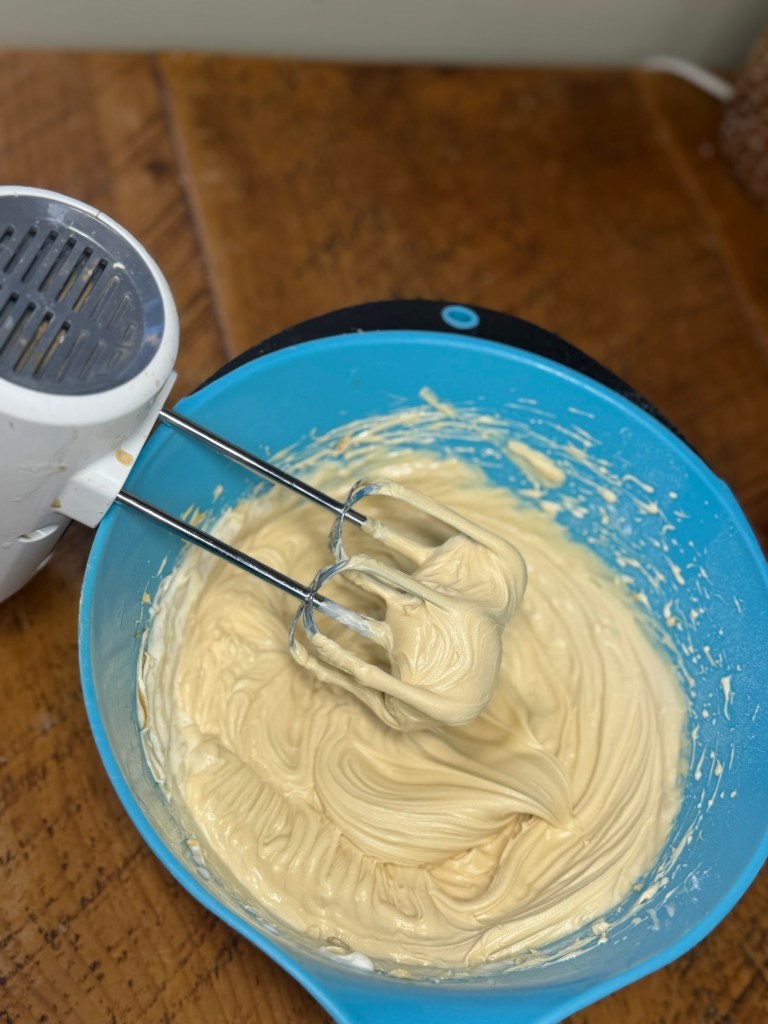
Add the double cream and whip until the mixture is thick and holds its shape.
Spoon the filling over the chilled biscuit base and smooth the top.
Cover and chill in the fridge for at least 6 hours, but overnight is best if you want neat, clean slices.
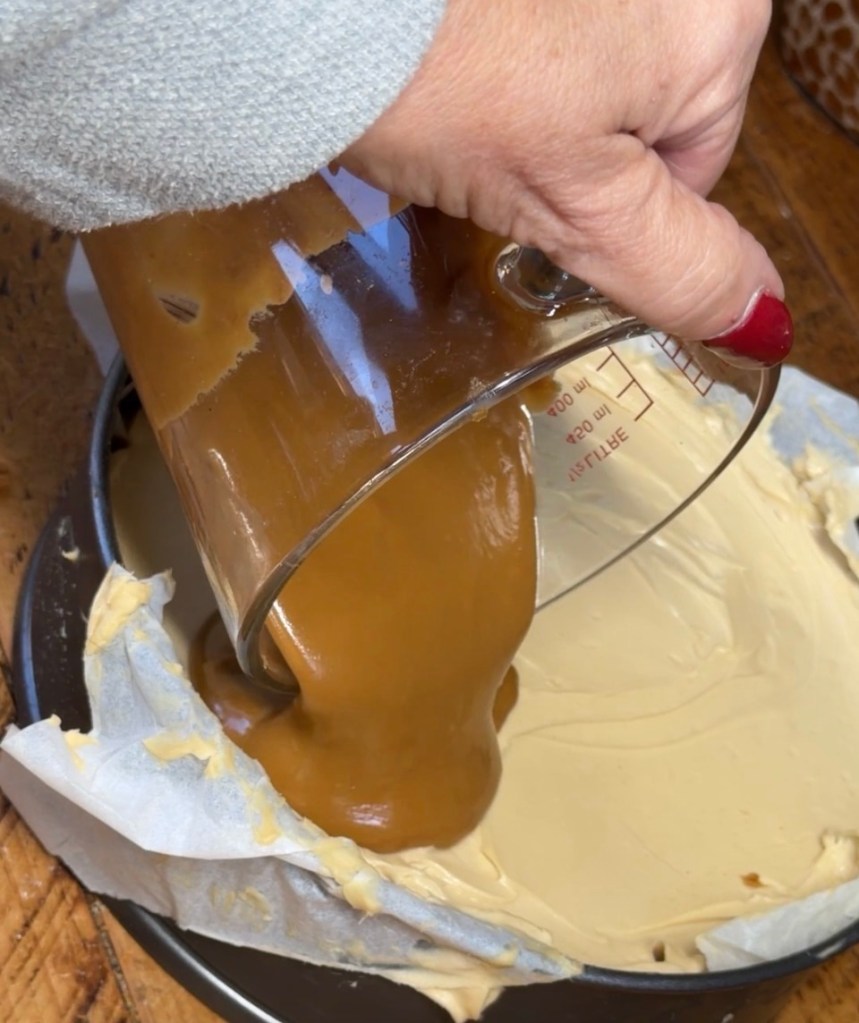
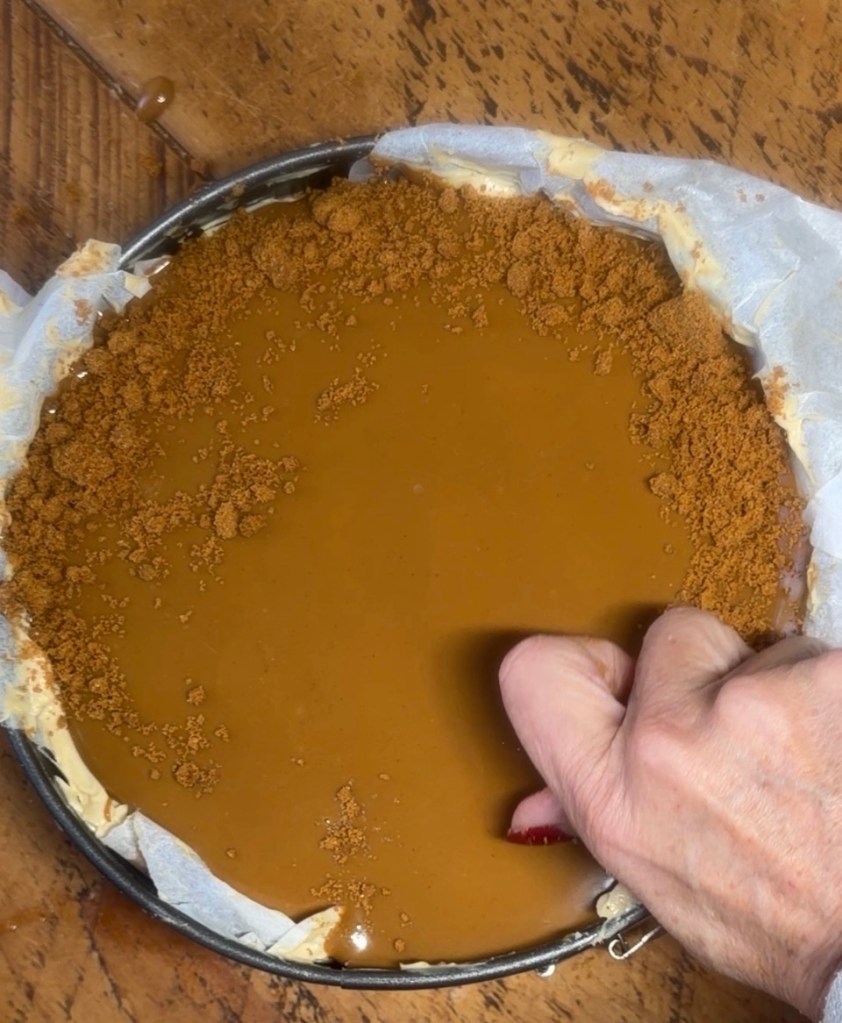
For the topping, gently melt the Biscoff spread in the microwave for around 20 to 30 seconds until it’s pourable.
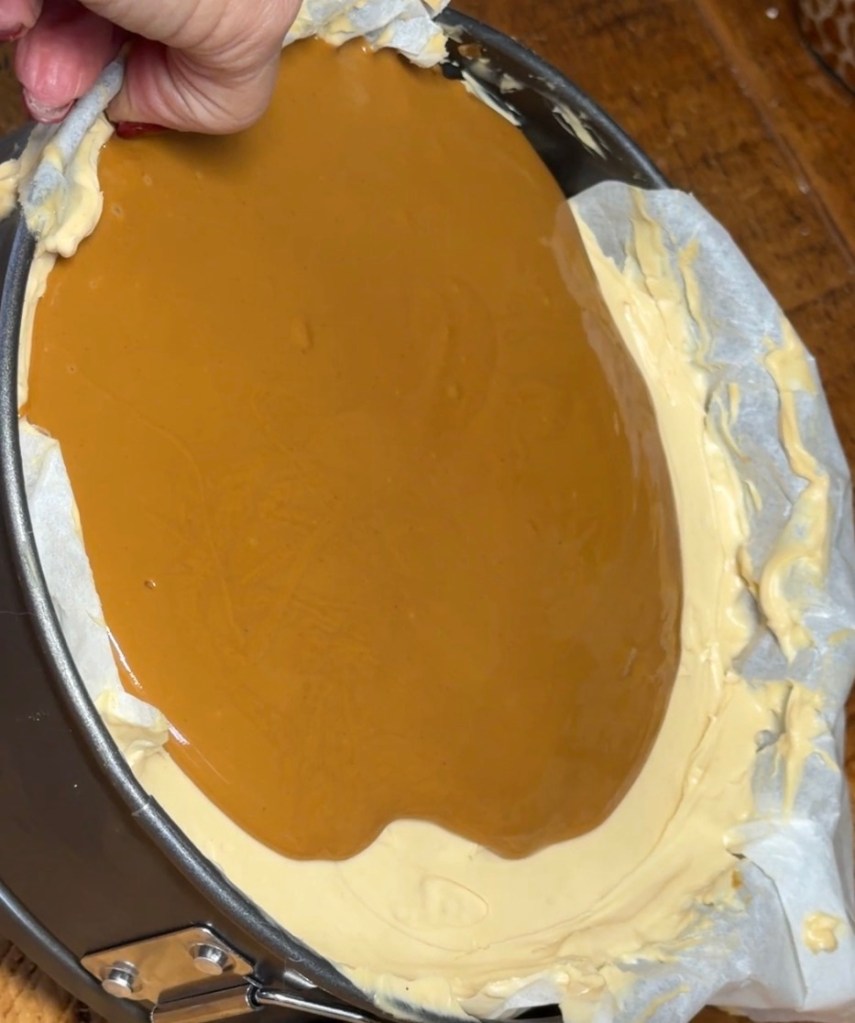
Let it cool slightly, then pour it over the cheesecake.
Sprinkle with crushed Biscoff biscuits and decorate however you like.
Chill again for 30 minutes before slicing.
My Best Tips
Use full-fat cream cheese. The lighter versions can make the cheesecake too soft and it may not set properly. Make sure your double cream is cold before whipping. It thickens much better straight from the fridge.
Don’t rush the chilling time. I know it’s tempting, but this cheesecake really does need time to firm up.
For neat slices, dip a sharp knife in hot water, wipe it dry, then cut. Repeat between slices if you want it to look really tidy.
How Long Does It Keep?
This no-bake Biscoff cheesecake will keep in the fridge for up to 3 days. Keep it covered or in an airtight container so it stays fresh. I wouldn’t leave it out at room temperature for too long because of the cream cheese and double cream. Bring it out just before serving, then pop any leftovers back in the fridge.
Can You Make It Ahead?
Yes, and I actually recommend it. This cheesecake is best made the night before you need it. The texture firms up beautifully overnight and the flavour seems to get even better.
You can add the melted Biscoff topping the night before too, or do that part on the day if you want it to look extra glossy and fresh.
To me, this is the kind of dessert that feels like a proper little treat without needing hours in the kitchen. It’s creamy, cosy, sweet in all the right ways, and always feels a bit special when you bring it to the table. Whether you’re making it for family, friends, or just because you fancy something lovely in the fridge, this no-bake Biscoff cheesecake is one of those recipes you’ll come back to again and again.
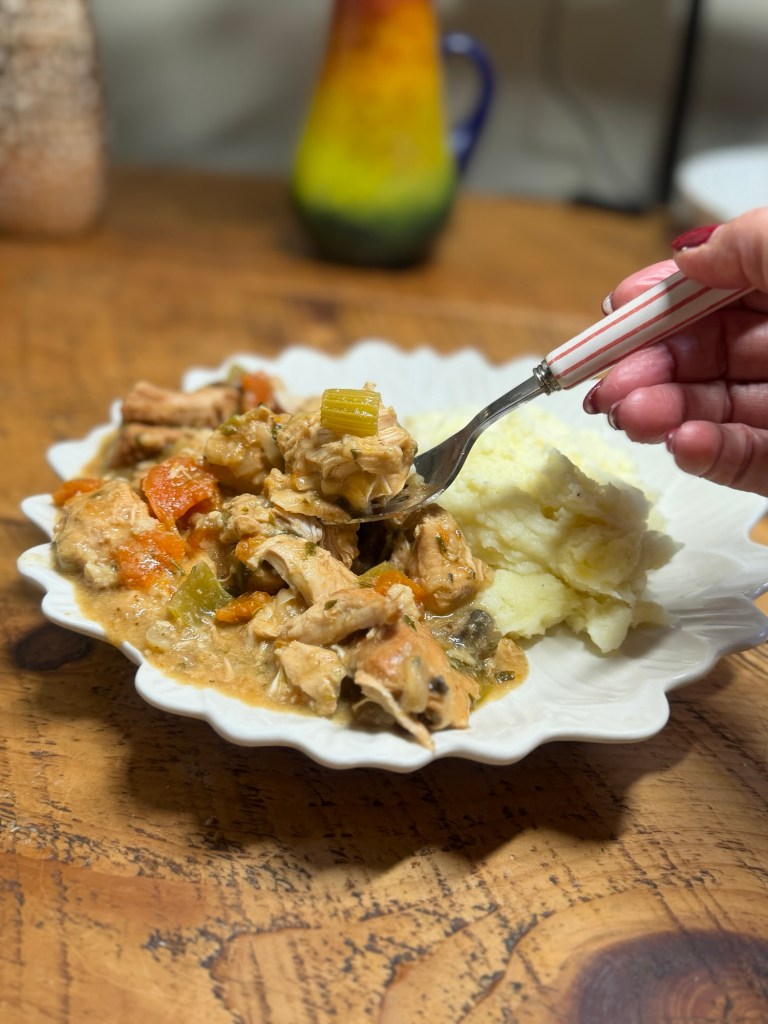
Some days you want a proper home‑cooked dinner… without standing over the hob for ages. This slow cooker chicken breast casserole is perfect for those days: you toss everything in, switch it on, and let it quietly get on with the job.
It uses simple ingredients, no wine, no faff, and you don’t even need to brown the chicken first. The chicken cooks gently in a savoury, herby sauce with soft vegetables – it’s the kind of meal everyone can tuck into, and it’s ideal for busy weeknights or lazy weekends.
Serve it with mash, rice, crusty bread, or whatever you like for soaking up that lovely gravy.
Why you’ll love this easy chicken casserole • No browning needed – you just coat the chicken in flour and straight into the slow cooker it goes. • No wine – great if you don’t cook with alcohol or just don’t have any open. • Simple ingredients – chicken breasts, basic veg, stock and a few store‑cupboard bits.
• Hands‑off cooking – once it’s in the pot, you can forget about it until dinner time.
Ingredients
For the chicken casserole (serves 4–5) • 750 g boneless, skinless chicken breasts, cut into large chunks (3–4 pieces per breast) • 2 tbsp plain flour • 2 medium onions, chopped • 3 medium carrots, sliced into chunky rounds • 2–3 sticks celery, sliced • 3–4 cloves garlic, crushed (or 1–2 tsp garlic granules) • 200–250 g mushrooms, quartered (optional but adds extra flavour) • 500 ml chicken stock (from a cube or pot, made with boiling water) • 1–2 tbsp tomato purée or 1 tsp Dijon mustard (or a bit of both, if you like) • 1 tsp dried thyme or mixed herbs • Salt and black pepper, to taste Optional to finish: • Small splash of cream or 2 tbsp crème fraîche
Step‑by‑step method (no browning)
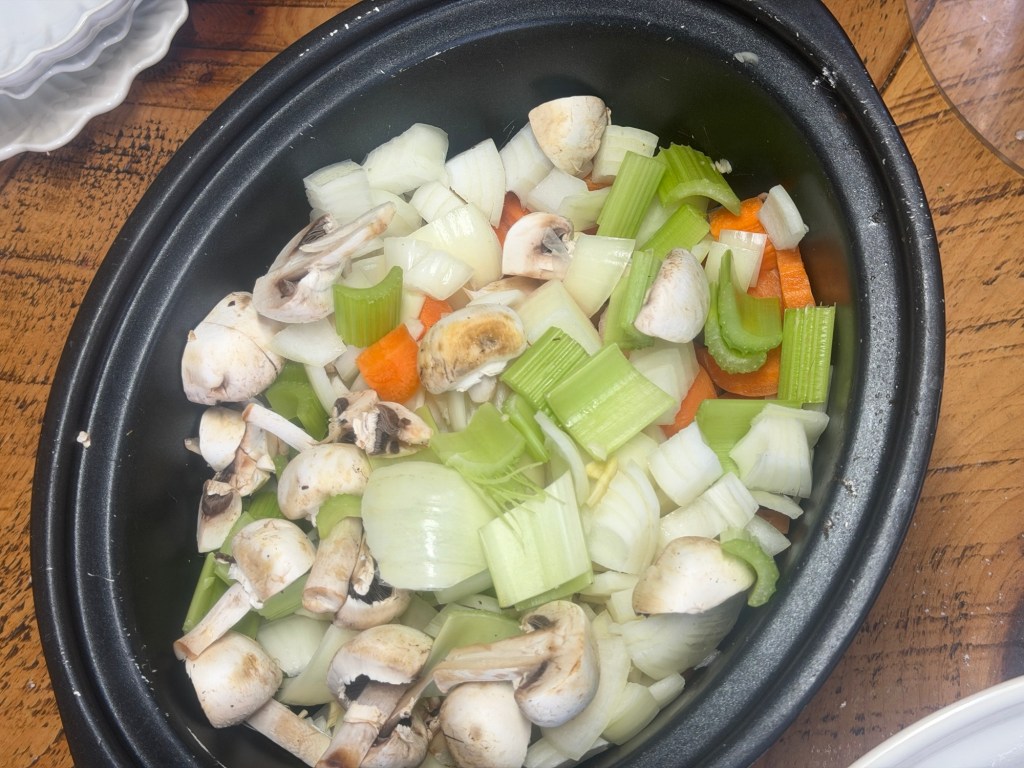
Get the veg in the pot Pop the chopped onions, carrots, celery, garlic and mushrooms straight into the bottom of your slow cooker.
Spread them out into an even layer – they go on the bottom because they’re closer to the heat source and need more time to soften.
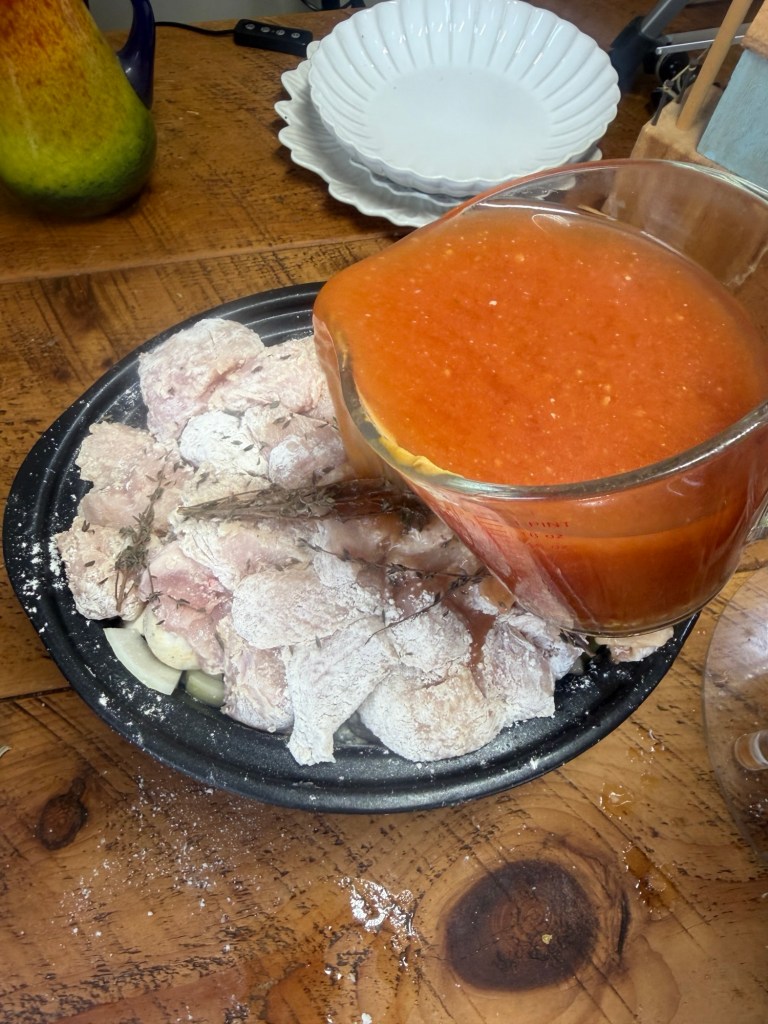
Coat the chicken in flour Cut the chicken breasts into chunky pieces and put them into a bowl.
Sprinkle over the plain flour, a good pinch of salt and some black pepper. Toss everything together so the chicken is well coated. This flour will help thicken the sauce as it cooks, so you don’t end up with a watery casserole.
Once coated, place the chicken pieces on top of the vegetables in the slow cooker. No browning, no extra pans – straight in.
Mix the sauce
In a jug, whisk together: • The chicken stock • Tomato purée and/or Dijon mustard • Dried thyme or mixed herbs • Another pinch of salt and pepper Give it a good stir until the tomato purée or mustard is completely mixed in. Pour this mixture into the slow cooker, around the chicken and vegetables. You don’t need to fully cover everything; more liquid will come out of the chicken and veg as it cooks.
Let the slow cooker do its thing Put the lid on and cook: • On LOW for about 4–6 hours, or • On HIGH for about 2.5–3 hours
You’re aiming for: • Chicken that is cooked through and tender • Vegetables that are nice and soft You can adjust slightly depending on how your slow cooker behaves, but mine was perfect after about 6 hours on low. If the chicken ends up a bit too soft, don’t worry – you can gently shred it into the sauce with a couple of forks and it turns into a slightly chunkier, stew‑style dish.
Adjust the sauce at the end Once the casserole has finished cooking, give everything a good stir and see how the sauce looks and tastes. • If it’s thick enough for you, leave it as it is. • If it’s a bit thin, you have two options: • Often the flour on the chicken will have thickened it enough once you stir – so try that first. • If you still want it thicker, mix 1–2 tsp cornflour with a splash of cold water, stir that into the hot sauce, then cook on HIGH for another 15–20 minutes until it thickens slightly.
For a richer finish, stir in a small splash of cream or a couple of tablespoons of crème fraîche and cook for another 5–10 minutes so it warms through. Taste and adjust the seasoning – add more salt, pepper, and a little squeeze of lemon juice if you’d like the flavour a bit brighter.
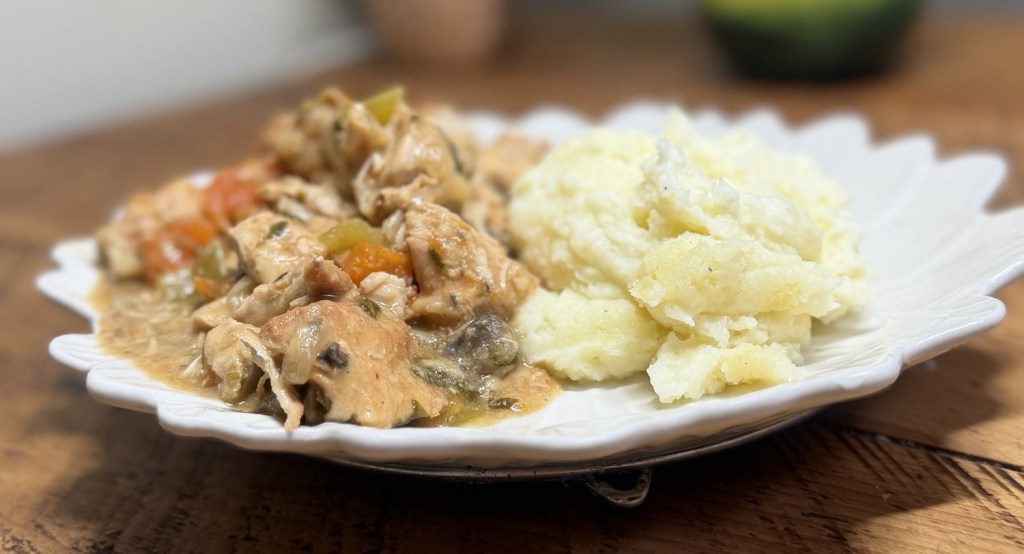
How to serve
This casserole is really flexible and works with loads of side dishes. You can serve it: • Over mashed potatoes • With rice, couscous, or quinoa • With steamed greens (broccoli, green beans, peas) • Alongside crusty bread or a baguette for dipping in the sauce
It’s also a good one for cooking a slightly bigger batch, then enjoying the leftovers another day.
Leftovers and storing • Fridge: Cool the casserole quickly, then store it in a sealed container in the fridge for up to 2 days. Reheat gently on the hob or in the microwave until piping hot all the way through.
• Freezer: You can freeze portions of the cooked casserole. Defrost in the fridge overnight and reheat thoroughly before serving.
Cook’s note
I cooked mine on low for around 6 hours in my slow cooker and it came out beautifully tender, with the vegetables soft and the sauce rich and full of flavour. It’s the kind of dish you can throw together earlier in the day, forget about, and then lift the lid to a proper home‑cooked dinner that feels like you’ve made an effort, even though the slow cooker has quietly done it all for you. However you choose to serve it – with mash, rice or a pile of greens – it’s a simple, dependable recipe you’ll find yourself coming back to whenever you want something cosy and fuss‑free.
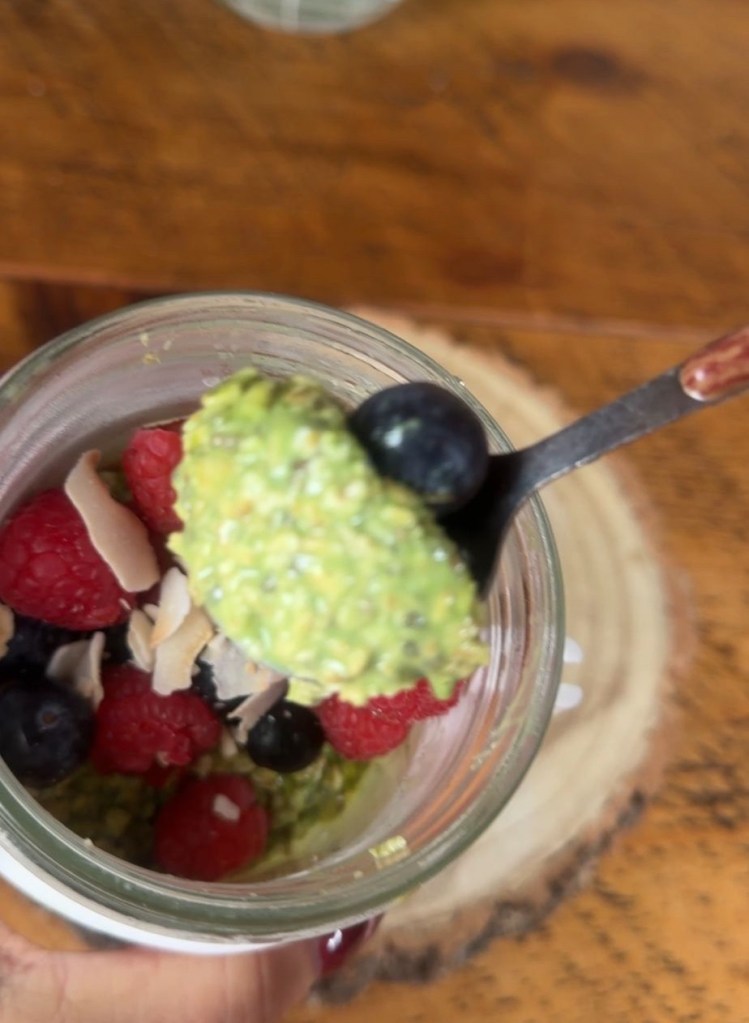
Some mornings I wake up already thinking about breakfast. On busy days, though, I need something that feels like a little hug in a bowl but doesn’t ask much of me at 7am. That’s exactly why I love these Matcha Berry Overnight Oats.
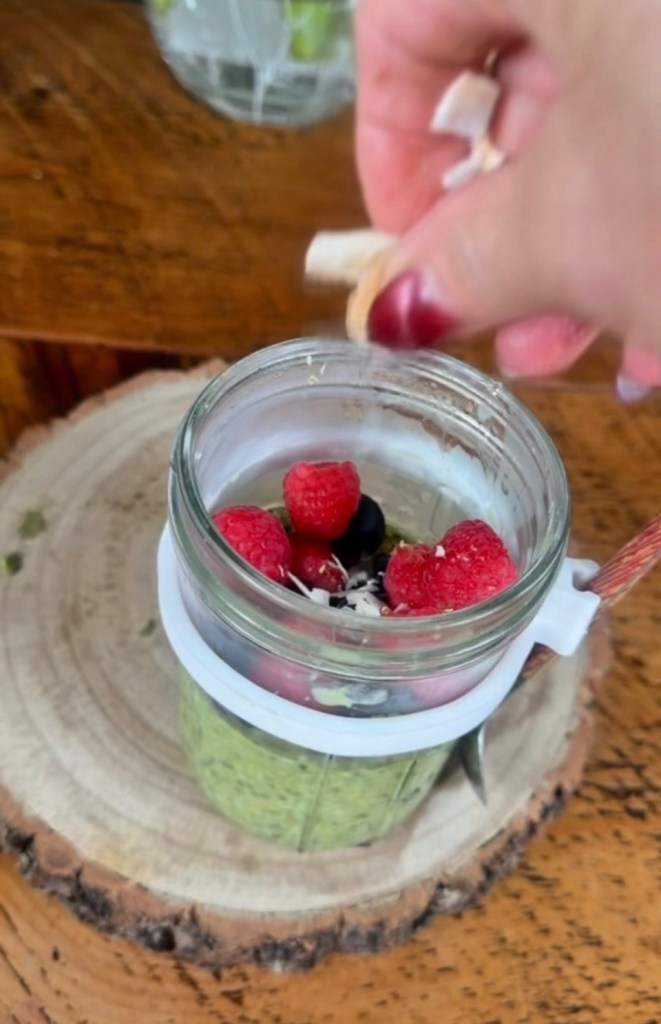
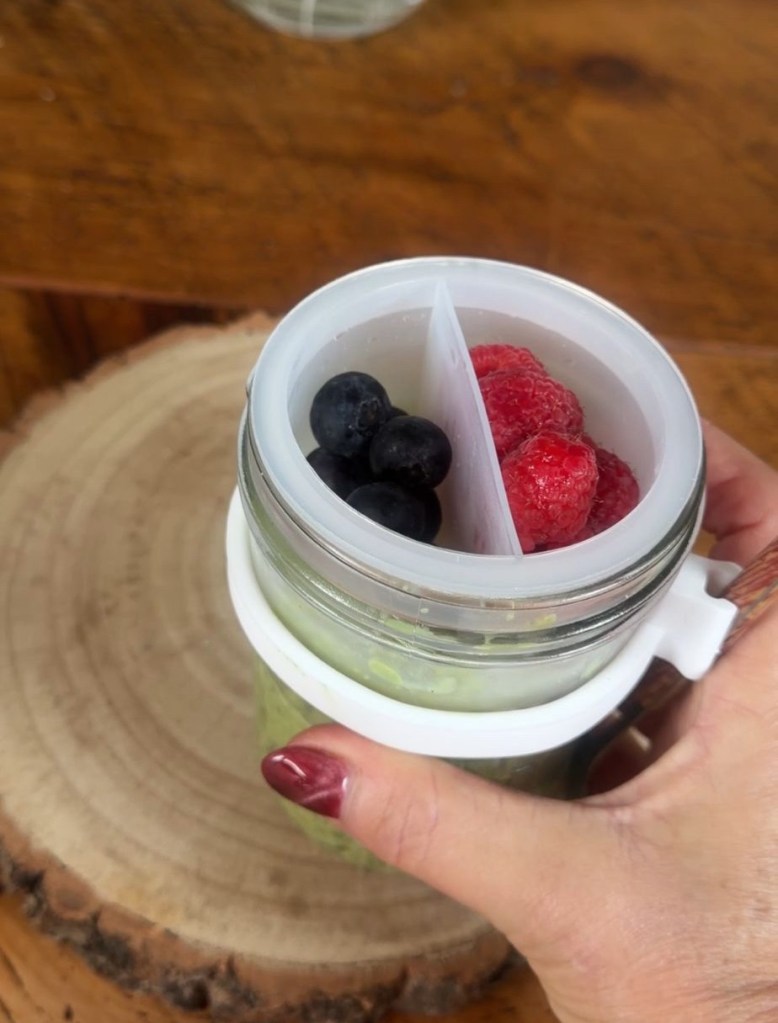
They’re creamy, gently sweet, and feel like a café treat, but all the work happens the night before when you’ve got a bit more brain power. I also love that they look beautiful – that pale green matcha base with pops of blueberries and raspberries on top. It’s the sort of breakfast that makes you pause for a moment, even if you’re rushing out the door. You just pull the jar from the fridge, stir, and you’ve instantly got something satisfying, nourishing and a tiny bit fancy.
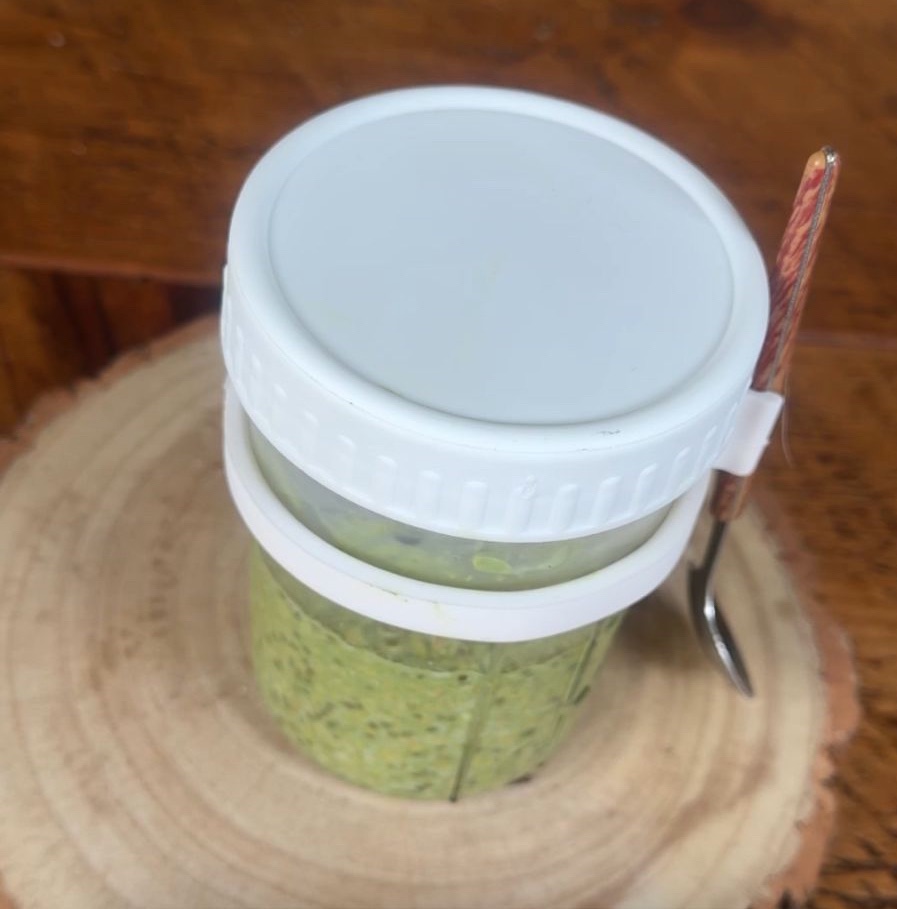
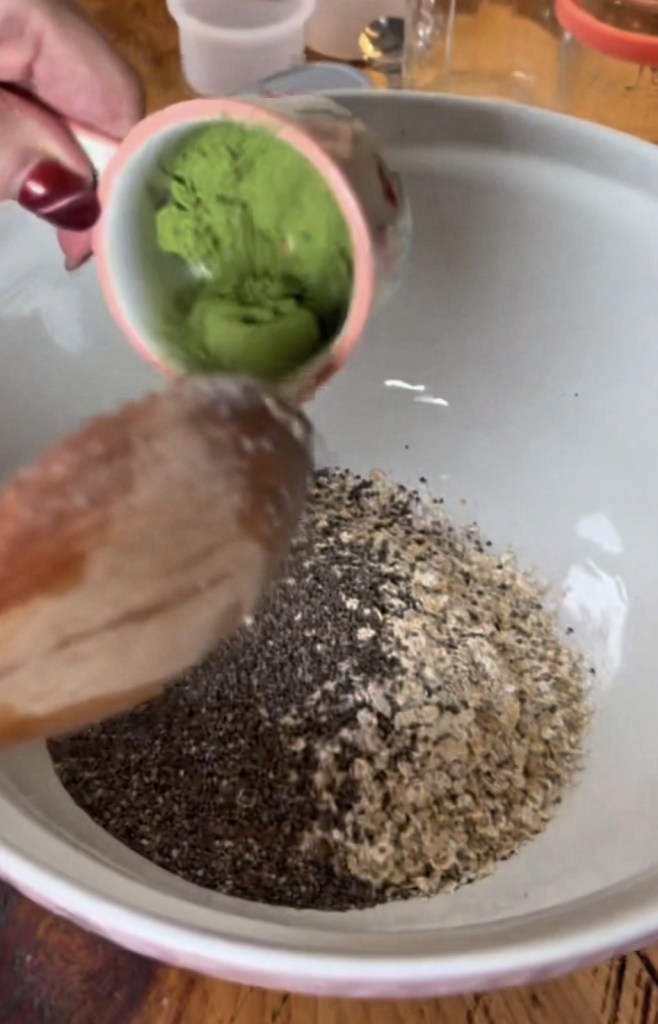
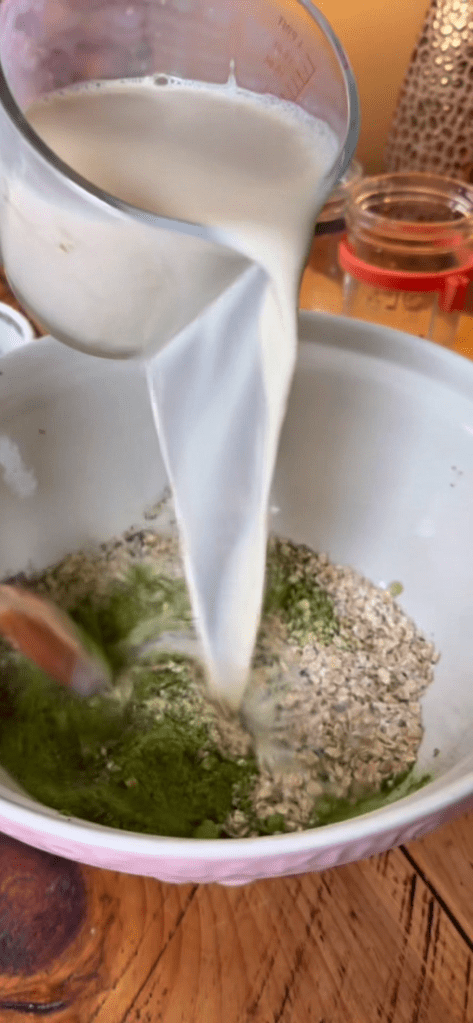
What you’ll need For one generous portion: • 160 ml skimmed milk (or any milk you like – oat, almond, soy all work beautifully) • 70 g rolled oats • 1 tsp matcha powder • 1 tbsp chia seeds • 2 tsp pure maple syrup • Pinch of salt • 30 g blueberries (a small handful) • 30 g raspberries (a small handful) • 1 tbsp flaked almonds You’ll also need a jar or lidded container – something you’re happy to shake or stir and pop straight into the fridge. I used these from Amazon which are brilliant as the have a separate container for fruit or toppings
How to make Matcha Berry Overnight Oats In the evening, when you’re pottering around the kitchen after dinner, take five quiet minutes for tomorrow-you.
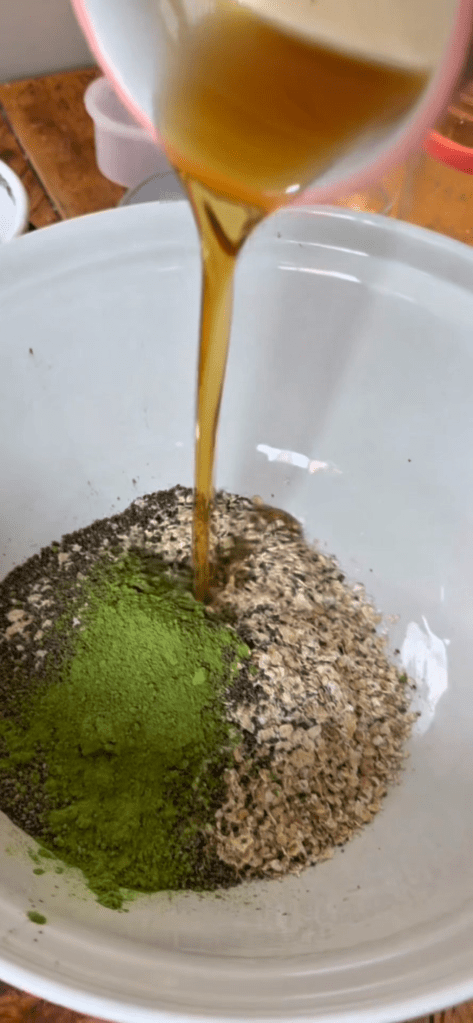
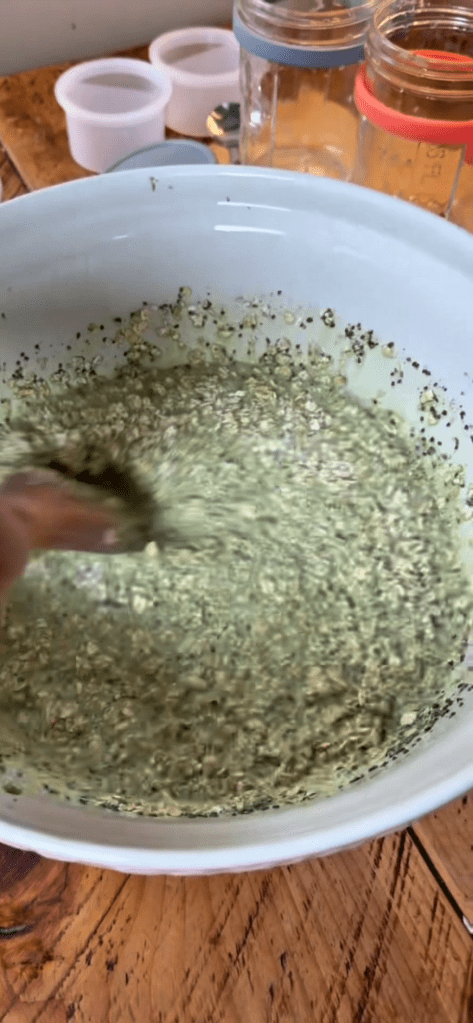
Add all the ingredients to the bowl and stir well.
The chia will look like it’s not doing much at this stage, but overnight it will swell and thicken everything into a pudding‑like texture.
Taste the mixture – if you prefer things sweeter, add an extra drizzle of maple syrup. If you like a stronger matcha flavour, you can add an extra half teaspoon.
Transfer to jars Pop the lid on and tuck it into the fridge for at least 4 hours, but ideally overnight.
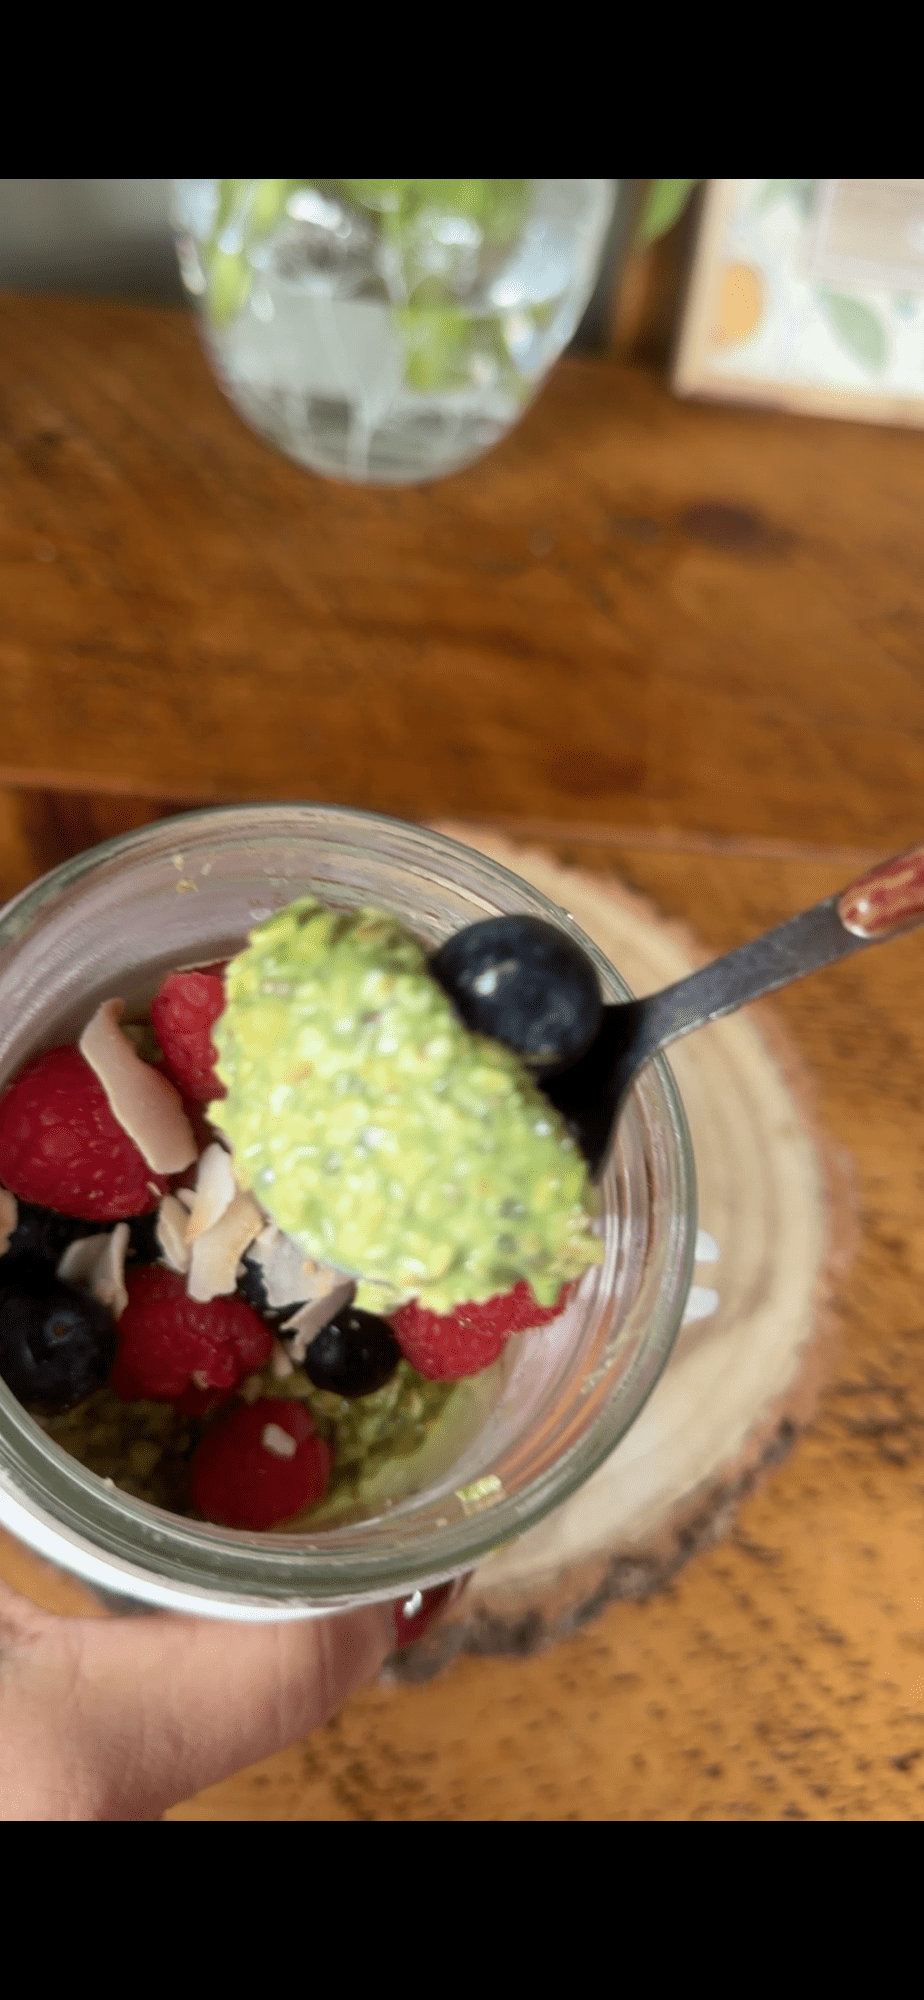
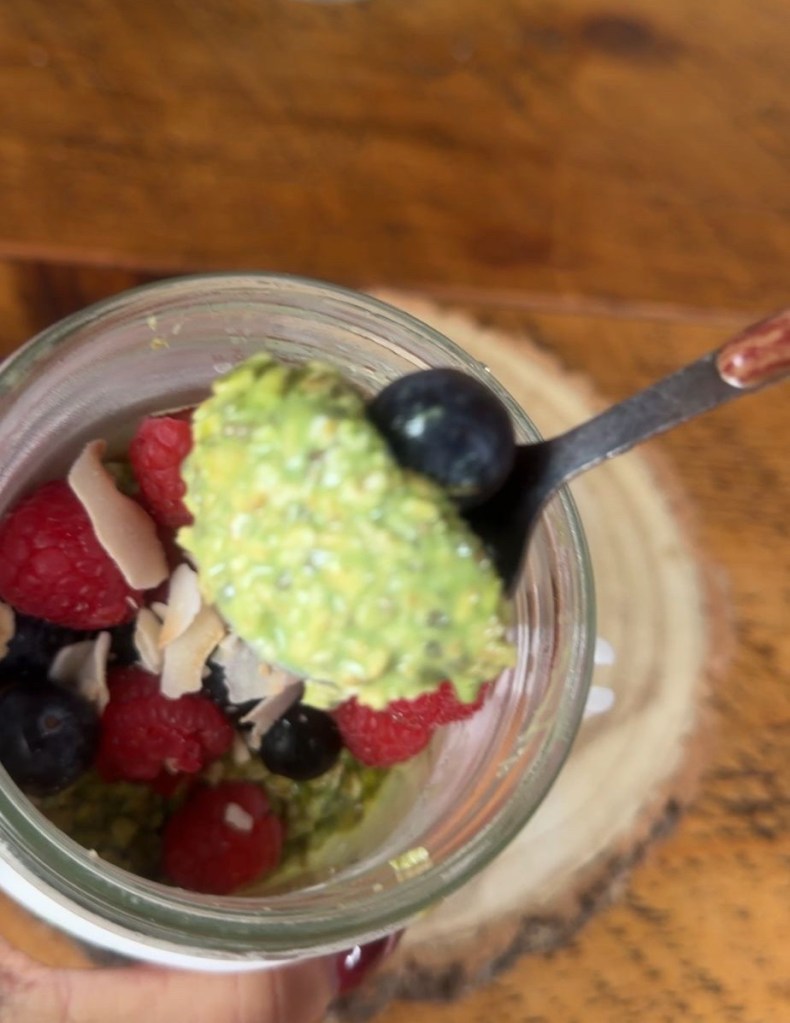
In the morning, give the oats a stir. They should be thick, creamy and spoonable.
Top with the blueberries, raspberries and flaked almonds. You can enjoy it cold straight from the jar, or let it sit out for 10–15 minutes if you prefer it closer to room temperature. It’s the kind of breakfast that feels like it took effort, but really, you barely did anything.
Let’s talk health benefits This bowl isn’t just pretty – it’s packed with ingredients that quietly support your body in lots of helpful ways. Oats: slow, steady energy Rolled oats are rich in complex carbohydrates and soluble fibre, particularly beta‑glucan. That means they digest slowly, helping to keep your blood sugar more stable and your energy levels steady through the morning. Many people find that a good portion of oats keeps them full for hours, which can help reduce mid‑morning snacking and support a more balanced appetite across the day.
Oats are also a gentle friend to your heart. The fibre they contain has been linked to helping maintain healthy cholesterol levels. On days when everything feels a bit chaotic, knowing you’ve at least given your body something solid and supportive can feel strangely grounding. Matcha: calm focus in a cup (or jar) Matcha isn’t just trendy green powder; it’s finely ground green tea leaves, so you’re consuming the whole leaf rather than just an infusion. That means a gentle dose of caffeine paired with an amino acid called L‑theanine. Together, they’re often described as giving calm, focused energy rather than the jittery buzz from coffee. A matcha breakfast can be especially lovely on busy mornings when you want to feel awake but not wired. Many people enjoy matcha for its antioxidant content too, particularly catechins such as EGCG, which are being studied for their potential benefits for cell protection and overall health.
Chia seeds: tiny powerhouses Chia seeds are tiny, but they bring a lot to the table: fibre, plant‑based omega‑3 fats, and a bit of protein. When they sit in liquid, they swell and create that thick, pudding‑like texture, which helps your breakfast feel more filling and satisfying. The combination of fibre and healthy fats can support digestion and help keep you fuller for longer. If you’re someone who often feels hungry again soon after breakfast, the addition of chia seeds can make a noticeable difference. Berries: colour, flavour and antioxidants The blueberries and raspberries aren’t just there to make things Instagram‑worthy. They add natural sweetness, a little tartness, and an array of vitamins and plant compounds. Berries are known for being rich in vitamin C and various antioxidants, which may help support immune function and protect cells from everyday wear and tear. They also add a lovely contrast in texture: juicy bites against the creaminess of the oats. That mix of textures can make a simple breakfast feel much more indulgent and satisfying. Almonds: crunch and healthy fats The flaked almonds on top bring a gentle crunch and a soft, nutty flavour that works beautifully with the matcha. Almonds offer healthy monounsaturated fats, a bit of protein, and some vitamin E. Together with the oats and chia, they help round out the bowl so you’re getting a satisfying mix of carbohydrates, fats and protein. This balance is one of the reasons this recipe works so well as a “grab and go” option – you’re less likely to crash a couple of hours later.
Ways to make it your own One of my favourite things about overnight oats is how forgiving they are. Once you’ve nailed the basic formula, you can play: • Swap the milk: Try oat milk for extra creaminess or almond milk for a nuttier taste. • Change the sweetener: Use honey, agave or even mashed ripe banana instead of maple syrup. • Add extra protein: Stir in a scoop of protein powder or a dollop of Greek yoghurt before chilling. • Play with toppings: Coconut flakes, cacao nibs, sliced strawberries or a spoon of nut butter all work beautifully with the matcha and berry flavours. Think of this recipe as your base canvas – you can tweak it to match your mood, your macros, or whatever you happen to have lingering in the fridge.
A gentle nudge to try it If mornings are usually a blur for you, consider this your sign to take five minutes tonight and set yourself up with something nourishing for tomorrow. There’s something very comforting about opening the fridge and seeing a jar of breakfast already waiting for you – like a little reminder that you looked after yourself in advance. If you do make these Matcha Berry Overnight Oats, notice how you feel afterwards: Do you stay fuller for longer? Do you feel calmer and more focused than after your usual breakfast? Those small shifts are often where the real magic is.
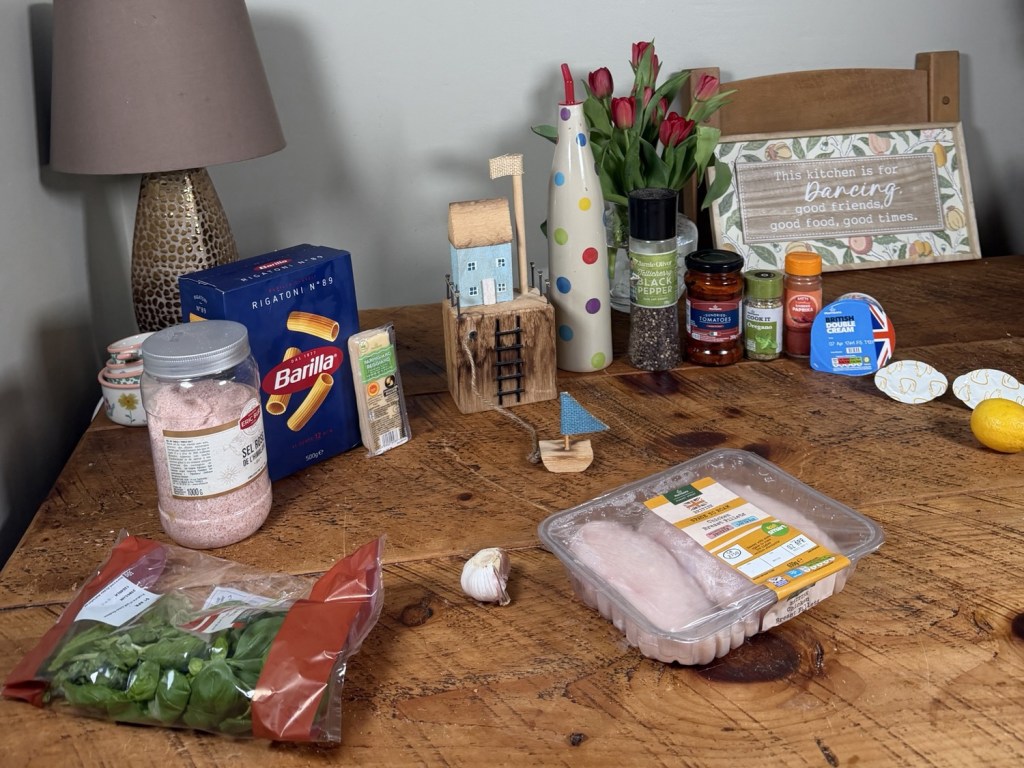
You know those pastas that are so good they go a bit quiet at the table because everyone’s too busy eating? That’s exactly the vibe with this Marry Me Chicken Rigatoni. It’s rich and creamy, but still bright and tangy, with juicy chicken, sun-dried tomatoes, garlic and Parmesan all wrapped around chunky rigatoni that catches every last bit of sauce. It looks like something you’d order out, but it’s actually just a big cosy one-pan pasta that you can absolutely pull off on a weeknight. This is the kind of recipe that quickly becomes a “signature dish” – perfect for at-home date nights, having friends round, or just spoiling yourself after a long day. The sauce comes together in the same pan you cook the chicken in, which means all those golden, flavour-packed bits on the bottom get whisked into the sauce. The rigatoni is important: the ridges and tubes hold the sauce beautifully so you’re never stuck with dry pasta and a puddle of sauce at the bottom of the bowl. Add some garlic bread and a glass of something nice and you’re fully in “fakeaway Italian restaurant” territory.
This is a proper cosy one‑pan pasta, so once you start, everything happens in the same dish – minimal effort, maximum comfort.
• Salt and black pepper • 1 tbsp olive oil • 3 garlic cloves, finely chopped • 60–80 g sun‑dried tomatoes in oil, drained and finely chopped • 1 tsp dried oregano • 1 tsp paprika • 250 g dried pasta (penne/spirals/rigatoni all good) • 600–650 ml chicken stock • 150 ml double cream • 40–50 g grated Parmesan cheese • Optional: pinch of chilli flakes, handful of fresh basil, squeeze of lemon
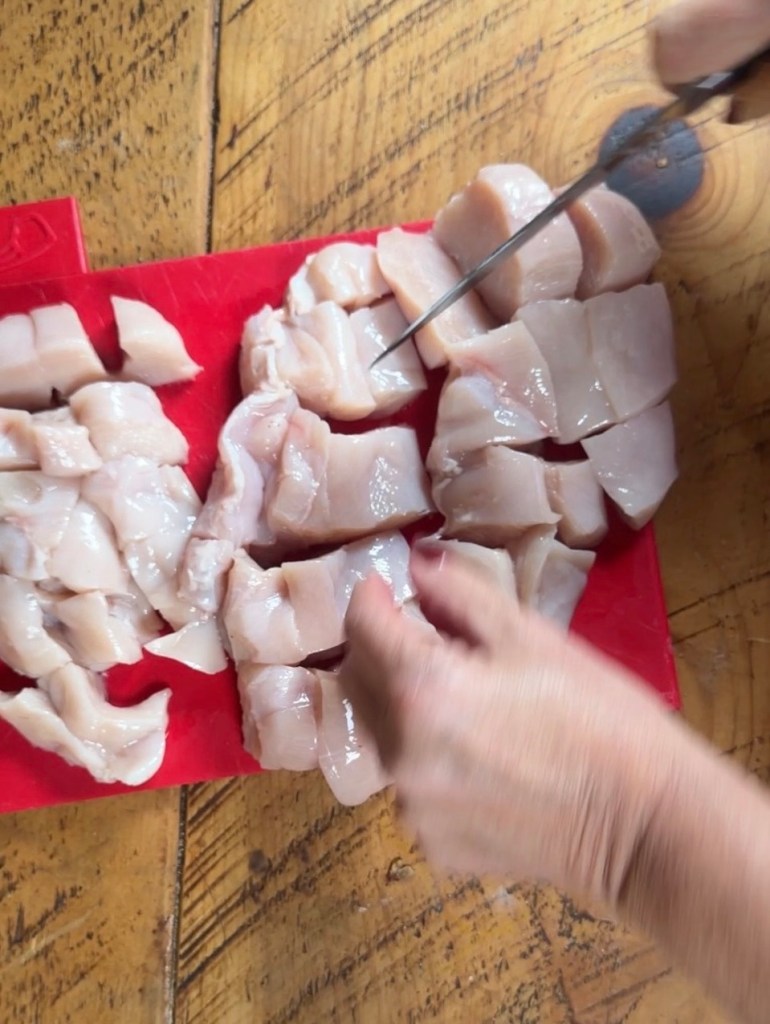
Season and brown the chicken Season your chicken pieces generously with salt and pepper. Heat the olive oil in a large deep frying pan or casserole over medium–high heat, then add the chicken and fry for about 5 minutes until it’s starting to colour on all sides. You don’t need it fully cooked yet, just nicely sealed and golden in places.
Build the flavour base Reduce the heat slightly so nothing burns. Add the chopped garlic, sun‑dried tomatoes, dried oregano and paprika straight into the pan with the chicken. Stir everything together and let it cook for 2–3 minutes until it smells amazing, the garlic has softened and the spices are toasty and fragrant.
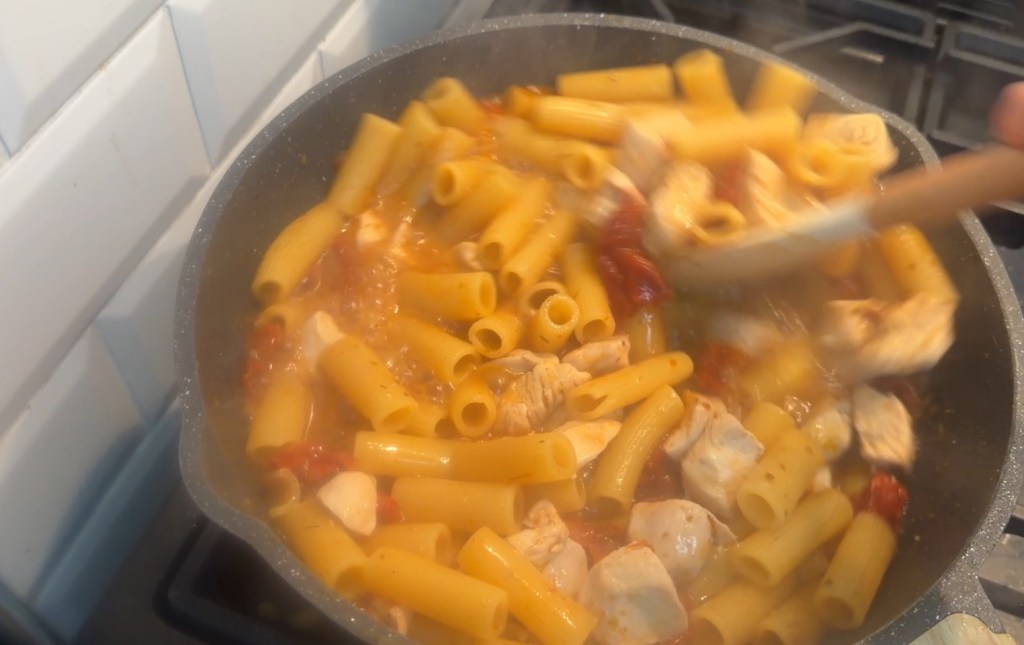
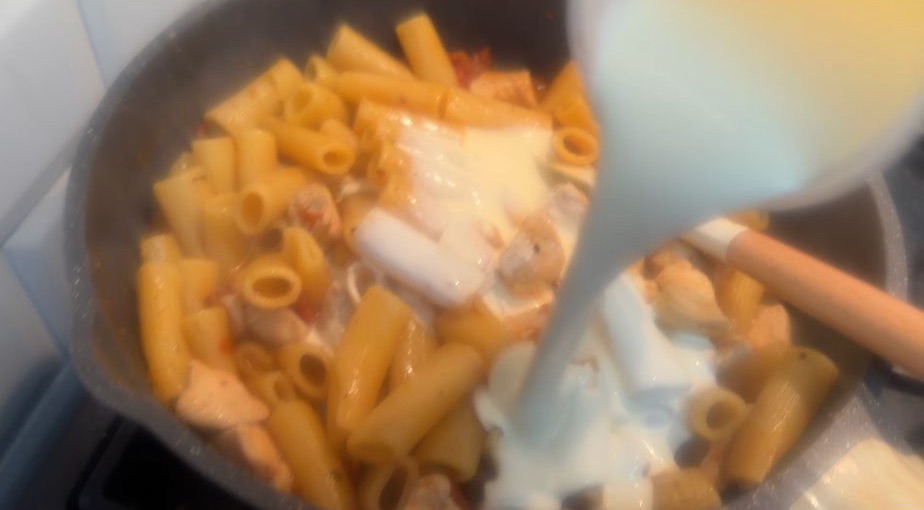
Add dry pasta and stock Tip the dry rigatoni straight into the pan with the chicken and flavour base. Pour in the chicken stock and stir well so the pasta is mixed through and everything is mostly submerged. Bring it up to a gentle boil, then lower the heat to a steady simmer.
Let the pasta cook in the pan Pop a lid on and cook for about 10–12 minutes, stirring occasionally so the pasta doesn’t stick to the bottom. The rigatoni will slowly soak up the stock and all those garlicky, tomato‑y flavours. You’re aiming for the pasta to be al dente and most of the liquid to be absorbed.
5. Add the cream and thicken the sauce Pour in the double cream and stir it through. Simmer for a further 2–3 minutes, lid off, until the sauce turns thick, silky and glossy, coating the pasta and chicken. If it looks too thick at any point, splash in a bit more stock or water to loosen it.
6. Finish with Parmesan, chilli and basil Take the pan off the heat and stir in the grated Parmesan until it melts into the sauce. Add chilli flakes for a gentle kick, then stir through the fresh basil. If you like a bit of brightness against the richness, squeeze in a little lemon juice and give it all a good mix.
Taste, tweak and serve Taste and adjust the seasoning – a little more salt, pepper or chilli if you think it needs it. Serve straight from the pan into warm bowls, topping each portion with extra Parmesan and a few basil leaves for that “wow” moment.
Little tips and serving ideas • A simple green salad or some steamed greens on the side balances the richness really nicely. • Garlic bread or crusty bread is perfect for mopping up any leftover sauce in the pan. • Leftovers reheat well – just add a splash of water or cream when you warm it through so the sauce loosens up again. Make this once and it’s very likely to become your signature pasta – the one people ask for again and again, and the one you know you can always rely on when you want maximum flavour with minimum faff.
If you make this One‑Pan Marry Me Chicken Rigatoni, let me know how it goes – I love hearing if it got any “marry me” reactions at the table! Save or pin this recipe so you’ve got it ready for your next cosy pasta night, and if you share it on social, tag me so I can see your version. And if creamy, one‑pan comfort food is your thing, stick around – there are plenty more easy, feel‑good dinners coming your way.
Shopping links – a small commission may be paid to me