If you’ve been scrolling through social media lately, you’ve probably seen everyone obsessing over dessert-inspired breakfasts. And honestly? Same. There is absolutely no reason why we shouldn’t be enjoying the flavours of a luxurious Italian dessert first thing in the morning
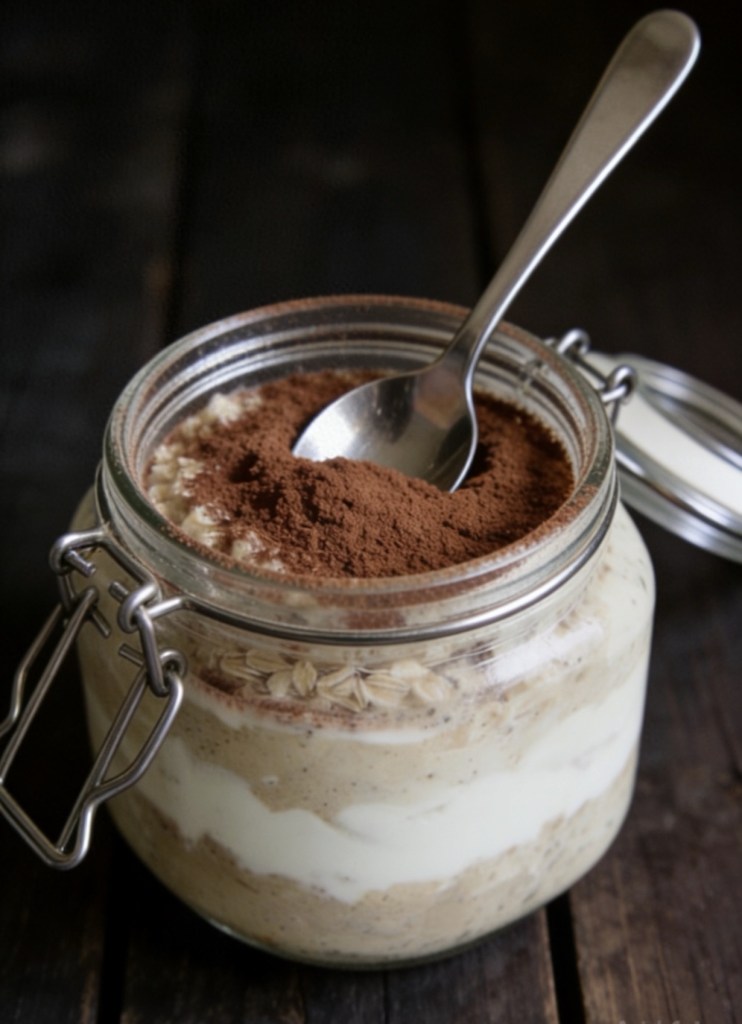
Enter these Tiramisu Overnight Oats.
This recipe gives you all the rich, coffee-soaked, creamy goodness of a traditional tiramisu, but it’s packed with protein and complex carbs to keep you full until lunch. It takes less than 5 minutes to prep the night before, meaning you can roll out of bed and immediately dive into breakfast bliss.
Why You’ll Love This Recipe
Zero Cooking Required: Just mix, layer, and chill.
The Ultimate Coffee Kick: It uses real espresso or strong brewed coffee to wake you right up.
Meal-Prep Friendly: Make a few jars on Sunday night and breakfast is sorted for the week.
Healthy but Decadent: It feels like a massive treat, but it’s actually a macro-friendly, wholesome breakfast.
The Ingredients (UK Measurements)
Here is everything you need to grab from the cupboard and fridge to make one single-serve pudding pot.
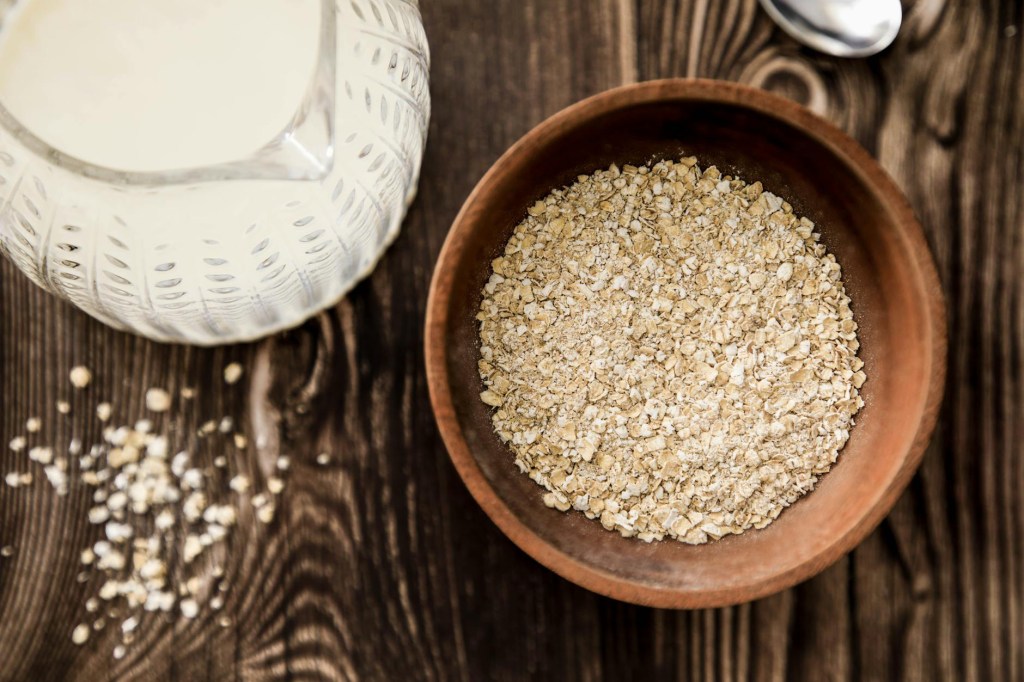
For the Oat Base:
45g porridge oats (rolled oats work best for texture)
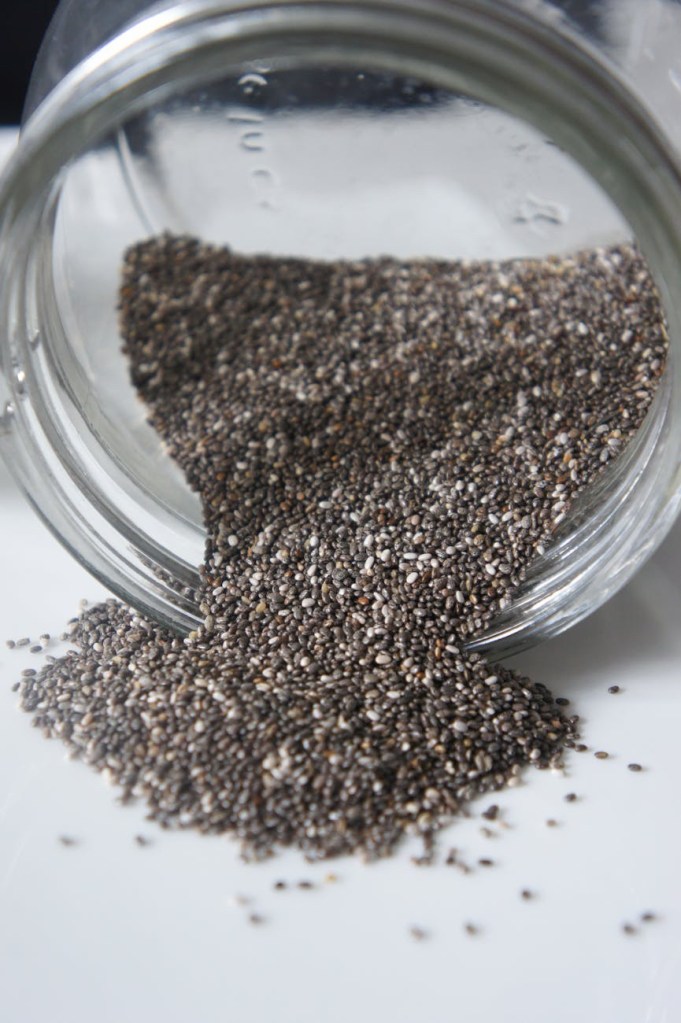
1 tbsp chia seeds (essential for getting that thick, pudding-like consistency)
60ml strong brewed coffee or espresso (make sure it has cooled down slightly)
120ml milk of choice (oat, almond, or dairy milk all work beautifully)
1 tbsp maple syrup (or honey/agave)
1 tsp vanilla extract
For the Cream Layer:
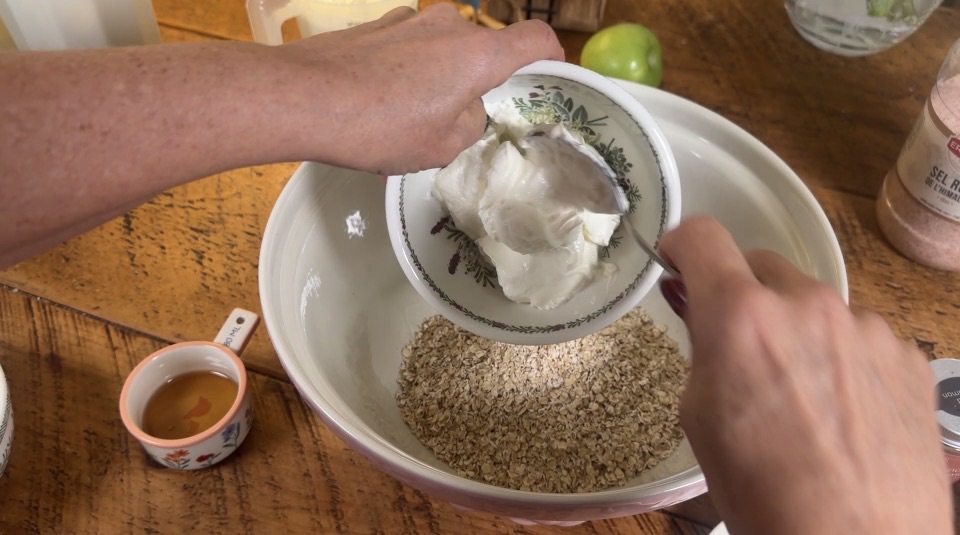
80g vanilla Greek yoghurt (For an authentic twist, you can mix 1 tbsp of mascarpone cheese straight into plain Greek yoghurt instead!)
1 tsp maple syrup
For the Topping:
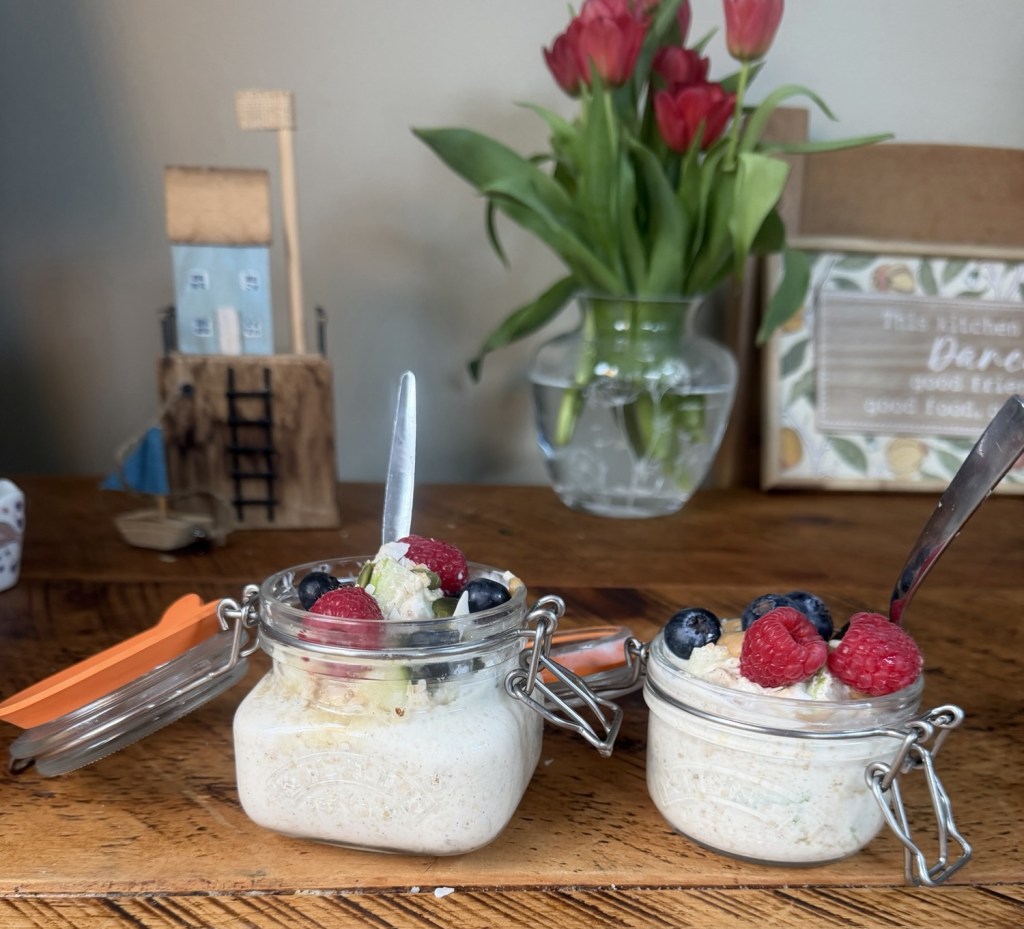
1 tsp unsweetened cocoa powder (for that classic dusty tiramisu finish)
Step-by-Step Method
1. Mix the Base
In a bowl or directly into your jar, combine the porridge oats, chia seeds, cooled coffee, milk, maple syrup, and vanilla extract. Stir thoroughly to make sure the chia seeds are well distributed and don’t clump together.
2. The First Chill
Pop the lid on your container and place it in the fridge for at least 4 hours, though overnight is ideal. This gives the oats and chia seeds time to soak up all that glorious coffee flavour and thicken up.
3. Whip the Cream Layer
In a small separate bowl, mix your vanilla Greek yoghurt (or your yoghurt and mascarpone blend) with a teaspoon of maple syrup until perfectly smooth.
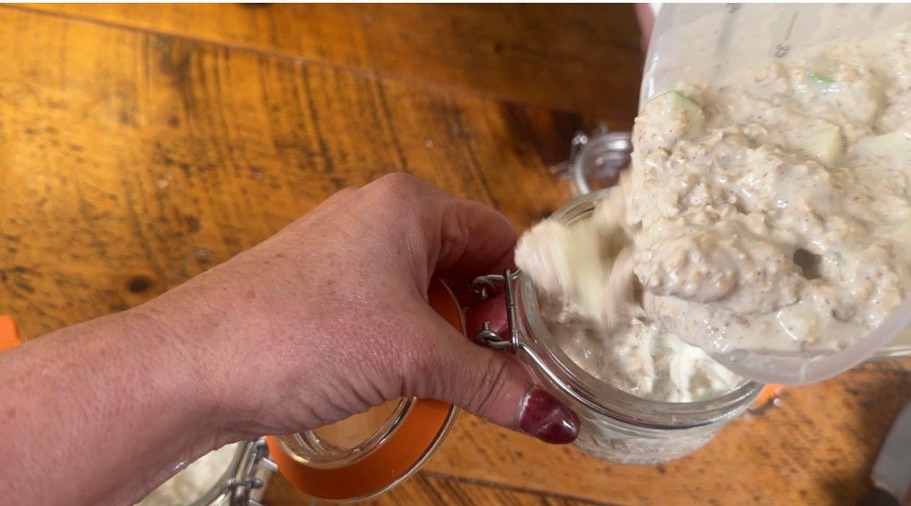
4. Layer and Assemble
Take your chilled oats out of the fridge. Smooth the sweet yoghurt mixture evenly over the top of the oats to create that iconic distinct white layer.
5. The Grand Finale
Right before you grab your spoon, grab a small sieve and dust the top generously with cocoa powder.
💡 Top Tip: Don’t dust the cocoa powder on the night before! It will absorb moisture from the yoghurt layer in the fridge and go a bit soggy. Always dust it fresh right before you eat.
Variations & Substitutions
Boost the Protein: Stir half a scoop of vanilla or blonde-chocolate protein powder directly into the oat base before chilling (you may need to add an extra splash of milk if it gets too thick).
Make it Vegan: Use a plant-based milk (like soy or oat) and swap the Greek yoghurt for a thick vanilla coconut or soy yoghurt.
Extra Indulgence: Grate a little bit of dark chocolate over the cocoa powder layer for an extra bit of crunch and luxury.

If you tried this recipe, let me know how you liked it in the comments below! Don’t forget to tag me in your breakfast photos on Instagram and TikTok.
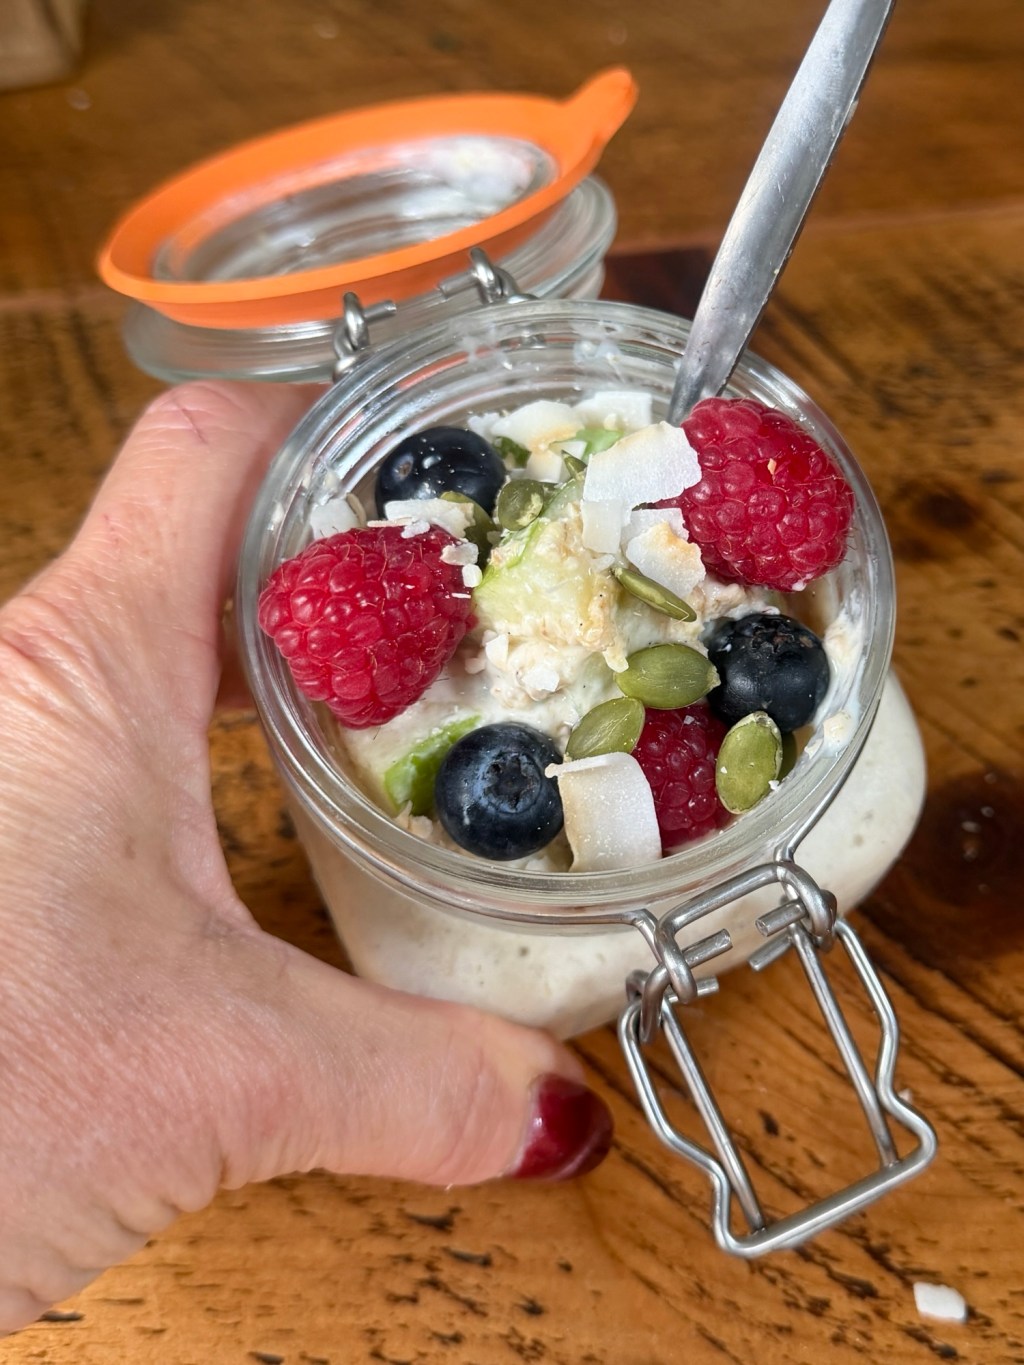
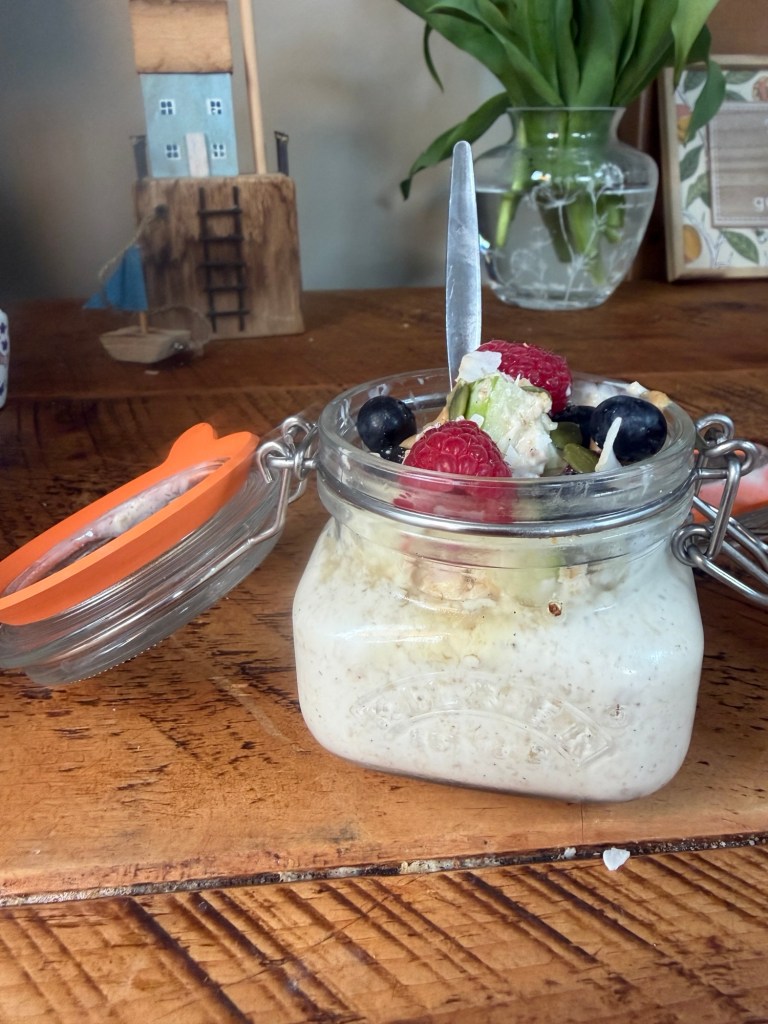
These jars are fab for oats on the go so no spillages on the way to work or college
This post may contain affiliate links, which means I may earn a small commission if you purchase through them — at no extra cost to you. As an Amazon Associate, I earn from qualifying purchases