If you are tired of spending £3+ on individual store-bought energy bars that are secretly loaded with artificial sweeteners and preservatives, you are in the right place.
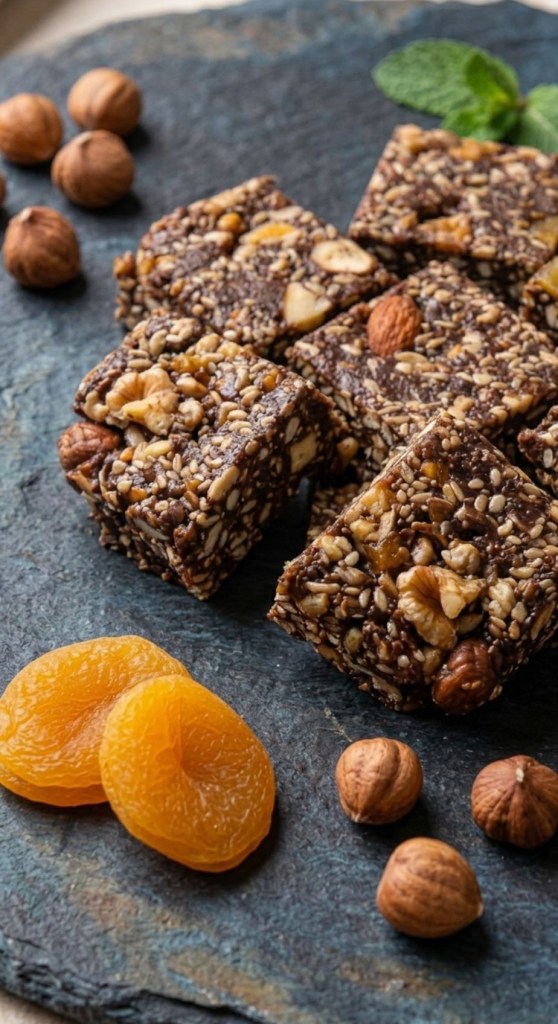
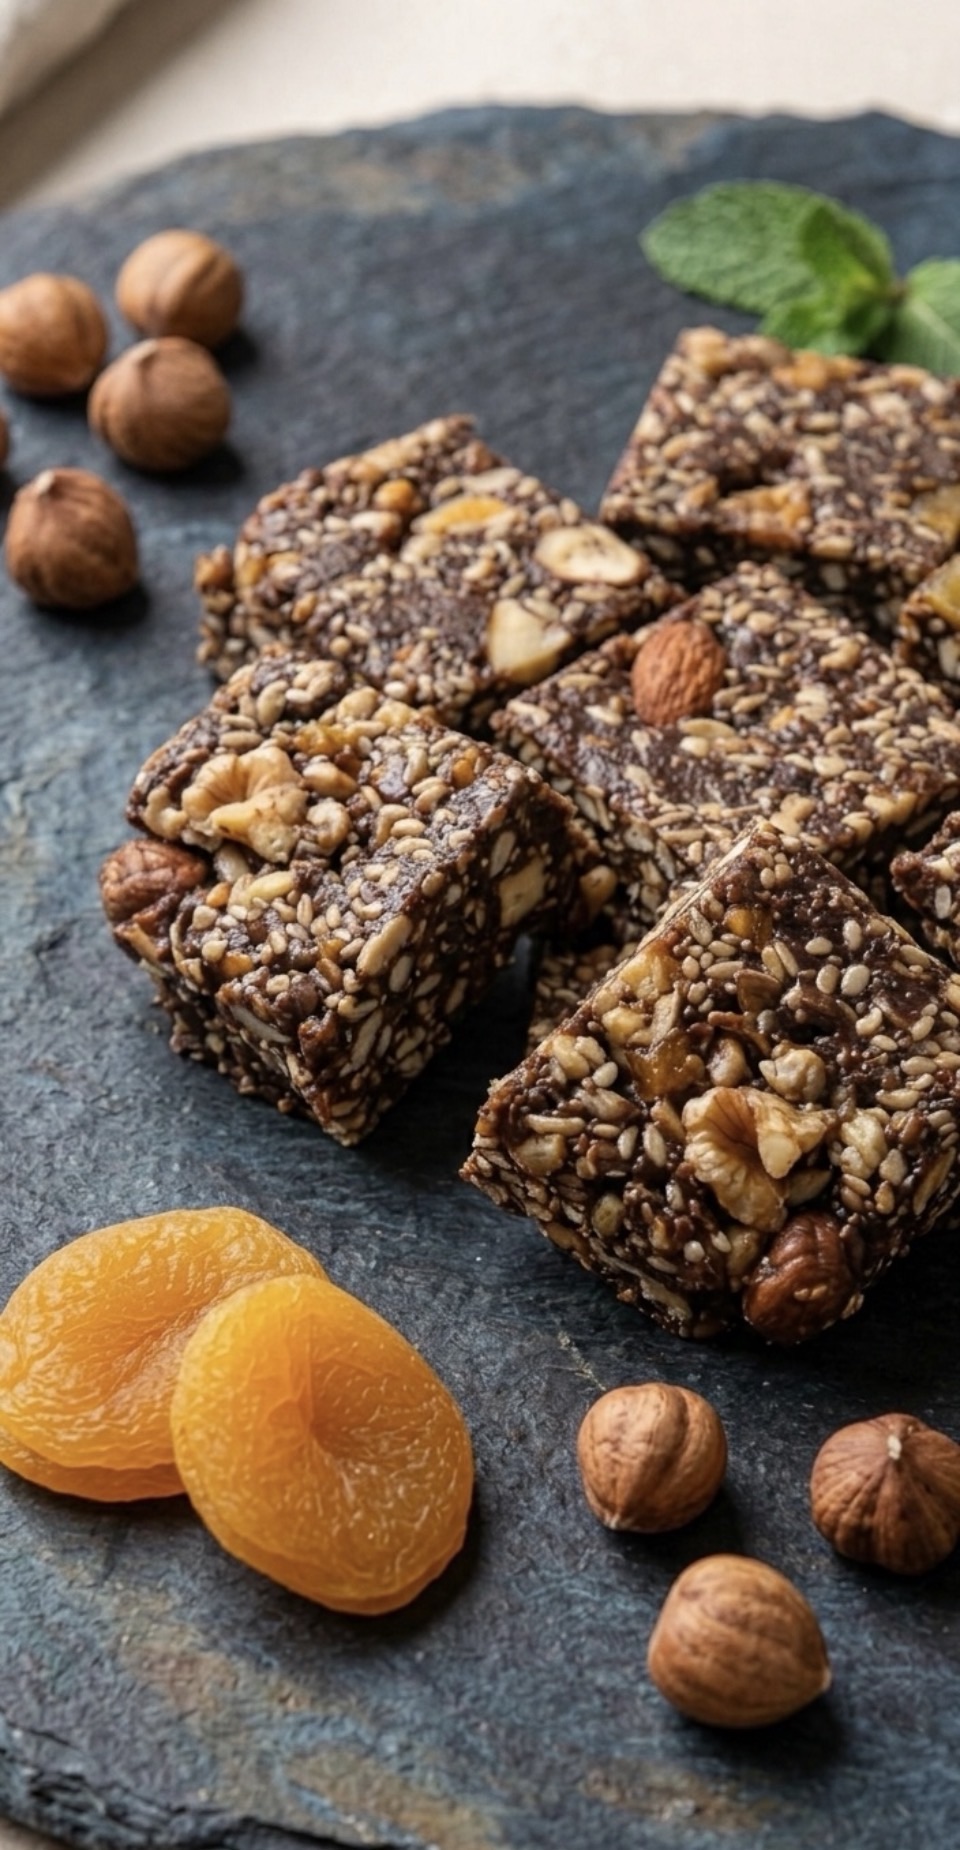
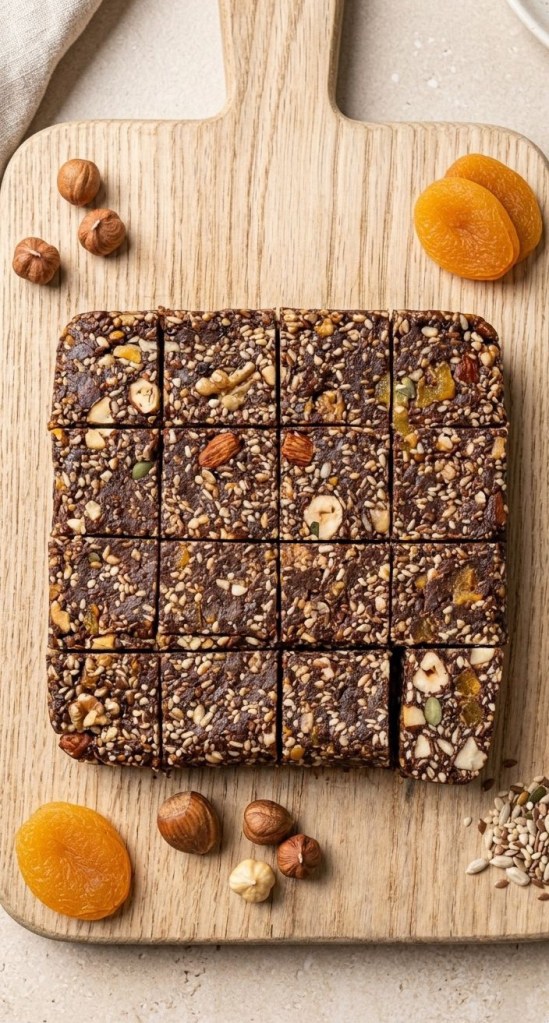
These homemade Apricot and Chocolate Bars are the ultimate healthy snack solution. They are rich, fudgy, and packed with satisfying crunch, tasting remarkably like chocolate fudge—but made entirely from wholesome, unrefined ingredients.
The best part? There is absolutely no baking required. You just need a food processor, 5 minutes of prep time, and a little bit of patience while they set in the freezer.
Let’s dive into why these will become your new weekly meal prep staple!
Why You’ll Love This Recipe
100% No-Bake: No need to turn on the oven. Perfect for quick prep.
Budget-Friendly: Makes 16 bars for a fraction of the price of store-bought alternatives.
Packed with Whole Foods: Healthy fats from the nuts, natural sweetness from the fruits, and antioxidants from the pure cocoa.
Family Friendly: A brilliant, nut-heavy lunchbox snack or midnight sweet-tooth fix.
Equipment Needed
Food processor
20cm (8in) square cake tin
Cling film
Sharp knife
Ingredients
Here is everything you need to grab from the cupboard:
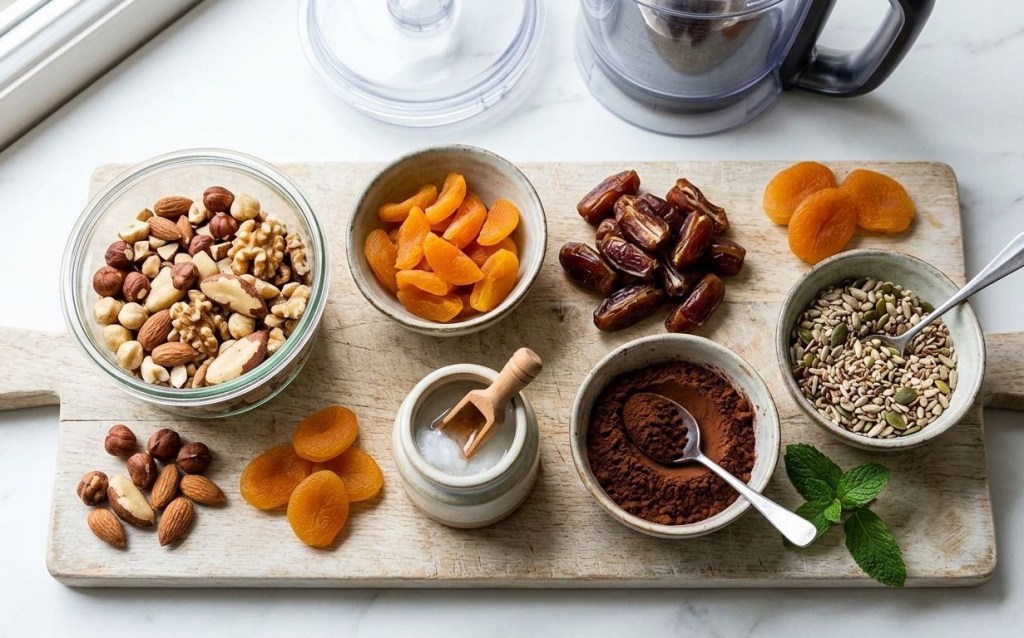
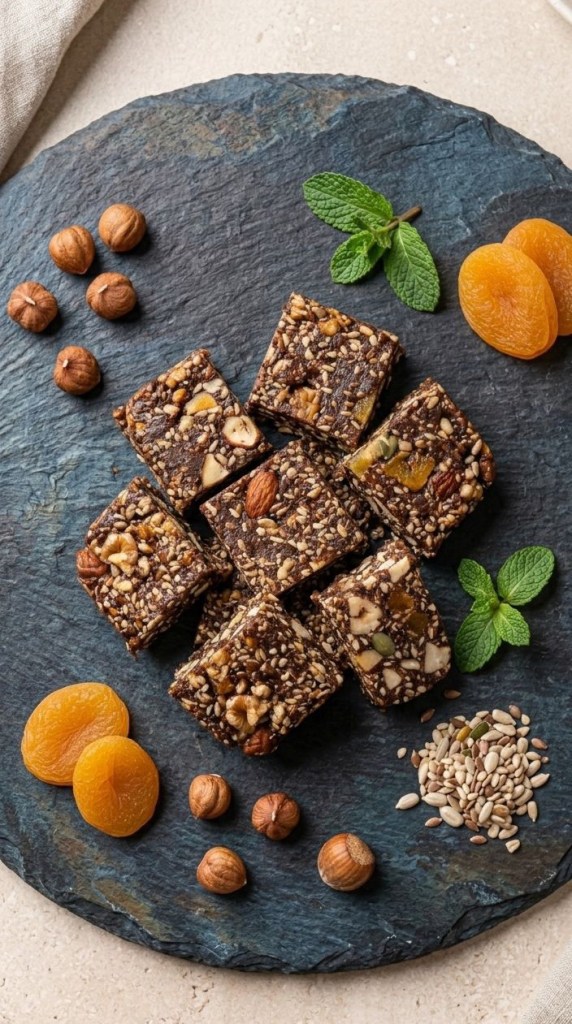
150g mixed nuts (such as almonds, hazelnuts, Brazil nuts, and walnuts), roughly chopped
150g ready-to-eat dried apricots, quartered
200g soft pitted dates, quartered
50g coconut oil
3 tbsp pure cocoa powder
3 tbsp mixed seeds (such as sunflower, pumpkin, sesame, and flax)
Step-by-Step Method
Step 1: Prep the Tin
Line your 20cm square cake tin with cling film, ensuring you leave plenty of excess overhanging the sides. This makes it incredibly easy to lift the bars out later.
Step 2: Blitz the Nuts
Put your mixed nuts into the food processor. Blitz until they are finely chopped, but do not grind them into a powder. You want to keep those distinct pieces to give the bars a lovely, satisfying crunch. Tip the chopped nuts into a separate bowl and set aside.
Step 3: Create the Fruit Paste
Add the quartered apricots and dates into the food processor. Blend them together until they form a thick, sticky paste. Again, don’t let it get completely smooth—a little texture is a good thing here!
Step 4: Bring It All Together
Return the chopped nuts to the food processor along with the coconut oil, cocoa powder, and mixed seeds. Blend until the mixture clumps together into a unified paste. (Tip: You may need to stop the processor once or twice to push the mixture down from the sides with a spatula).
Step 5: Press and Freeze
Spread the chocolate paste evenly over the base of your lined tin, smoothing the surface with the back of a spoon or your spatula. Fold the overhanging cling film over the top to cover it completely. Pop the tin into the freezer for 30 to 60 minutes, or until it feels completely solid.
Step 6: Slice and Store
Take the tray out of the freezer, unwrap it, and place the block onto a chopping board. Using a sharp knife, cut into 16 equal squares.
How to Store Your Bars
No To keep your Apricot and Chocolate bars fresh and fudgy, transfer them to a lidded airtight container.
Top Tip: Interleave the layers with sheets of baking paper (parchment paper). Because these bars are unrefined and contain coconut oil, they will stick together if they touch. Store the container in the fridge to keep them perfectly firm!
Variations & Swaps
Nut-Free Option: Swap the mixed nuts for oats or extra pumpkin and sunflower seeds if making them for a nut-free school run.
Fruit Swaps: If you aren’t a fan of apricots, dried figs or sultanas work beautifully as a direct substitute.
Did you make this recipe? Let me know how they turned out in the comments below, or tag me in your recipe photos on Instagram!