Tag: meal prep

  • The Best Cheesy Chicken Fajita Bake You’ll Ever Make! ðŸ§€ðŸ”¥

    The Best Cheesy Chicken Fajita Bake You’ll Ever Make! ðŸ§€ðŸ”¥

    Looking for a dinner that feels like a treat but takes minimal effort? If you’re anything like me, you’re always on the hunt for those “set it and forget it” meals that don’t skimp on flavor. Well, grab your oven mitts, because I’ve found your new go-to.

    This 50g Protein Cheesy Chicken Fajita Bake is seriously a game-changer. It’s got that classic fajita kick, all the melty, gooey cheese you could ever want, and it’s all made in one single baking dish. Less washing up? Yes, please!

    Why You’ll Love This Recipe

     Protein-Packed: With roughly 50g–55g of protein per serving, it’s a perfect post-gym meal or just a solid way to hit your macros while enjoying dinner.

     Minimal Effort: Seriously, it’s just seasoning, tossing, and baking.

     Crowd Pleaser: Even the pickiest eaters seem to love the combo of peppers, onions, and plenty of melted cheddar.

    What You’ll Need

    This recipe serves two, so it’s perfect for a quick dinner for two or easy meal prep for the next day.

    Ingredients
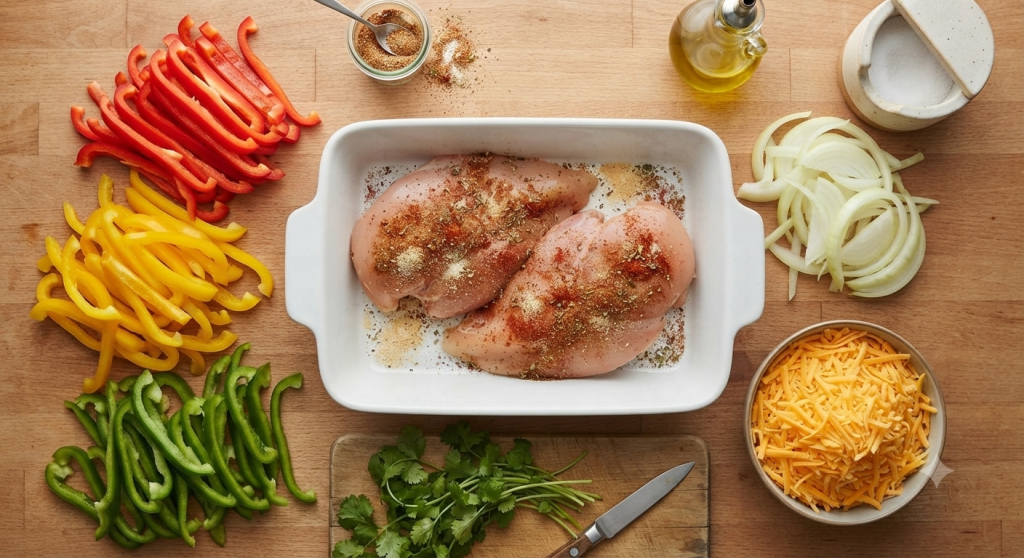
     Chicken: 2 boneless, skinless chicken breasts (approx. 450g–500g).

     Seasoning: 2 tbsp fajita seasoning.

     Veggies: 1 green bell pepper (or capsicum), 1 yellow bell pepper, 1 red bell pepper, and 1 medium yellow onion. Slice them all into nice, even strips.

     Cheese: 2 cups (approx. 200g–225g) shredded mature cheddar cheese.

     Garnish: 1 tbsp fresh chopped coriander (cilantro) to brighten it all up at the end.

    How to Make It

    1. Prep the Oven: Get your oven preheated to 190°C (375°F).

    2. Season the Chicken: Arrange your chicken breasts in a baking dish. Make sure they’re in a single layer. Sprinkle that fajita seasoning evenly over both sides—don’t be shy with it!

    3. Toss the Veg: In a separate bowl, toss your sliced peppers and onions together. Spread them out over the chicken in the baking dish.

    4. The Good Part: Sprinkle the shredded cheddar evenly over the top of the peppers and onions.

    5. Bake: Pop it in the center of the oven and bake for 30–40 minutes. You’re looking for the chicken to be fully cooked through and the cheese to be bubbly and golden.

    6. Serve: Once it’s out, sprinkle over the fresh coriander and serve it hot. I love eating this as-is, but it’s also great with a side of rice or wrapped in a warm tortilla!

    Protein Breakdown

    Each serving of this cheesy goodness packs a massive 50g–55g of protein. It’s the perfect way to feel full, satisfied, and ready for whatever your day brings.

    Give this a try and let me know in the comments how it turns out! Do you add extra spice or serve yours with sour cream? I want to hear your favorite ways to customize this dish!

    Happy cooking!
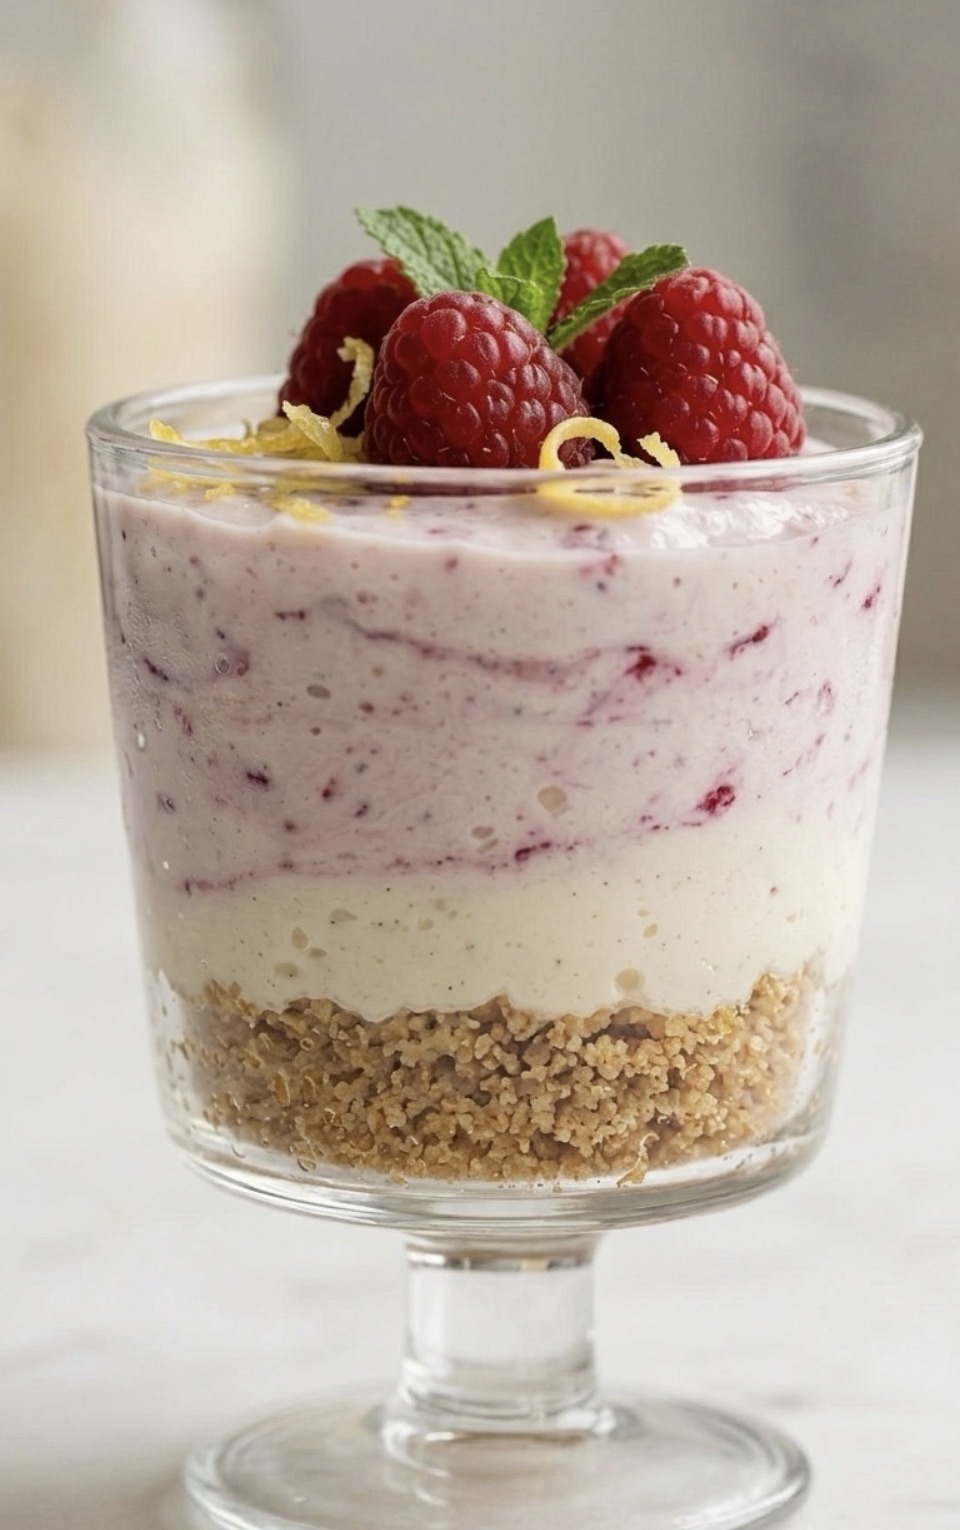
  • Creamy Raspberry & Lemon No-Bake Cheesecake Jars

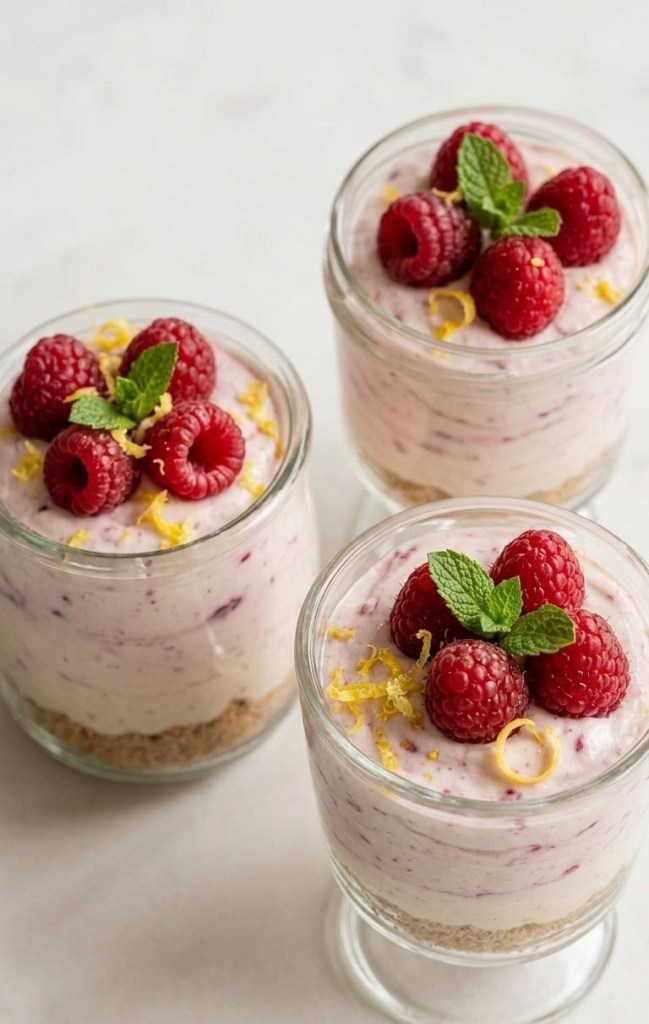
    Creamy Raspberry & Lemon No-Bake Cheesecake Jars

    There is something undeniably satisfying about a dessert that looks sophisticated but comes together in minutes. Whether you are meal-prepping healthy treats for the week or need a quick crowd-pleaser for a dinner party, these No-Bake Raspberry & Lemon Cheesecake Jars are the answer.

    Combining the tang of Greek yogurt with the creamy texture of cottage cheese, this dessert provides a protein boost while satisfying your sweet tooth. Best of all, it requires zero time in the oven.

    Why You’ll Love This Recipe

     Minimal Effort: No baking, no fuss, just fresh ingredients.

     Protein-Packed: By using cottage cheese and Greek yogurt, you get a much more satisfying treat than standard heavy-cream desserts.

     Perfectly Portionable: The individual jars make them easy to grab on the go or store in the fridge.

     Customizable: You can swap the berries for blueberries or even add a drizzle of melted dark chocolate.

    The Recipe

    Prep time: 10 minutes | Servings: 3

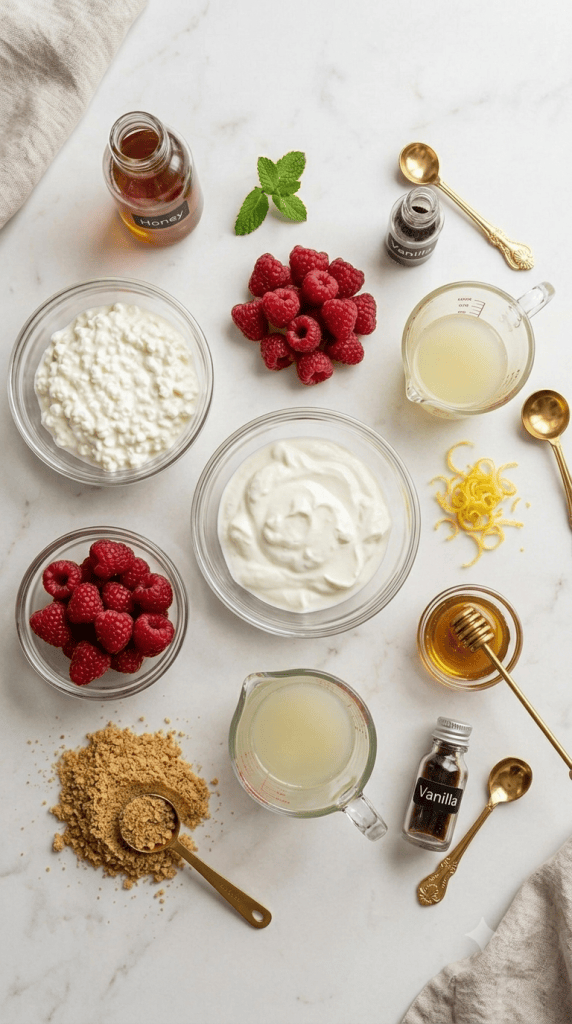
    Ingredients

     1 cup (100g) Digestive biscuits or graham crackers (crushed)

     1 cup (225g) Cottage cheese

     1/2 cup (120g) Greek yogurt

     1 cup (125g) Fresh raspberries

     2 tbsp Honey (or maple syrup)

     1 tbsp Lemon juice

     1 tsp Vanilla extract

     Optional: Lemon zest and mint leaves for garnish

    Instructions

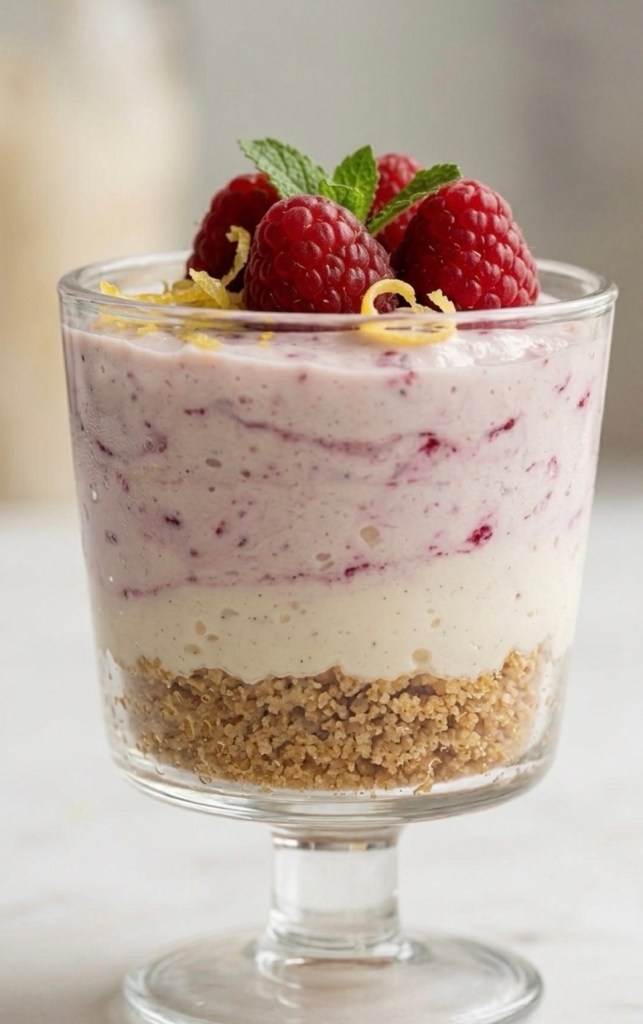
    1. Prepare the Base: Divide your crushed biscuits equally among three jars. Press them down gently with a spoon to create a compact, even layer.

    2. Blend the Cream: In a food processor or high-speed blender, combine the cottage cheese, Greek yogurt, honey, lemon juice, and vanilla extract. Blitz until the mixture is completely smooth and creamy.

    3. Add the Fruit: Gently fold in half of your fresh raspberries. If you prefer a marbled look, pulse the blender just two or three times rather than fully blending them.

    4. Assemble: Spoon or pipe the cheesecake mixture over the biscuit bases.

    5. Garnish: Top with the remaining fresh raspberries, a sprinkle of lemon zest, and a small mint leaf.

    6. Set: You can enjoy these immediately, but they taste even better after chilling in the fridge for 30 minutes!

    Nutritional Information

    Per serving (makes 3)

    📊 Macros

     Calories: 215 kcal

     Protein: 14g

     Carbohydrates: 32g

     Fat: 3g

    Tips for Success

     Smooth Texture: If you don’t like the texture of cottage cheese curds, blending it thoroughly is key. It will transform into a silky cream that rivals mascarpone.

     Keep it Crunchy: If you plan to store these for more than a day, add the biscuit base right before serving to ensure it stays crunchy rather than getting soggy from the moisture in the cream.

     Zest is Best: Don’t skip the lemon zest! It adds a bright, fresh aroma that ties the lemon and berries together perfectly.

    Have you tried this recipe? Tag us in your photos or let us know in the comments how you customized your jars!

  • High Protein Chicken Curry That Beats Takeaway

    High Protein Chicken Curry That Beats Takeaway


    If you love a good curry but also want to hit your protein goals, this high‑protein chicken curry is perfect for you. It’s creamy, comforting, packed with flavour, and still simple enough for a busy weekday night.

    This recipe uses lean chicken breast and thick Greek yogurt to boost the protein while keeping the sauce silky and rich. With around 35–40g protein per serving (before adding any extra sides), it’s a proper main meal, not just a light bite.

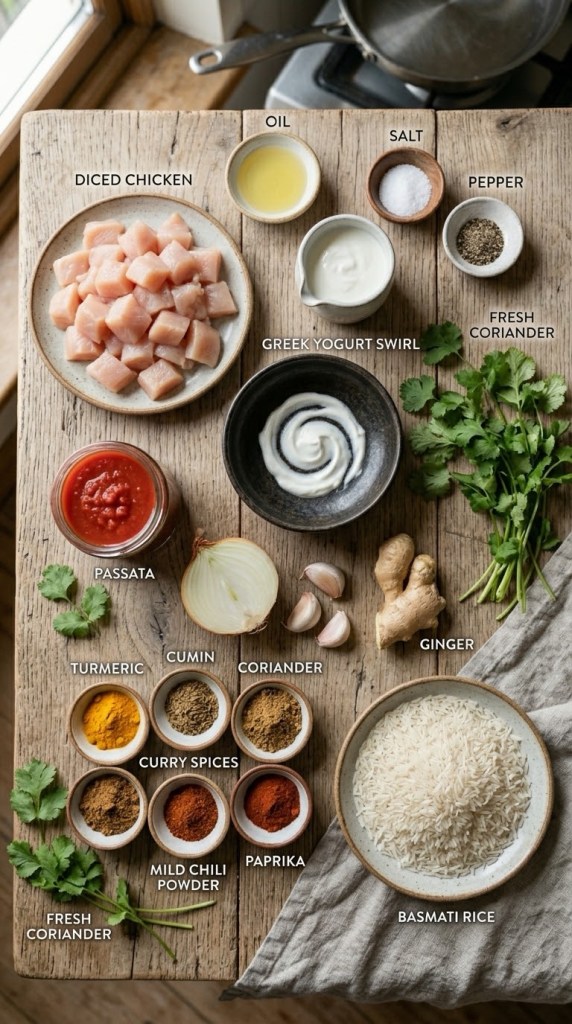
    Ingredients


    Serves 2 hungry adults
    • 400 g chicken breast, diced into bite‑size pieces
    • 150 g thick Greek yogurt
    • 1 medium onion, finely chopped
    • 3 cloves garlic, crushed or finely chopped
    • 1 teaspoon fresh grated ginger (about a 2 cm piece of ginger root)
    • 2 tablespoons curry powder (or your favourite mild/medium blend)
    • 200 g chopped tomatoes or passata
    • 1 tablespoon oil (olive or vegetable)
    • 1/2 teaspoon chilli powder (adjust to taste)
    • Salt and black pepper to taste
    • Fresh coriander, chopped, to serve

    • Cooked basmati rice, to serve

    Method

    1. Marinate the chicken
      Add the diced chicken to a bowl.
      Stir in half of the Greek yogurt (about 75 g), half of the curry powder, a good pinch of salt, and some black pepper.
      Mix well, then set aside while you prepare everything else – even 10 minutes of marinating helps the flavour.
    2. Brown the chicken
      Heat the oil in a large non‑stick pan over medium‑high heat.
      Add the marinated chicken pieces and cook until lightly browned on the outside. They don’t need to be fully cooked through yet.
      Remove the chicken to a plate and keep any juices in the pan.
    3. Build the flavour base
      In the same pan, add the chopped onion. Cook gently for 4–5 minutes until soft and starting to turn golden.
      Stir in the garlic and grated ginger and cook for about 1 minute until fragrant.
      Add the remaining curry powder and the chilli powder, stirring for 30 seconds to toast the spices.
    4. Create the sauce
      Pour in the chopped tomatoes or passata and a small pinch of salt.
      Stir well, then let the sauce simmer for a few minutes until slightly thickened.
    5. Finish cooking the chicken
      Return the browned chicken (and any juices) to the pan.
      Stir so the pieces are well coated in the sauce.
      Simmer gently for 8–10 minutes, or until the chicken is cooked through and the sauce has reduced to a nice consistency.
    6. Stir in the yogurt
      Turn the heat right down (or briefly off) so the curry is hot but not boiling.
      Stir in the remaining Greek yogurt until the sauce becomes creamy and smooth.
      Taste and adjust the seasoning with extra salt, pepper or chilli if you like more heat.
    7. Serve
      Spoon cooked basmati rice into bowls.
      Ladle the chicken curry on top or to one side.
      Garnish with chopped fresh coriander.

    Enjoy immediately – or let it cool and portion up for high‑protein meal prep.

    Approximate Nutrition (Per Serving, Without Rice)
    These numbers will vary slightly depending on the exact brands you use, but for this curry split into two portions:
    • Calories: roughly 350–400 kcal
    • Protein: roughly 35–40 g
    • Carbohydrates: mostly from the tomatoes, roughly 10–15 g
    • Fat: roughly 10–15 g

    Once you add a typical serving of basmati rice, you’ll have a very satisfying, balanced high‑protein main meal.

    Tips and Variations
    • Make it milder: Use a mild curry powder and reduce the chilli powder to a pinch.
    • Make it hotter: Add extra chilli powder, fresh chilli, or a little cayenne.
    • Add more veg: Stir in a handful of spinach, peas or peppers in the last few minutes of cooking.


    • Swap the protein: You can replace the chicken with firm tofu or chickpeas; just adjust cooking time so they heat through in the sauce.

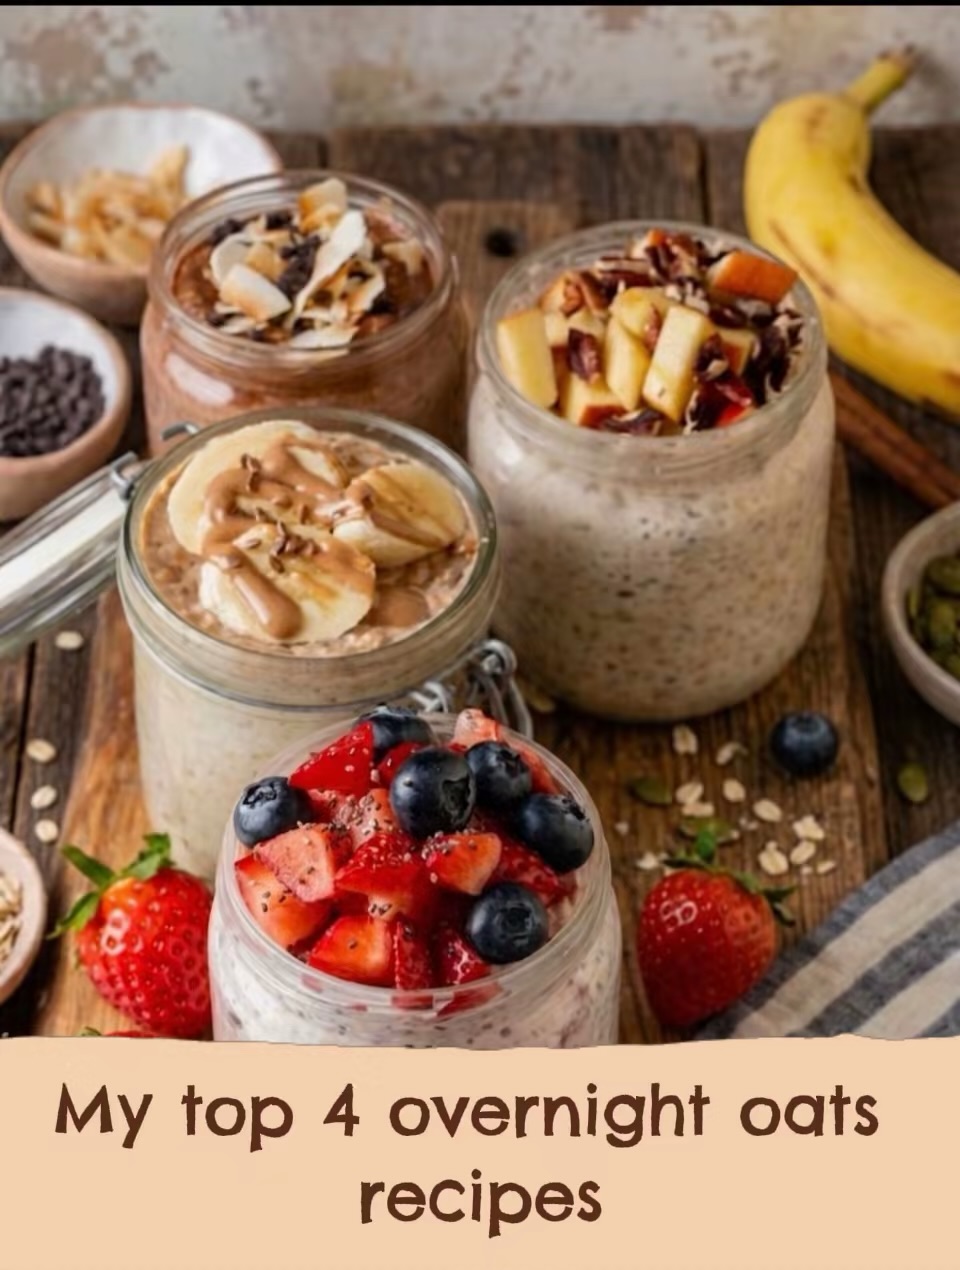
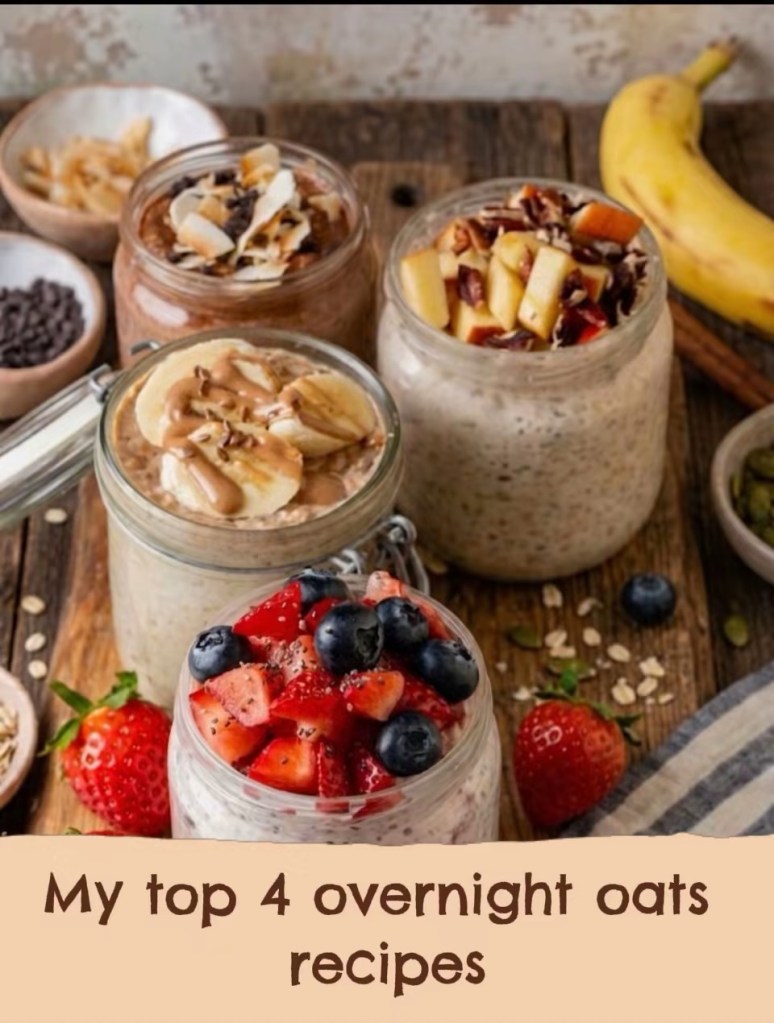
  • Fuel Your Day: My Top 4 Nutrient-Dense Overnight Oats

    Fuel Your Day: My Top 4 Nutrient-Dense Overnight Oats

    We all know the morning struggle: you’re running late, the kitchen is chaotic, and you end up skipping breakfast or grabbing something processed.

    But here is the secret to a high-energy morning: prep your fuel the night before. Overnight oats are more than just a convenient breakfast; they are a nutritional powerhouse. By soaking your oats, you make them easier to digest, and when you combine them with whole-food ingredients, you get a balanced macro-nutrient profile to sustain your energy levels throughout the morning.

    Here are my four go-to recipes, each designed with health and satiety in mind.

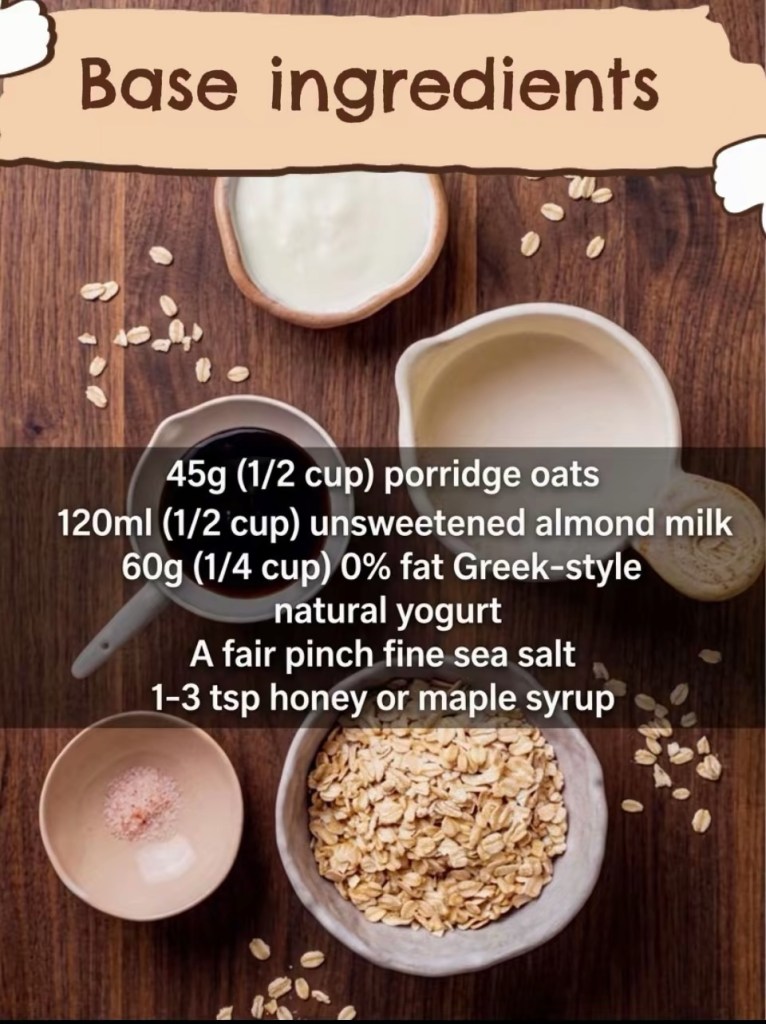
    The Nutrient-Dense Base

    To ensure you are getting a complete breakfast, I use this base ratio for every jar:

     1/2 cup (45g) Rolled Oats: A fantastic source of complex carbohydrates and beta-glucan fiber, which helps support heart health.

     1/2 cup (120ml) Unsweetened Plant-Based Milk: I prefer almond or soy for a lighter profile.

    60g Greek yoghurt

     A pinch of Sea Salt: Essential for electrolyte balance.

    Instructions: Simply combine these in a glass jar, add your specific “flavour add-ins” below, stir, seal, and refrigerate for at least 4 hours.

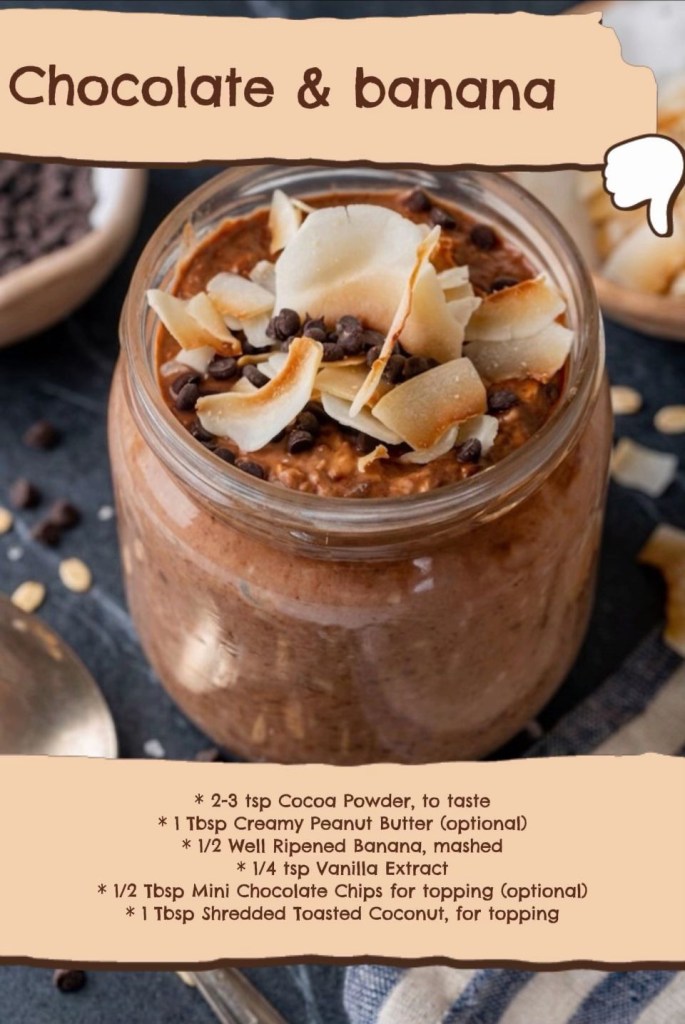
    1. Chocolate Coconut Bliss (Antioxidant-Rich)

    Satisfy your sweet tooth with ingredients that actually support your well-being.

     2-3 tsp Raw Cacao Powder: High in flavonoids, which are excellent for cardiovascular health.

     1 tbsp Natural Peanut Butter: Provides healthy monounsaturated fats to keep you satiated.

     1/2 Well-Ripened Banana: Provides a natural source of potassium and energy.

     Topping: 1 tbsp shredded unsweetened coconut (for healthy MCT fats) and a sprinkle of 70% dark chocolate chips.

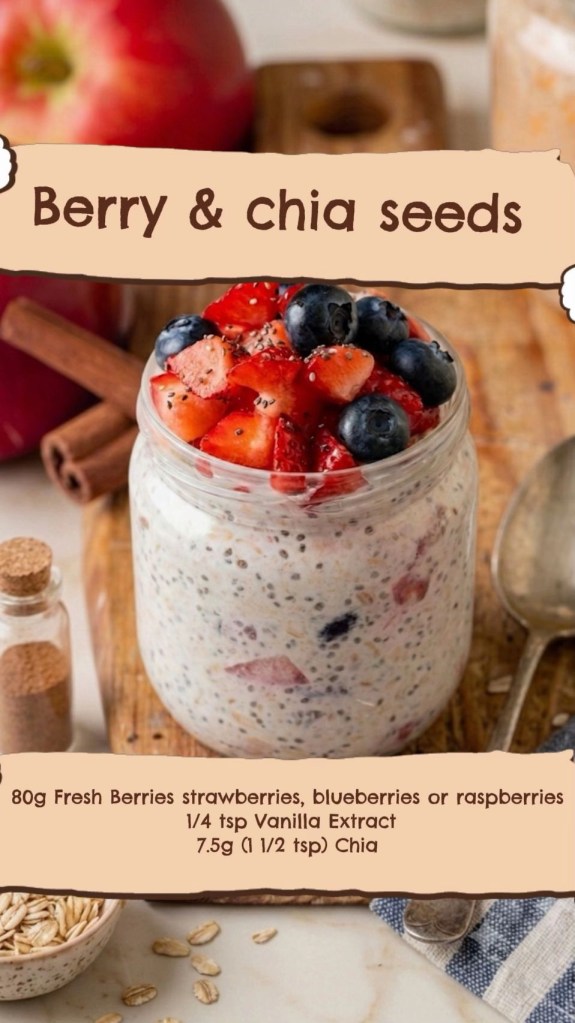
    2. Berry Chia Power (Omega-3 & Fiber Boost)

    The perfect way to start your day with anti-inflammatory nutrients.

     1/2 cup Fresh Berries: Blueberries and strawberries are packed with vitamin C and antioxidants.

     1 1/2 tsp (7.5g) Chia Seeds: A goldmine of Omega-3 fatty acids and soluble fiber to support gut health.

     Preparation: Shake well to ensure the chia seeds are evenly distributed, allowing them to create a hydrating, gel-like texture.

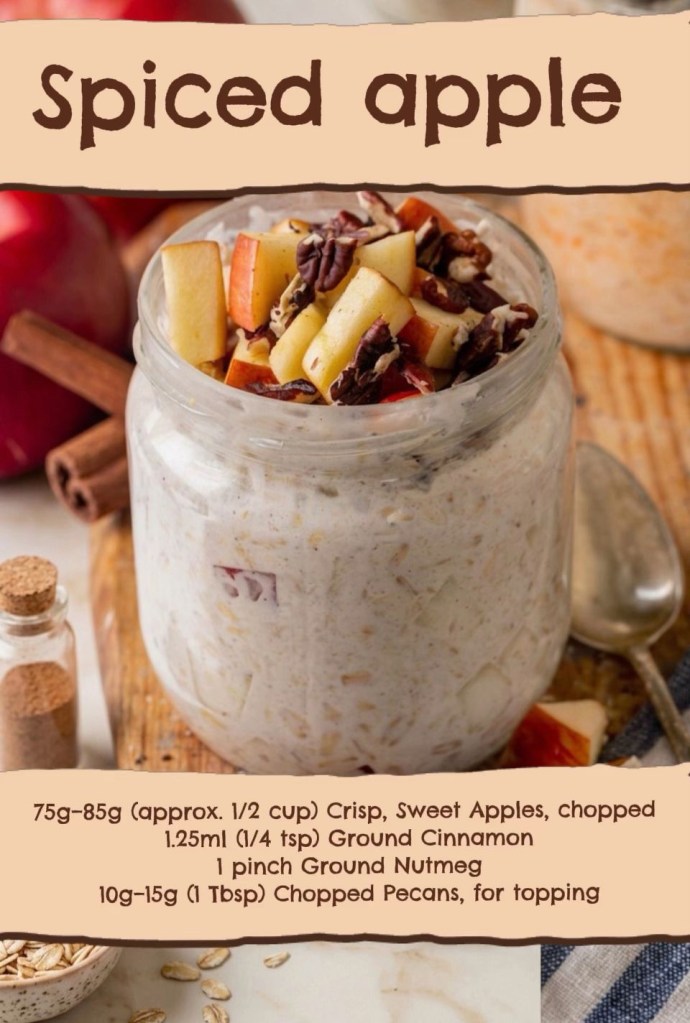
    3. Apple Autumn Spice (Blood Sugar Friendly)

    A comforting bowl that focuses on digestion and stable energy.

     1/2 cup Finely Chopped Apple: Provides natural fiber and pectin.

     1/4 tsp Ground Cinnamon: Studies suggest cinnamon may help support healthy blood sugar levels.

     1 Pinch Nutmeg: Added for its digestive benefits.

     Topping: 1 tbsp (10g) raw pecans. Pecans offer a great hit of plant-based protein and magnesium.

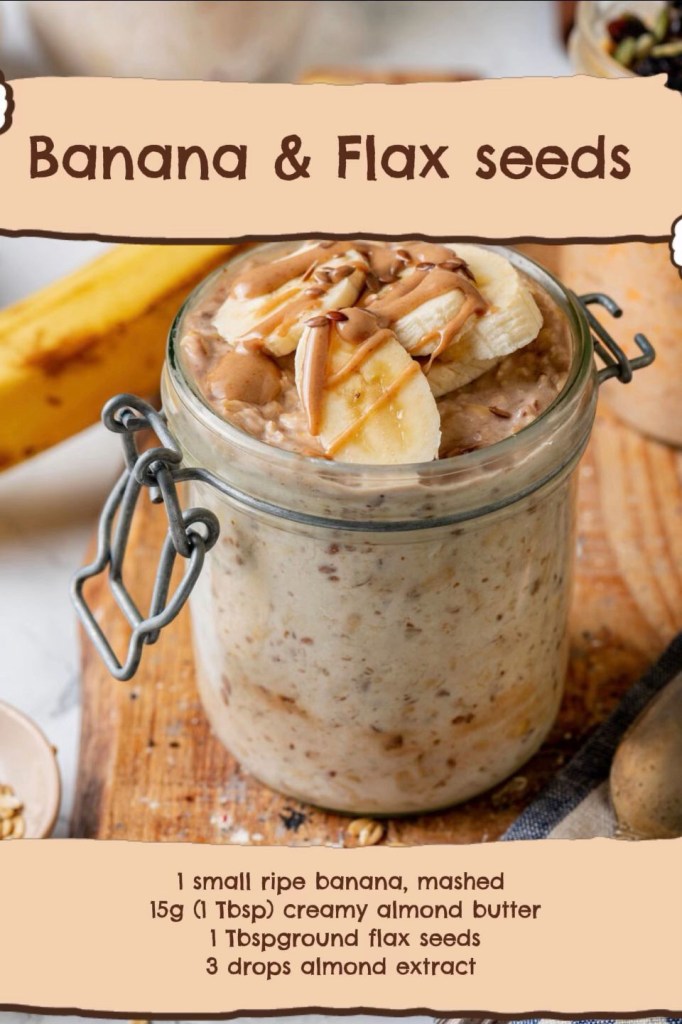
    4. Banana Almond Flax (The “Energy Sustainer”)

    My favorite “power” bowl for long mornings where I need sustained focus.

     1 Small Ripe Banana: Mashed for natural sweetness and quick-release energy.

     1 tbsp (15g) Natural Almond Butter: Rich in vitamin E and healthy fats.

     1 tbsp (7g) Ground Flax Seeds: A stellar source of plant-based Omega-3s and lignans.

     3 Drops Almond Extract: Provides all the flavor without any added sugars or syrups.

    Why These Are Better for You:

     Sustained Energy: Unlike high-sugar breakfast cereals, the fiber in oats and flax/chia keeps your blood sugar levels stable, preventing that mid-morning “crash.”

     Gut Health: The soluble fiber in these ingredients acts as a prebiotic, nourishing your gut microbiome.

     Whole-Food Focused: Every ingredient serves a purpose, providing vitamins, minerals, and healthy fats rather than empty calories.

    Pro-Tip: If you need a protein boost, stir in one tablespoon of your favorite unflavored or vanilla plant-based protein powder to any of these bases!

    Which one of these nutrient-dense jars are you going to prep first? Let me know in the comments below!