Category: #cake

  • The Dreamy Marble Tray Bake You Need This Weekend

    The Dreamy Marble Tray Bake You Need This Weekend

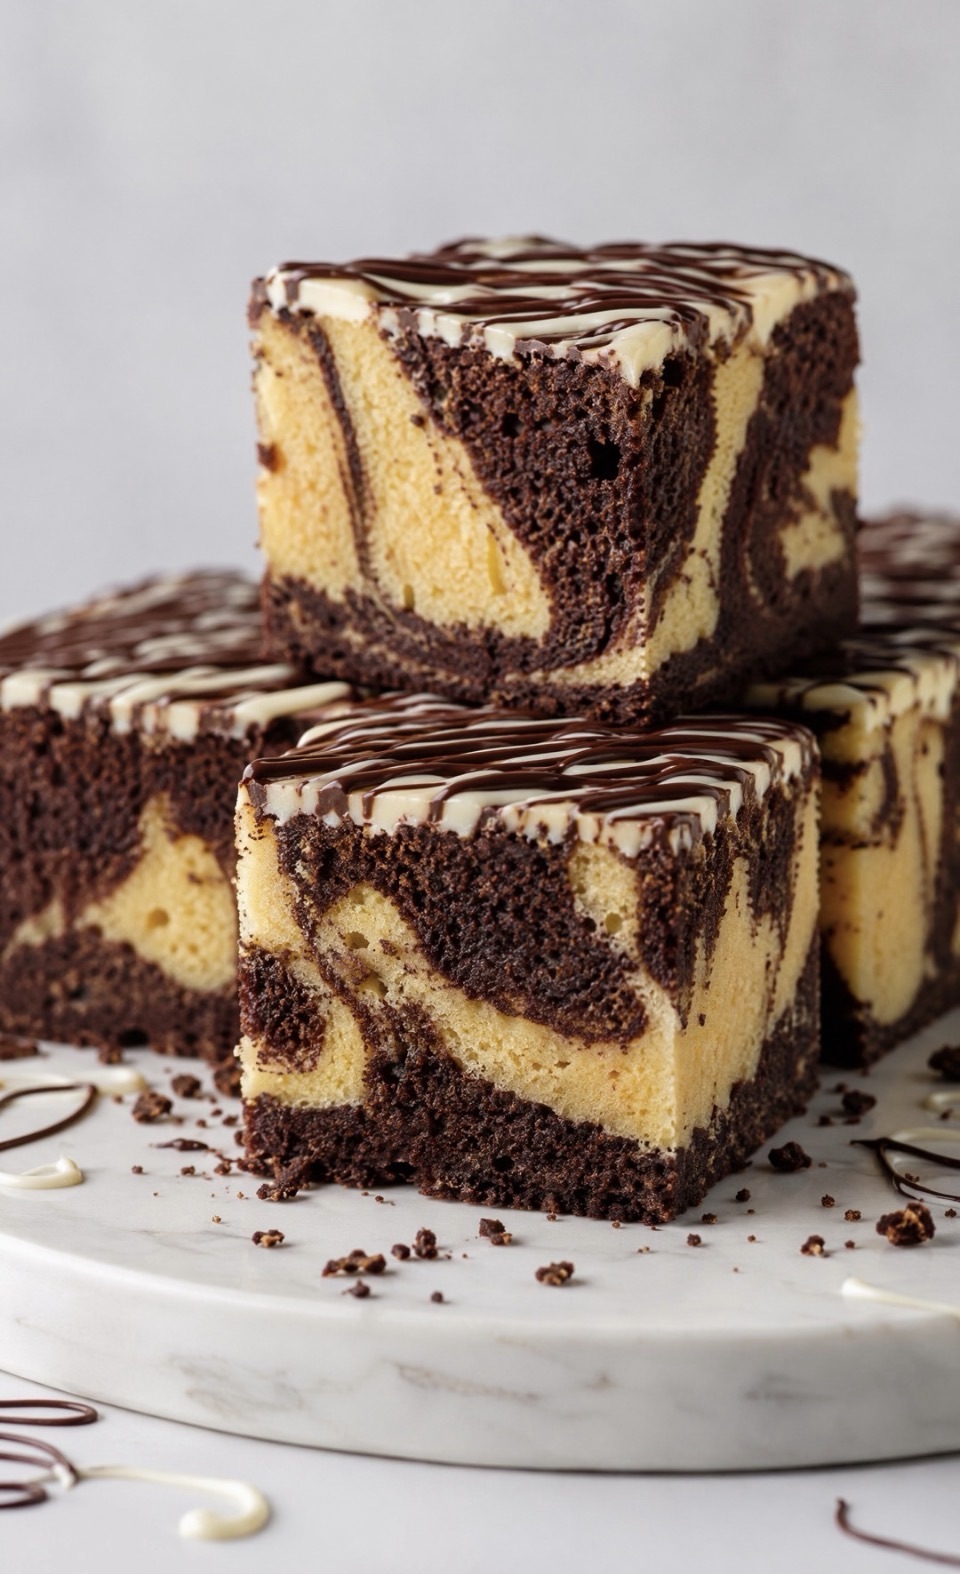
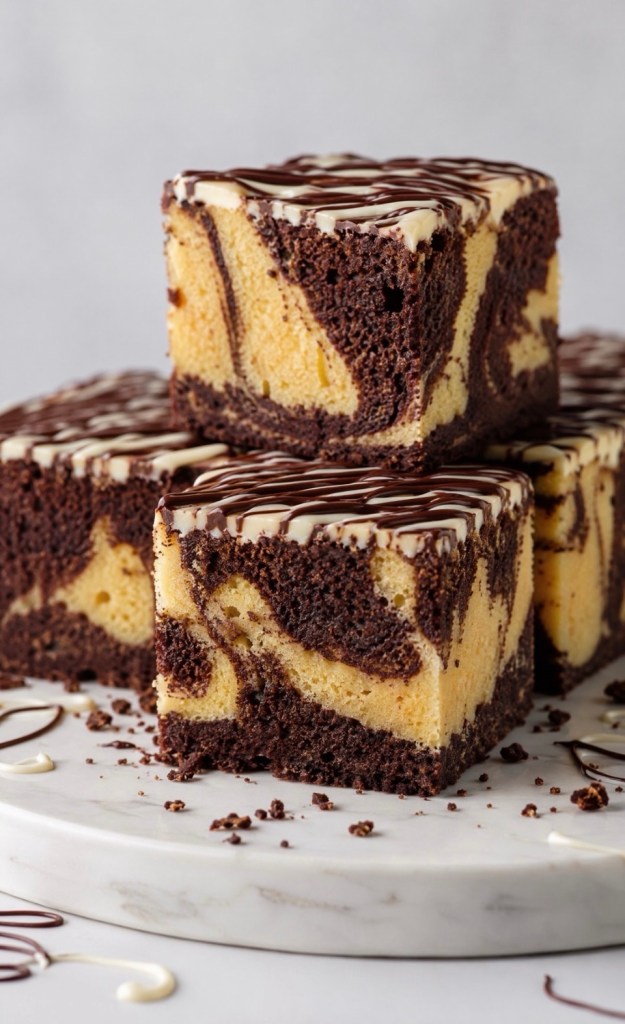
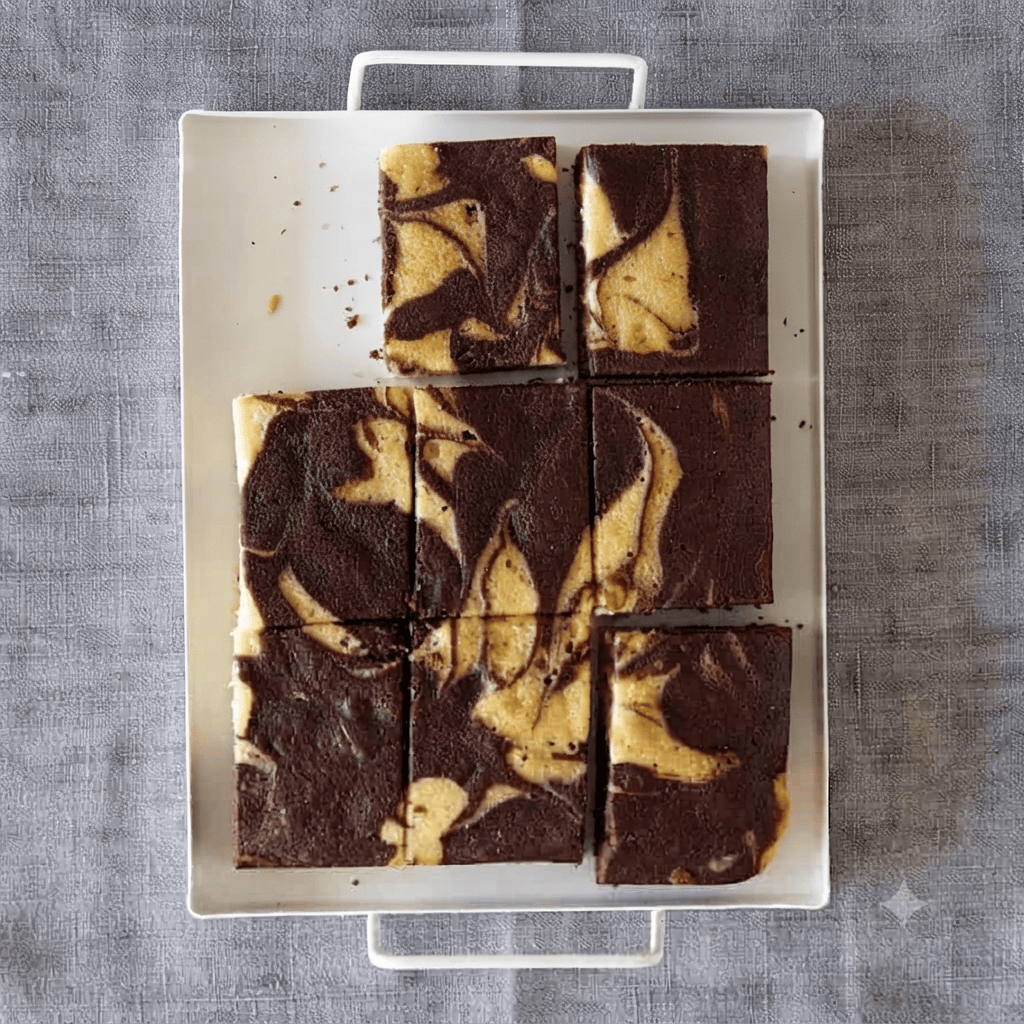
    Let’s be real for a second—is there anything better than a slice of cake that looks like you spent hours in the kitchen, but actually came together in a total breeze? I have been obsessed with marble cakes lately. There is just something so satisfying about that swirl of dark, fudgy chocolate batter and light, fluffy vanilla cake.
    And because I know we are all busy, I decided to turn this classic into a tray bake. Why? Because it’s easier to slice, easier to share, and—let’s be honest—it’s the perfect thickness for a mid-afternoon treat.

    Why You’ll Love This Recipe

    This isn’t just any cake. By adding a handful of chocolate chips into the mix and finishing it off with a double-chocolate drizzle, you get a beautiful texture and a serious hit of cocoa goodness in every single bite. It’s simple, it’s reliable, and it’s a total crowd-pleaser.


    The Ingredients

    To get that perfect marble effect, here is what you need to have on your counter:
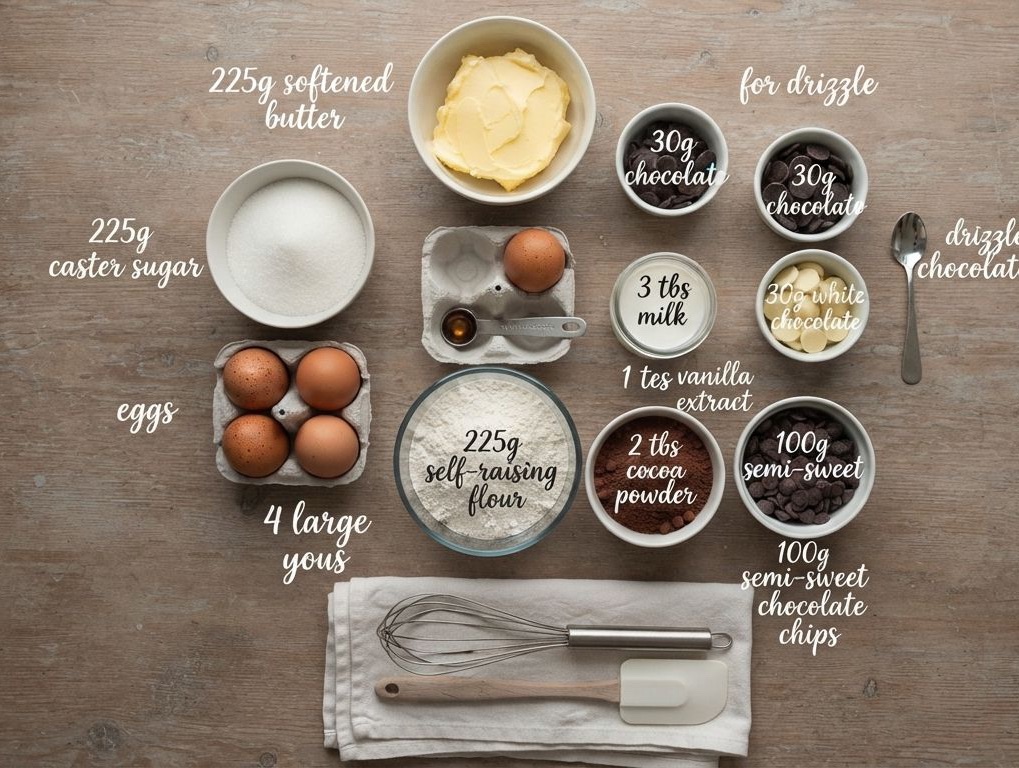
    • 225g Softened Butter: Room temperature is non-negotiable here, people!
    • 225g Caster Sugar
    • 4 Large Eggs
    • 225g Self-raising Flour
    • 3 tbsp Milk
    • 1 tsp Vanilla Extract
    • 2 tbsp Cocoa Powder
    • 100g Semi-sweet Chocolate Chips: Use mini ones if you can find them!
    • For the Drizzle: 30g Dark Chocolate, 30g White Chocolate

    How to Make the Magic Happen

    1. Prep Time: Preheat your oven to 180°C (160°C fan). Grab a 20cm (8-inch) square tin and line it with parchment paper. Trust me, you don’t want to skip this!
    2. Creaming: In a large bowl, beat that butter and sugar until it’s light and fluffy. Add your eggs one by one, giving it a good mix after each one.
    3. The Base: Fold in the flour, milk, and vanilla. Once it’s smooth, divide the batter equally into two bowls.
    4. The Marble: Sift the cocoa powder into one bowl and stir it in. Fold your chocolate chips into the mixtures (I like to split them evenly between both).
    5. The Swirl: Dollop the batters into your tin alternately. Now, take a skewer and gently run it through in a figure-eight pattern. Resist the urge to over-mix! You want distinct swirls, not a muddy brown mess.
    6. Bake & Drizzle: Pop it in the oven for 45–55 minutes. Once it’s cool, melt your dark and white chocolates separately and drizzle them over the top. Wait for them to set, then dive in!

    Pro-Tips for Success

    • Don’t over-bake: Keep an eye on it after 45 minutes. A skewer should come out clean.
    • Make it pretty: When drizzling the chocolate, move your hand quickly across the tray to get those nice, thin lines.

    Tag me in your photos if you make this! I can’t wait to see your swirls.
  • The Easiest Chocolate Banana Muffins You’ll Ever Bake! 🍫🍌

    The Easiest Chocolate Banana Muffins You’ll Ever Bake! 🍫🍌

    If you’re anything like me, you’ve got those two sad, overripe bananas sitting on the counter right now, just begging to be turned into something delicious. Forget the standard banana bread—today we are leveling up!

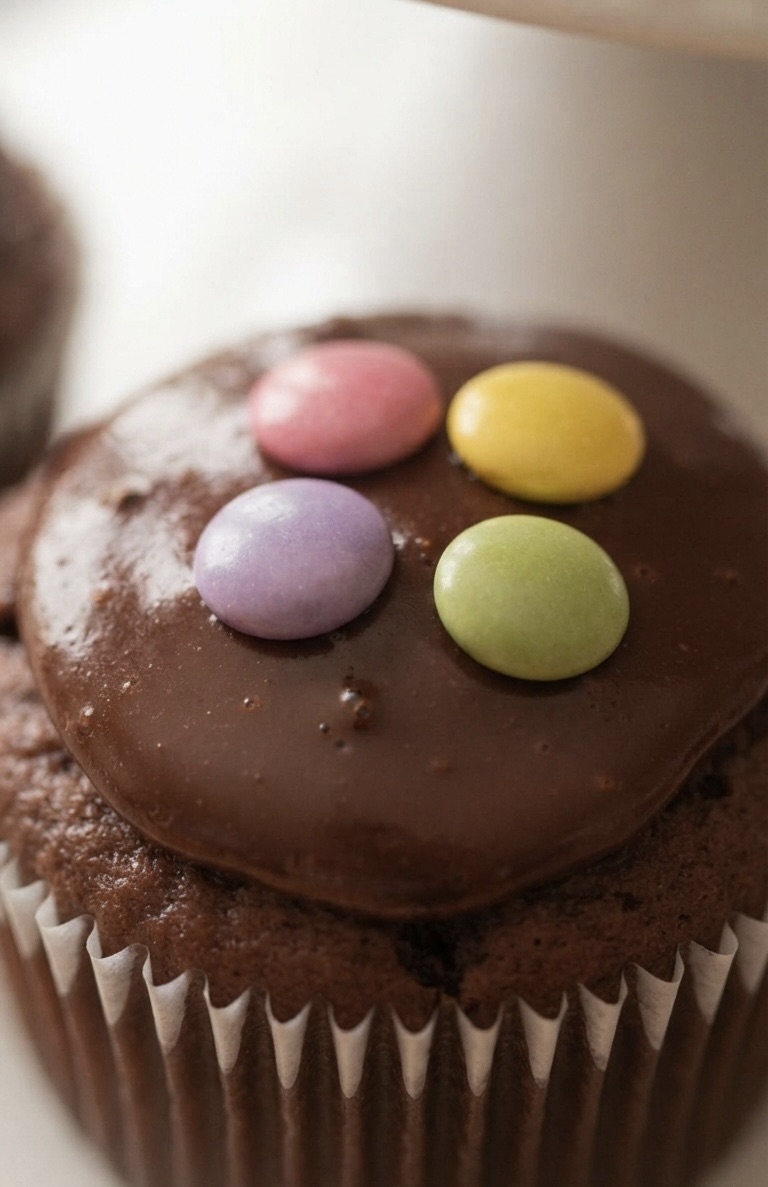
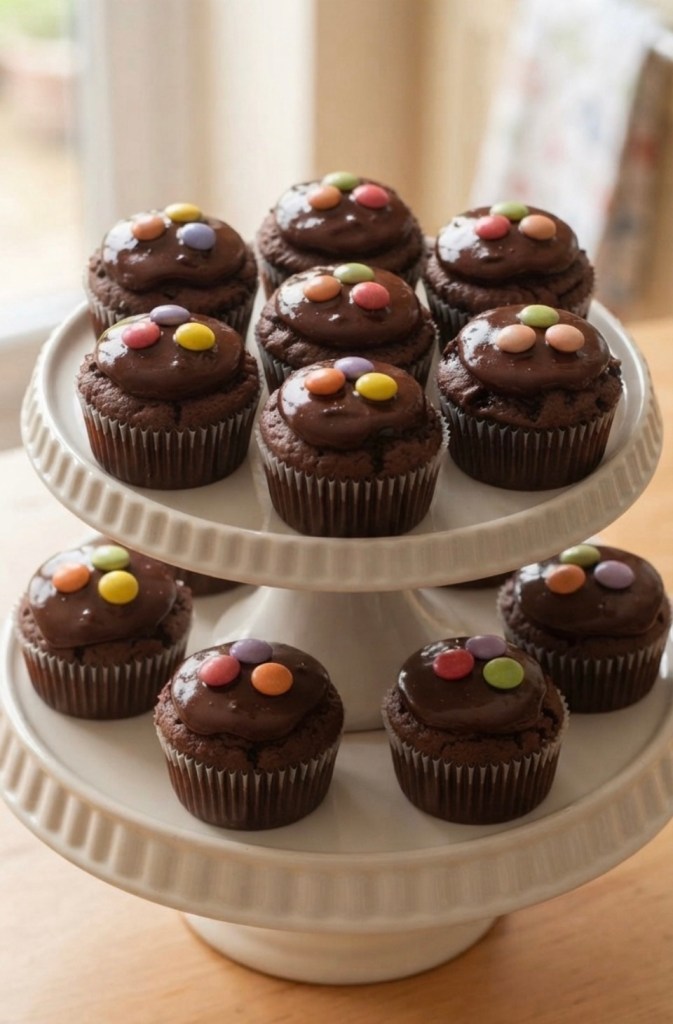
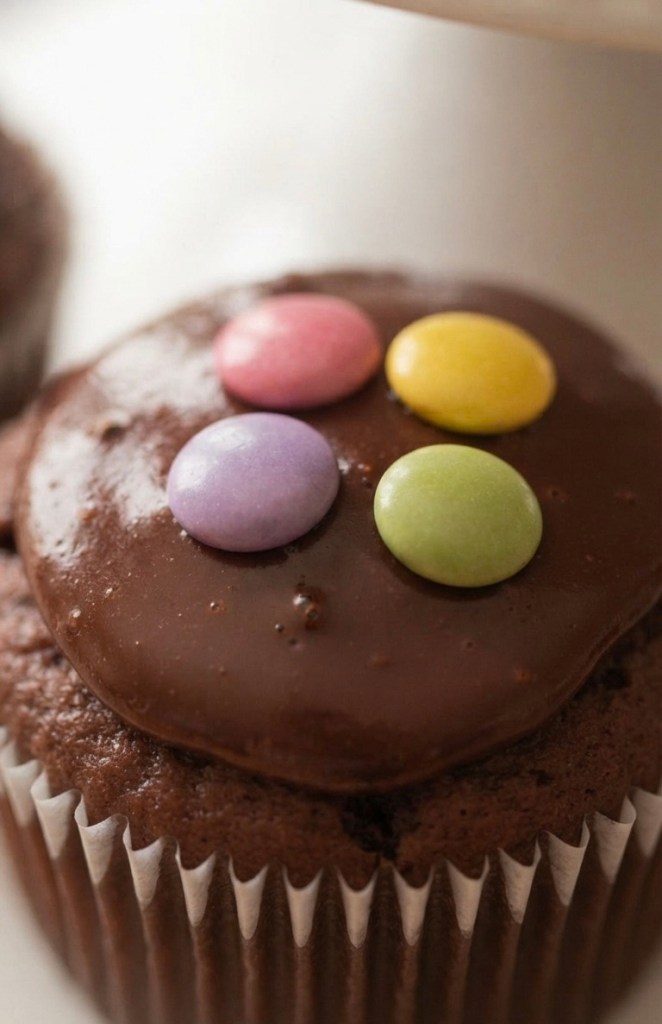
    These Chocolate Banana Smarties Muffins are my new go-to. They are incredibly moist, intensely chocolatey, and that pop of color from the Smarties makes them look like they came straight out of a bakery window. Plus, they come together so fast, you’ll have a fresh batch ready for your afternoon coffee in no time.

    Let’s get baking!

    What You’ll Need

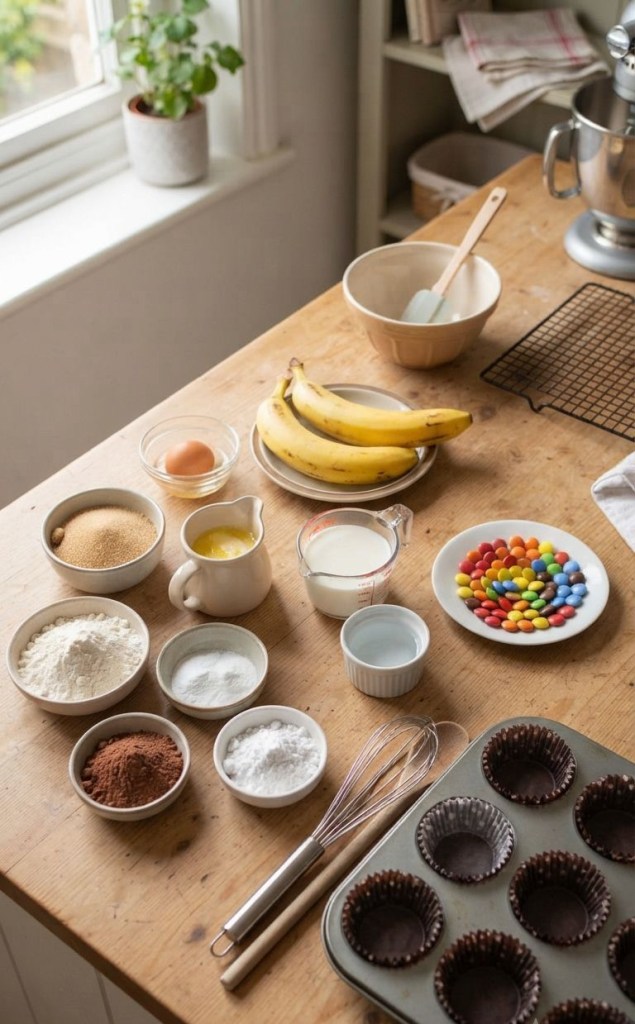
    This recipe is simple, straightforward, and uses ingredients you probably already have in your pantry.

    The Ingredients:

     For the Muffins:

     2 Bananas (the riper, the better!)

     1 Large Egg

     100g Light Brown Soft Sugar

     55g Butter, melted (because butter just tastes better!)

     65ml Skimmed Milk

     200g Plain Flour

     1 Tsp Baking Powder

     1 Tsp Bicarbonate of Soda

     30g Cocoa Powder

     For the Fun Stuff:

     3 ½ Tbsp Icing Sugar

     1 Tsp Cocoa Powder (for the glaze)

     ½ Tbsp Water

     36 Smarties (that’s 3 per muffin!)

    How to Make Them

    1. Prep is Key: Start by pre-heating your oven to 160°C (fan setting) and line a 12-hole cupcake tin with your favorite paper cases.

    2. Dry Mix: In a large mixing bowl, grab a whisk and stir together your plain flour, light brown soft sugar, cocoa powder, baking powder, and bicarbonate of soda. Give it a good mix to make sure there are no cocoa lumps.

    3. The Banana Magic: In a second bowl, mash those bananas until they’re nice and smooth. Pour in your melted butter and stir. Then, crack in the egg and add the milk, mixing until everything is well combined.

    4. The Big Mix: Pour your wet banana mixture into the dry ingredients. Whisk it all together until you have a smooth, glorious chocolate muffin batter.

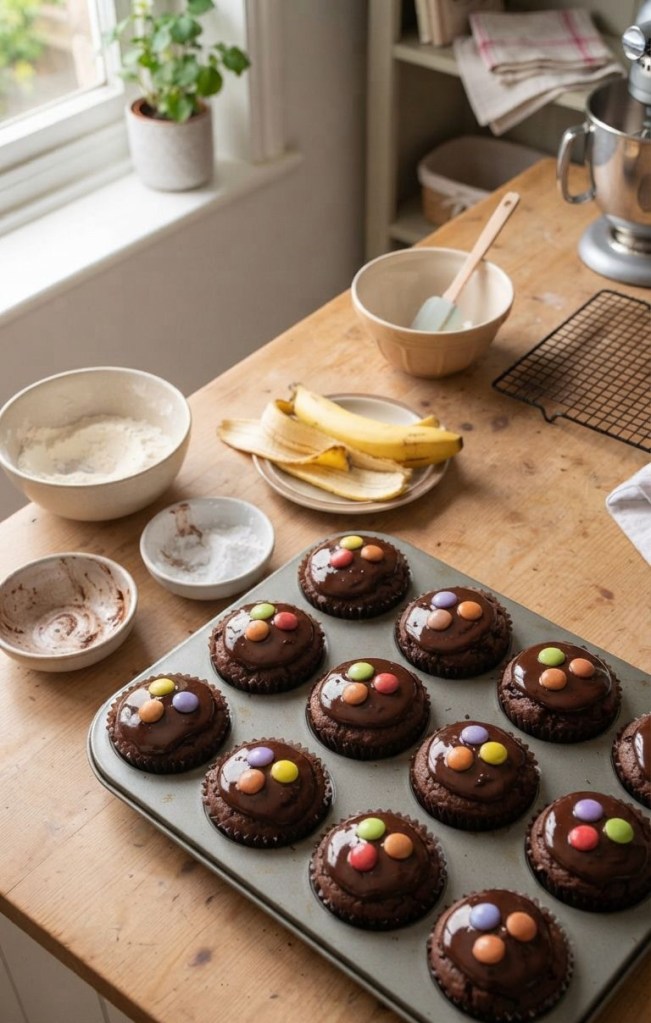
    5. Bake: Divide that batter evenly between your 12 paper cases. Pop them into the oven for 20-25 minutes. You’ll know they are done when they have risen beautifully and a cocktail stick inserted into the center comes out clean.

    6. Cooling: Resist the urge to dive in immediately! Move them to a wire rack and let them cool fully.

    7. The Finishing Touch: Whisk your icing sugar, the extra teaspoon of cocoa powder, and the water together until you have a smooth, glossy paste. Drizzle it over the cooled muffins, and finally, press 3 Smarties onto the top of each one.

    Why You’ll Love Them

    These muffins are the perfect balance of fruity sweetness and rich cocoa. The butter adds a lovely depth of flavor that you just don’t get with spread, and the Smarties add that perfect little crunch in every bite.

    They are fantastic for lunchboxes, a cheeky treat at work, or just for enjoying on a lazy Sunday morning. Give them a try and let me know in the comments how they turned out for you!

    Happy baking,

  • The Secret to the Famous Kris Jenner Brownies: Fudgy, Rich, and Irresistible

    The Secret to the Famous Kris Jenner Brownies: Fudgy, Rich, and Irresistible

    The Secret to the Famous Kris Jenner Brownies: Fudgy, Rich, and Irresistible

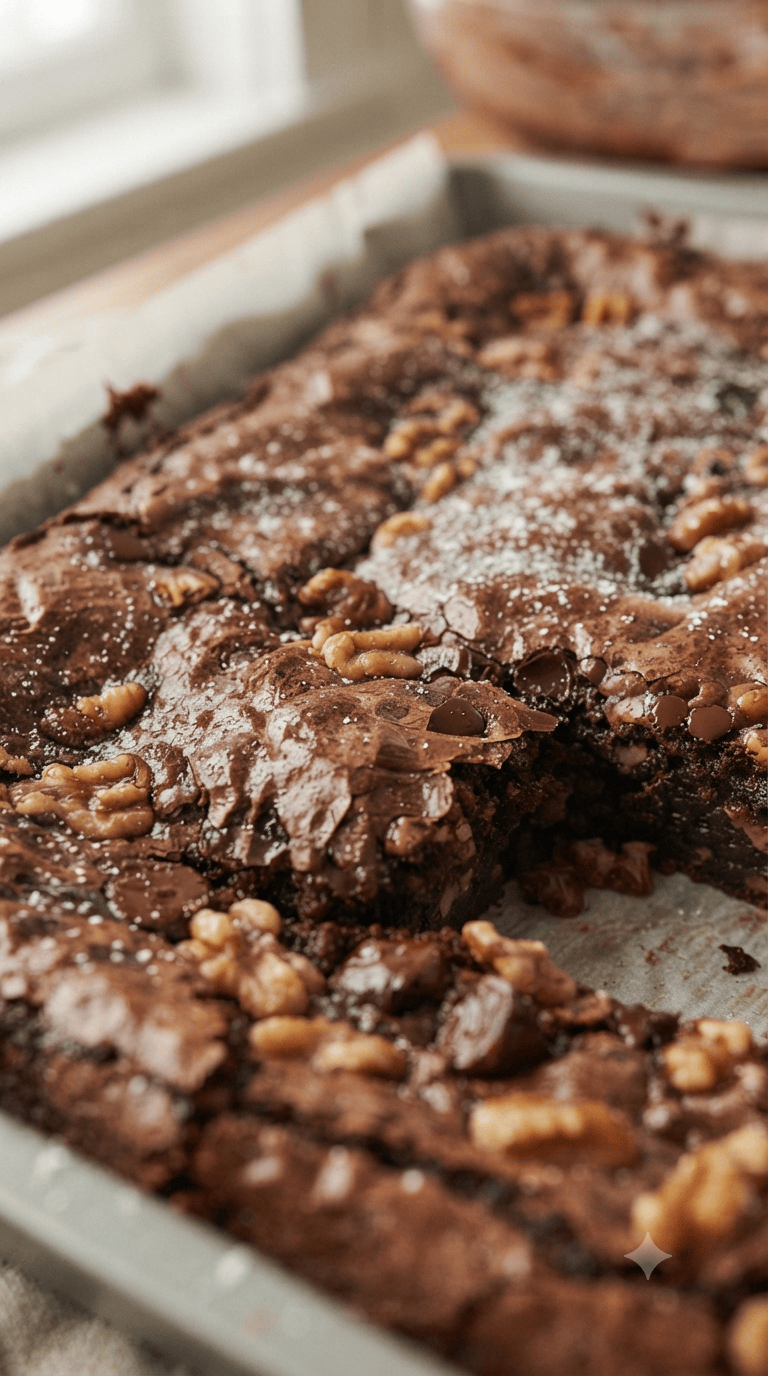
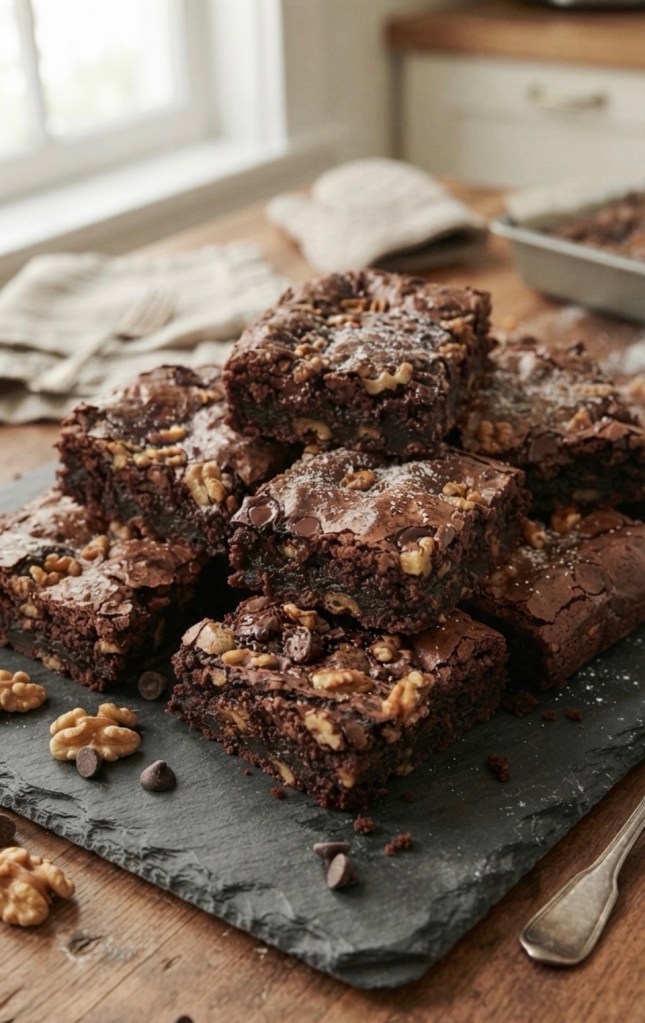
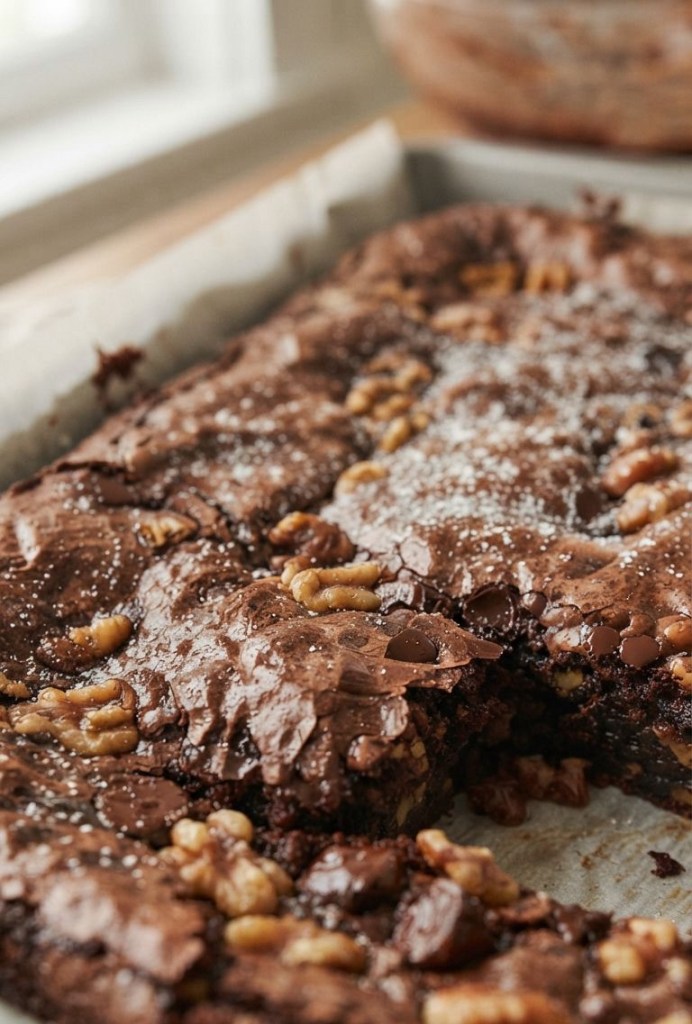
    If you have watched Keeping Up with the Kardashians or The Kardashians over the last decade, you have undoubtedly seen them—the legendary brownies. They are famous for being thick, decadent, and perfectly chewy. Whether you are a fan of the family or just a fan of high-quality chocolate, these brownies are a staple for any home baker.

    Today, we are breaking down how to make these at home. We have combined the measurements for both our US and UK readers so you can bake these without any guesswork.

    The Secret Ingredient? Patience.

    The secret to these brownies isn’t a hidden spice; it’s the ratio of butter and chocolate to flour. Because this recipe uses a high amount of chocolate chips and nuts, the texture is dense and fudgy rather than cakey.

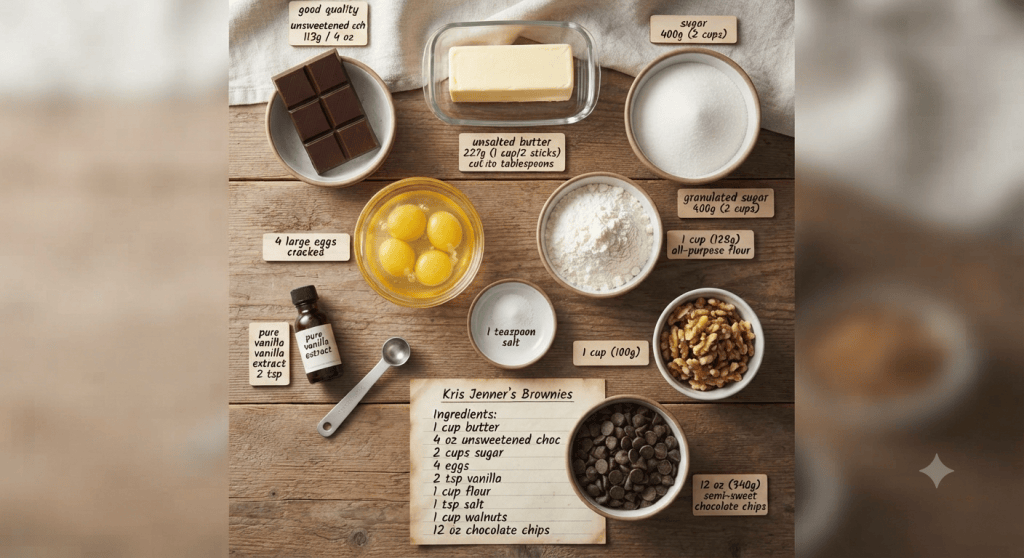
    Ingredients

     Butter: 1 cup (2 sticks) / 227g unsalted butter

     Unsweetened Chocolate: 4 oz / 113g, chopped

     Sugar: 2 cups / 400g granulated or caster sugar

     Eggs: 4 large eggs

     Vanilla Extract: 2 tsp

     Flour: 1 cup / 128g all-purpose or plain flour

     Salt: 1 tsp

     Walnuts: 1 cup / 100g, chopped

     Semisweet Chocolate Chips: 12 oz / 340g

    Method

    1. Prep: Preheat your oven to 325°F (160°C fan/Gas 4). Grease or line a 9×13 inch (23×33 cm) baking tin with parchment paper to ensure easy removal.

    2. Melt: Melt the unsweetened chocolate and butter together until smooth. Set aside and allow to cool slightly.

    3. Mix: In a large bowl, whisk the eggs and vanilla together. Gradually whisk in the sugar until the mixture is well combined.

    4. Combine: Gently stir in the melted chocolate and butter mixture.

    5. Dry Ingredients: Whisk in the flour and salt. Finally, fold in the chopped walnuts and the generous portion of chocolate chips.

    6. Bake: Spread the batter into your prepared tin. Bake for 20–25 minutes. Pro tip: The edges should be set, but the center should remain moist—don’t overbake them!

    7. Serve: Allow the brownies to cool completely in the tin before slicing. This allows the fudgy texture to set properly.

    Why We Love Them

    These brownies strike the perfect balance between a crunchy, crackly top and a soft, molten center. They are the perfect treat for parties, gifts, or a cozy night in.

    Have you tried making these yet? Let me know in the comments how yours turned out and if you added a scoop of vanilla ice cream on top!

  • The Secret to Nostalgia: Jam and Coconut Sponge

    The Secret to Nostalgia: Jam and Coconut Sponge

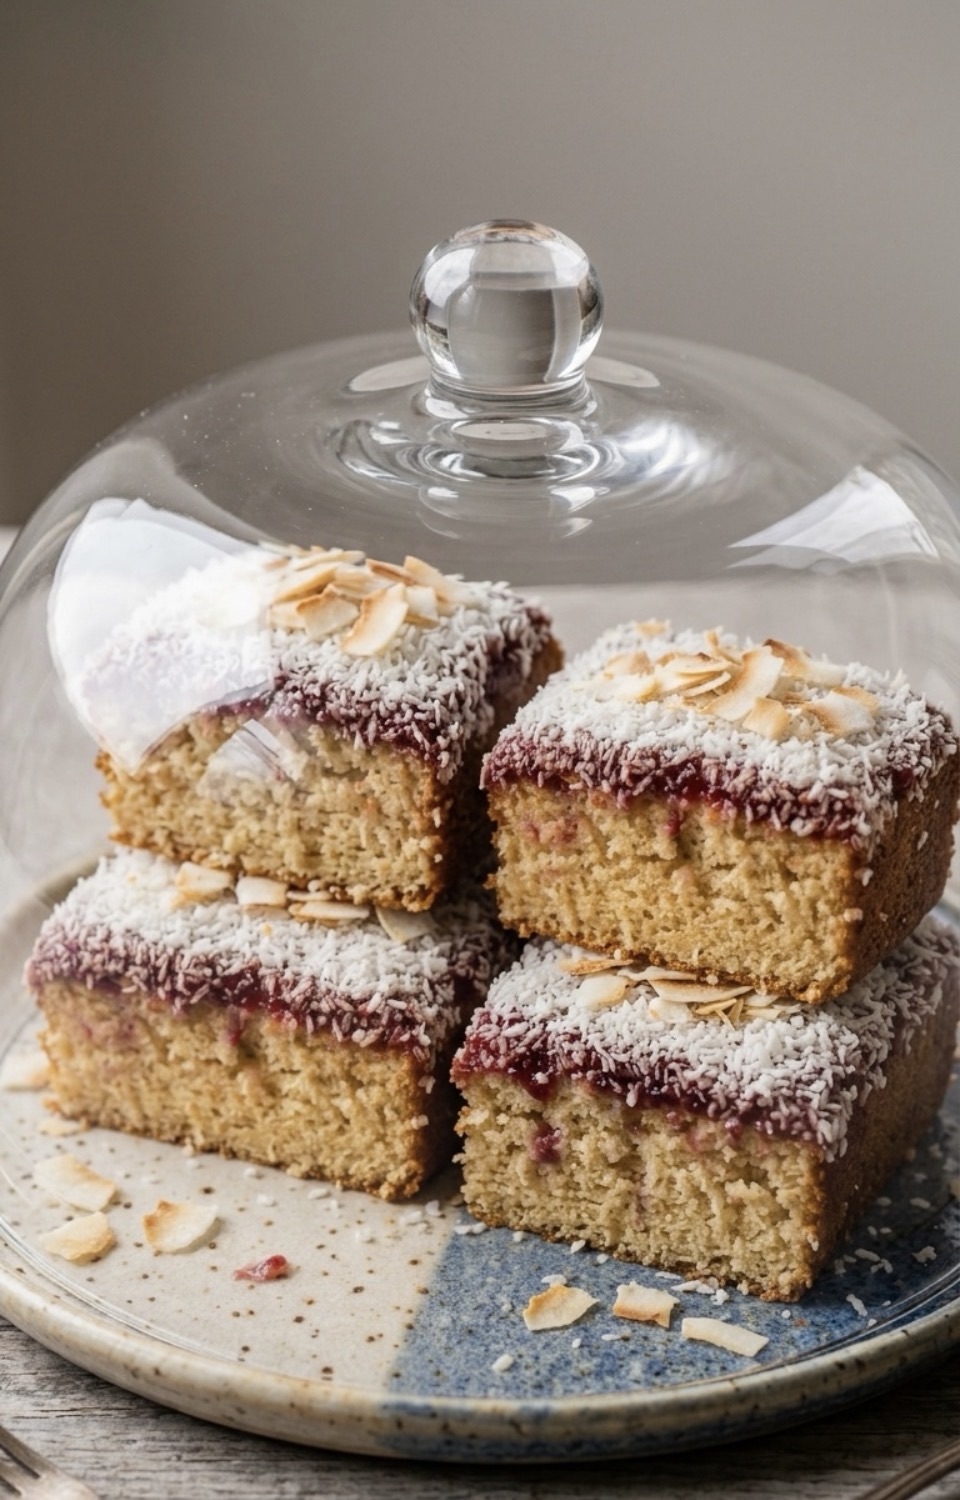
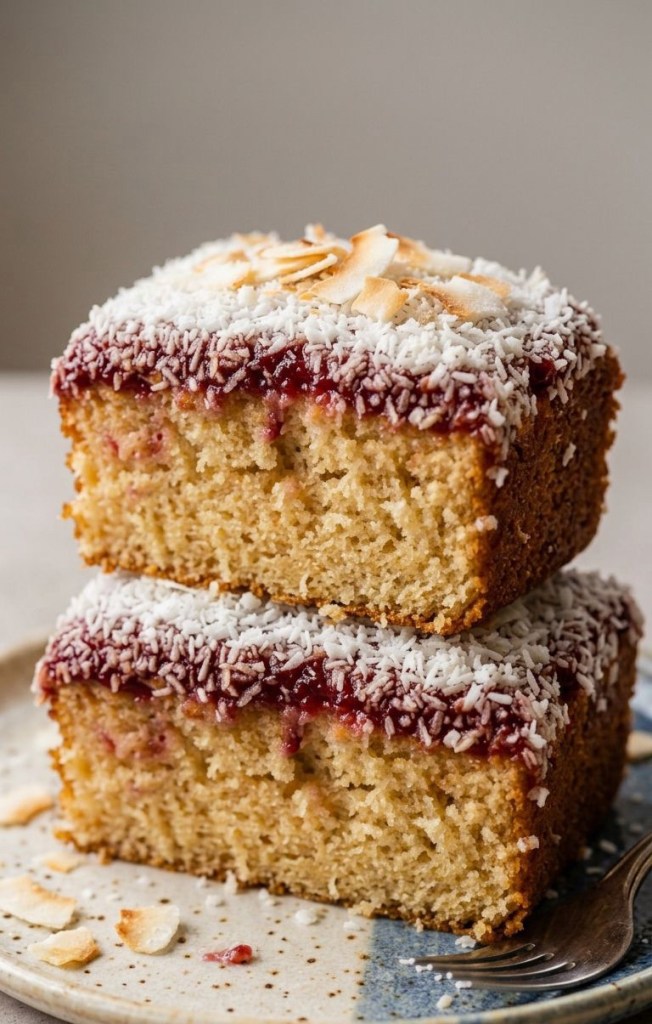
    There are some recipes that just feel like a warm hug, aren’t there? You know the ones—they take you right back to the school canteen or a Sunday afternoon at Grandma’s house. For me, that is always the Jam and Coconut Sponge.

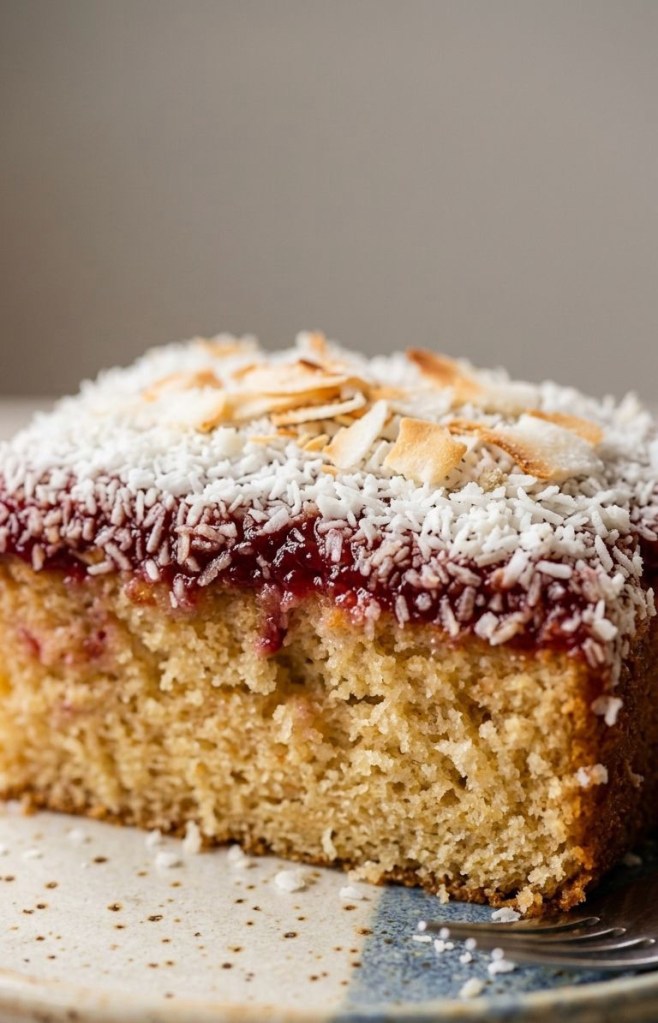
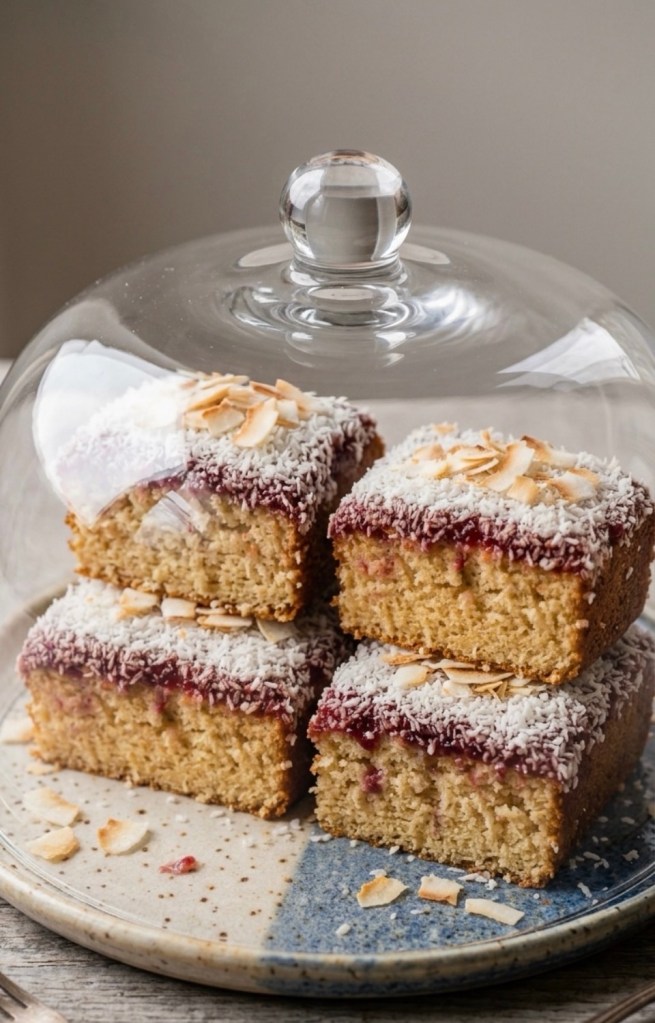
    It’s not trying to be fancy. It doesn’t need twenty different layers or a complicated frosting. It’s just honest, buttery, jammy perfection. And let’s be real, the best part is how it looks—that bright red jam topped with a snowy drift of coconut is just iconic!

    Why You’ll Love This Tray Bake

    If you’ve been following my kitchen adventures, you know I’m a sucker for a good tray bake. They are so easy to slice up, they feed a crowd, and they stay moist for days. This particular recipe is my go-to when I want something that feels special but takes zero stress to whip up.

    Let’s Get Baking!

    Yields: One 9×13 inch tin

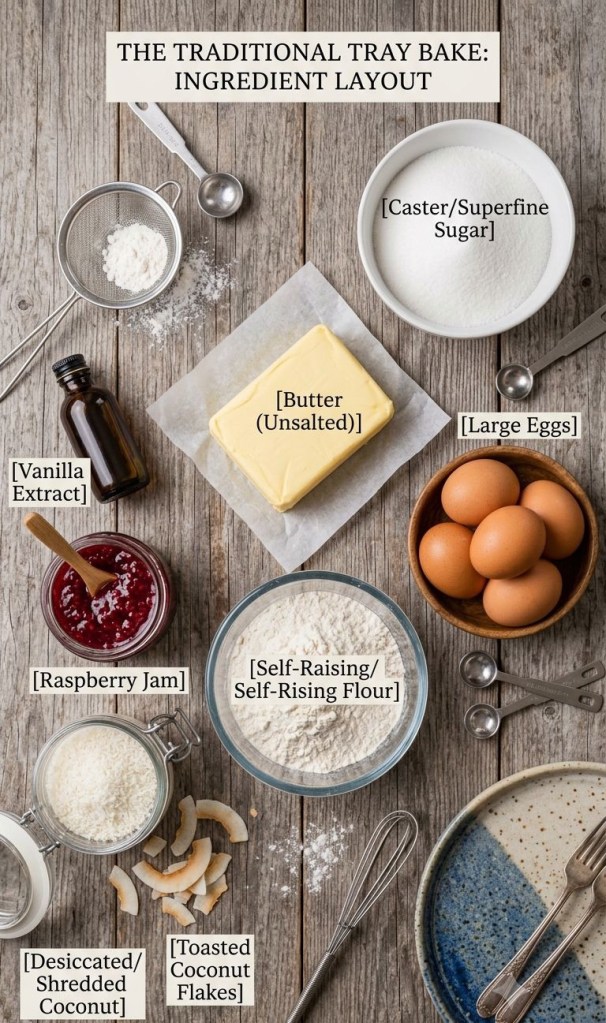
    Ingredients:

     225g (1 cup) Unsalted butter, softened

     225g (1 cup) Caster sugar

     4 Large eggs

     225g (1¾ cups) Self-raising flour

     1 tsp Vanilla extract

     3–4 tbsp Raspberry or Strawberry jam (warmed)

     50g (½ cup) Desiccated coconut

    The Method:

    1. Prep: Preheat your oven to 180°C (350°F) and grease/line your 9×13 inch tin.

    2. Cream: Beat that butter and sugar until it’s super pale and fluffy. Add your eggs one at a time, then mix in the vanilla.

    3. Fold: Gently fold in the flour until it’s just combined—don’t overwork it!

    4. Bake: Pour it into your tin, level it out, and pop it in for 25–30 minutes. It should be golden and bouncy to the touch.

    5. Decorate: Once it’s cooled slightly, spread that warmed jam all over the top, then shower it with the coconut.

    Pro-tip: If you really want to level up the flavor, toast your coconut in a dry pan for a minute or two until it’s golden brown. It adds such a lovely depth!

    Serve it warm with a splash of custard if you’re feeling extra nostalgic, or enjoy it as-is with a cup of tea. Let me know in the comments if you’re Team Raspberry or Team Strawberry—or if you have another childhood favorite I need to try!

  • Classic Victoria Sponge: A Traditional British Afternoon Tea Cake

    Classic Victoria Sponge: A Traditional British Afternoon Tea Cake


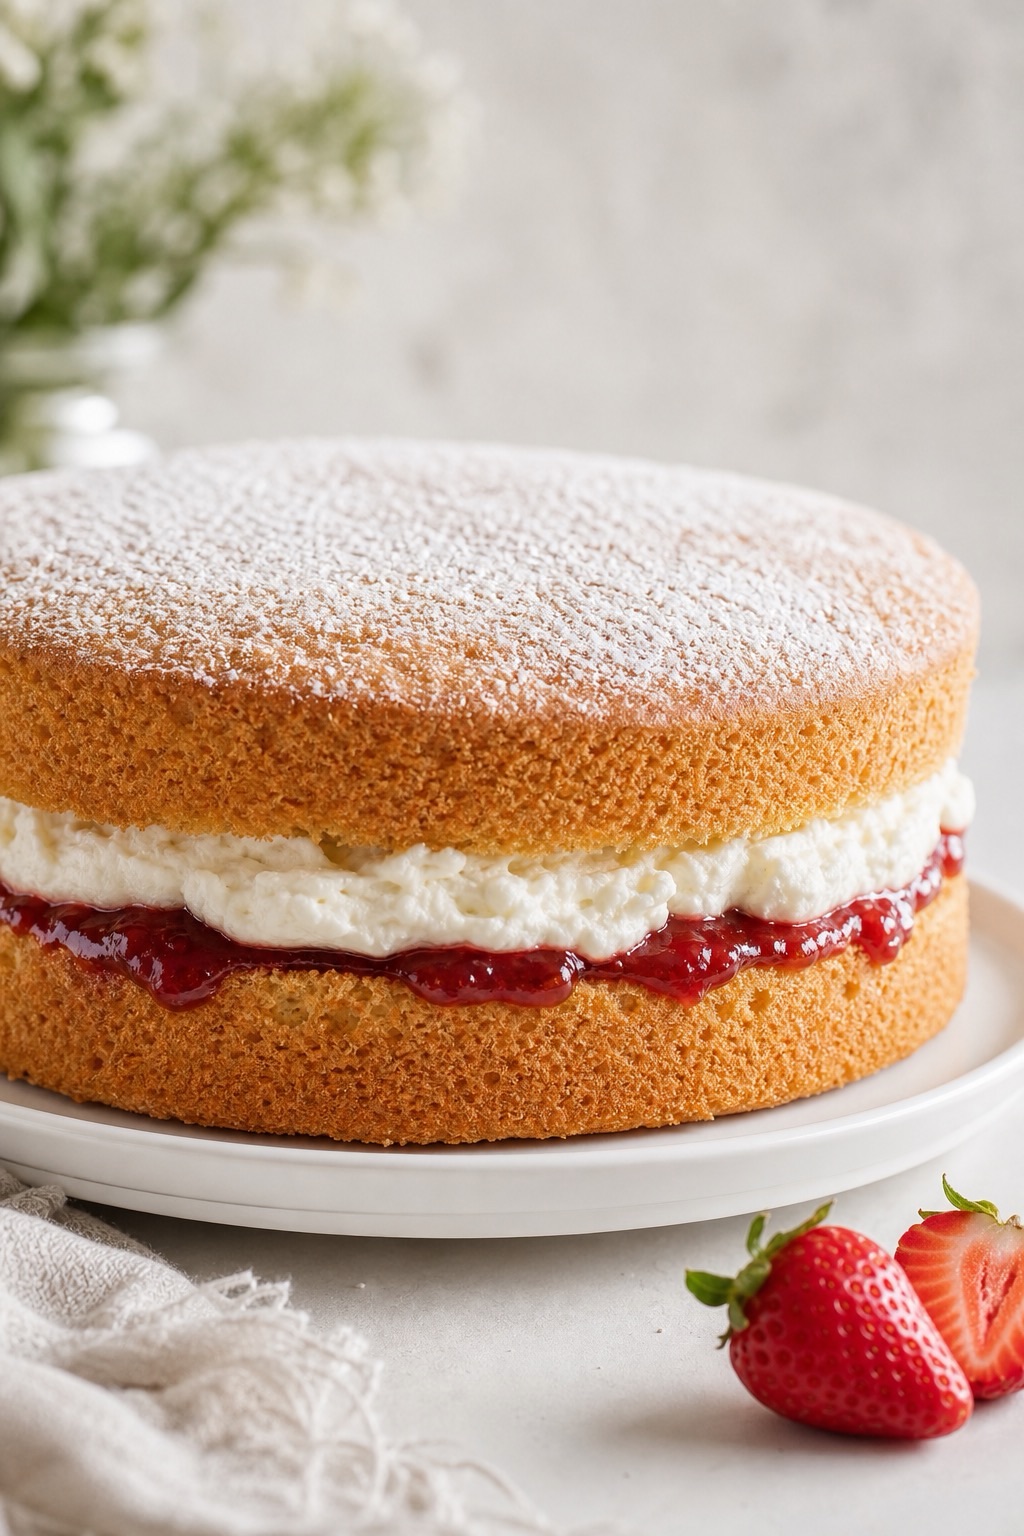
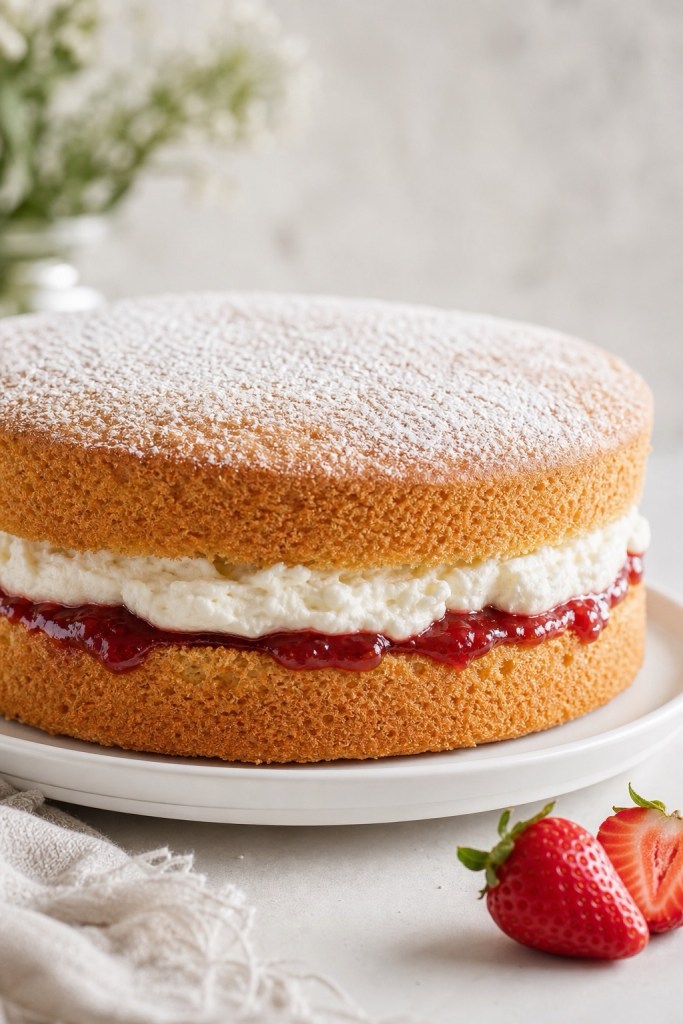
    There’s something wonderfully nostalgic about a classic Victoria sponge cake – light golden layers, a generous spread of strawberry jam, and soft clouds of cream, all finished with a delicate dusting of icing sugar.

    It’s simple, elegant, and feels like a warm invitation to sit down with a proper cup of tea.

    This version uses both UK and US measurements, so no matter where you’re baking from, you can follow along easily. It’s a brilliant go‑to recipe for afternoon tea, birthdays, or whenever you fancy a traditional British bake that never goes out of style.

    What Is a Victoria Sponge?
    A Victoria sponge (or Victoria sandwich) is a traditional British cake made from two layers of vanilla sponge, sandwiched together with jam and often whipped cream. It’s named after Queen Victoria, who was said to enjoy a slice with her afternoon tea.

    What makes it special is its simplicity. There’s no heavy frosting or elaborate decoration – just soft, buttery sponge, a bright layer of jam, and a creamy filling. When you cut into it and see those neat layers, it just feels like home on a plate.

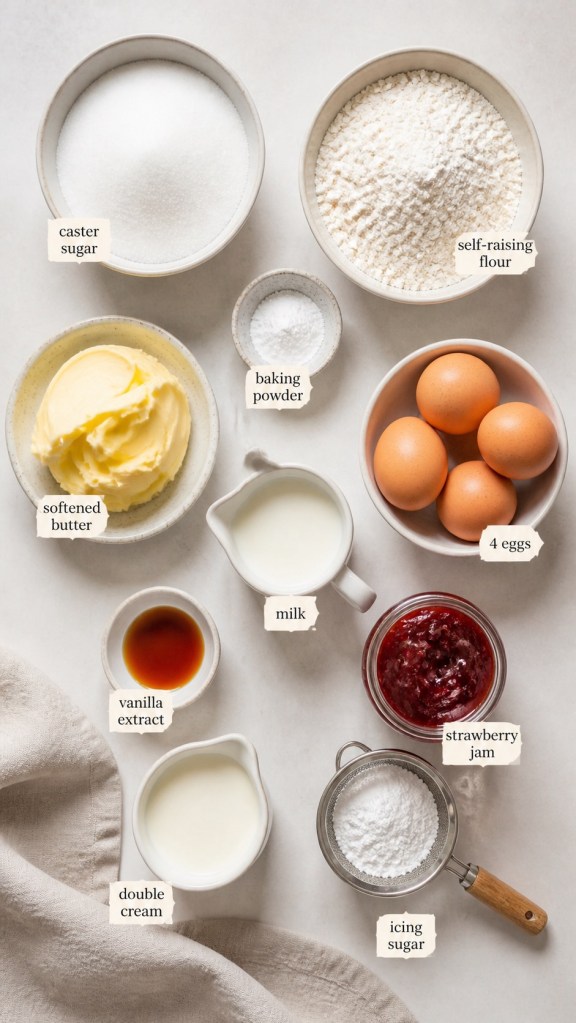
    Ingredients (UK & US Measurements)
    This recipe makes one 20 cm / 8‑inch two‑layer cake.


    For the sponge
    • 200 g caster sugar (1 cup superfine sugar)
    • 200 g unsalted butter, softened (14 tbsp / 1 ¾ sticks)
    • 4 medium eggs (UK) or 4 large eggs (US)
    • 200 g self‑raising flour (1 ⅔ cups self‑rising flour)
    • 1 tsp baking powder
    • 2–3 tbsp milk (2–3 tbsp whole milk), as needed for consistency
    • 1 tsp vanilla extract
    For the filling
    • 200 g strawberry jam (about ¾ cup)
    • 150 ml double cream, whipped (⅔ cup heavy or whipping cream, whipped)
    • Icing sugar (powdered sugar) for dusting the top
    Equipment
    • Two 20 cm sandwich tins (two 8‑inch cake pans)
    • Baking paper (parchment) for lining

    • Mixing bowl, electric mixer, spatula, wire rack

    Step‑by‑Step Method

    1. Prepare your tins and oven
      Preheat your oven to 180°C (160°C fan) / 350°F.
      Grease the bases and sides of your two 20 cm / 8‑inch tins, then line the bases with baking paper.

    Taking a moment to line the tins properly really helps the sponges rise evenly and release cleanly, which is especially important if you want neat layers for photos or video.

    1. Cream the butter and sugar
      In a large mixing bowl, beat the softened butter and caster sugar together until very pale and fluffy. This usually takes around 3–4 minutes with an electric hand mixer or a stand mixer.

    This step is key: creaming properly incorporates air into the mixture and gives you that light, soft crumb that makes a Victoria sponge so lovely to eat.

    1. Add the eggs and vanilla
      Add the eggs one at a time, beating well after each addition so the mixture stays smooth. If it starts to look a little curdled, you can mix in a spoonful of the flour to bring it back together.

    Stir in the vanilla extract. It adds a gentle sweetness that lifts the flavour without overpowering the jam and cream.

    1. Fold in the dry ingredients
      Sift the self‑raising flour and baking powder together, then gently fold them into the bowl using a spatula or large metal spoon.

    Add the milk a tablespoon at a time until the batter reaches a soft “dropping” consistency – when you lift the spoon, the mixture should fall off slowly in dollops rather than running or sticking.

    1. Bake the sponges
      Divide the batter evenly between the two prepared tins and level the tops so they bake flat.

    Bake in the preheated oven for 20–25 minutes, or until the sponges are risen, lightly golden and a skewer inserted into the centre comes out clean. Try not to open the oven door too early, as that can cause the cakes to sink.

    1. Cool completely
      Leave the cakes in their tins for about 5 minutes, then carefully turn them out onto a wire rack. Peel away the baking paper and allow the sponges to cool completely.

    If the cakes are even slightly warm when you add the filling, the cream can melt and the top layer may slide, so cooling fully is worth the wait.

    1. Fill with jam and cream
      Once the sponges are fully cool, place one layer upside down on your serving plate or cake pedestal.
      • Spread an even layer of strawberry jam over the base.
      • Whip the double cream to soft peaks and spoon it over the jam, spreading gently towards the edges.

    Carefully place the second sponge on top, right‑side up, and try not to press down too firmly so you don’t squeeze out all the filling.

    1. Finish and serve
      Just before serving, sift a light dusting of icing sugar over the top of the cake.

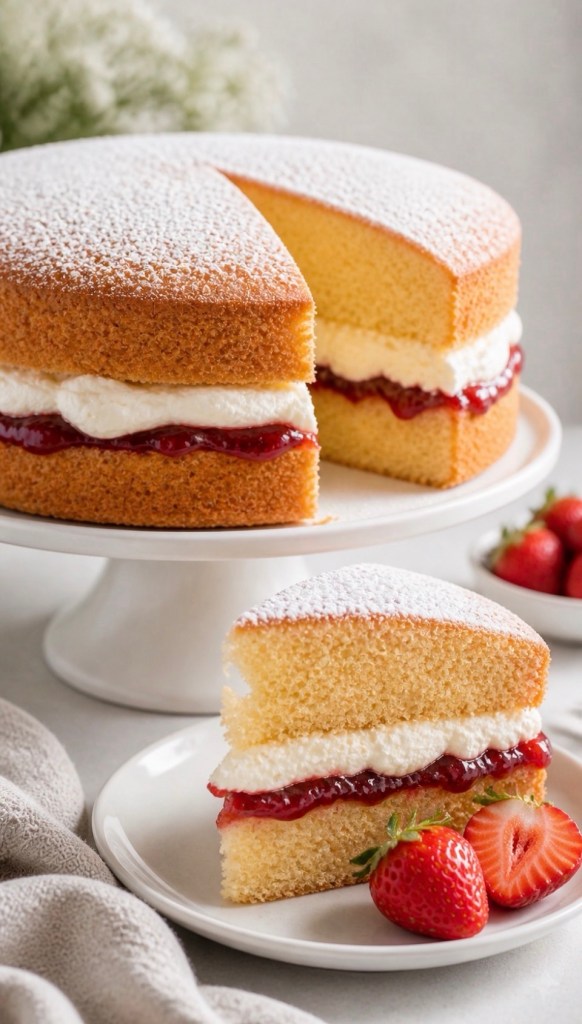
    Slice with a sharp knife to reveal the layers of sponge, jam and cream. This is the perfect moment for a close‑up photo or video: one slice on a small plate in front, showing off the crumb and filling, with the rest of the cake proudly on its pedestal behind.

    Tips for the Perfect Victoria Sponge
    • Use room‑temperature ingredients: Butter and eggs blend more easily and help create a smoother, lighter batter.
    • Don’t overmix once the flour goes in: Gentle folding keeps the sponge tender and prevents it turning dense.
    • Measure accurately: For sponge cakes, weighing ingredients (especially flour and sugar) makes a big difference to the final texture.
    • Watch the bake time: Start checking from around 20 minutes; over‑baked sponge will feel dry rather than soft and springy.

    • Serve fresh: This cake is best on the day it’s filled, when the sponge is soft and the cream is fresh and light.

    Variations on This Traditional British Cake
    Once you’re comfortable with the classic, you can easily play with a few variations:
    • Swap strawberry jam for raspberry, cherry or mixed berry jam.
    • Add a handful of fresh sliced strawberries to the filling for extra colour and texture.
    • Use vanilla buttercream instead of whipped cream if the cake needs to sit out for a while or travel.

    • Add a little lemon zest to the sponge for a subtle citrus twist.

    Perfect for Afternoon Tea – And Social Media
    This classic Victoria sponge is ideal for afternoon tea, family celebrations or a simple weekend treat. It also happens to be incredibly photogenic, especially when you show off the crumb and layers in a close‑up slice.
    If you share your bake on social media, let people know whether you’re team “jam only” or “jam and cream” and invite them to vote in the comments – it’s a fun way to spark conversation around this traditional British favourite

  • Black Forest Cake Is Back On The Menu (And It Belongs On Your Tea Table)

    Black Forest Cake Is Back On The Menu (And It Belongs On Your Tea Table)


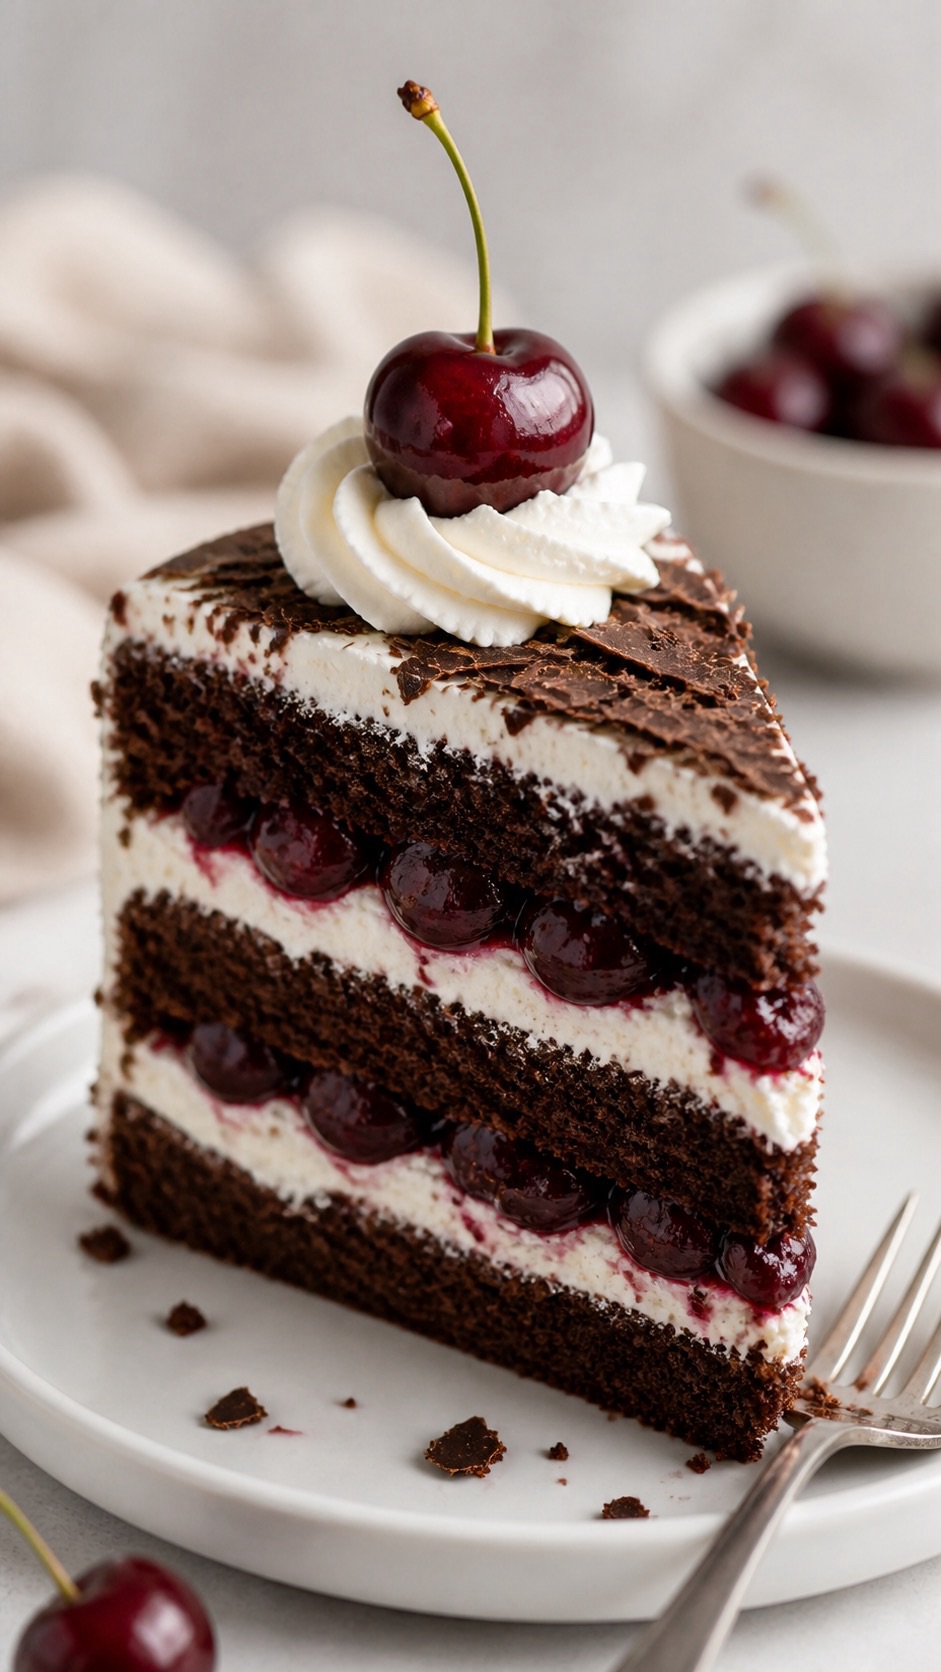
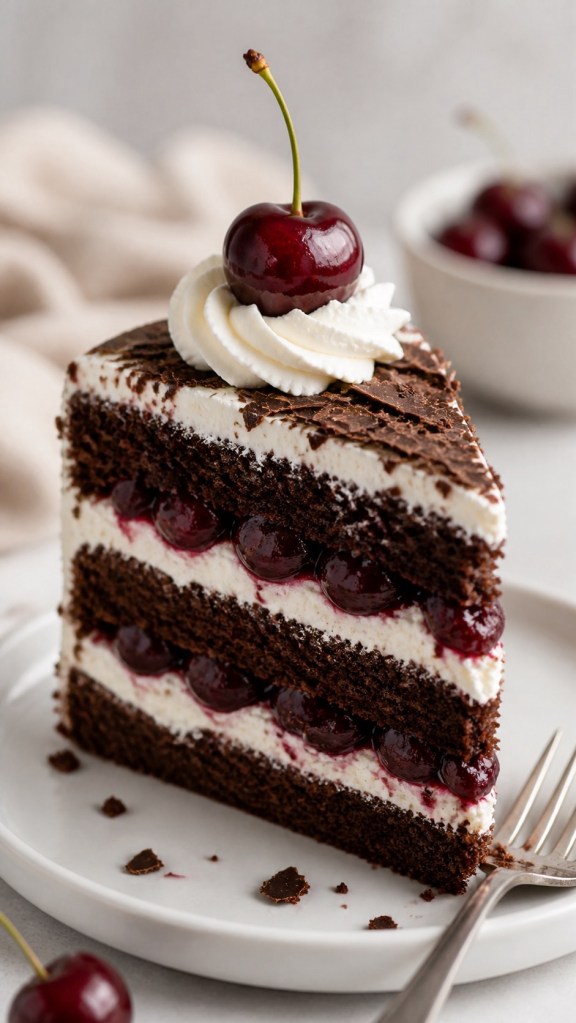
    Some cakes never go out of style – they just wait patiently for us to remember how good they are. Black Forest cake is one of those bakes: rich chocolate sponge, juicy cherries, and soft clouds of cream, all in one dramatic, sliceable dessert.
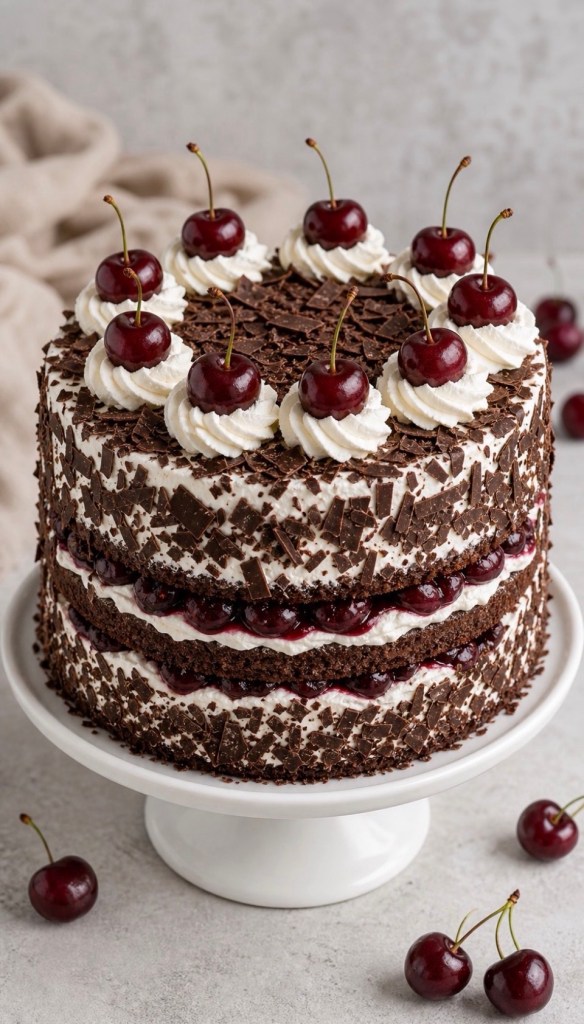
    In this post I’m sharing my TikTok‑ready Black Forest cake: a full, round cake that works just as well for family tea as it does for a scroll‑stopping video. You’ll get UK ingredients first (with US cups in brackets), plus a streamlined method that keeps the classic flavour without making you live in the kitchen.


    What Makes A Black Forest Cake “Black Forest”?
    Black Forest cake (Schwarzwälder Kirschtorte) comes from the Black Forest region of Germany and traditionally combines chocolate sponge, cherries, and kirsch (a clear cherry brandy). Instead of buttercream, it uses lightly sweetened whipped cream, which keeps every bite lighter than it looks.
    Modern versions often tone down the alcohol and lean on jarred cherries in juice instead of fresh, which makes the recipe more accessible for home bakers. The essential elements are still the same: chocolate sponge, cherry filling, cream, and plenty of chocolate shavings on top.
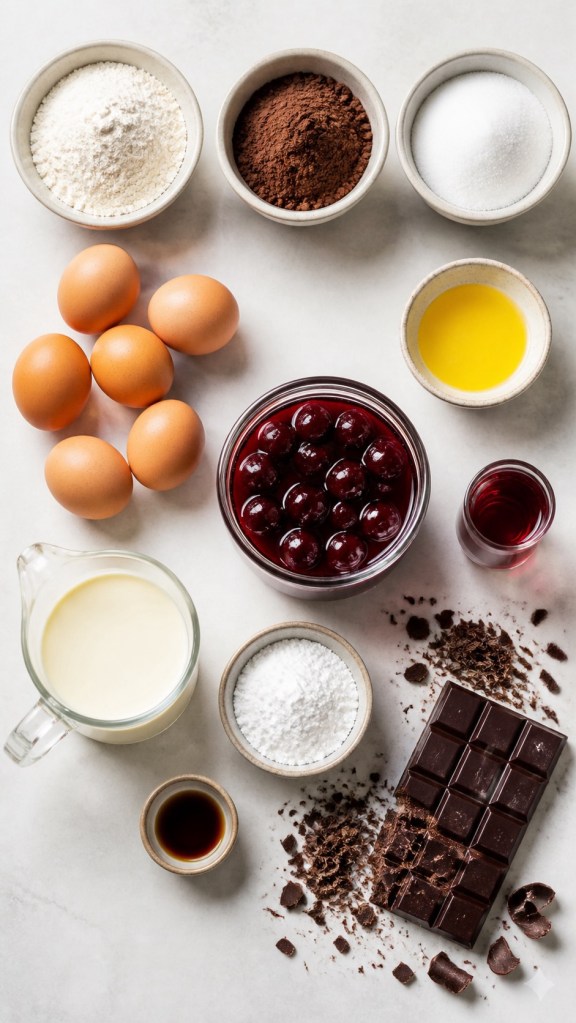
    Ingredients (UK First, With US Cups)


    I’ve kept this as simple as possible, using store‑cupboard ingredients and a jar of cherries in juice. This quantity makes a full round cake, about three 18–20 cm layers, ideal for a celebration or Sunday tea.
    Sponge
    • 6 eggs
    • 200 g caster sugar (1 cup sugar)
    • 120 g plain flour (1 cup all‑purpose flour)
    • 50 g cocoa powder (½ cup unsweetened cocoa)
    • 1 tsp baking powder (or ½ tsp baking soda)
    • Pinch of salt
    • 60 g melted butter (4 tbsp unsalted butter), cooled
    Cherries
    • 1 large jar pitted cherries in juice (about 680 g / 24 oz can)
    • 50 g sugar (¼ cup)
    • 2–3 tbsp cornflour (cornstarch)
    • Optional: 2–3 tbsp kirsch or cherry brandy (or extra juice if alcohol‑free)
    Cream
    • 600 ml double cream (2½ cups heavy/whipping cream)
    • 50–70 g icing sugar (½–¾ cup powdered sugar)
    • 1–2 tsp vanilla extract
    Topping
    • Dark chocolate shavings (a bar of dark chocolate, roughly grated)
    • Extra cherries for the top
    Step‑By‑Step: Chocolate Sponge
    This sponge relies on whisked eggs and sugar for structure, so take your time with this step. You’re aiming for a thick, pale mixture that leaves ribbons on the surface when you lift the whisk.

    1. Preheat your oven to 180°C (160°C fan) / 350°F and grease and line three 18–20 cm round tins.
    2. In a large bowl or stand mixer, whisk the eggs and caster sugar for 6–7 minutes until very pale and doubled in volume.
    3. In a separate bowl, sift together the plain flour, cocoa powder, baking powder, and salt.
    4. Gently fold the dry ingredients into the egg mixture in two or three additions, keeping as much air as possible in the batter.
    5. Pour in the cooled melted butter and fold again until just combined.
    6. Divide the batter evenly between the tins and bake for 20–25 minutes, or until the sponges are risen and a skewer comes out clean.
    7. Allow the cakes to cool in their tins for 10 minutes, then turn out onto a wire rack to cool completely.
      Step‑By‑Step: Cherry Filling And Syrup
      The cherry layer is part compote, part syrup: a glossy mixture that sits between the layers while some of the juice is reserved to soak the sponge. This keeps the cake moist and gives you that unmistakable cherry flavour in every slice.
    8. Drain the cherries, reserving the juice in a jug.
    9. Measure about 300 ml (1¼ cups) of the cherry juice into a saucepan; top up with water if needed.
    10. Whisk in the sugar and cornflour until no lumps remain, then add the optional kirsch if using.
    11. Bring to a gentle boil over medium heat, whisking often, until the mixture thickens and turns glossy.
    12. Remove from the heat and stir in the cherries, coating them in the thickened juice.
    13. Set aside to cool; keep a little plain cherry juice or a splash of the syrup thinned with water for brushing over the sponge layers.
      Step‑By‑Step: Whipped Cream And Assembly
      Because Black Forest cake uses whipped cream instead of buttercream, it’s lighter on the palate but needs a bit of care in warm kitchens. You can stabilise the cream with a spoonful of Greek yoghurt or a commercial stabiliser if you want it to hold longer for photos.
    14. Add the double cream, icing sugar, and vanilla to a chilled bowl.
    15. Whisk to soft‑stiff peaks – firm enough to hold its shape, but still smooth and spreadable.
    16. To assemble, place the first sponge layer on a serving plate or cake stand and brush generously with reserved cherry juice or kirsch syrup.
    17. Pipe or spread a ring of whipped cream around the edge, then spoon some cherry mixture into the middle.
    18. Add a little more cream over the cherries, then top with the second sponge layer and repeat.
    19. Place the final sponge layer on top, brush with syrup, and then cover the top and sides of the cake with the remaining whipped cream.
    20. Press dark chocolate shavings onto the sides and top, then decorate with extra cherries.
    21. Chill for at least 1–2 hours before slicing to allow the flavours to meld and the cream to set slightly.

    22. Tips For Health‑Conscious Bakers
      Black Forest cake is naturally lighter than many buttercream‑heavy layer cakes because it uses whipped cream and fruit. You can lean into that by making a few gentle adjustments without losing the spirit of the dessert.
      • Swap some caster sugar for a lower‑GI sweetener if that’s part of your routine.
      • Use an alcohol‑free version by skipping the kirsch and adding extra cherry juice instead.
      • Keep your slice sizes modest and pair with a cup of tea or coffee – a little goes a long way.
      For everyday baking, you might save this for weekends or special occasions, then keep your weekday treats simpler and higher in protein. This kind of balance keeps cake joyful rather than guilt‑ridden, especially if you already focus on walking and general wellness.
  • Why You Need This White Chocolate & Raspberry Traybake in Your Life

    Why You Need This White Chocolate & Raspberry Traybake in Your Life

    Hello, lovely bakers! Let’s have a proper catch-up. Is there anything better than the smell of something sweet baking in the oven? I’ve been craving something that strikes that perfect balance between indulgent and fresh, and I think I’ve found the answer.

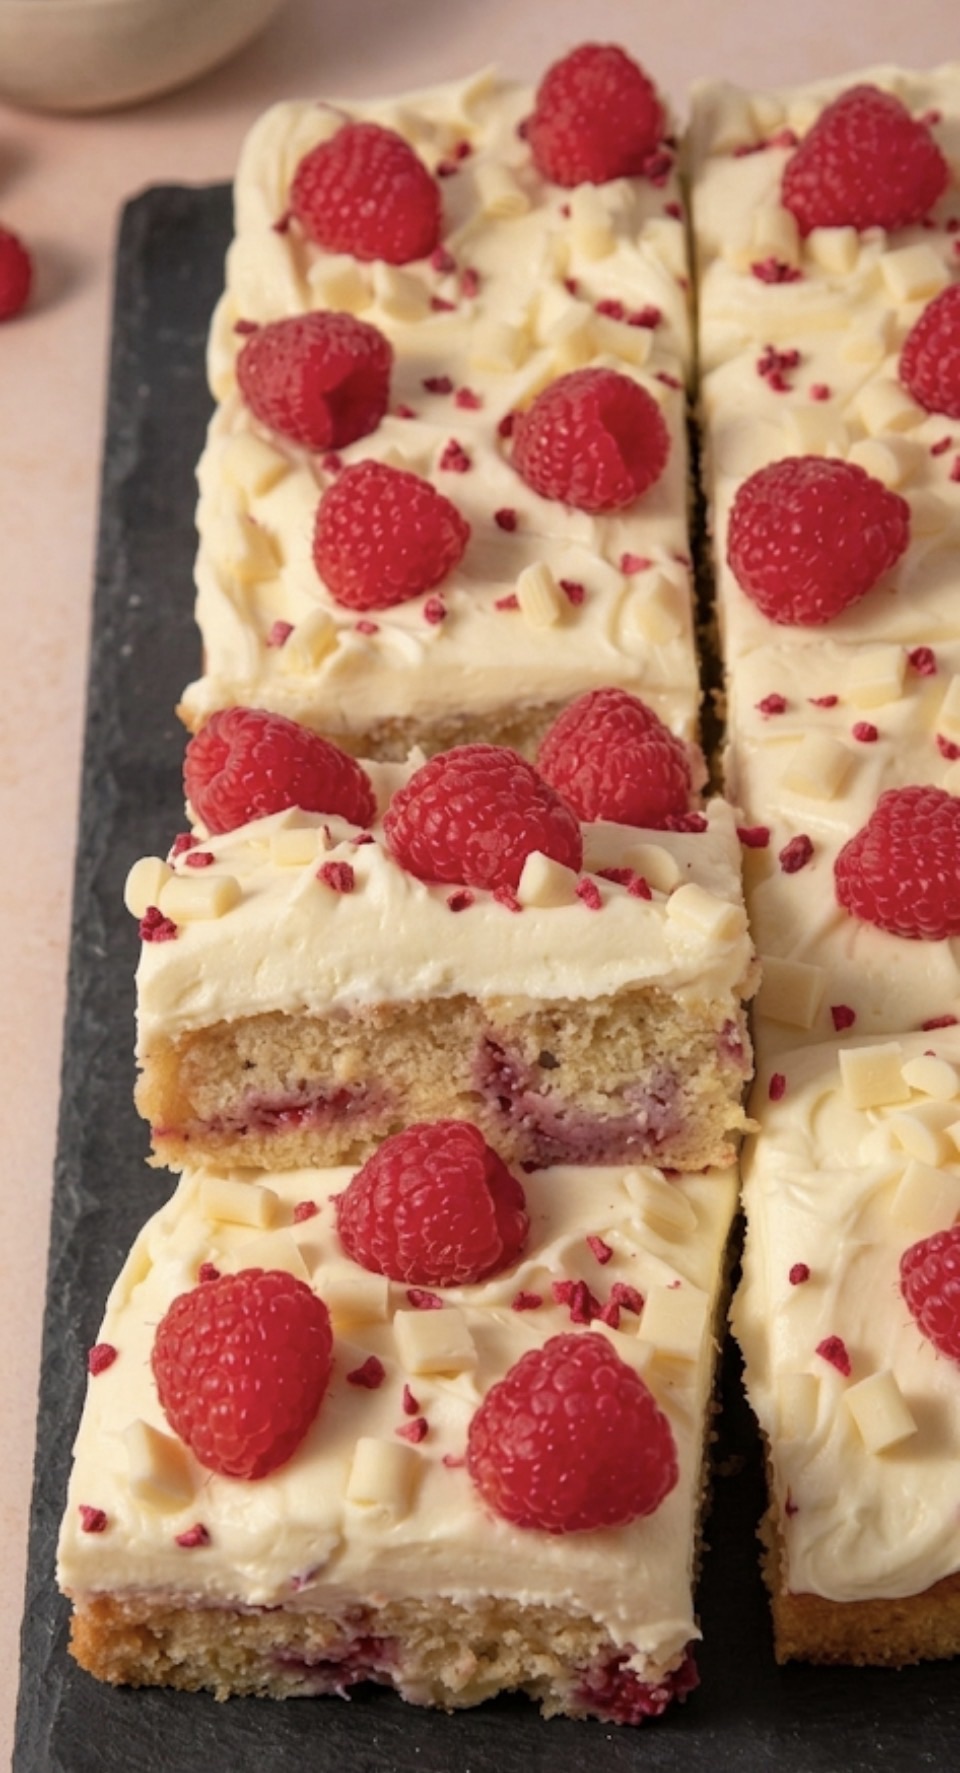
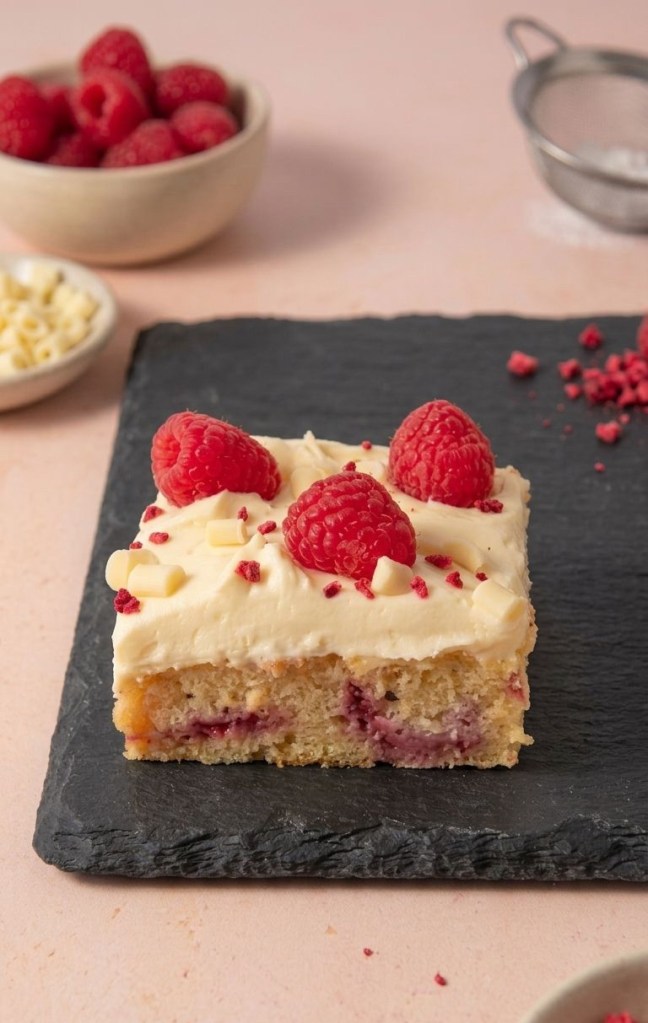
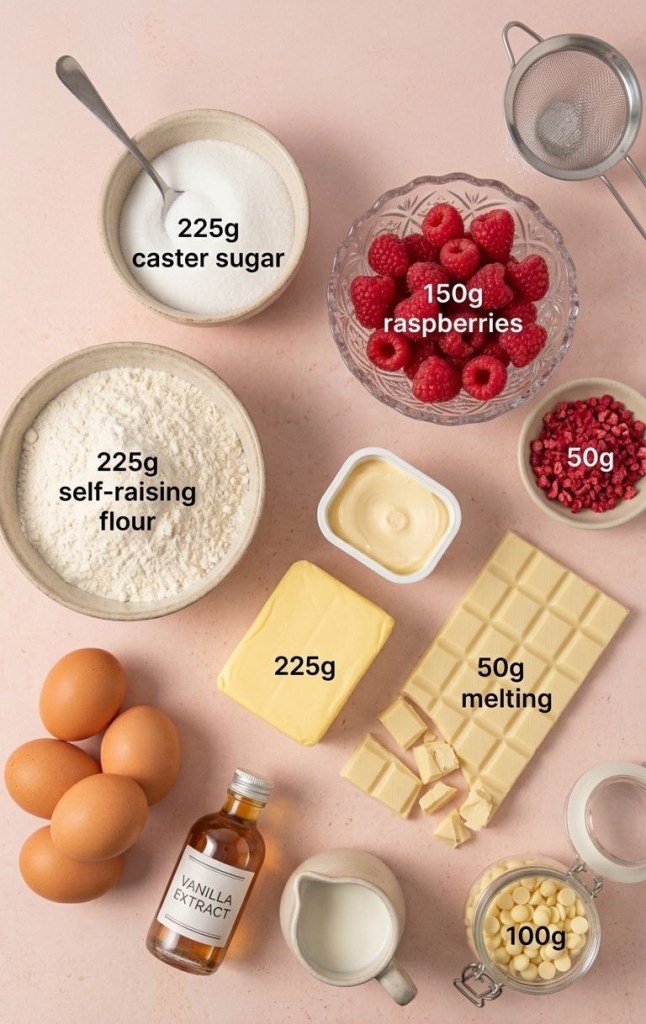
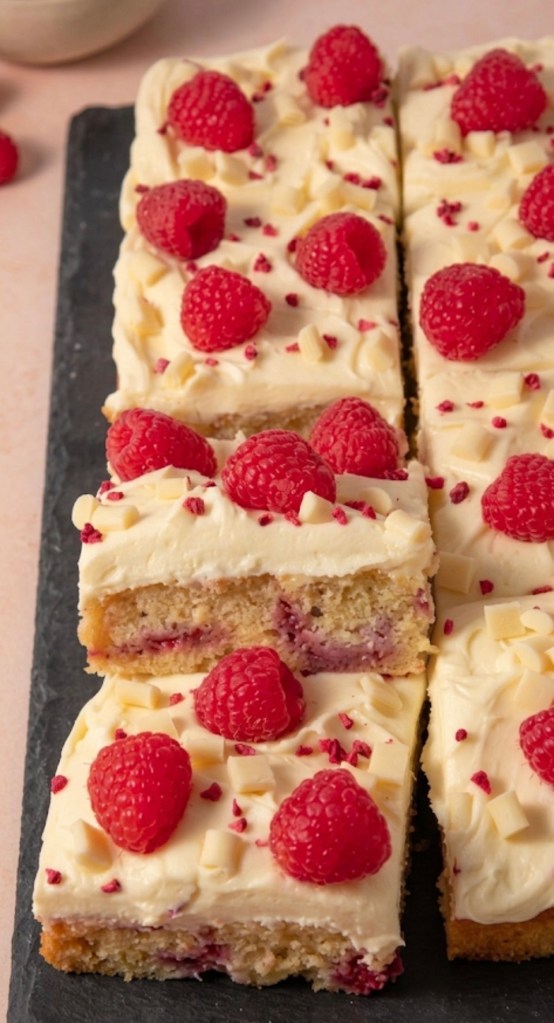
    If you’re looking for a crowd-pleaser that is honestly impossible to mess up, this White Chocolate and Raspberry Traybake is going to become your new best friend. It’s got that soft, buttery sponge we all love, pockets of tart raspberries that burst with flavour, and a silky white chocolate buttercream that brings it all together. It’s perfect for a rainy afternoon with a cuppa, or for bringing into the office when you want to be the favourite person of the day!

    What You’ll Need

    For the Cake:

     225g baking spread or butter: Make sure it’s nice and soft so it creams together with the sugar like a dream.

     225g caster sugar: For that fine, even crumb.

     225g self-raising flour: The secret to a nice lift.

     4 large eggs: To bind everything together.

     1 tsp vanilla extract: Because, really, is it even baking without a dash of vanilla?

     2 tbsp milk: Just to loosen the batter slightly.

     150g fresh raspberries: Give these a little light coating in flour before they go in—it stops them from sinking to the bottom!

     100g white chocolate chips: For those lovely little pockets of sweetness.

    For the Buttercream & Topping:

     150g butter: Softened, for the base.

     300g icing sugar: Sift this if you want that super smooth finish.

     50g melted white chocolate: This is the magic ingredient that makes the frosting extra luxurious.

     A splash of milk: Add this slowly until you reach your perfect piping consistency.

     The finishing touches: Fresh raspberries, a scattering of white chocolate chips, and some crushed freeze-dried raspberries for that gorgeous pop of colour.

    The Method (Let’s Get Baking!)

    1. Prep is Key: Get your oven warming up to 160°C Fan / 180°C / Gas Mark 4. Grab your 12″ x 9″ tin and make sure it’s well-lined with baking parchment—it makes washing up so much easier later!

    2. Creaming: In a big mixing bowl, beat your butter and sugar together until the mix looks pale and really fluffy. This usually takes about 2-3 minutes; if you have an electric mixer, let it do the hard work for you.

    3. The Wet Ingredients: Crack in those eggs, add your vanilla and the milk, and give it all a good mix until it’s silky smooth.

    4. Folding: Gently fold in your flour. Once it’s just combined, tip in your flour-dusted raspberries and white chocolate chips. Be gentle here—we want to keep the fruit intact!

    5. Bake: Pour the batter into your tin, level it off, and pop it in the oven for about 25-30 minutes. You’re looking for a lovely golden top and a skewer that comes out clean.

    6. The Frosting: While the cake is cooling, whip your butter until it’s light, then slowly add the icing sugar and milk. Finally, pour in that melted white chocolate. If it feels a bit stiff, just add a tiny splash more milk until it’s smooth enough to spread.

    7. Decorate: Once the cake is completely cool (don’t rush this, or the icing will melt!), spread that beautiful buttercream all over the top. Add your raspberries and chocolate chips, and sprinkle over the freeze-dried raspberries to make it look like a bakery-standard treat.

    Slice it up, put the kettle on, and enjoy every single bite. If you have any left over, just keep it in an airtight container, and it should stay delicious for up to 3 days ..if it lasts that long which I doubt !

    Happy baking, everyone! Let me know in the comments how yours turned out!

  • The Tropical Twist Your Carrot Cake Has Been Missing 🍍🥕

    The Tropical Twist Your Carrot Cake Has Been Missing 🍍🥕

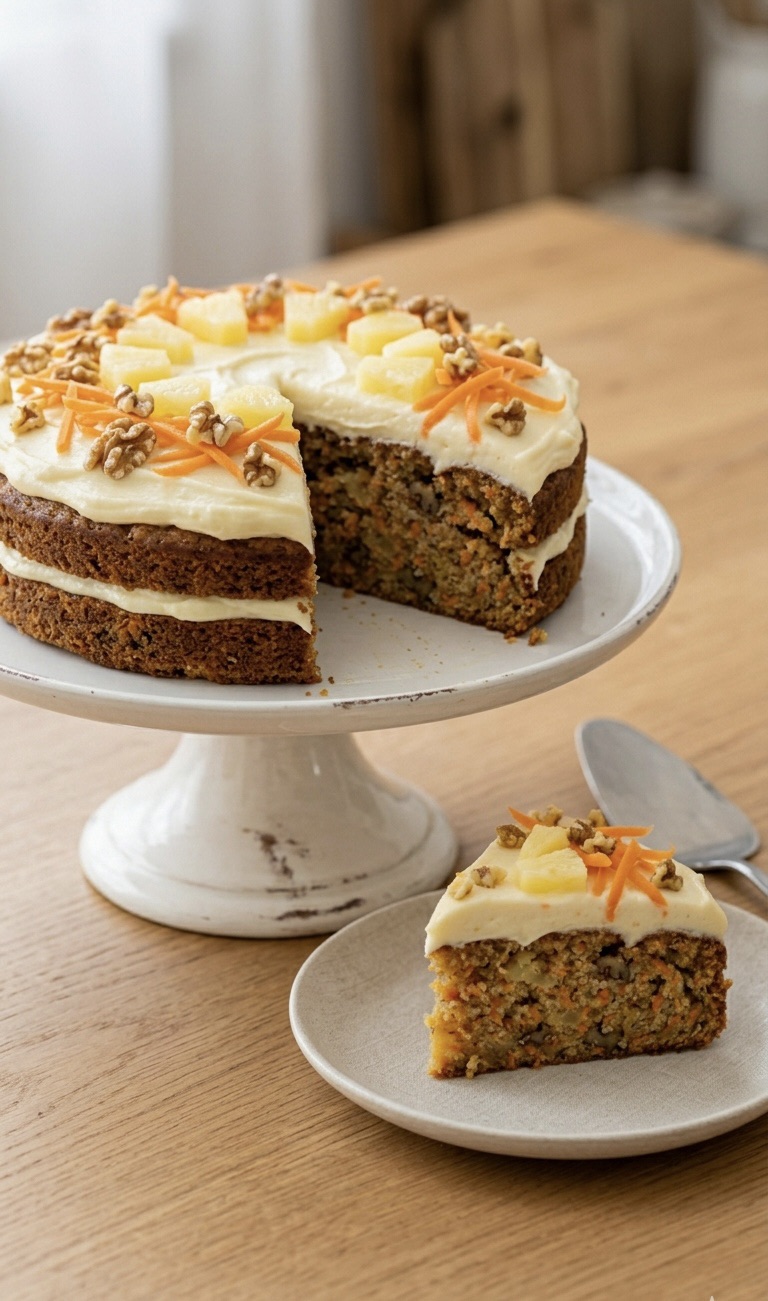
    If you think you know carrot cake, think again! I’ve taken the classic, comforting recipe we all love and given it a sun-drenched, tropical makeover that changes the game entirely.

    The secret? Crushed pineapple.

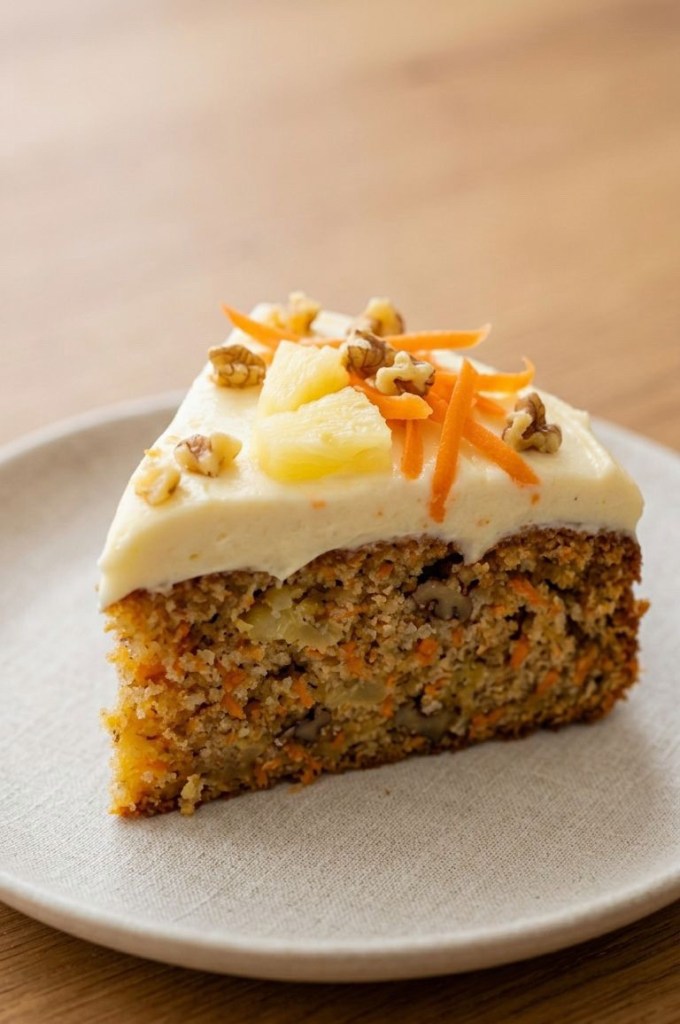
    It adds a subtle sweetness and an incredible level of moisture that makes this cake almost impossibly tender. Combined with the crunch of toasted walnuts and a silky-smooth cream cheese frosting, this is guaranteed to be your new go-to bake for birthdays, brunches, or just because.

    Why You’ll Love This Recipe

     Insanely Moist: Thanks to the secret pineapple ingredient, this cake stays fresh for days.

     Easy to Make: No complicated techniques here—just simple mixing and folding.

     The Perfect Balance: The warm cinnamon and earthiness of the carrots pair perfectly with the bright, tangy pineapple and velvety cream cheese topping.

    The Tropical Carrot Cake

     Prep time: 20 mins

     Bake time: 35–40 mins

     Yields: One 9×13-inch traybake

    Ingredients

     250g plain flour

     2 tsp baking powder

     1 tsp bicarbonate of soda

     2g ground cinnamon

     ½ tsp salt

     300g caster sugar

     3 large eggs

     240ml vegetable oil

     2 tsp vanilla extract

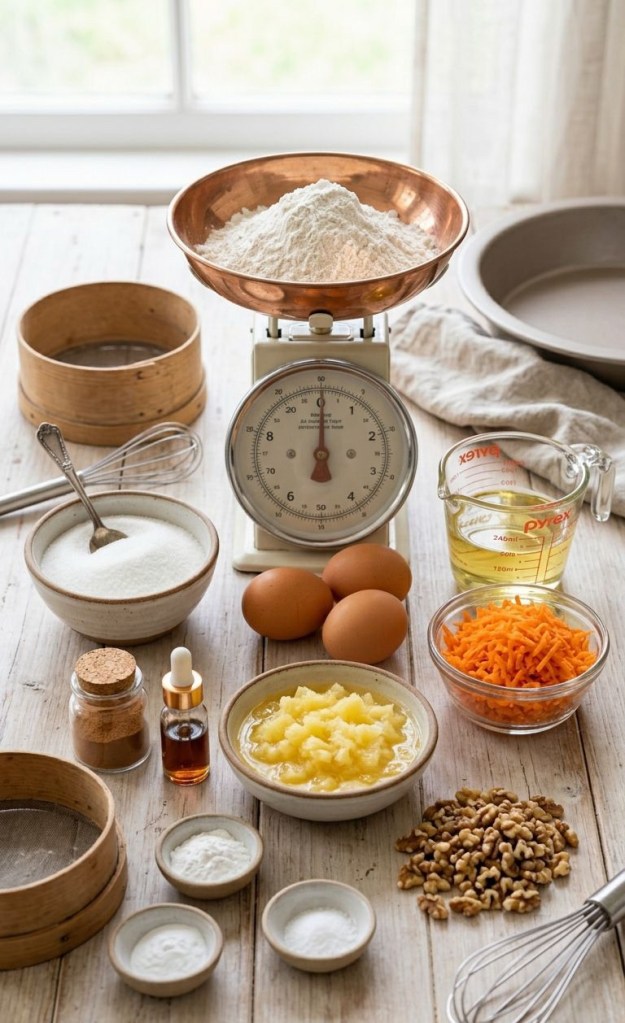
     220g carrots, finely grated

     150g crushed pineapple, well drained

     60g walnuts, chopped (optional)

    For the Frosting:

     225g cream cheese, softened

     115g unsalted butter, softened

     240g icing sugar

     1 tsp vanilla extract

    Method

    1 Get Ready: Preheat your oven to 180°C (160°C fan/gas mark 4). Grease and flour a 23cm x 33cm baking tin.

    2 Dry Mix: In a medium bowl, whisk together your flour, baking powder, bicarb, cinnamon, and salt.

    3 Wet Mix: In a larger bowl, beat the sugar, eggs, oil, and vanilla until the mixture is pale and creamy. This helps build a great structure for the cake.

    4 Combine: Gently fold the dry ingredients into the wet mixture. Be careful not to overmix—just stir until the flour streaks disappear.

    5 Add the Goodies: Fold in the grated carrots, well-drained pineapple, and those crunchy walnuts.

    6 Bake: Spread evenly into your tin and bake for 35–40 minutes. You’ll know it’s done when a skewer inserted into the center comes out clean. Let it cool completely in the tin.

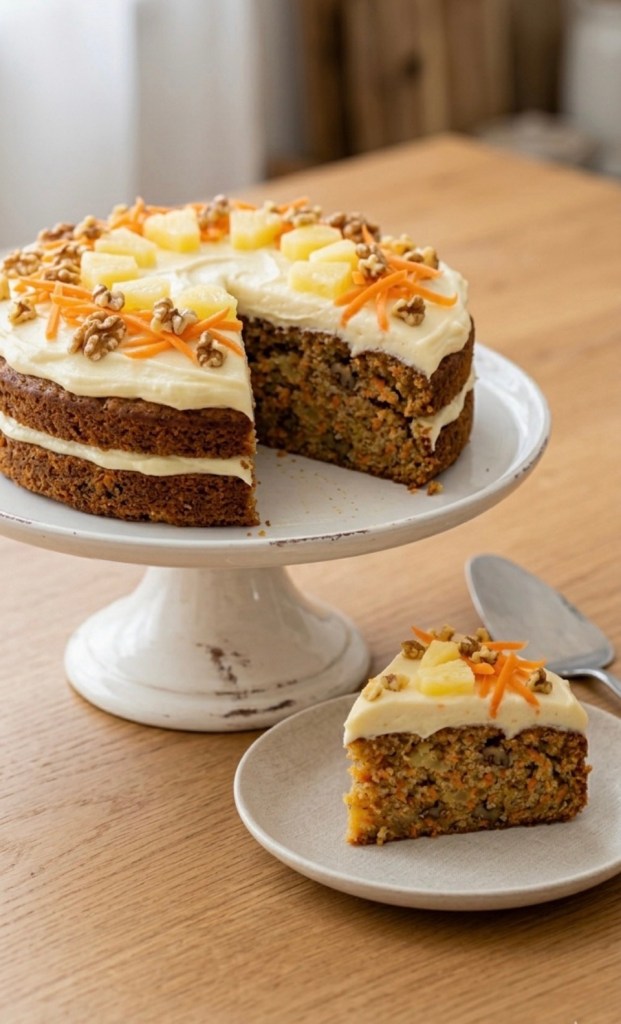
    7 Frost: Whisk the cream cheese and butter until fluffy, then gradually beat in the icing sugar and vanilla until smooth. Spread generously over your cooled cake.

    8 Garnish: Top with a few extra pineapple chunks and a sprinkle of shredded carrot for that professional, sunny finish!

    Have you tried adding fruit to your carrot cake before? Let me know in the comments below!

    Did you find this post helpful? Don’t forget to save this recipe for your next baking session!