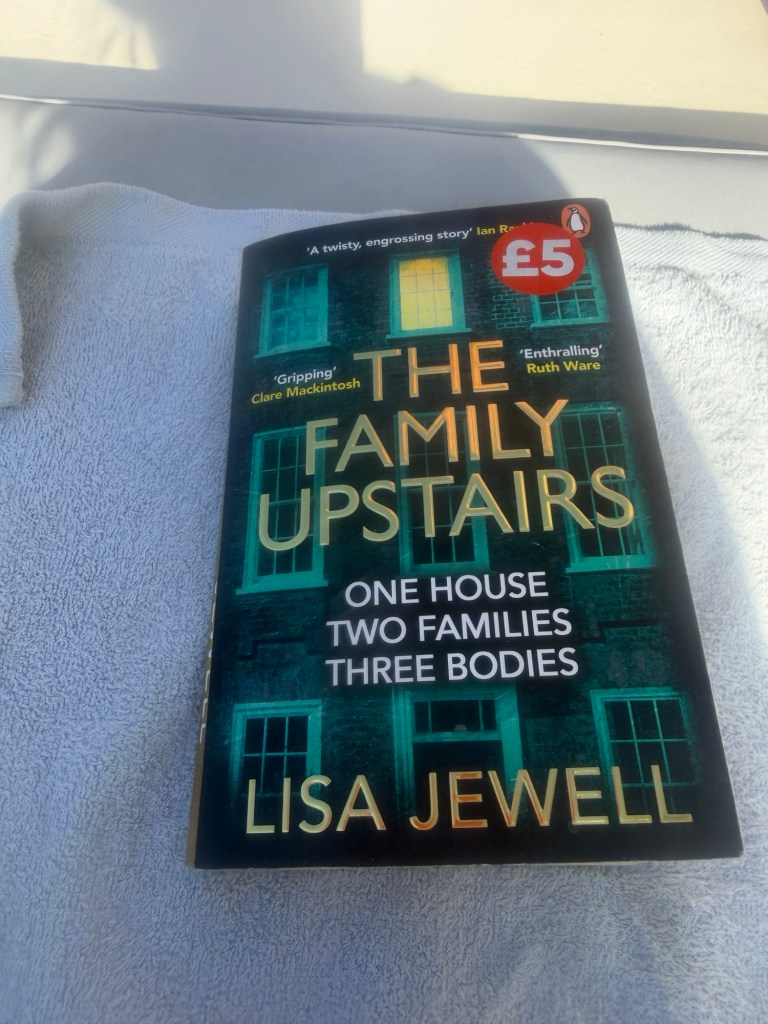
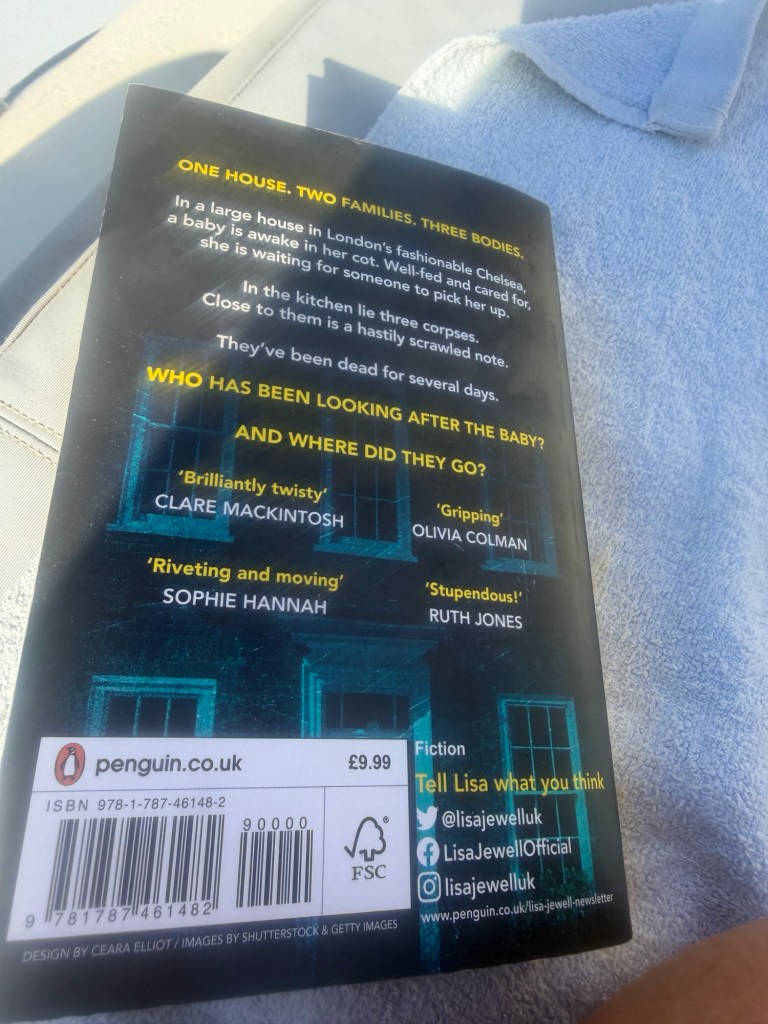
⭐️⭐️⭐️⭐️½ I’m giving The Family Upstairs a solid 4.5 stars. It’s a dark, twist‑packed psychological thriller that hooked me quickly and kept me turning the pages, constantly trying to work out who was telling the truth and what really happened in that unsettling Chelsea house.
Why it deserves 4.5 stars The plot is cleverly structured, moving between past and present and shifting between multiple narrators in a way that builds tension rather than confusion. The house in Chelsea becomes a wonderfully eerie focal point, transforming from a dream inheritance into a claustrophobic, almost gothic setting as the story unfolds. I loved how the short chapters and alternating viewpoints kept the pace up – it’s very much a “just one more chapter” kind of book. The characters are another big strength. They’re flawed, layered, and often morally ambiguous, which makes their choices feel disturbingly believable. Watching the household dynamic change under a controlling, charismatic influence is both fascinating and chilling. The book also weaves in themes of power, manipulation, trauma, and identity without ever losing that compulsive thriller feel. Why not a full 5 stars? The only reason I’d hold back half a star is that, in places, the darkness of the subject matter and the intensity of the family dynamics can feel a bit heavy, and there were moments where I’d have liked just a touch more emotional closure for certain characters. It’s nothing that ruins the experience, but it’s enough to stop it being an absolutely perfect read for me personally. Final thoughts Overall, The Family Upstairs is an excellent psychological thriller: atmospheric, unsettling, and full of twists and turns that keep you guessing right up to the end. At 4.5 stars, I’d highly recommend it to anyone who enjoys dark, character‑driven stories with a strong sense of place and plenty of secrets waiting to be uncovered. Do you want a one‑ or two‑sentence 4.5‑star summary you can drop straight into a caption or Goodreads review box?
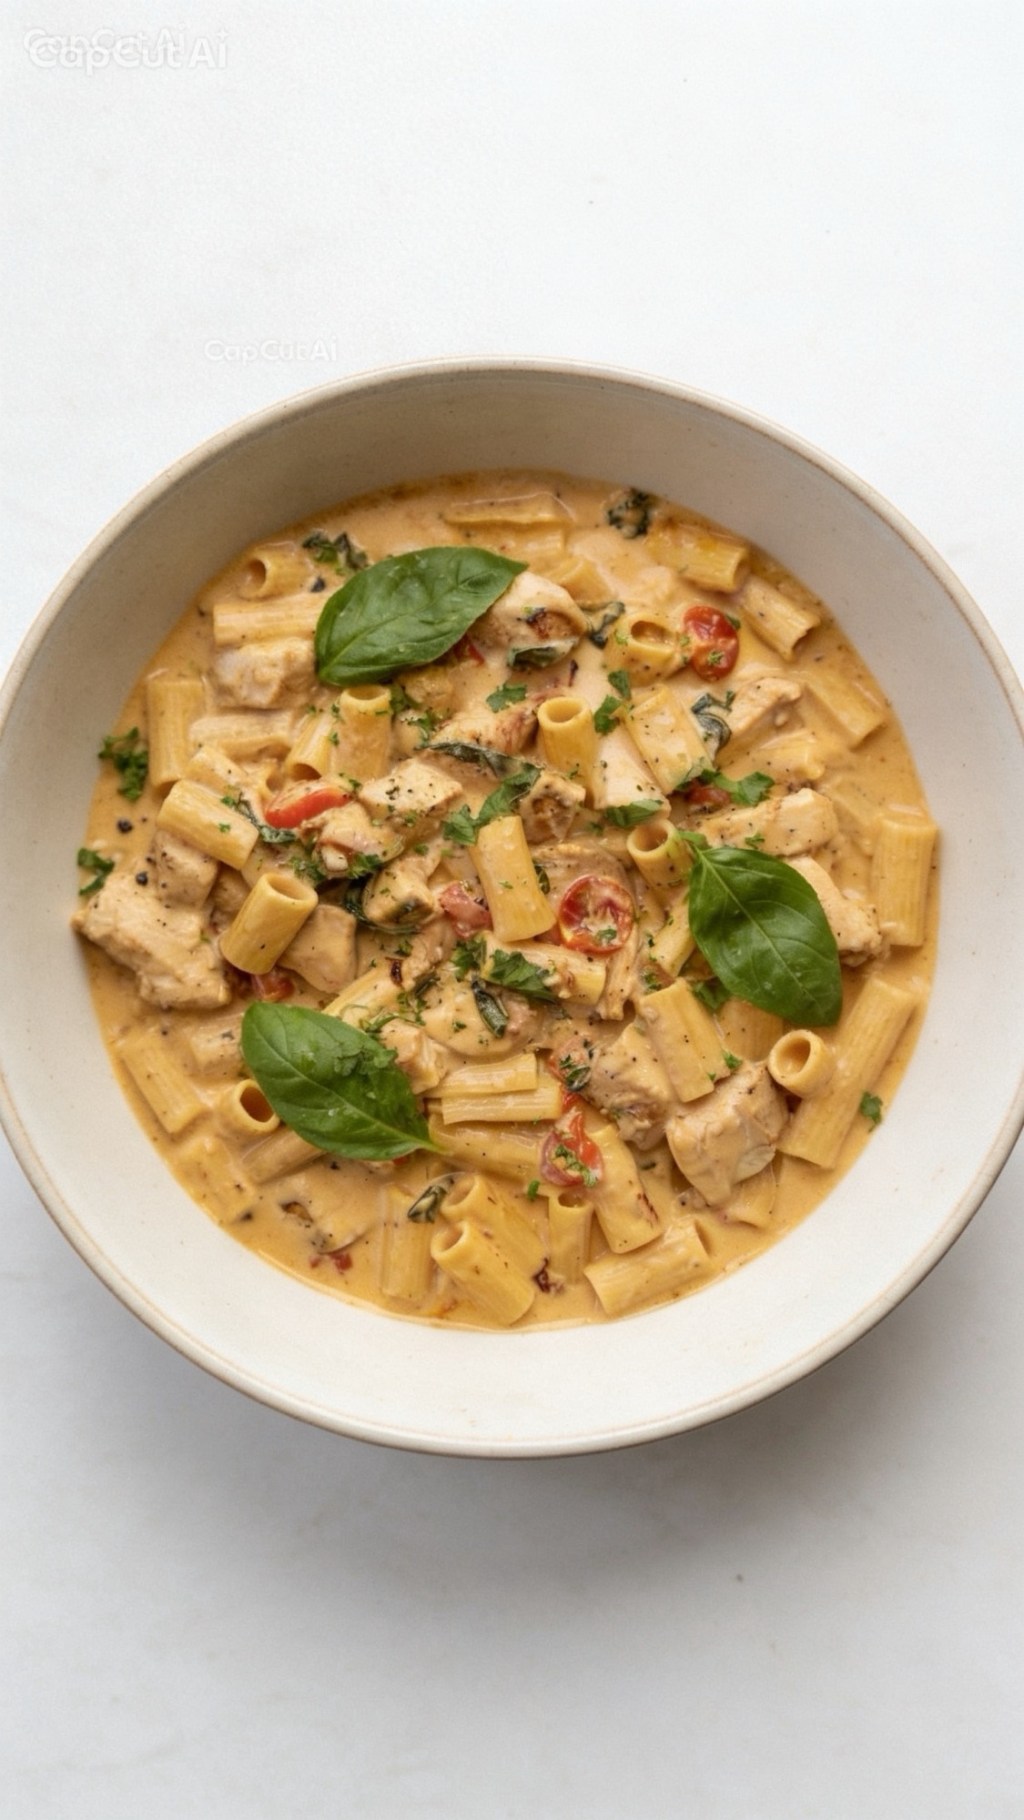
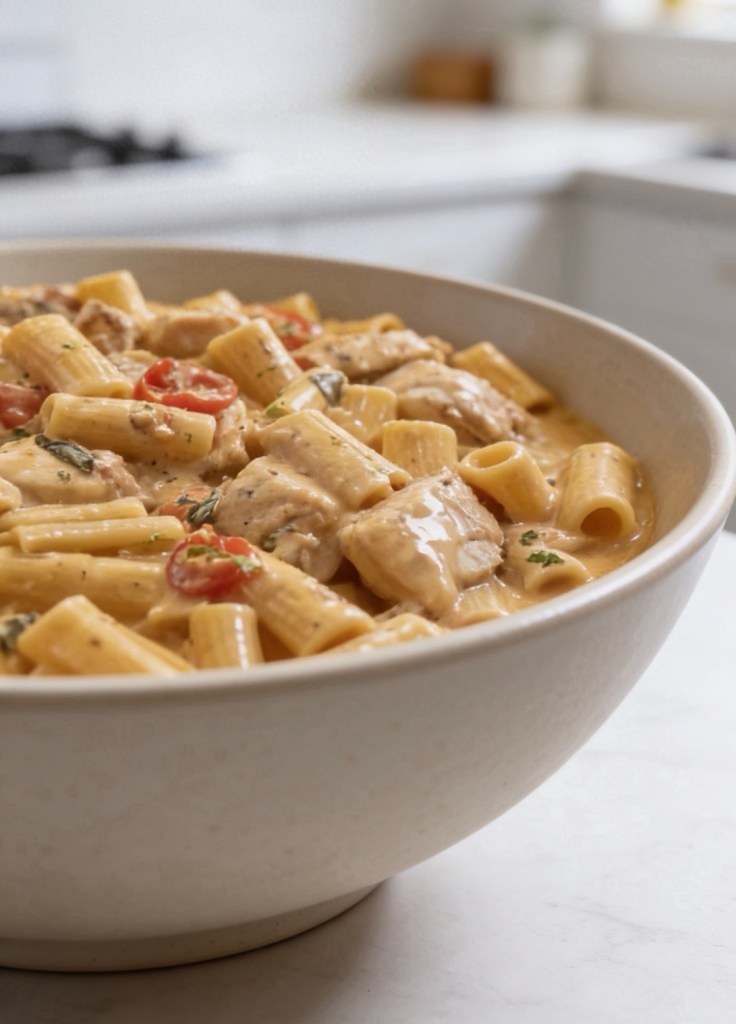
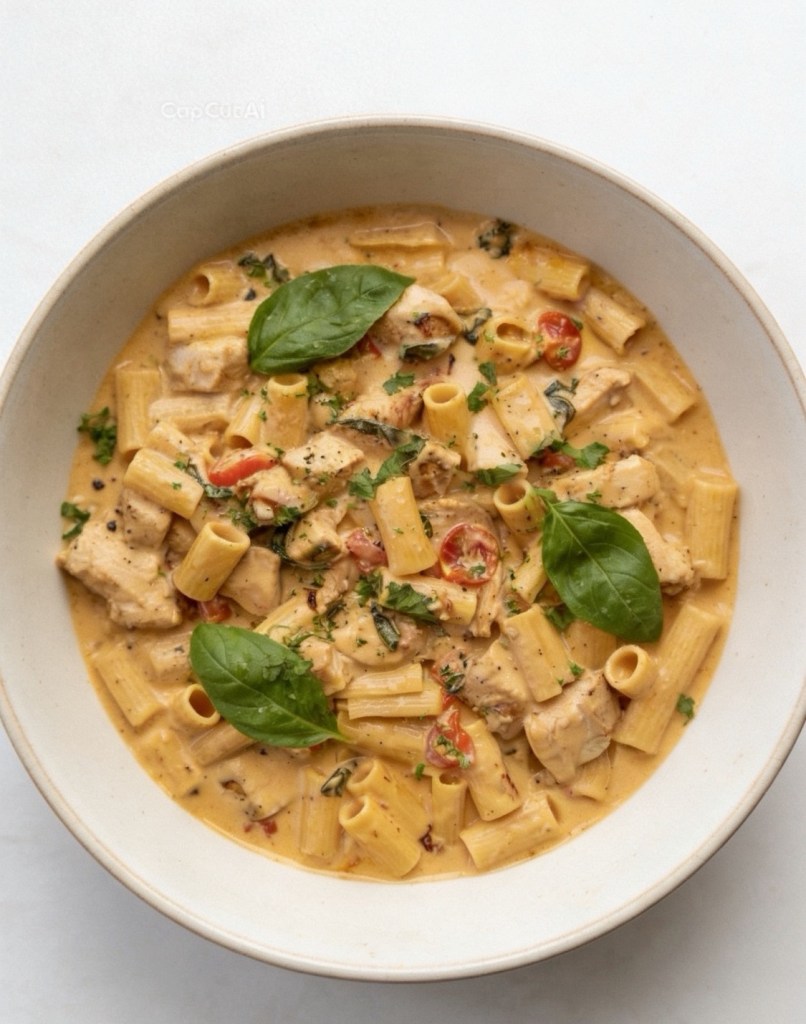
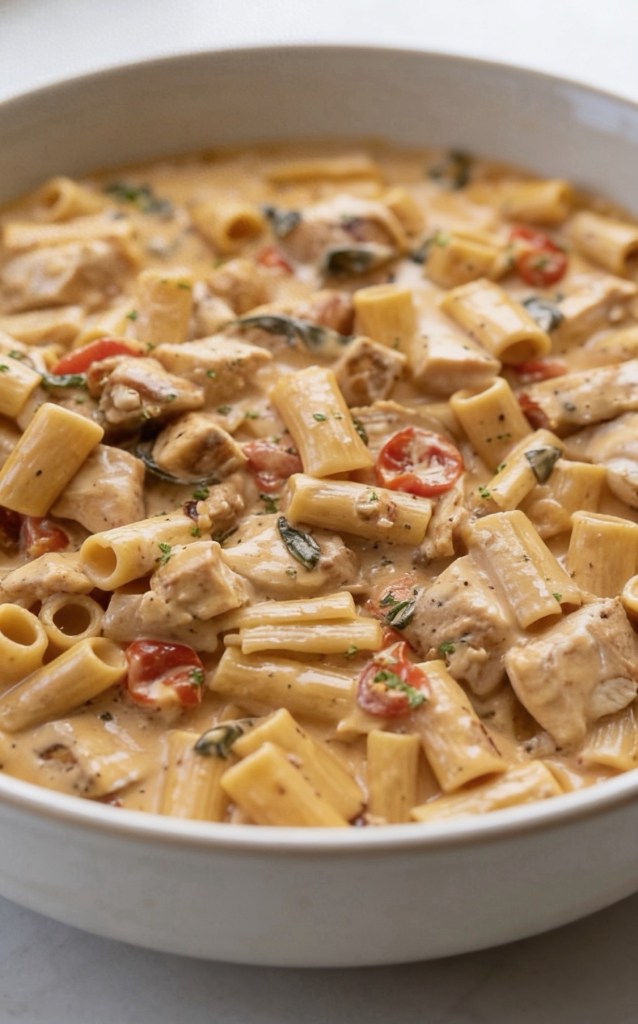
Do you ever have one of those nights where you want a restaurant-quality dinner, but you absolutely do not have the energy for restaurant-quality effort? Enter this Creamy Tuscan Chicken Pasta.
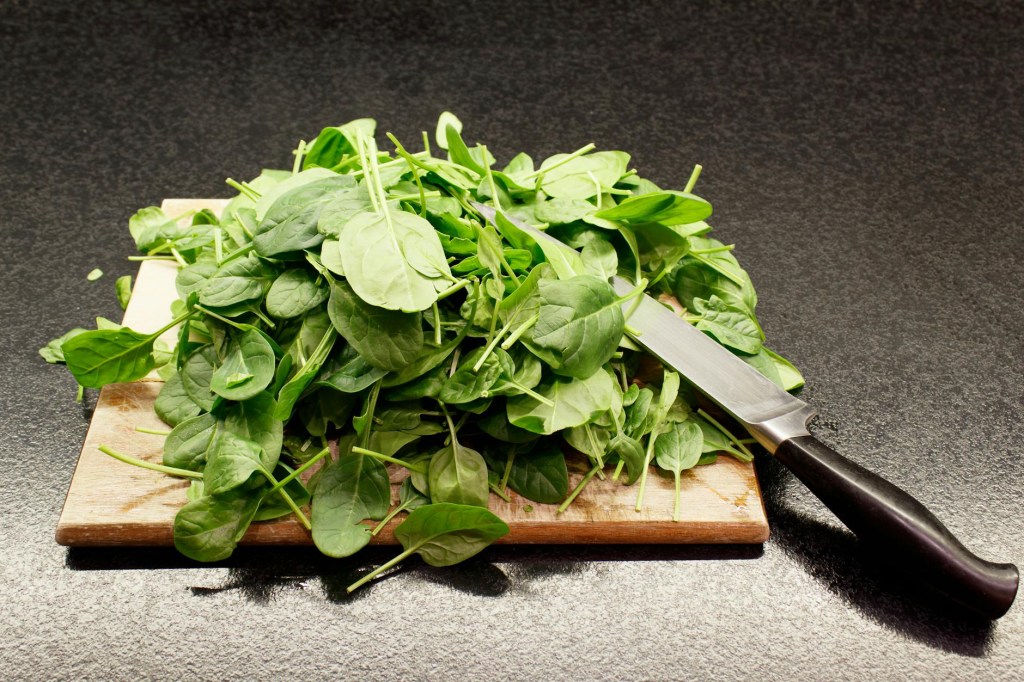
Packed with juicy chicken, tangy sun-dried tomatoes, and fresh spinach tossed in a rich, velvety Parmesan sauce, this dish tastes like it simmered for hours. The best part? It goes from prep to plate in just 20 minutes.
Whether you’re looking to shake up your midweek meal rotation or need an effortless date-night dinner, this recipe hits the comfort food jackpot. Here is exactly how to make it using standard UK measurements.
What You’ll Need (Ingredients)
Before you hit the kitchen, gather these simple ingredients. Everything can be easily found at your local UK supermarket:
• 340g penne pasta: Holds onto the creamy sauce perfectly, but rigatoni or fusilli work great too.
• 450g chicken breasts: Sliced into thin strips so they cook quickly and stay tender.
• 2 tbsp olive oil: For searing the chicken and building the base of the sauce.
• 3 garlic cloves: Minced.
• 150g sun-dried tomatoes: Chopped. These add a rich, sweet, and tangy punch to balance the cream.
• 60g baby spinach: Adds a pop of colour and a bit of freshness.
• 240ml double cream: The ultimate base for a glossy, luxurious sauce.
• 240ml chicken stock: Balances the richness of the cream.
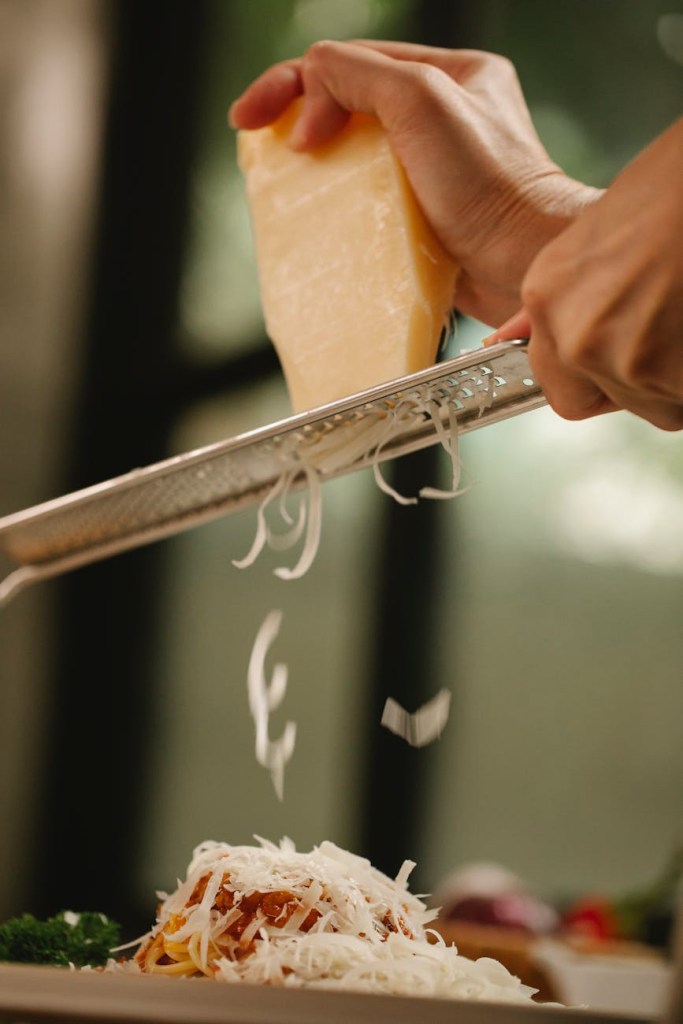
• 90g grated Parmesan cheese: Freshly grated melts the smoothest.
• 1 tsp Italian seasoning: A classic herb blend to season the chicken.
• 1/2 tsp dried chilli flakes (optional): For a subtle, warming kick.
• Salt and black pepper: To taste.
Step-by-Step Method
1. Cook the Pasta
Bring a large pot of salted water to a rolling boil and cook your 340g of penne pasta according to the packet instructions until it’s al dente (cooked through but still holding a bit of a bite). Drain the pasta and set it aside.
2. Sear the Chicken
Season your sliced chicken breasts generously with salt, pepper, and the teaspoon of Italian seasoning. Heat 2 tablespoons of olive oil in a large frying pan over a medium-high heat. Add the chicken strips and sear them for 5–6 minutes, tossing occasionally, until they are beautifully golden and completely cooked through. Remove the chicken from the pan and pop it onto a plate for later.
3. Build the Creamy Base
Don’t clean out the pan—those browned bits left behind mean extra flavour! Turn the heat down to medium and toss in your 3 minced garlic cloves and 150g of chopped sun-dried tomatoes. Fry for about 1 minute until fragrant, being careful not to let the garlic burn. Next, pour in 240ml of chicken stock and 240ml of double cream. Bring the mixture to a gentle simmer and let it bubble away for 3 minutes to reduce and thicken slightly.
4. Wilt the Spinach and Melt the Cheese
Stir 90g of grated Parmesan and 60g of baby spinach into the simmering sauce. Keep stirring for a minute or two until the cheese has completely melted into the cream and the spinach has wilted. If you like a little heat, stir your chilli flakes in now.
5. Toss it All Together
Return the cooked chicken and the drained penne pasta to the pan. Toss everything together vigorously for a minute or two until the pasta is completely coated in that glossy, velvety sauce and everything is piping hot.
Top Tips for Success
• Don’t Overcook the Garlic: Garlic burns quickly and can turn bitter. Make sure your pan has cooled down slightly from cooking the chicken before you toss it in, and only fry it for a minute before hitting it with the liquids.
• Switch Up the Protein: If you don’t fancy chicken, this recipe works beautifully with prawns, or you can add some fried pancetta along with the garlic for an extra layer of depth.
• Make it Vegetarian: Simply skip the chicken, swap the chicken stock for vegetable stock, and throw in some sliced mushrooms or artichoke hearts instead.
Give it a Try!
This Creamy Tuscan Chicken Pasta is guaranteed to please everyone at the dinner table. If you make this recipe, I’d love to hear how it turned out!
Leave a comment below, let me know if you made any tweaks, and don’t forget to tag me on TikTok if you filmed your creation! Happy cooking!
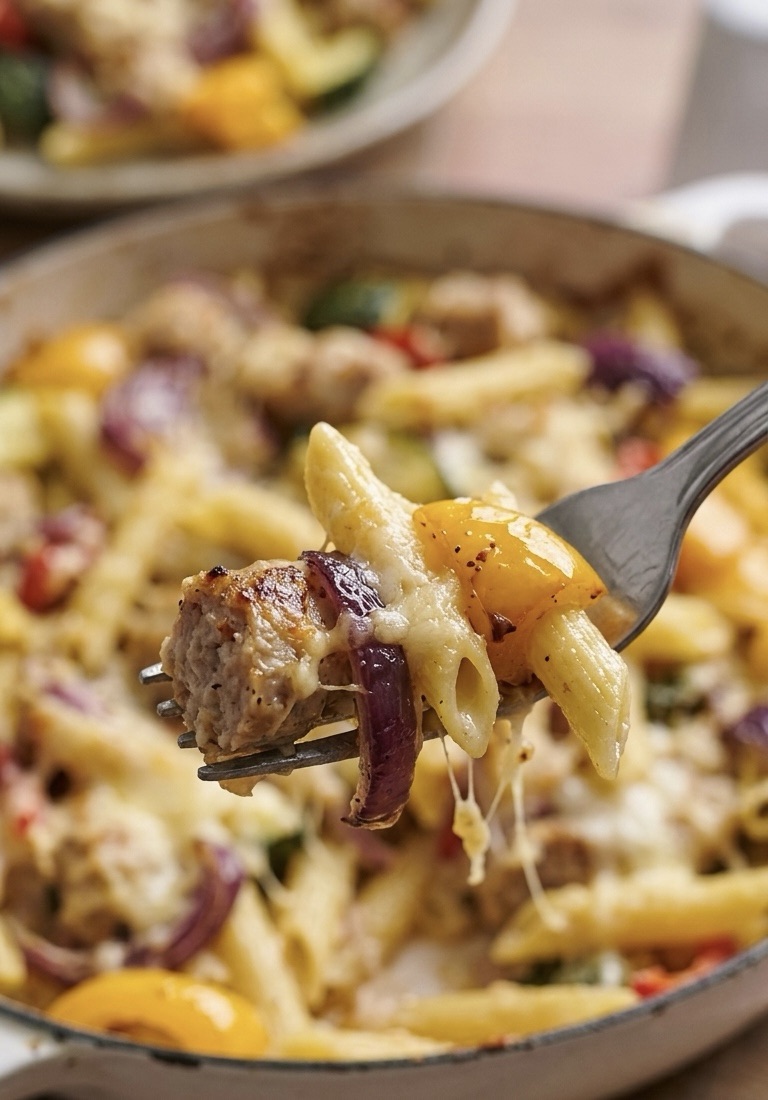
Let’s be honest: there’s nothing quite like a traybake to save a busy weeknight. I’ve been obsessed with this specific combo lately—it’s inspired by a classic recipe which is “ Pinterest-worthy” and made in my own kitchen.
The Secret is in the Sausage
If you want this dish to go from “standard midweek meal” to “gourmet comfort food,” don’t skimp on the sausages. I highly recommend using high meat content sausages (look for 85% meat or higher) from your local butcher or even more reasonable Lidl do some brilliant ones . Heck sausages are good too.
A proper Cumberland or a peppery Lincolnshire works beautifully here. Because we’re roasting them, cheaper sausages tend to shrink or release too much water; a high-quality banger stays juicy, holds its shape, and develops a gorgeous caramelised crust that flavours the entire tin.
The Double-Roast Technique
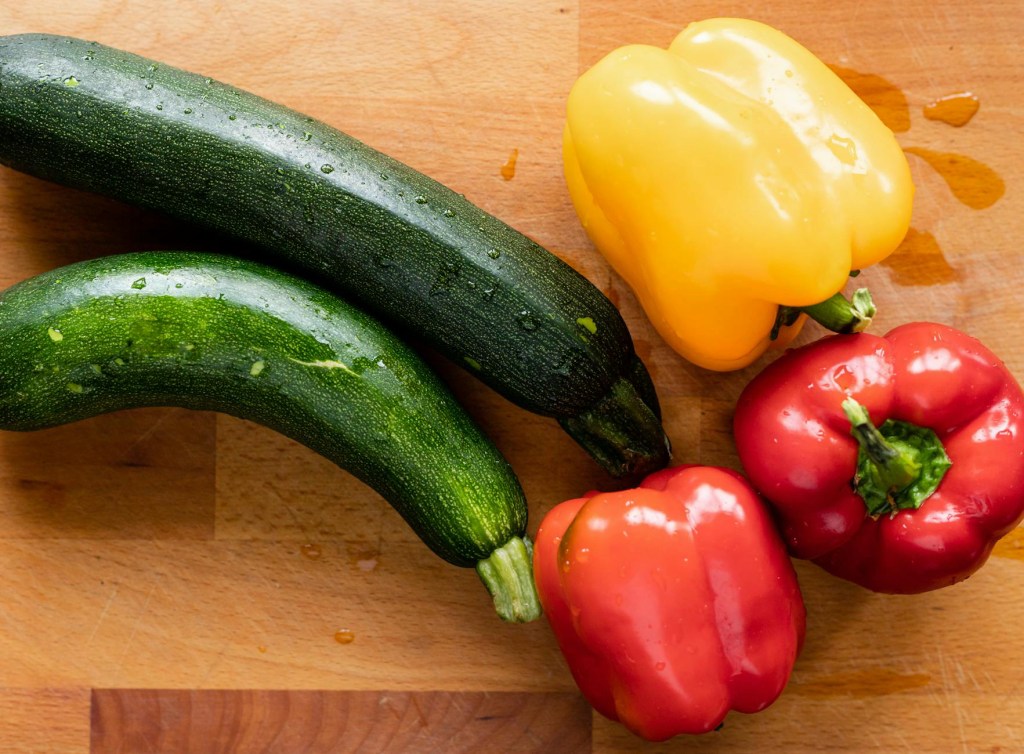
What makes this version a winner is the roasting process. Instead of just boiling everything, we’re roasting the peppers, courgettes, and red onions first to intensify their natural sweetness. Then, we toss in those chunky sausage pieces so they get lovely and browned while the veg finishes off.
While the oven is doing the heavy lifting, you just boil your penne until al dente, drain it, and then the magic happens. You toss the pasta directly into that hot roasting tin, letting it soak up the juices. Pour over the silky double cream, blanket the whole thing in a sharp, mature Cheddar, and give it one last blast in the oven.
The result? A colourful, quintessentially British “hug in a bowl” that looks like it took way more effort than it actually did.
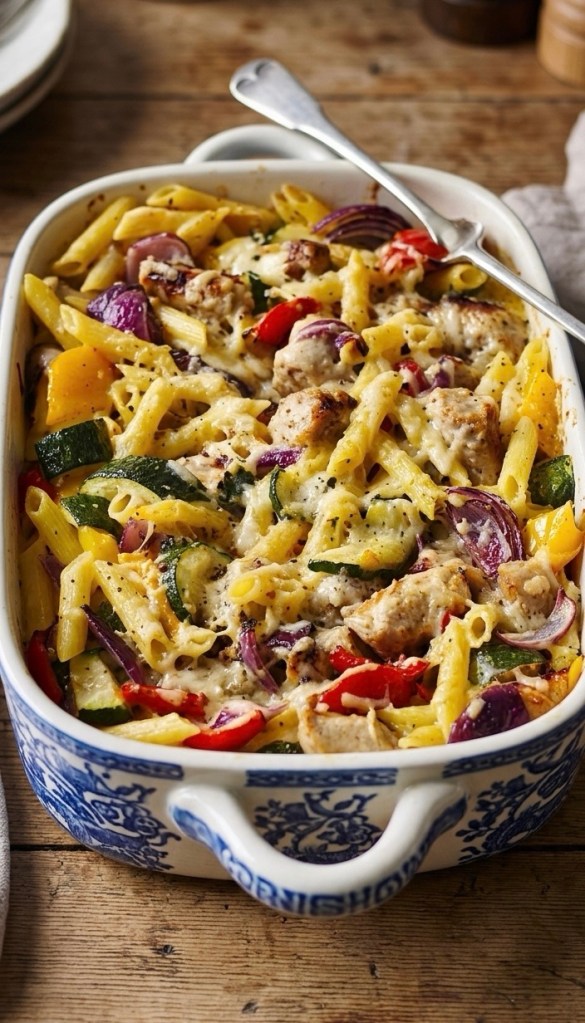
The Recipe & Method
Prep time: 15 mins | Cook time: 40 mins | Serves: 4
Ingredients
• The Stars: 6-8 high meat content sausages (Cumberland or Lincolnshire are top-tier choices), cut into thick, chunky coins.
• The Veg: 1 large red onion (peeled and wedged), 1 large courgette (sliced into thick half-moons), and 2 mixed peppers (deseeded and chopped into 3cm chunks).
• The Pasta: 300g dried Penne pasta.
• The Sauce: 100ml Double cream (don’t use single, it’ll split!) and 1 tbsp olive oil.
• The Topping: 150g Mature Cheddar, freshly grated for the best melt.
• Seasoning: A generous pinch of sea salt and plenty of freshly ground black pepper.
Method
1. Prep the Heat: Crank your oven up to 220°C (200°C Fan / Gas 7). You want it hot so the veg roasts rather than steams.
2. The First Roast: Spread your chopped onion, peppers, and courgette in a large roasting tin. Drizzle with oil, season well, and toss. Roast for 10 minutes.
3. Sausage Time: Add your high-quality sausage chunks to the tin. Give it all a good stir to coat the sausages in those lovely veg juices. Roast for another 20 minutes until the sausages are golden-brown and cooked through.
4. Boil the Pasta: While the tin is sizzling, cook your penne in a large pan of salted boiling water for 10–12 minutes. You want it tender but with a slight bite. Drain well.
5. The Big Mix: Tip the drained pasta into the roasting tin. Pour over the double cream and toss everything together until every tube of pasta is glistening.
6. The Grand Finale: Scatter the grated Cheddar over the top. Return to the oven for a final 4–5 minutes until the cheese is bubbling, golden, and starting to brown at the edges.
Serve it straight from the dish with a side of garlic bread or a simple rocket salad. Perfect!
Let’s be real for a second. We’ve all been there: it’s 6:30 PM on a Tuesday, your brain is absolutely fried from the day, and the thought of standing over a stove chopping onions makes you want to order takeout for the third time this week.
But wait! Step away from the food delivery apps.
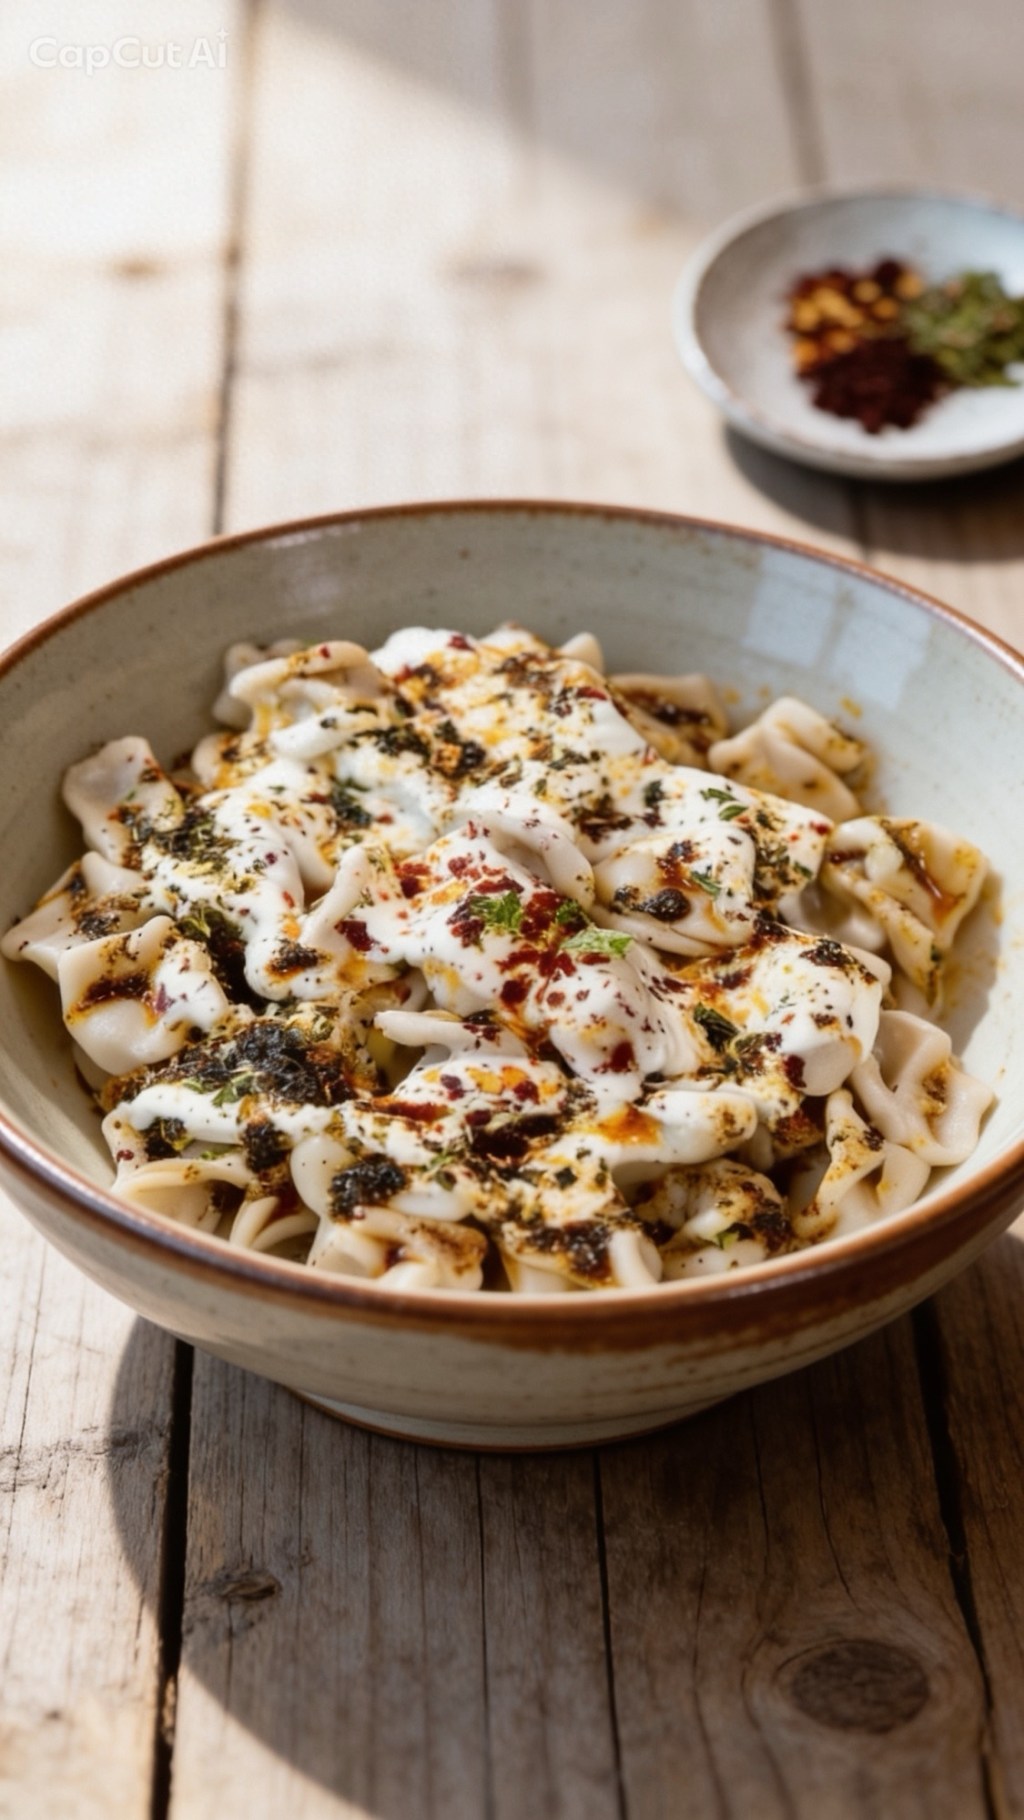
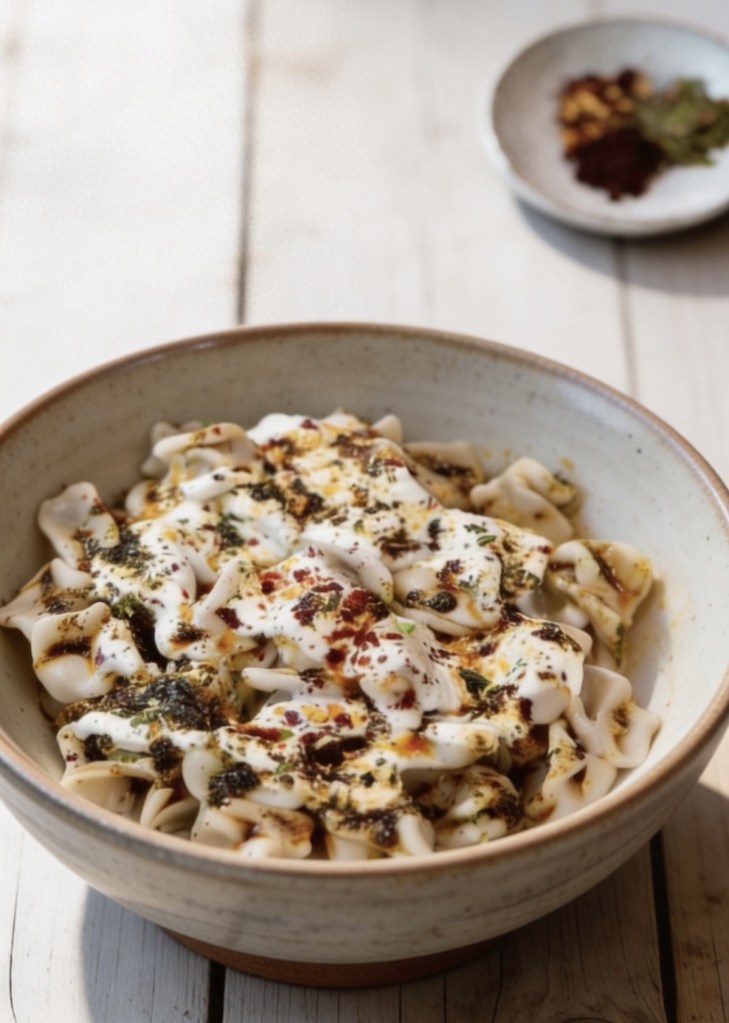
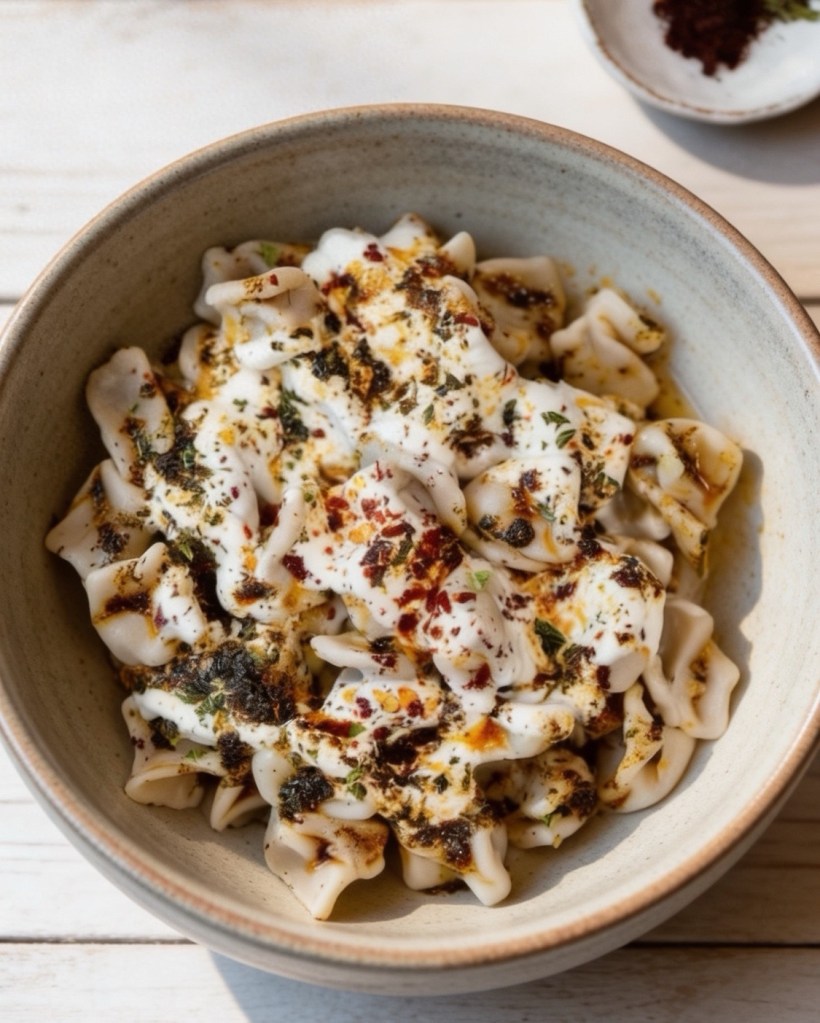
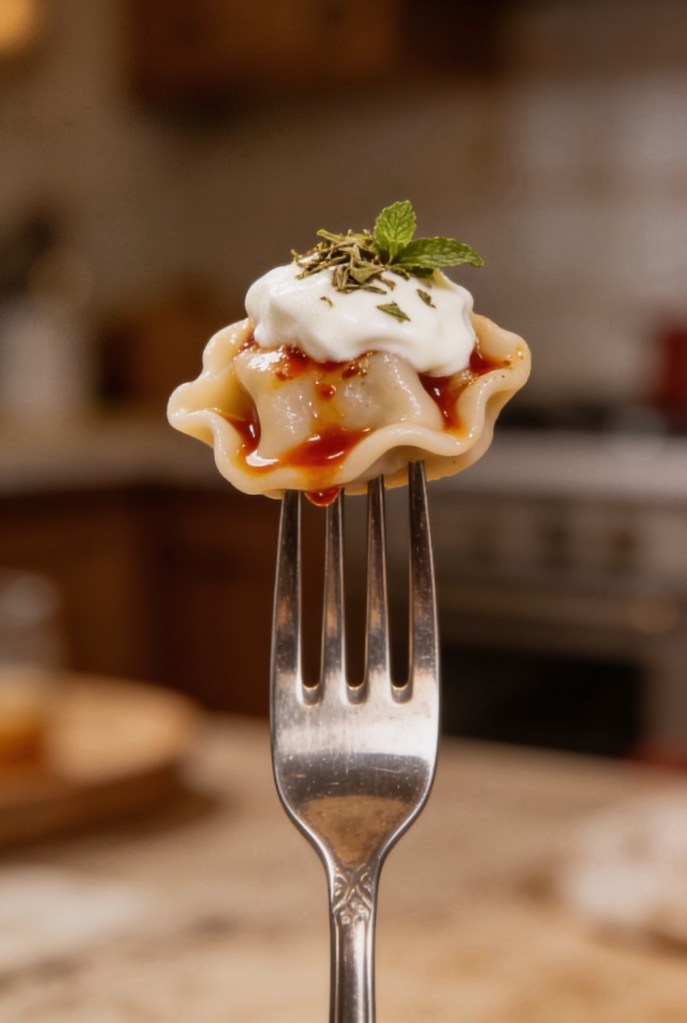
If you have a pack of store-bought tortellini, some yogurt, and a stick of butter, you are exactly 15 minutes away from a dinner that tastes like it came straight out of a trendy Mediterranean bistro. Say hello to Lazy Turkish Mantı Pasta.
The Backstory (Without the 3-Hour Prep Time)
Traditional Turkish Mantı is a masterpiece. It consists of tiny, hand-folded meat dumplings served with a garlic yogurt sauce and infused melted butter. It is spectacular, comforting, and takes about three hours of intensive labor to make from scratch.
Since we don’t have three hours on a weeknight, the internet did what the internet does best: it found a shortcut. By swapping the handmade dumplings for store-bought beef or cheese tortellini, you get all that pillowy, savory goodness in a fraction of the time.
Why This Recipe Works (The Science of Yum)
This dish is all about the contrast of temperatures and textures:
1. The Hot: Piping hot, savory pasta.
2. The Cool: Cool, creamy, sharp garlic yogurt.
3. The Sizzle: Hot, foaming butter infused with dried mint and pantry spices.
When that hot spiced butter hits the cool yogurt, it creates these beautiful, glossy red swirls that look like art on a plate.
How to Make It (The 15-Minute Blueprint)
Ingredients You Need:
• 1 pack (9–12 oz) store-bought tortellini: Beef is traditional, but cheese or mushroom works beautifully too!
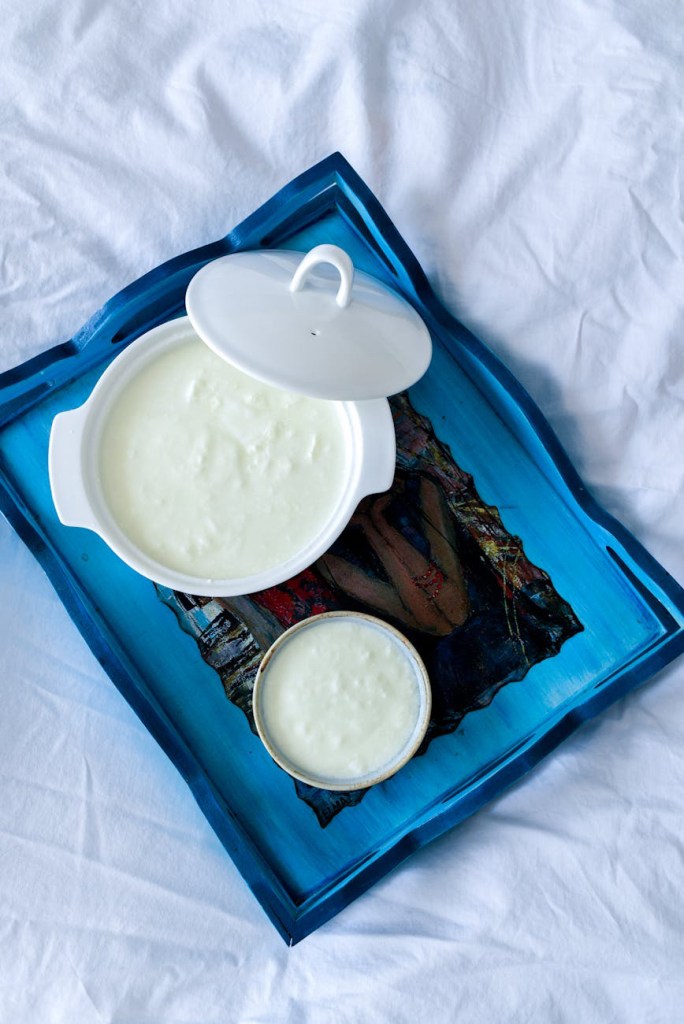
• 1 cup plain Greek yogurt: Go for full-fat (4%) here. Trust me, it makes a difference.
• 1–2 garlic cloves: Finely grated or minced.
• 3 tbsp unsalted butter
• 1 tbsp tomato paste: This gives the butter sauce a rich, savory depth.
• 1 tsp dried mint: Don’t skip this! It sounds unusual for pasta, but it’s the secret ingredient that makes it authentic.
• 1 tsp sweet or smoked paprika + 1/4 tsp regular chili flakes: A quick pantry hack to replace traditional Aleppo pepper.
Step-by-Step Instructions:
Step 1: The Pasta Base
Bring a pot of salted water to a boil and cook your tortellini according to the package instructions. Drain it well, but keep it hot!
Step 2: The Cool Garlic Yogurt
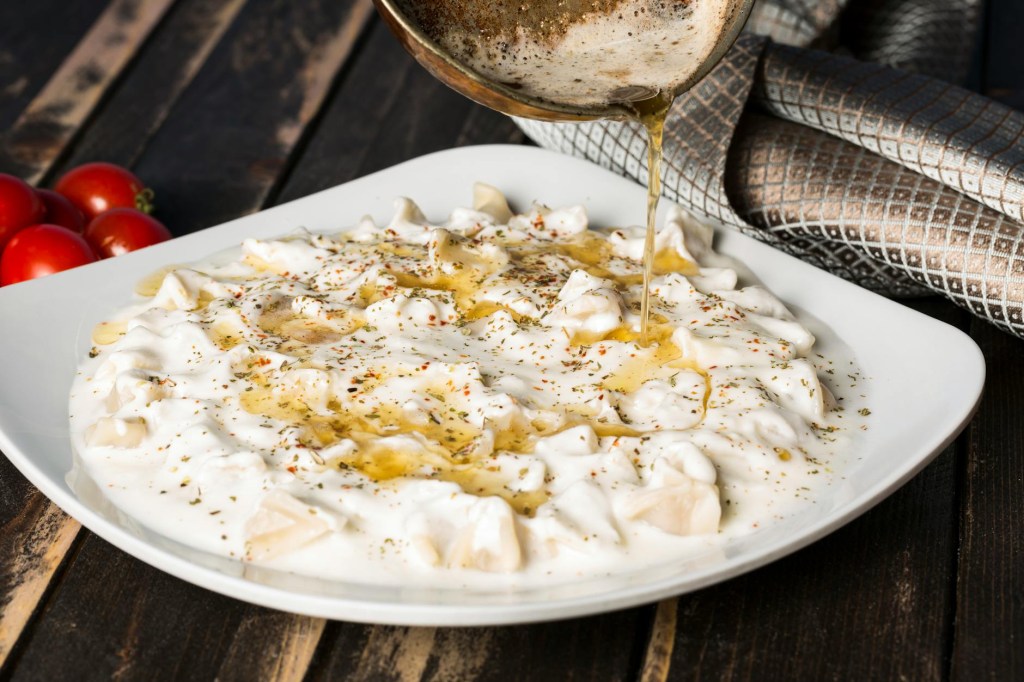
While the pasta is boiling, whisk together your Greek yogurt, minced garlic, and a generous pinch of salt in a small bowl. Pro tip: Leave this bowl on the counter while you cook. If the yogurt is straight-from-the-fridge cold, it will chill your pasta too fast. Room temp is perfect.
Step 3: The Sizzling Butter
In a small skillet, melt the butter over medium heat. Once it’s bubbling, stir in the tomato paste and let it fry for about 60 seconds (this coaxes out the sweet tomato flavor). Turn off the heat completely, then stir in your dried mint, paprika, and chili flakes. It will foam up, turn a gorgeous brick-red color, and smell incredible.
Step 4: The Assembly
Grab a shallow bowl. Lay down your hot tortellini. Smother it generously with the garlic yogurt. Finally, drizzle that hot, sizzling spiced butter right over the top.
And there you have it. You just made a restaurant-worthy meal in the time it takes to watch a couple of TikTok videos. It’s comforting, tangy, spicy, and deeply satisfying.
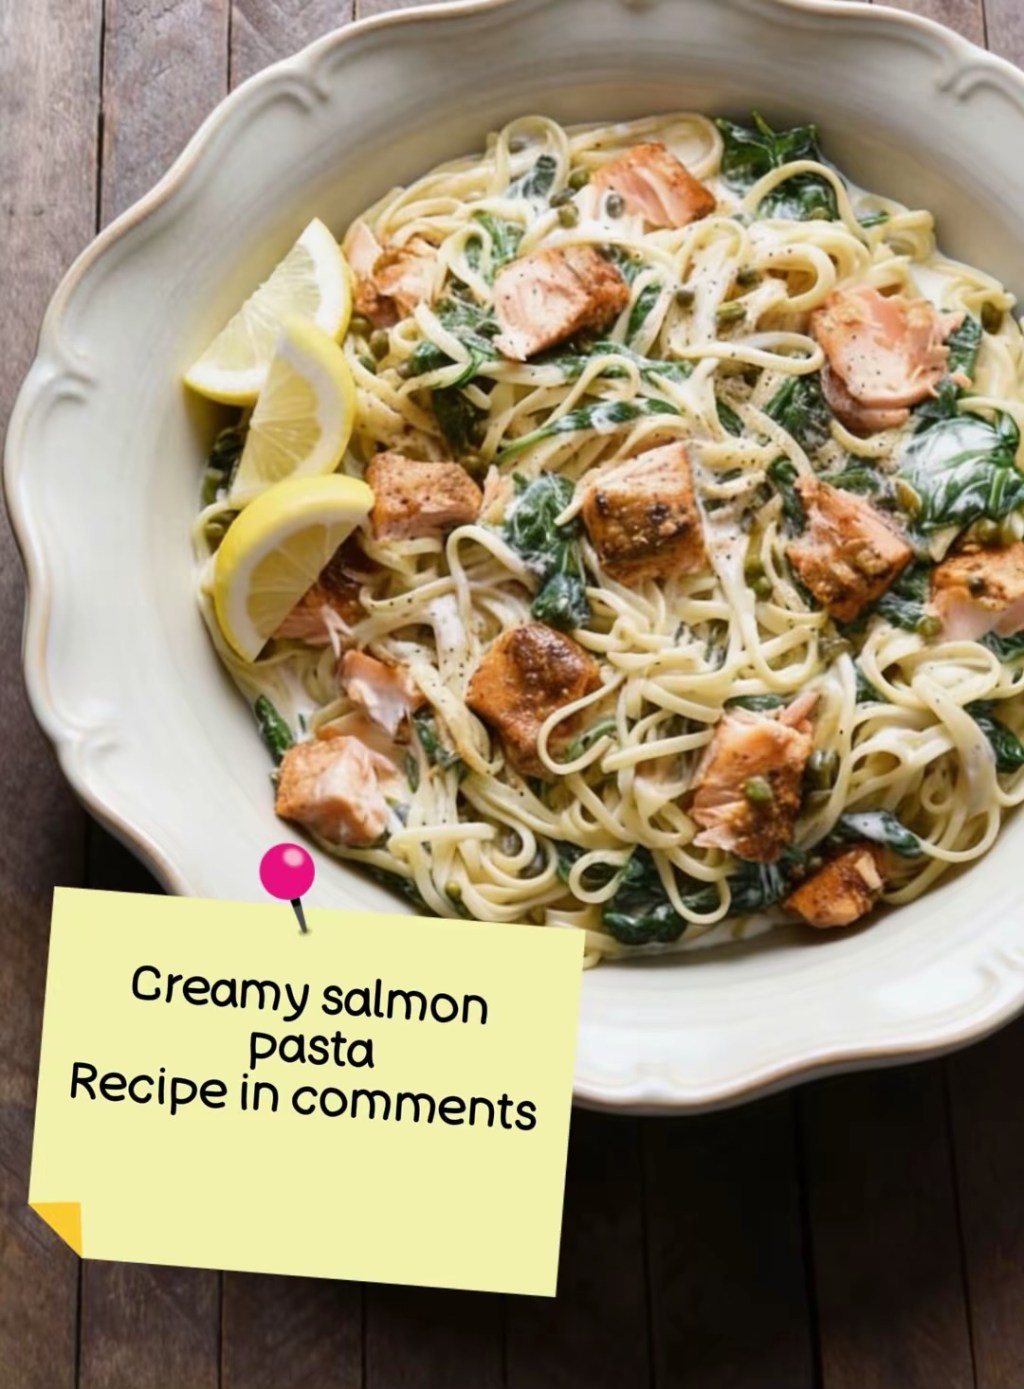
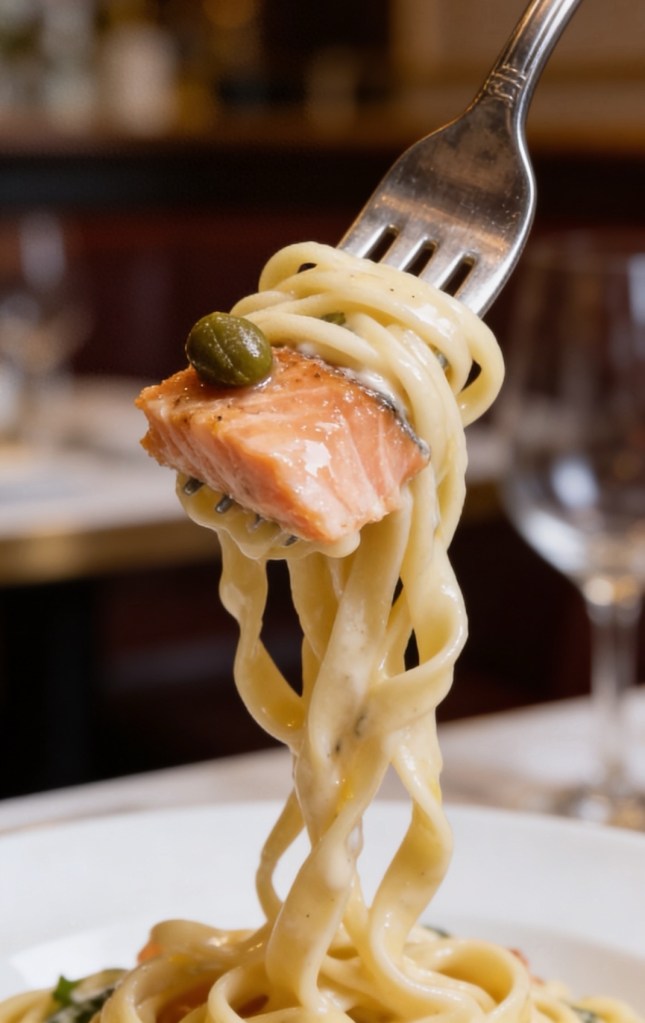
Can we just be honest for a second? Some days, the thought of standing over a hot stove flipping food, dodging oil splatters, and washing three different pans makes me want to just pour a bowl of cereal and call it a night. I love a good home-cooked meal as much as the next person, but weeknight energy is a very limited resource.
That is exactly how this recipe was born.
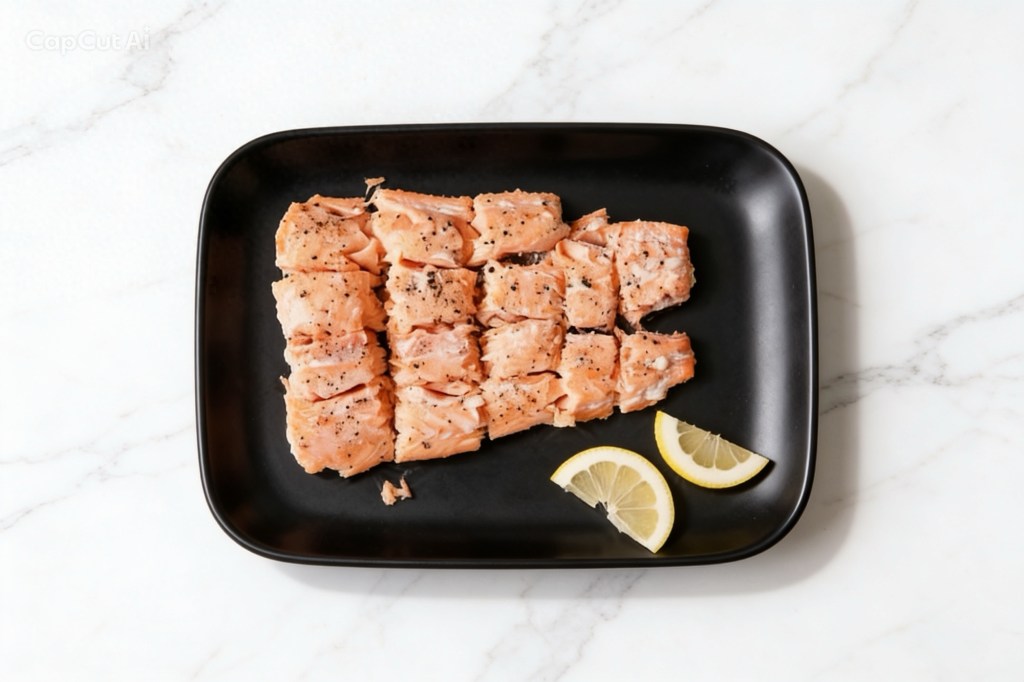
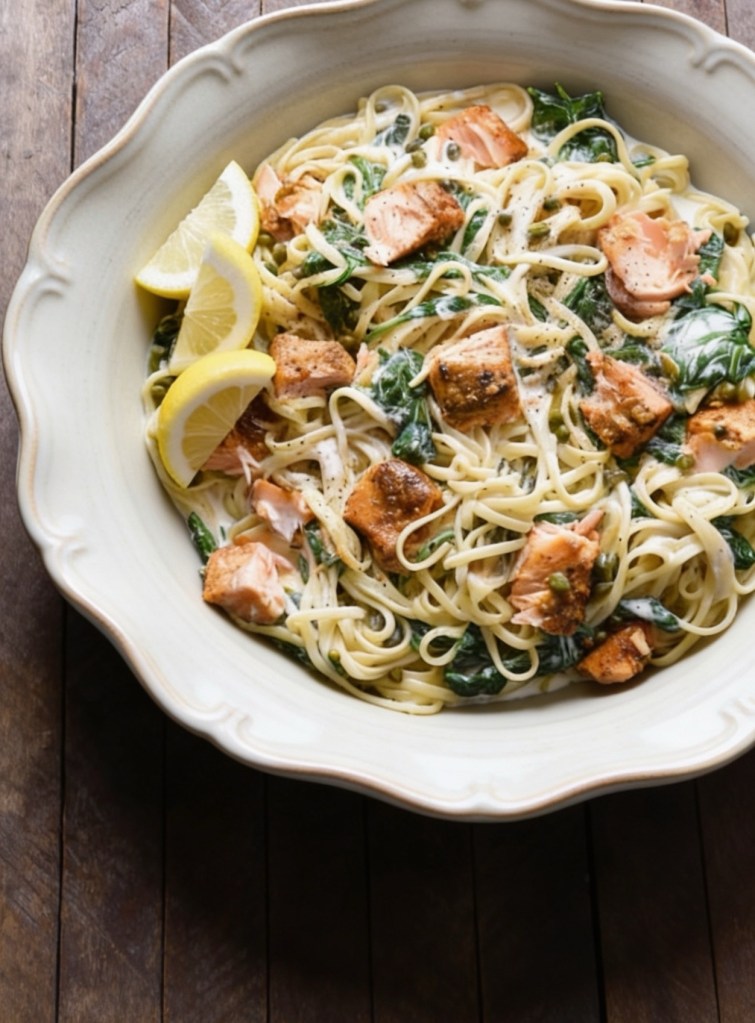
I used to pan-sear the salmon for my pasta, but after one too many times of the fish breaking apart into sad little shreds (or worse, drying out because I got distracted), I tried baking it instead. Total game-changer. You just pop the seasoned fillets into the oven, let them get perfectly tender and juicy, and use that time to whip up the easiest, most luxurious garlic cream sauce you’ve ever tasted.
And using tagliatelle? Absolute heaven. There is something so incredibly satisfying about winding those long, glossy ribbons around your fork, especially when they are carrying a velvety parmesan sauce and flakes of juicy salmon. It feels like a fancy £25 restaurant meal, but it takes about 20 minutes and uses ingredients you probably already have in the fridge.
What You’ll Need
• The Salmon: 250g salmon fillets, a drizzle of olive oil, a pinch of paprika, and a good pinch of salt and pepper.
• The Pasta: 225g of tagliatelle nests (the thick ribbons are built for this sauce).
• The Velvet Sauce: 2 tbsp butter, 4 cloves of finely chopped garlic, 60ml dry white wine (or just use a splash of pasta water if you’ve already finished the bottle), 240ml double cream, 50g grated parmesan, and a big handful of fresh baby spinach.
How to Make It
First things first, get your oven preheating to 200°C (180°C fan/Gas Mark 6). Rub your salmon fillets with the olive oil, paprika, salt, and pepper, then pop them on a baking tray. Bake for about 12–15 minutes. It should flake beautifully with a fork.
While the salmon is doing its thing, boil your tagliatelle in well-salted water. Don’t forget this part: right before you drain it, scoop out a mug of that starchy pasta water. It’s pure liquid gold for making sauces silky.
Now for the magic. Melt the butter in a large pan over medium heat and fry the garlic for just a minute until your kitchen smells incredible. Pour in the white wine to deglaze the pan, letting it bubble away for about two minutes. Next, pour in the double cream and let it simmer gently for 3 minutes. Turn the heat right down, stir in the parmesan until it’s completely melted, and toss in the spinach until it wilts.
To finish, flake your baked salmon into lovely, chunky pieces (you can leave the skin behind). Toss the glorious tagliatelle ribbons and the salmon gently into the cream sauce. If it feels a bit too thick, splash in some of that saved pasta water to help it glide and coat the pasta.
Top with a massive squeeze of fresh lemon juice, and you’re ready to eat.
A Little Thought Before You Go…
There is something so deeply comforting about sitting down to a warm bowl of pasta at the end of a long day. It’s more than just fuel; it’s a little reset button. I love this recipe because it proves that taking care of yourself and eating something genuinely delicious doesn’t have to require hours of effort or a mountain of washing up. Pull up a chair, pour yourself a glass of whatever you fancy, and treat yourself tonight. You’ve earned it.
Let me know in the comments below if you make this, and tell me: are you team tagliatelle or do you prefer short pasta shapes like penne?
Whether you’re clearing out your wardrobe or finally shifting those leftover rolls of wallpaper, the UK’s second-hand market is thriving. To make the most money with the least stress, you need to understand the unique cultures of eBay, Vinted, and the platforms you should probably avoid.
1. Choosing Your Platform: Fees & Visibility
• eBay (The Powerhouse): eBay is now free for private sellers (no final value fees). However, they heavily push you to Promote your listings for a percentage fee. Without this, your items can easily get buried. It is the gold standard for “searchable” items like home goods, tools, and niche hobby gear.
• Vinted (The Community): Vinted is free for sellers, but if you have a lot of stock, the Showcase feature is a game-changer. For around £10 a week, it highlights your entire wardrobe to buyers.
• The Ones to Avoid: * Whatnot: We tried it and hated it. You have to be “on-air” live, and the audience expects items for £1. For the stress and low returns, you’re better off just donating to a charity shop.
• Depop: Now a ghost town. Sales are slow and the volume is very low; don’t waste your energy here.
2. Mastering the Logistics: Shipping & Labels
Both platforms generate pre-paid posting labels, but how you use them matters:
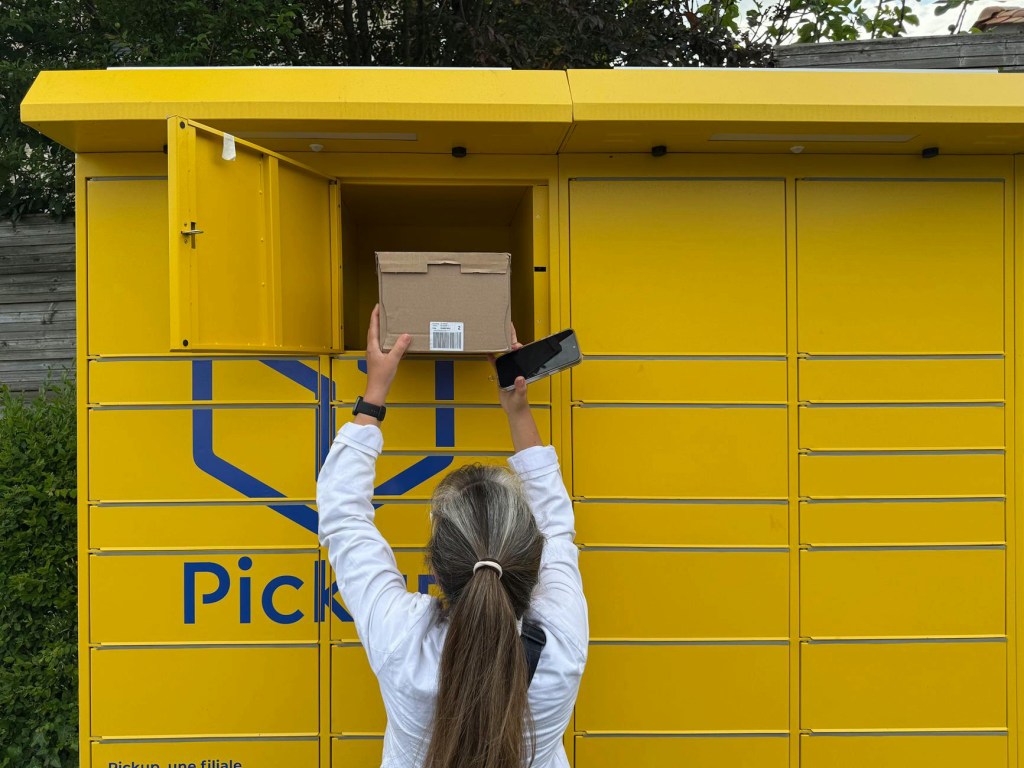
• InPost Warning: I strongly suggest printing off your labels rather than just using the QR code to stick items in a locker. Mix-ups are frequently reported on social media where couriers apply the wrong label to the wrong “blank” parcel.
• Vinted & Royal Mail: If you use Royal Mail, they often provide a QR code. I always print this off and stick it on the parcel myself. At the very least, write the name of the buyer on the parcel so you don’t get them mixed up at the drop-off point.
• The InPost App: Lockers get full quickly. Download the app to check live availability before you leave the house so you don’t make a wasted journey.
• Local Hubs: Many Post Offices now take Evri parcels as well as Royal Mail. Turn on as many postage options as possible on Vinted to maximise sales, but disable any that aren’t convenient for you.
3. The “Hidden Gold” in Your Home
Don’t just sell clothes! There is a massive market for household “odds and ends”:
• Wallpaper: Leftover odd rolls are gold dust for small DIY projects or upcycling furniture.
• Bedding & Curtains: Quality linens and heavy curtains sell brilliantly on eBay.
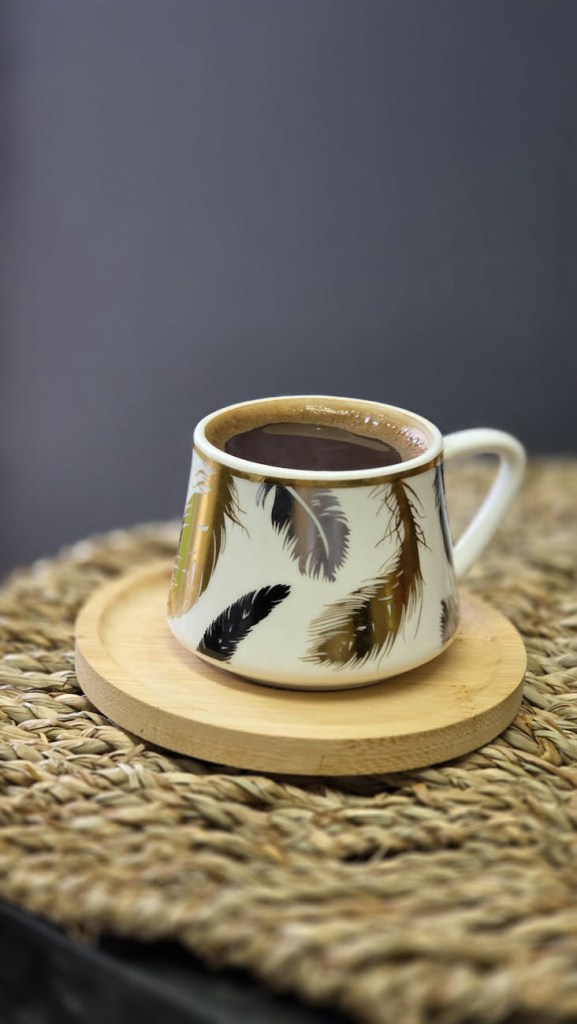
Mugs . Yes you read that right . People break their favourite mugs and NEED a replacement. Your junk could be someone’s holy grail. I’ve lost count of of the number of times someone has contacted me because they have broken mum/dad/ girlfriends favourite . You could be a lifesaver !
Crockery
Though this can be a nightmare to package we have done really well on odd plates dishes etc . If you break one item from a dinner set you have to buy a new one. EBay can be the way to sell your own odd plates to complete someone else’s
I went on eBay years ago because I lost a part on my then baby daughters steriliser and eBay found me one ! So don’t throw this type of things out they sell !
• Presentation: Ensure clothes are freshly laundered and ironed for photos. My rule of thumb: “Would I be happy to receive this?” If you hesitate when looking at a flaw, don’t list it.
4. Buyer Protection: What You Need to Know
• eBay: Robust and automatic. Buyers pay a Buyer Protection Fee (included in the price). If an item is “not as described,” the seller must pay for return postage. Offers on eBay are binding—payment is taken immediately when you accept.
• Vinted: Buyers pay a fee at checkout but only have 48 hours to report an issue once delivered. Crucially, the buyer usually pays for return postage. Offers here are non-binding—people “ghost” all the time, so only celebrate once the label is generated.
5 Pricing
2. Price Research: Don’t Guess, Use the Data
Before you list on eBay, you need to know what your item is actually worth—not just what people are dreaming of getting.
• Sold vs. Active: Never base your price on current “Active” listings. Someone might be asking £50 for a vase that only ever sells for £10.
• How to check: On the eBay app, search for your item, then tap Filter and scroll down to toggle on “Sold Items.” * The “Green” Numbers: This will show you the “Completed” listings. Prices in green are what the item actually sold for. If the price is in black, it ended without a buyer. This is the only way to see the true market value. Be realistic it’s better to sell and get the item sold than have it In the death pile on the spare bedroom!
6. Final Pro-Tips
• Double Listing: You can list on both platforms at once, but delete the listing on the other platform immediately when it sells. Getting caught out is a nightmare for your ratings!
• Photos & AI: Vinted is strict—no AI-generated images or stock photos or you risk a ban. eBay allows AI background tools but still bans stock photos for used items.
The Verdict
While eBay is the best place to get top dollar for niche household items and branded curtains, Vinted is my personal favourite. Even though you might not sell items for quite as much as you would on eBay, they tend to move much quicker. The whole experience feels more laid back and social—it’s just a much easier way to clear your clutter without the corporate pressure . Any questions let me know !!
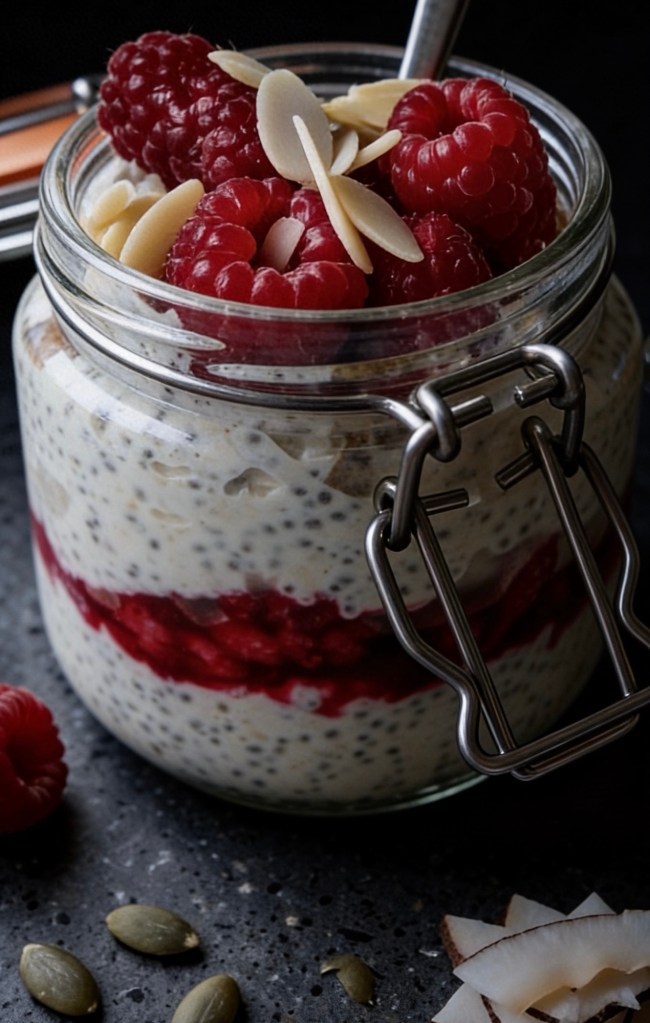
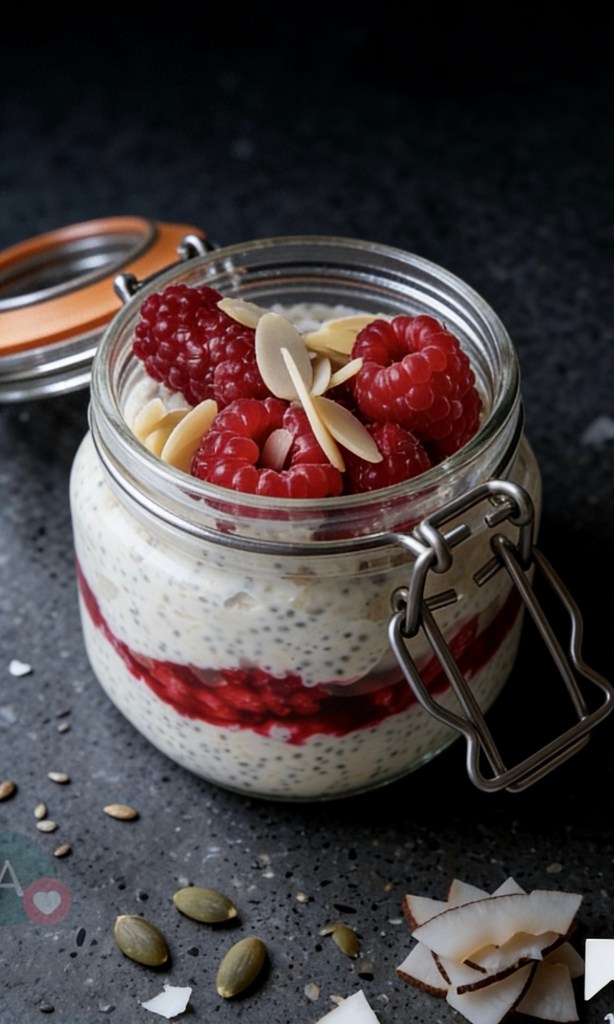
If you are looking for a breakfast that feels like a luxury but takes less than five minutes of effort, you’ve found it. These Raspberry Almond Bliss Overnight Oats are creamy, naturally sweet, and look absolutely stunning layered in a glass jar.
By combining the nuttiness of almond extract with a bright, tart raspberry layer, this breakfast tastes exactly like a raspberry almond pastry—minus the sugar crash.
Why You’ll Love This Recipe
Zero Cooking Required: Just mix, layer, and sleep.
Packed with Fiber: Chia seeds and rolled oats keep you full until lunch.
Perfect for Meal Prep: Make 3 or 4 of these on Sunday night for an easy grab-and-go week.
Ingredients & Measurements
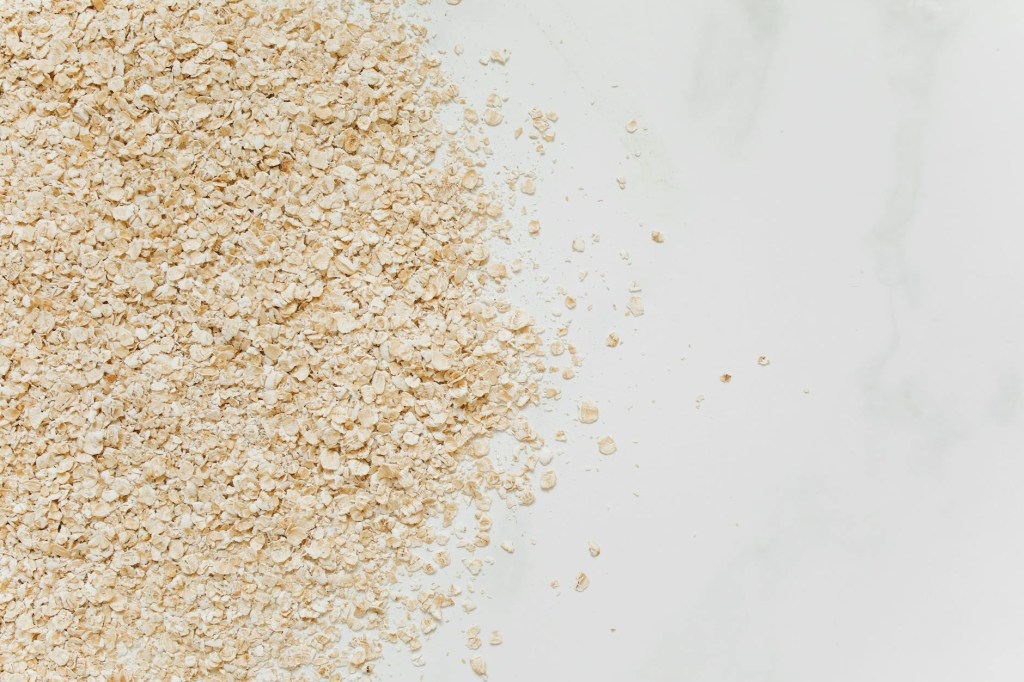
Layer Ingredient Amount The Oats Base
Rolled oats (old-fashioned) ½ cup Almond milk (or milk of choice) ½ cup Greek yogurt (plain or vanilla) ¼ cup Chia seeds 1 tbsp Maple syrup or honey 1 tbsp Almond extract ¼ tsp The Raspberry Puree Fresh or frozen raspberries ½ cup Lemon juice A squeeze
The Toppings Fresh raspberries & blueberries A handful Sliced almonds 1 tbsp Dark chocolate curls or mini chips 1 tsp
Step-by-Step Instructions
Mix the Oats: In a medium bowl, stir together the rolled oats, almond milk, Greek yogurt, chia seeds, maple syrup, and almond extract until well combined.
Make the Berry Puree: In a small bowl, mash the raspberries with a fork and add a quick squeeze of lemon juice to brighten the flavor.
Layer for the “Look”: Take a clean mason jar or a clear glass. Spoon half of the oats mixture into the bottom, layer on the raspberry puree, and top with the remaining oats.
Chill: Cover and place in the refrigerator for at least 4 hours, or overnight.
Top and Serve: Right before eating, garnish with fresh berries, sliced almonds, and a sprinkle of dark chocolate.
Pro Tip: For a beautiful “swirl” effect on camera, take a butter knife and gently drag it up against the inside of the glass jar before putting it in the fridge!
Did you make this recipe? Tag me on TikTok or leave a comment below to let me know how yours turned out!
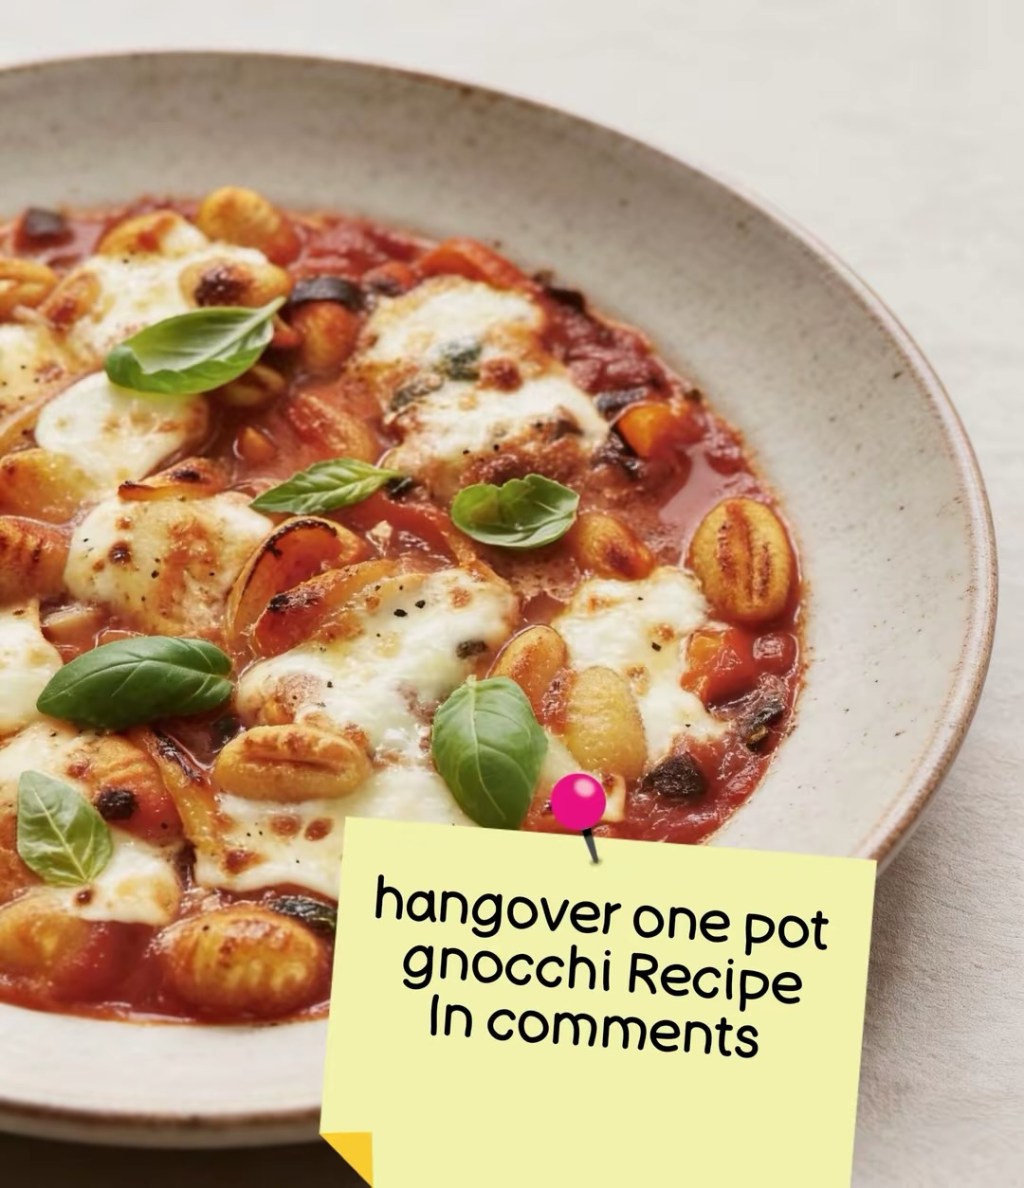
We’ve all been there. The sun is shining a little too brightly through the curtains, your head is doing a passable impression of a techno festival, and your stomach is demanding immediate attention. You need food, you need comfort, and you absolutely cannot deal with a sink full of dishes.
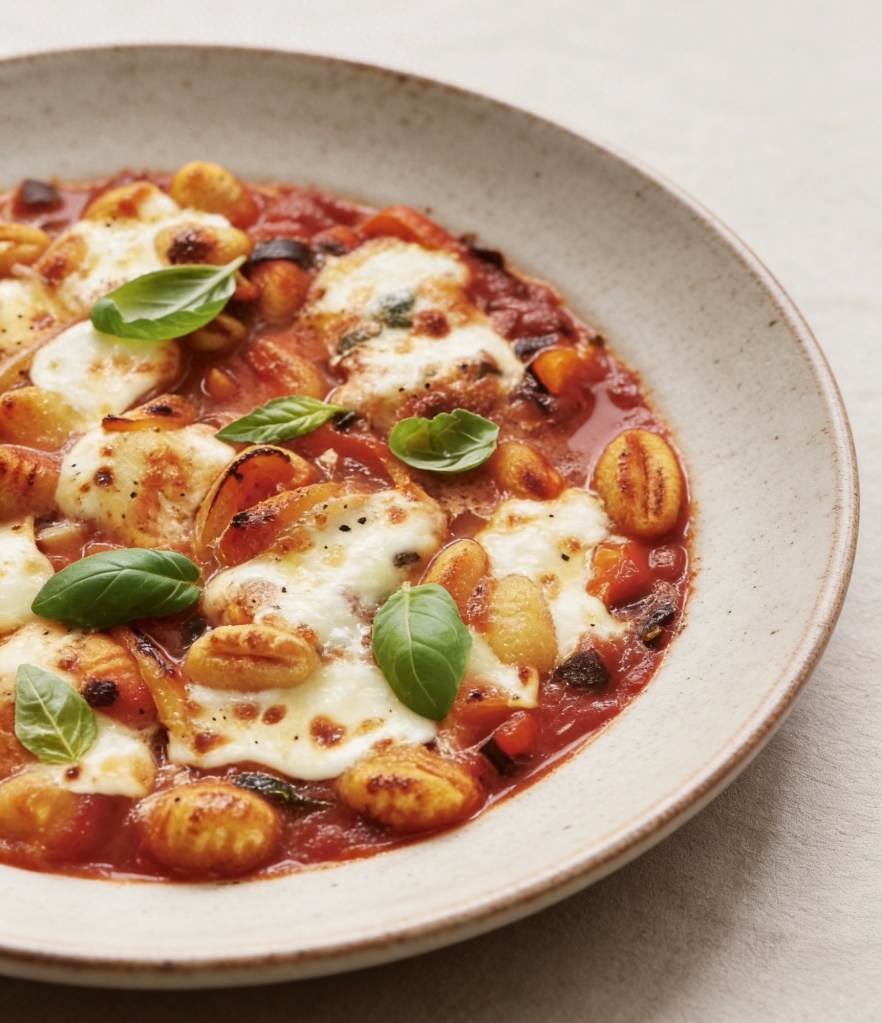
Enter the holy grail of hangover food: the One-Pot Cheesy Gnocchi Bake.
Why This is the Ultimate Hangover Cure
When you’re hurting, your body is crying out for a few specific things, and this recipe hits every single one of them:
• The Ultimate Carb Blanket: Gnocchi is pure, pillowy comfort. Unlike heavy pasta that requires waiting for a massive pot of water to boil (who has the patience?), gnocchi cooks right in the sauce. It provides the fast-acting carbohydrates your brain is begging for to restore your crashing blood sugar.
• Hydration & Electrolytes: Alcohol dehydrates you, stripping your body of essential salts. The rich tomato passata and veggie stock pot in this recipe act like a delicious, savory electrolyte drink, helping your body retain moisture and kickstarting your recovery.
• The Magic of Melted Cheese: Let’s be honest, science aside, melted mozzarella is good for the soul. The fats in the cheese help line your stomach and trigger those happy endorphins to battle the “hangover anxiety.”
• Minimal Effort, Maximum Reward: It’s a one-pot wonder. You chop a few veggies, dump everything into a casserole dish, cover it in cheese, and let the oven do the heavy lifting while you lie on the couch.
Ingredients & Method
Here is exactly how to pull this together when you’re operating on 10% brain power.
Step-by-Step
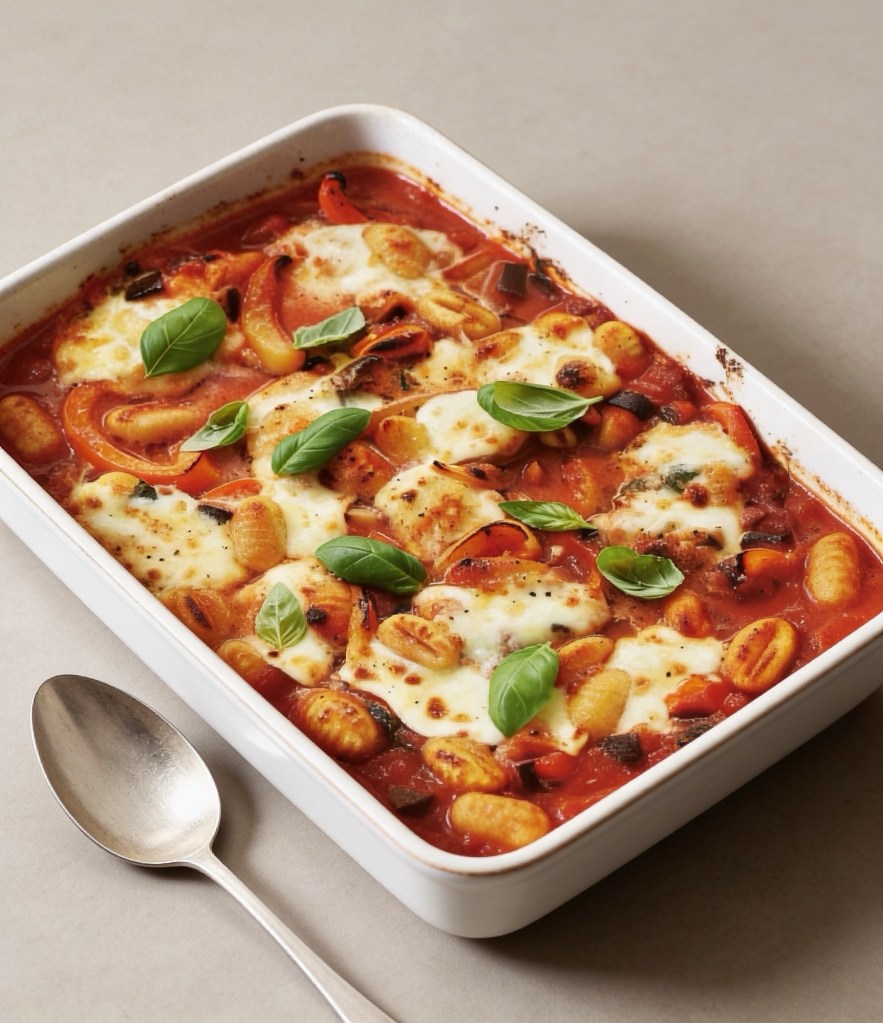
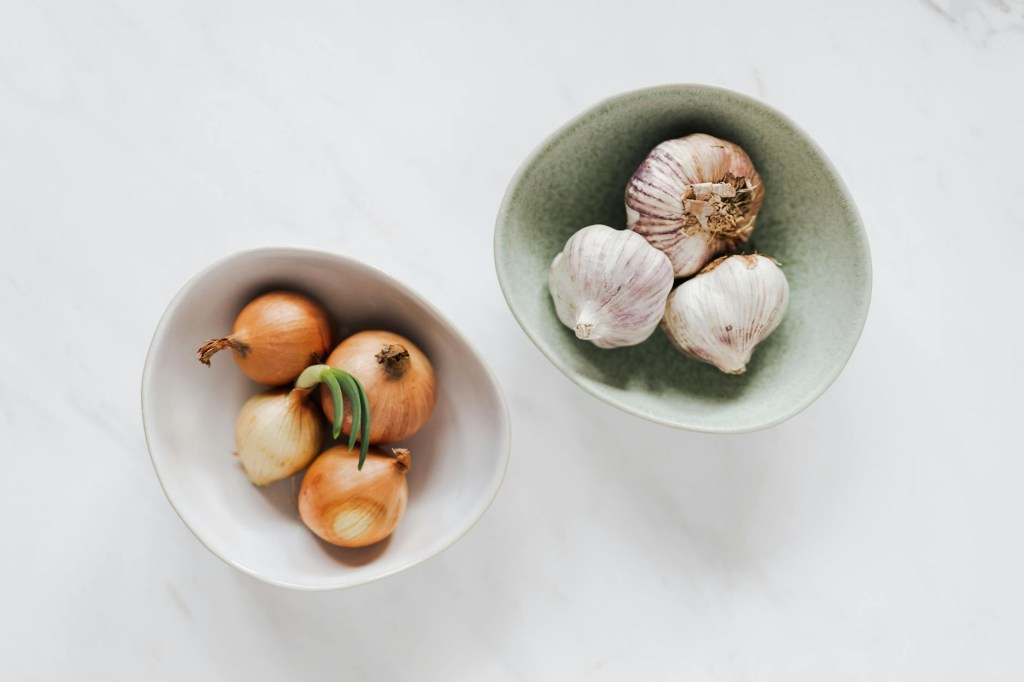
1. Get the base going: Heat a splash of olive oil in a heavy-based, ovenproof casserole dish. Toss in your chopped onion and garlic. Let them cook over a medium heat for about 6-8 minutes until they’re soft and fragrant.
2. Add the bulk: Stir in your chopped aubergine and let it cook for another 10 minutes. Give it an occasional stir—nothing too strenuous.
3. Preheat and level up: Crank your oven to 220°C/200°C fan/gas 7. Stir the chopped peppers and a handful of torn basil into the pan, letting them cook for 5 more minutes.
4. Make the sauce: Dissolve your stock pot in 200ml of boiling water. Pour that into the pan along with the passata. Give it all a really good stir.
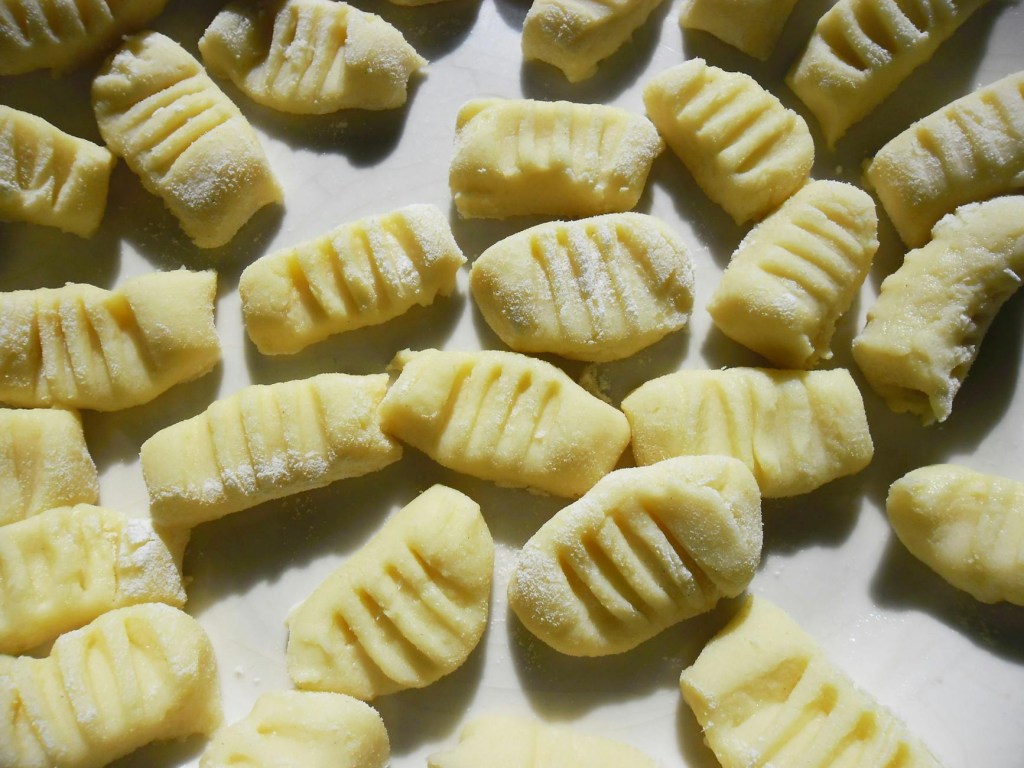
5. The best part: Stir the gnocchi straight into the sauce (yes, raw!). Tear up your mozzarella and scatter it generously over the top.
6. Bake and relax: Pop the whole dish into the oven for 15-20 minutes. You’re looking for a bubbling sauce and a gorgeous, golden, melted cheese crust.
Scatter a few fresh basil leaves over the top to make it look pretty, grab a bowl, and go melt into the sofa. You’ve earned this.
What’s your go-to drink to pair with a hangover meal like this—are you team ice-cold cola or team extra-spicy Bloody Mary?
A Rainy Sunday Afternoon and a Game-Changing Recipe
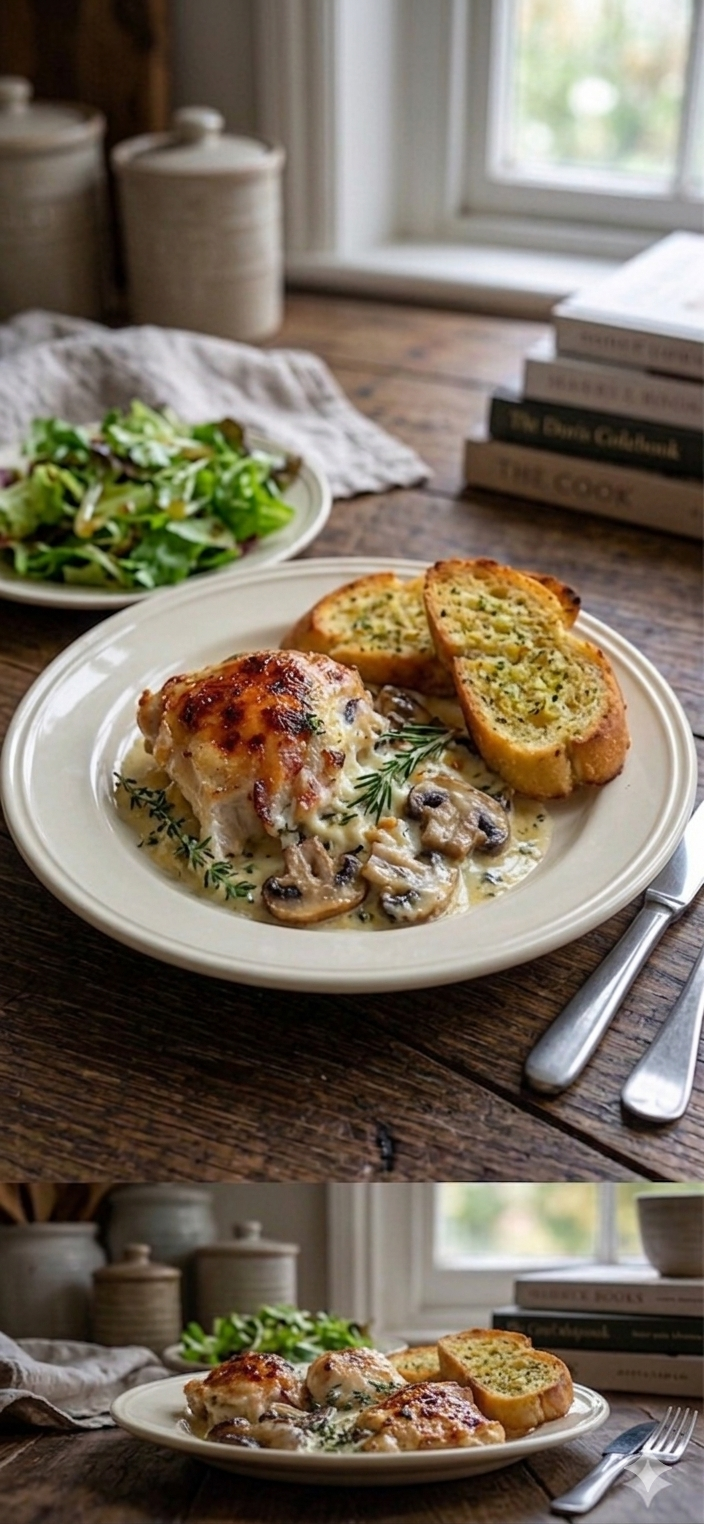
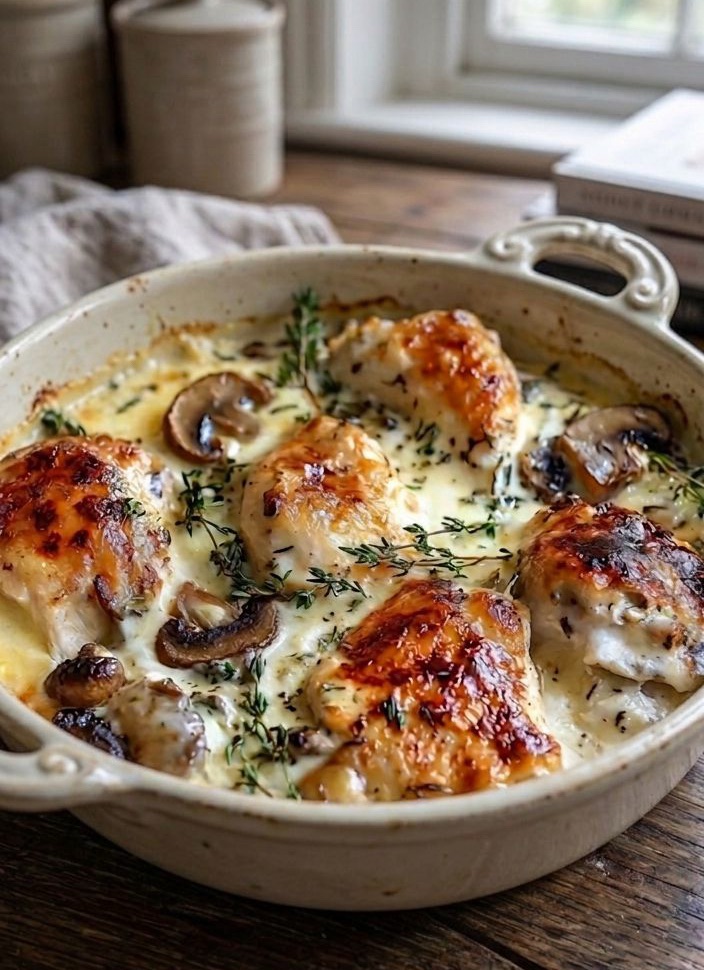
There’s something about a rainy Sunday afternoon that calls for comfort food. The other week, as the rain pattered against the window, I was craving something that felt like a warm hug. My kitchen was filled with the rich, earthy scent of roasting chicken and mushrooms, and for a moment, I was transported right back to my favorite little bistro.
I’d been on the hunt for a dish that delivered that deep, satisfying, home-cooked flavor but without the all-day faff in the kitchen. And that’s exactly when I stumbled across this absolute gem: a Creamy Chicken & Mushroom Cheese Bake.
Let me tell you, this recipe is a total game changer. It’s a gorgeous mix of succulent chicken, sautéed mushrooms, and a velvety, cheesy sauce, all baked until it’s bubbly and golden. It’s simple enough for a busy weeknight (perfect for after school and work!) but elegant enough to serve up to friends for a casual dinner party. And the best bit? You probably have most of what you need already in your cupboards!
This isn’t just dinner; it’s a cosy culinary adventure that guarantees smiles all around the table. No fast food hassle, just pure, homemade comfort. Ready to try my new go-to recipe? Let’s get cooking!
Why You’ll Adoooooore This Creamy Chicken & Mushroom Cheese Bake
Ultimate Comfort: If this dish was a person, it would be that friend who gives the best hugs. It’s warm, gooey, and deeply satisfying. Perfect for when you need a pick-me-up.
Super Simple: Honestly, this recipe is ridiculously easy to follow. You don’t need to be some sort of Michelin-star chef. If you can slice mushrooms and stir a sauce, you’ve got this. It looks gourmet but is genuinely foolproof.
What You’ll Need (All in Proper UK Measures!)
The ingredients are simple, no-nonsense classics. Here’s your shopping list:
For the Chicken
• 400g Chicken Breast: Grab boneless, skinless breasts. They stay lovely and tender when they’re baked in the sauce.
• A good pinch of Sea Salt: A little salt goes a long way to really making that chicken flavor pop.
For the Mushrooms
• 300g Fresh Mushrooms: I like a mix of button and chestnut for this, sliced. They add that beautiful, deep, earthy depth that works so perfectly with the creamy sauce.
• 1 tbsp Olive Oil: Just a standard olive oil (no need to use your fancy extra virgin stuff here) for sautéing the mushrooms and bringing out all their natural goodness.
For that Lush Creamy Sauce
• 200ml Double Cream: Okay, I know, I know… but double cream is what gives this dish its insanely rich and velvety texture. You could use single cream or even semi-skimmed milk for a lighter version, but for that true, bistro-style indulgence, go for the double cream. It’s so worth it!
• 150g (approx. 1½ cups) Grated Cheese: For the perfect gooey topping that pull-aparts in the most satisfying way, use a mix. Half Mozzarella (for the melt) and half Mature Cheddar (for the punchy flavor) is my absolute favorite combo.
• 1 tsp Garlic Powder: This adds a gorgeous, subtle hint of garlic that elevates the whole sauce without being overwhelming.
• 1 tsp Onion Powder: Pairs perfectly with the garlic for that classic, deep, savory flavor.
For the Perfect Finishing Touch (The Topping!)
• A small handful of Fresh Parsley: Chopped finely, this adds a burst of vibrant green color and a lovely, fresh flavor contrast.
• 1-2 tbsp Grated Parmesan Cheese (Optional): If you’re feeling extra indulgent, a sprinkle of Parmesan on top takes the cheesy goodness to a whole new level of rich and savory. Trust me, it’s a pro move!
And that’s it! Just simple, quality ingredients that come together to create absolute magic. Let’s get to the fun part… making it!
How to Make Your Creamy Chicken & Mushroom Cheese Bake
Okay, grab your favorite apron (and maybe pour yourself a glass of something nice – it is a rainy Sunday, after all!). Here is my super easy, step-by-step guide.
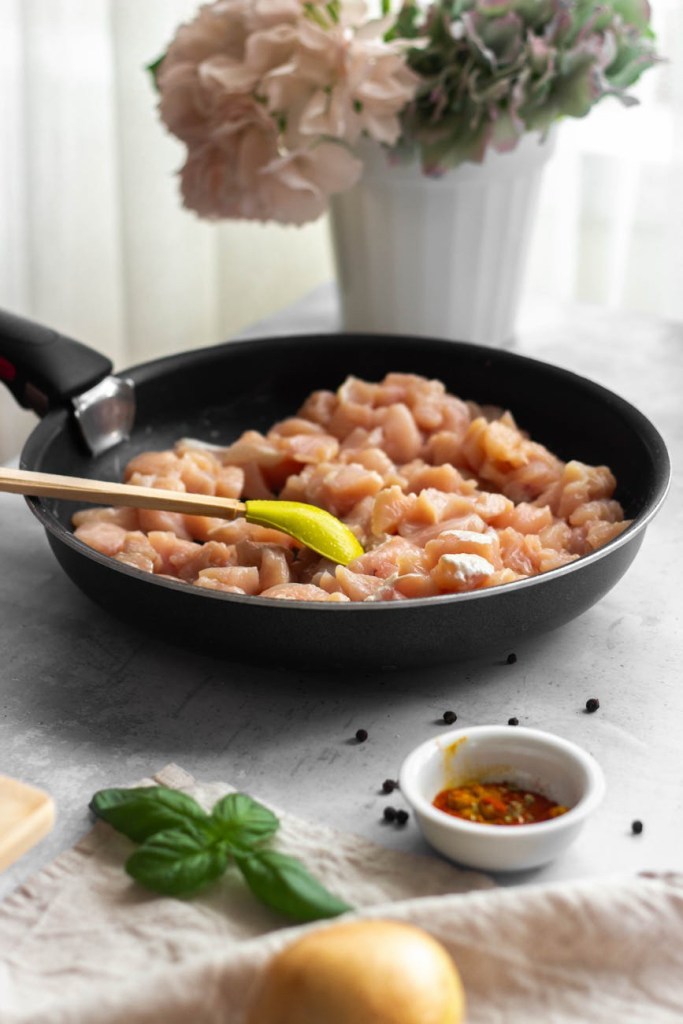
1. Prep Your Chicken: First things first, get that oven on! Preheat it to 200°C (180°C fan) / Gas Mark 6. While that’s heating up, grab your 400g of chicken breast. I like to slice mine into strips or bite-sized pieces so it cooks a bit faster and gets completely coated in that amazing sauce. Season it generously with your pinch of sea salt. This simple step makes a huge difference in the final taste.
2. Sauté Your Mushrooms: In a nice big skillet or frying pan (the one you’ll also be making the sauce in, to save on washing up!), heat up your 1 tbsp of olive oil over a medium heat. Once it’s hot, add in your 300g of sliced fresh mushrooms. Sauté them, stirring every now and then, for about 5 minutes, or until they’ve released their juices, are gorgeous and golden brown, and smelling divine. Remove them from the pan and set them aside.
3. Cook the Chicken: Using the same pan (more flavor!), add the seasoned chicken. Cook it for about 5-7 minutes on each side. You want it to get some lovely color, but the main thing is ensuring it’s no longer pink in the middle. (If you’ve sliced it small, this might only take 3-4 minutes per side).
4. Make the Lush Sauce: This is where the magic happens. Turn the heat down slightly and pour in your 200ml of double cream. Stir in your 1 tsp of garlic powder and 1 tsp of onion powder. Let it simmer very gently for about 3-5 minutes, just until the mixture is slightly thickened. You’re not trying to reduce it too much, just get it to a beautiful, velvety consistency.
5. Get it Oh-So-Cheesy: Now, the moment of truth. Stir in your 150g of grated cheese mix (Mozzarella and Cheddar). Watch in pure joy as it melts effortlessly into that cream, creating a smooth, rich, and ridiculously gooey sauce that smells like actual heaven. Make sure it’s fully melted and has beautifully coated all that succulent chicken.
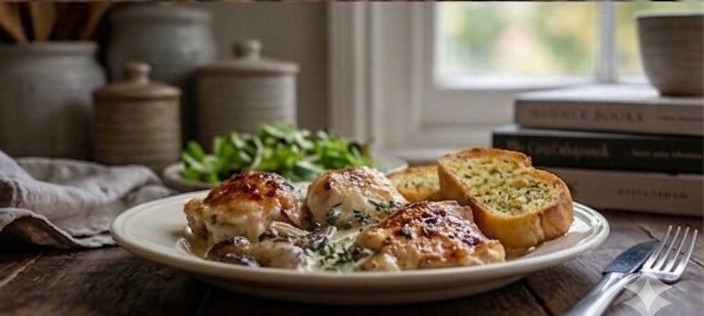
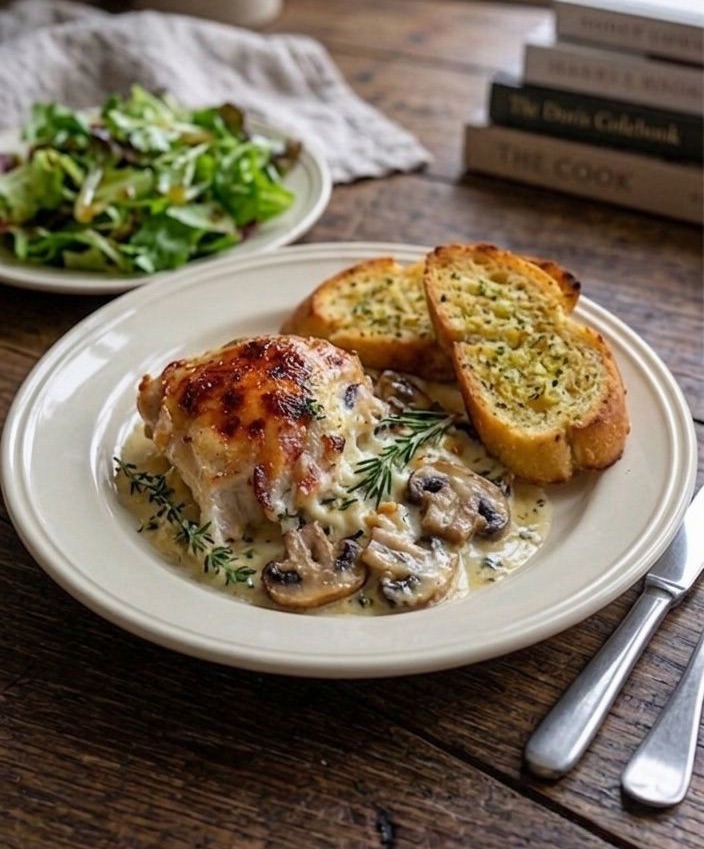
6. Bake to Perfection: Now, transfer the whole glorious mixture into your favorite ovenproof dish (a medium-sized rectangular or oval one works perfectly). For that extra-special touch, top it with a light sprinkling of the optional grated Parmesan and a handful of the freshly chopped parsley. Pop it in the preheated oven and bake for 20 minutes, or until the top is an irresistible golden brown and it’s all bubbling away beautifully.
7. Serve & Devour: The hardest part: waiting for it to cool for a few minutes before serving. This allows the sauce to set slightly. Once you can’t wait a second longer, garnish with some more fresh parsley, dish it up, and watch as it creates instant silence around the table (the sign of a very good meal!).
I love serving mine with some crusty garlic bread to mop up all that delicious sauce, and maybe a simple side salad if I’m feeling fancy. It’s also incredible over some fluffy rice or even tossed through pasta.
So there you have it, my go-to recipe for the ultimate comfort food. This Creamy Chicken & Mushroom Cheese Bake is guaranteed to be a hit. It’s simple, delicious, and brings that bistro feeling right to your kitchen. I can’t wait for you to try it!
Let me know in the comments if you make it, and don’t forget to tag me on social media so I can see your cozy culinary creations! Happy cooking!
Brave For The Other — Volume 1 (Adult Edition) Listening time: 20 minutes · Also available as a children’s edition Long description Some stories are written. This one was walked. Brave For The Other — Volume 1 is the adult companion to the children’s picture book
of the same name — the unflinching version, the one told after the lights go down and the pram wheels stop turning. In twenty raw, cinematic minutes, Lance and Carolyn pull back the curtain on the year that asked everything of them — and on the three cats who quietly held the line. There’s Ruby, the black-and-white tuxedo tom: cantankerous, impossibly resilient, the kind of cat who looks at a terminal prognosis and decides he isn’t finished yet. Moon, the soft one, who gives love away like it costs her nothing.
Pic: The Luxury Of TouchPic: “Ruby illustration. One night, I recorded a portion of this audio and heard him behind me at 2:00 AM. I felt like a hypocrite reciting his praises and ignoring him, so I turned around and wondered if he could understand. Instantly, I sat him beside me. Not a herd of wild horses would have me believe that he wasn’t absorbing the melancholy prognosis from the vet.”
Here is the clip .
Pic: She looked appallingly sad when I found her. She Pic: Adorable
And Millie, the tortoiseshell — only ever touched gently, head-first, because somebody before them got it wrong, and she has not forgotten. This is the origin story behind LC Chaos and Home. A small Cheshire life. A blue pram. A cloud blanket. And the lanes of Warrington, Hillcliffe and Stockton Heath in sun and rain — nearly nine weeks of long walks after the vet said weeks, not months. Ruby curled into a tight ball most days, almost weightless. Then someone would say the word pram — and to their astonishment, he’d uncurl, find his feet, and go and wait beside it. Every single time. Volume 1 doesn’t flinch from the strain. The pensive ache of wanting a break, a holiday, anything — and not being able to leave. The quiet recalibration of two people who realised they had become entirely centric to one small life, and that the only way through was outward — branching into new realms, learning AI, building something that could carry the story when they couldn’t carry it alone. It is, at its heart, the simplest equation of all: two people and a promise. One small step. One kind thing. Brave for the other. For listeners of memoir-led audio in the vein of Glennon Doyle, Matt Haig and Helen Macdonald — and for anyone who has ever loved something so much they had to learn a new version of themselves to keep loving it well. The children’s edition tells it gently, with paw prints and sunshine. This one tells it true. Press play. Meet Ruby, Moon and Millie. Be brave for the other.