Tag: #healthy

  • Nut Butter Energy Bars: Your New Favorite Healthy Snack

    Nut Butter Energy Bars: Your New Favorite Healthy Snack

    If you’re anything like me, you’re constantly looking for a snack that hits that perfect sweet spot—something chewy, satisfying, and filling enough to keep you going until your next meal.

    The problem? So many “healthy” store-bought bars are packed with hidden sugars and processed syrups.

    That is why I’ve been making these Nut Butter Energy Bars on repeat lately. They use natural nut butter as a binder, meaning you get a dose of healthy fats and protein without the refined sugar crash. Plus, they take less than 25 minutes from start to finish!

    Why You’ll Love These

     Simple Ingredients: You likely already have most of these in your pantry.

     Highly Customizable: Switch up the nuts, seeds, or add-ins based on what you have on hand.

     Meal Prep Friendly: They hold up perfectly for the week—just grab and go.

    Ingredients

     250g Rolled oats

     180g Natural peanut butter (ensure it’s the runny kind with no added palm oil)

     80g Maple syrup or honey

     60g Melted coconut oil

     1 tsp Vanilla extract

     1/2 tsp Sea salt

     Optional: 50g dark chocolate chips, almonds, or pumpkin seeds for extra texture

    Method

    1 Prep: Preheat your oven to 175°C (155°C fan). Line an 8×8-inch baking dish with parchment paper, leaving a little overhang on the sides so you can lift the bars out easily later.

    2 Combine Wet Ingredients: In a large bowl, whisk together the peanut butter, maple syrup, coconut oil, vanilla, and salt until smooth.

    3 Mix: Fold in the oats and any optional add-ins (like chocolate chips or seeds). Stir until every oat is evenly coated in the nut butter mixture.

    4 The Secret Step: Transfer the mixture to your baking dish. Use the back of a flat-bottomed glass or a metal spatula to press the mixture down firmly. This is the key to getting a dense, chewy bar that doesn’t crumble!

    5 Bake: Bake for 18–22 minutes. The edges should look golden brown, even if the center still feels slightly soft.

    6 Cool & Slice: Let the bars cool completely in the tin on a wire rack. For the best result, chill them in the fridge for 30 minutes before slicing into squares.

    Tips for Success

     Nut Butter Swaps: You can easily swap the peanut butter for almond or cashew butter. Almond butter offers a slightly more earthy, sophisticated profile.

     Storage: Keep these in an airtight container at room temperature for up to 5 days. If you’ve made a double batch, you can freeze them for up to 3 months.

    Have you tried making these? Tag me in your photos or let me know in the comments which nut butter you chose!

  • Healthy Tiramisu Overnight Oats (Dessert For Breakfast!)

    Healthy Tiramisu Overnight Oats (Dessert For Breakfast!)

    If you’ve been scrolling through social media lately, you’ve probably seen everyone obsessing over dessert-inspired breakfasts. And honestly? Same. There is absolutely no reason why we shouldn’t be enjoying the flavours of a luxurious Italian dessert first thing in the morning

    Enter these Tiramisu Overnight Oats.

    This recipe gives you all the rich, coffee-soaked, creamy goodness of a traditional tiramisu, but it’s packed with protein and complex carbs to keep you full until lunch. It takes less than 5 minutes to prep the night before, meaning you can roll out of bed and immediately dive into breakfast bliss.

    Why You’ll Love This Recipe

     Zero Cooking Required: Just mix, layer, and chill.

     The Ultimate Coffee Kick: It uses real espresso or strong brewed coffee to wake you right up.

     Meal-Prep Friendly: Make a few jars on Sunday night and breakfast is sorted for the week.

     Healthy but Decadent: It feels like a massive treat, but it’s actually a macro-friendly, wholesome breakfast.

    The Ingredients (UK Measurements)

    Here is everything you need to grab from the cupboard and fridge to make one single-serve pudding pot.

    For the Oat Base:

     45g porridge oats (rolled oats work best for texture)

     1 tbsp chia seeds (essential for getting that thick, pudding-like consistency)

     60ml strong brewed coffee or espresso (make sure it has cooled down slightly)

     120ml milk of choice (oat, almond, or dairy milk all work beautifully)

     1 tbsp maple syrup (or honey/agave)

     1 tsp vanilla extract

    For the Cream Layer:

     80g vanilla Greek yoghurt (For an authentic twist, you can mix 1 tbsp of mascarpone cheese straight into plain Greek yoghurt instead!)

     1 tsp maple syrup

    For the Topping:

     1 tsp unsweetened cocoa powder (for that classic dusty tiramisu finish)

    Step-by-Step Method

    1. Mix the Base

    In a bowl or directly into your jar, combine the porridge oats, chia seeds, cooled coffee, milk, maple syrup, and vanilla extract. Stir thoroughly to make sure the chia seeds are well distributed and don’t clump together.

    2. The First Chill

    Pop the lid on your container and place it in the fridge for at least 4 hours, though overnight is ideal. This gives the oats and chia seeds time to soak up all that glorious coffee flavour and thicken up.

    3. Whip the Cream Layer

    In a small separate bowl, mix your vanilla Greek yoghurt (or your yoghurt and mascarpone blend) with a teaspoon of maple syrup until perfectly smooth.

    4. Layer and Assemble

    Take your chilled oats out of the fridge. Smooth the sweet yoghurt mixture evenly over the top of the oats to create that iconic distinct white layer.

    5. The Grand Finale

    Right before you grab your spoon, grab a small sieve and dust the top generously with cocoa powder.

    💡 Top Tip: Don’t dust the cocoa powder on the night before! It will absorb moisture from the yoghurt layer in the fridge and go a bit soggy. Always dust it fresh right before you eat.

    Variations & Substitutions

     Boost the Protein: Stir half a scoop of vanilla or blonde-chocolate protein powder directly into the oat base before chilling (you may need to add an extra splash of milk if it gets too thick).

     Make it Vegan: Use a plant-based milk (like soy or oat) and swap the Greek yoghurt for a thick vanilla coconut or soy yoghurt.

     Extra Indulgence: Grate a little bit of dark chocolate over the cocoa powder layer for an extra bit of crunch and luxury.

    If you tried this recipe, let me know how you liked it in the comments below! Don’t forget to tag me in your breakfast photos on Instagram and TikTok.

    These jars are fab for oats on the go so no spillages on the way to work or college

    https://amzn.to/4fR7Kls

    This post may contain affiliate links, which means I may earn a small commission if you purchase through them — at no extra cost to you. As an Amazon Associate, I earn from qualifying purchases
  • The Viral “Princess-Approved” Salad: Does it Live Up to the Hype?

    The Viral “Princess-Approved” Salad: Does it Live Up to the Hype?

    If you’ve been scrolling through social media lately, you’ve likely seen the vibrant, refreshing Watermelon, Avocado, and Feta Salad taking over everyone’s feeds. Often dubbed the “Kate Middleton Salad,” this dish has become the ultimate symbol of a chic, healthy summer lunch. But is it actually worth the hype? I decided to put it to the test.

    Why This Salad Works

    The beauty of this recipe lies in the contrast. You get the cooling, sweet hydration of the watermelon paired with the salty tang of the feta and the rich, creamy texture of avocado. It is simple, fast, and feels like a meal fit for royalty.

    The Recipe (Metric Measurements)

    Ingredients

     500g–600g cubed watermelon

     1 English cucumber, chopped

     1 avocado, diced

     75g–100g crumbled feta cheese

     Small bunch of fresh mint, roughly chopped

    For the Dressing

     60ml extra virgin olive oil

     Juice of 1 lime

     30ml apple cider vinegar

     Salt & pepper to taste

    Instructions

    1 Prep: Place the watermelon, cucumber, avocado, feta, and mint into a large mixing bowl.

    2 Whisk: In a small jar or bowl, whisk together the olive oil, lime juice, apple cider vinegar, salt, and pepper until emulsified.

    3 Toss & Serve: Pour the dressing over your salad. Toss everything together very gently so you don’t mash the avocado. Serve immediately while cold.

    Final Verdict

    Whether or not this was truly served at Kensington Palace, it is undoubtedly a winner for warm weather. It’s light, vibrant, and packed with flavor. If you’re looking for a quick lunch that doesn’t require turning on the oven, this is the one.

    Have you tried this viral salad yet? Let me know in the comments if it’s a staple in your summer rotation!

  • Strawberry Cheesecake Oat Bars: A Fresh, No-Bake Treat

    Strawberry Cheesecake Oat Bars: A Fresh, No-Bake Treat

    There is something inherently satisfying about a cheesecake, but let’s be honest: the time and effort required for a traditional baked version can be a bit daunting when you just want a quick, delicious snack. That is exactly why I’ve fallen in love with these Strawberry Cheesecake Oat Bars.

    They are creamy, fruity, and perfectly balanced by a nutty, oaty base. The best part? There is absolutely zero baking involved. Whether you are after a sophisticated post-dinner treat or a refreshing afternoon pick-me-up, these bars are the ultimate answer.

    Why You’ll Adore These Bars

     No-Bake Bliss: No hot oven, no complicated water baths, and no stress. Just mix, set, and enjoy.

     Fresh Flavours: The combination of tangy Greek yogurt and sweet, seasonal strawberries makes for a bright, vibrant flavour profile.

     Customisable: This recipe is incredibly forgiving. Feel free to swap the strawberries for raspberries or even blueberries if you want to mix things up!

    The Ingredients

    Everything you need can be found at your local shop:

     For the Base:

     150g oats: Porridge oats work perfectly for that classic texture.

     60g melted butter or coconut oil: This binds the base together beautifully.

     40ml honey: Adds a touch of natural sweetness to the oaty crust.

     For the Cheesecake Filling:

     200g Greek yogurt: Use a thick, full-fat variety for the best creamy consistency.

     100g cream cheese: Brings that authentic cheesecake tang.

     1 tsp vanilla extract: Essential for that classic aroma.

     100g fresh strawberries: You’ll want to mash or blend these to create a beautiful fruity swirl.

    Method

    1. Create the Foundation

    In a medium bowl, stir together your oats, melted butter (or coconut oil), and honey until the oats are thoroughly coated. Tip this mixture into a parchment-lined tin and press it down very firmly with the back of a spoon to create an even, compact base.

    2. Whip Up the Filling

    In a separate bowl, whisk together the Greek yogurt, cream cheese, and vanilla extract until smooth. You want the mixture to be velvety with no lumps.

    3. The Strawberry Swirl

    Gently fold in your mashed strawberries. Don’t over-mix this part—you want those lovely ribbons of red strawberry puree running through the pale pink yogurt mixture.

    4. Set to Perfection

    Pour your creamy mixture over the oaty base and smooth out the top. Pop the tin into the freezer for at least 3 hours. This is the secret to getting that perfect, sliceable texture.

    5. Serve and Enjoy

    Once firm, lift the block from the tin and slice into your preferred bar size. Top each one with a fresh strawberry slice or a dusting of toasted coconut for that professional finishing touch.

    Top Tip: These bars are best enjoyed straight from the freezer for a “frozen cheesecake” vibe, or left to sit for 10 minutes if you prefer a softer, creamier texture. They keep perfectly in an airtight container in the freezer for up to two weeks.

    Are you a fan of fruity desserts, or do you always gravitate towards chocolate? Let me know your favourite treat in the comments below!

  • Fig & honey frozen yoghurt ice cream

    Fig & honey frozen yoghurt ice cream


    This frozen dessert is the perfect bridge between a quick snack and a sophisticated, naturally sweetened treat. By balancing the deep, molasses-like sweetness of dried figs with the tangy sharpness of high-quality Greek-style yogurt, you create a complex flavour profile that feels far more indulgent than the ingredient list suggests.

    Why This Recipe Works

    The secret lies in the rehydration process. Dried figs have a tough, chewy exterior and dense seeds. By soaking them, you not only soften the flesh to ensure a smooth, velvelty blend but also release their natural sugars, which helps create a more consistent texture once frozen.

    Ingredients

    • 6 dried figs: Look for soft, organic Turkish or Mission figs if possible.
    • 250g Greek-style yogurt: Choose full-fat or 5% fat for a creamier result; the higher protein and fat content prevent icy crystals from forming.
    • 30g walnuts: Walnuts provide a necessary textural contrast. They are rich in omega-3 fatty acids, which complement the earthiness of the figs.
    • 2 tbsp runny honey: Acacia or wildflower honey works best for its clean, floral finish.
    • 1 tsp high-quality vanilla extract: A small amount of real vanilla helps bridge the gap between the fruit and the dairy.

    Step-by-Step Method

    1. The Soak: Submerge your figs in a bowl of hot (not boiling) water. Let them steep for 15–20 minutes. Drain thoroughly—excess water here will make your final product icy rather than creamy.
    2. The Blitz: Combine the softened figs (remove any hard stems first), yogurt, honey, and vanilla in a high-speed blender. Process until the mixture is uniform and the figs are completely incorporated into the dairy base.
    3. Textural Addition: Roughly chop the walnuts by hand rather than blending them. This keeps the pieces substantial. Fold them into the mixture manually to ensure an even distribution.
    4. The Freeze: Pour the mixture into a shallow, stainless steel or glass freezer-safe container. Freezing in a shallow dish increases the surface area, allowing for a faster and more even freeze.
    5. The Essential Stir: After 2 hours in the freezer, use a fork to vigorously break up the ice crystals forming along the edges. Stir thoroughly and level the top. Repeat this once more if time allows for a superior, smoother finish.
    6. Resting: Before serving, remove the container from the freezer and leave it at room temperature for 5 to 7 minutes. This allows the honey and fats to soften slightly, making it scoopable and highlighting the flavours.

    Pro-Tips for Success:

    • Toast Your Nuts: For a deeper flavour, lightly dry-toast the walnuts in a pan over medium heat for 3 minutes before chopping. Allow them to cool completely before folding into the yogurt.
    • Spice it up: Add 1/4 tsp of ground cinnamon or a pinch of cardamom to the blender for a warm, autumnal twist.
    • Storage: If you plan to store this for more than 24 hours, place a layer of baking paper directly onto the surface of the mixture to prevent ice crystals from developing on top.

    This recipe is a masterclass in using simple, whole-food ingredients to create a sophisticated dessert. Whether enjoyed as a post-workout protein snack or a light evening treat, it delivers on both texture and taste.

  • Healthy “Snickers” Bars (No-Bake & Addictive!)

    Healthy “Snickers” Bars (No-Bake & Addictive!)

    Looking for a treat that tastes like a candy bar but is packed with wholesome ingredients? These healthy, no-bake “Snickers” bars are about to become your new obsession. They are naturally sweetened, perfect for snacking, and incredibly easy to make.

    Why You’ll Love Them:

     Refined Sugar-Free: Sweetened naturally with dates.

     No-Bake: Keeps the kitchen cool!

     Customizable: Use your favourite nut or seed butter.

     Meal Prep Friendly: They store perfectly in the fridge for whenever a craving hits.

    Ingredients

    The Base:

     500g pitted dates

     Boiling water (for soaking)

     180g nut butter (peanut, almond, or cashew butter)

     90ml melted unrefined, virgin coconut oil

     1 ½ teaspoons sea salt

     4 ½ teaspoons pure vanilla extract

     270g rolled oats

     60g unsweetened coconut flakes

     150g mix-ins (chopped nuts, seeds, cacao nibs, etc.)

    The Topping:

     500g dark chocolate chips (or unsweetened chocolate with stevia to taste)

     30ml unrefined, virgin coconut oil

     Flaky sea salt (optional, for that perfect finish)

    Instructions

    1 Soak the Dates: Place the dates in a medium bowl and cover with boiling water, ensuring they are fully submerged. Let them soak for 10–15 minutes until they are soft. Drain, reserving about 45ml (3 tablespoons) of the soaking liquid.

    2 Prep the Tin: Line a 23cm x 13cm (approx. 9×5 inch) loaf tin with baking parchment.

    3 Blitz: In a food processor or blender, blitz the softened dates with the 45ml of reserved soaking liquid, nut butter, 90ml of coconut oil, salt, and vanilla until completely smooth.

    4 Mix: Transfer the date mixture to a large bowl and stir in the rolled oats, coconut flakes, and your chosen nuts/seeds until well combined. (If you have a large-capacity food processor, you can simply remove the blade and stir these ingredients in by hand).

    5 Press: Transfer the mixture to your prepared loaf tin. Spread it out evenly and smooth the top with a spatula.

    6 The Chocolate Layer: In a heat-proof bowl set over a pan of simmering water, melt the chocolate chips with the remaining 30ml of coconut oil until smooth. Pour over the oat layer and spread evenly.

    7 Chill: Sprinkle with flaky sea salt if desired. Refrigerate for at least 8 hours, or overnight, until firm.

    8 Serve: Remove from the tin using the parchment paper and cut into bars or squares. Keep leftovers stored in the fridge!

    Did you try this recipe? Let me know how it turned out in the comments below!

  • A Refreshing Treat: Simple Frozen Yogurt Bars

    A Refreshing Treat: Simple Frozen Yogurt Bars

    Looking for a healthy, crowd-pleasing dessert that takes minimal effort? These frozen yogurt bars are the perfect solution for a hot day or a quick, nutritious snack. Made with simple, wholesome ingredients, they offer a creamy, fruity flavor profile that hits the spot every time.

    Simple Ingredients

    This recipe relies on just a few staples you likely already have in your kitchen.

     2 cups (approx. 475g) Greek yogurt

     1/2 cup (approx. 170g) honey

     1 teaspoon (5ml) vanilla extract

     1 cup (approx. 150g) mixed berries

    Preparation Steps

    The process is straightforward and quick, leaving you with a delicious treat to reach for in the freezer.

    1. Mix: In a bowl, combine the Greek yogurt, honey, and vanilla extract until the mixture is smooth.

    2. Fold: Gently fold in the mixed berries.

    3. Pour: Transfer the mixture into your chosen popsicle molds.

    4. Freeze: Let them set in the freezer for at least 4 hours before serving.

    Nutrition Breakdown

    If you are tracking your macros, here is an estimate per serving, assuming the recipe makes 6 bars:

     Calories: 165 kcal

     Protein: 7g

     Carbohydrates: 28g

     Fat: 3g

    Whether you are looking to satisfy a sweet craving or need a cool-down snack, these frozen bars are a fantastic, easy-to-make option. Give them a try and let us know what your 

  • Creamy White Kinder Bueno Overnight Oats (The Ultimate Dessert for Breakfast)

    Creamy White Kinder Bueno Overnight Oats (The Ultimate Dessert for Breakfast)

    If you are firmly of the belief that breakfast should taste like dessert, welcome to your new obsession.

    We’ve all had standard overnight oats. They’re practical, they’re healthy, and let’s be honest—sometimes they’re a little bit boring. This recipe is the exact opposite of boring. This is a rich, velvety, ultra-creamy White Kinder Bueno Overnight Oats jar, complete with a crackable chocolate shell that makes waking up the best part of your day.

    If you love the iconic, milky, hazelnut cream filling of a classic Kinder Bueno, this recipe recreates that exact flavor profile using a few simple ingredients. It’s perfect for meal prep, takes less than 5 minutes to whip up, and feels like an absolute cheat meal.

    Why You’ll Love This Recipe

     That Satisfying Chocolate Crack: The melted chocolate top hardens in the fridge, giving you a perfect ASMR “spoon crack” moment before you dive into the creamy layers.

     The Secret Ingredient: By using a white chocolate hazelnut spread instead of traditional Nutella, you get that authentic, milky Kinder filling taste.

     Meal-Prep Friendly: Whip it up tonight in less than 5 minutes, and breakfast is ready to grab and go all week.

    Ingredients You’ll Need

    Here is everything you need to grab from your pantry to assemble these dream jars.

    The Creamy Oat Base

     Porridge Oats (40g): Rolled oats work best for absorbing the liquid without becoming mushy.

     Chia Seeds (1 tbsp): The secret to getting that thick, pudding-like texture.

     Milk of Choice (120ml): Almond, oat, or dairy milk all work perfectly.

     Honey or Maple Syrup (1 tbsp): For just a touch of natural sweetness.

     Greek Yogurt (2 tbsp): This is non-negotiable for achieving maximum creaminess and adding a nice protein boost.

     White Chocolate Hazelnut Spread (1 tbsp): Warmed up slightly so it mixes easily. Look for this in the spread aisle at your local supermarket (Tesco, Morrisons, and M&S all make incredible versions!).

    The Layer & Topping

     White Hazelnut Spread (1 tbsp): For a hidden surprise layer in the middle.

     Milk Chocolate (30g): Melted down to create the hard top shell.

     Coconut Oil (1 tsp): Mixed into the melted chocolate to make it beautifully glossy and easier to crack with a spoon.

     White Kinder Bueno (1 piece): The ultimate finishing touch.

    Step-by-Step Instructions

    Step 1: Mix the Base

    In a small mixing bowl or directly inside your glass jar, combine the porridge oats, chia seeds, milk, honey, Greek yogurt, and 1 tablespoon of the white hazelnut spread. Stir vigorously until everything is completely smooth and well combined.

    Step 2: Create the Hidden Layer

    Pour half of your oat mixture into the bottom of a clean, clip-top glass jar. Take your extra tablespoon of white hazelnut spread and smooth it evenly over the oats. Pour the remaining half of the oat mixture right on top.

    Step 3: Melt the Chocolate Shell

    Break your milk chocolate into a microwave-safe bowl, add the teaspoon of coconut oil, and microwave in 20-second bursts, stirring in between, until completely melted and smooth.

    Step 4: Assemble and Chill

    Pour the melted chocolate over the top layer of oats, tilting the jar slightly to ensure it creates an even, edge-to-edge seal. Press a fresh piece of White Kinder Bueno gently into the center of the wet chocolate.

    Pop the lid on and place it in the fridge overnight (or for at least 4 hours) to let the oats thicken and the chocolate shell set rock-solid.

    💡 Pro-Tip for the Perfect Crack: If the chocolate shell feels a bit too hard straight out of the fridge, let the jar sit on the counter for 3 to 5 minutes before eating. The chocolate will soften just enough to give you that perfect, satisfying spoon-crack without smashing the glass!

    Frequently Asked Questions

    Where can I find white hazelnut spread?

    Most major supermarkets now stock a white chocolate hazelnut spread right next to the regular chocolate spreads. Brands like Nutoka, Morrisons, and various imported brands offer a “milky hazelnut” paste that perfectly mimics the inside of a Kinder Bueno.

    Can I make this high-protein?

    Absolutely! Simply swap out the standard Greek yogurt for a high-protein vanilla yogurt, or stir half a scoop of your favorite vanilla or white chocolate protein powder directly into the oat base before layering. You may just need to add an extra splash of milk if the protein powder makes it too thick.

    If you tried this White Kinder Bueno Overnight Oats recipe, make sure to leave a comment below and let me know how satisfying your chocolate shell crack was! Don’t forget to tag me in your breakfast creations on socials.

  • The Secret to the Ultimate Creamy Strawberry Smoothie (TikTok’s Favorite Hack)

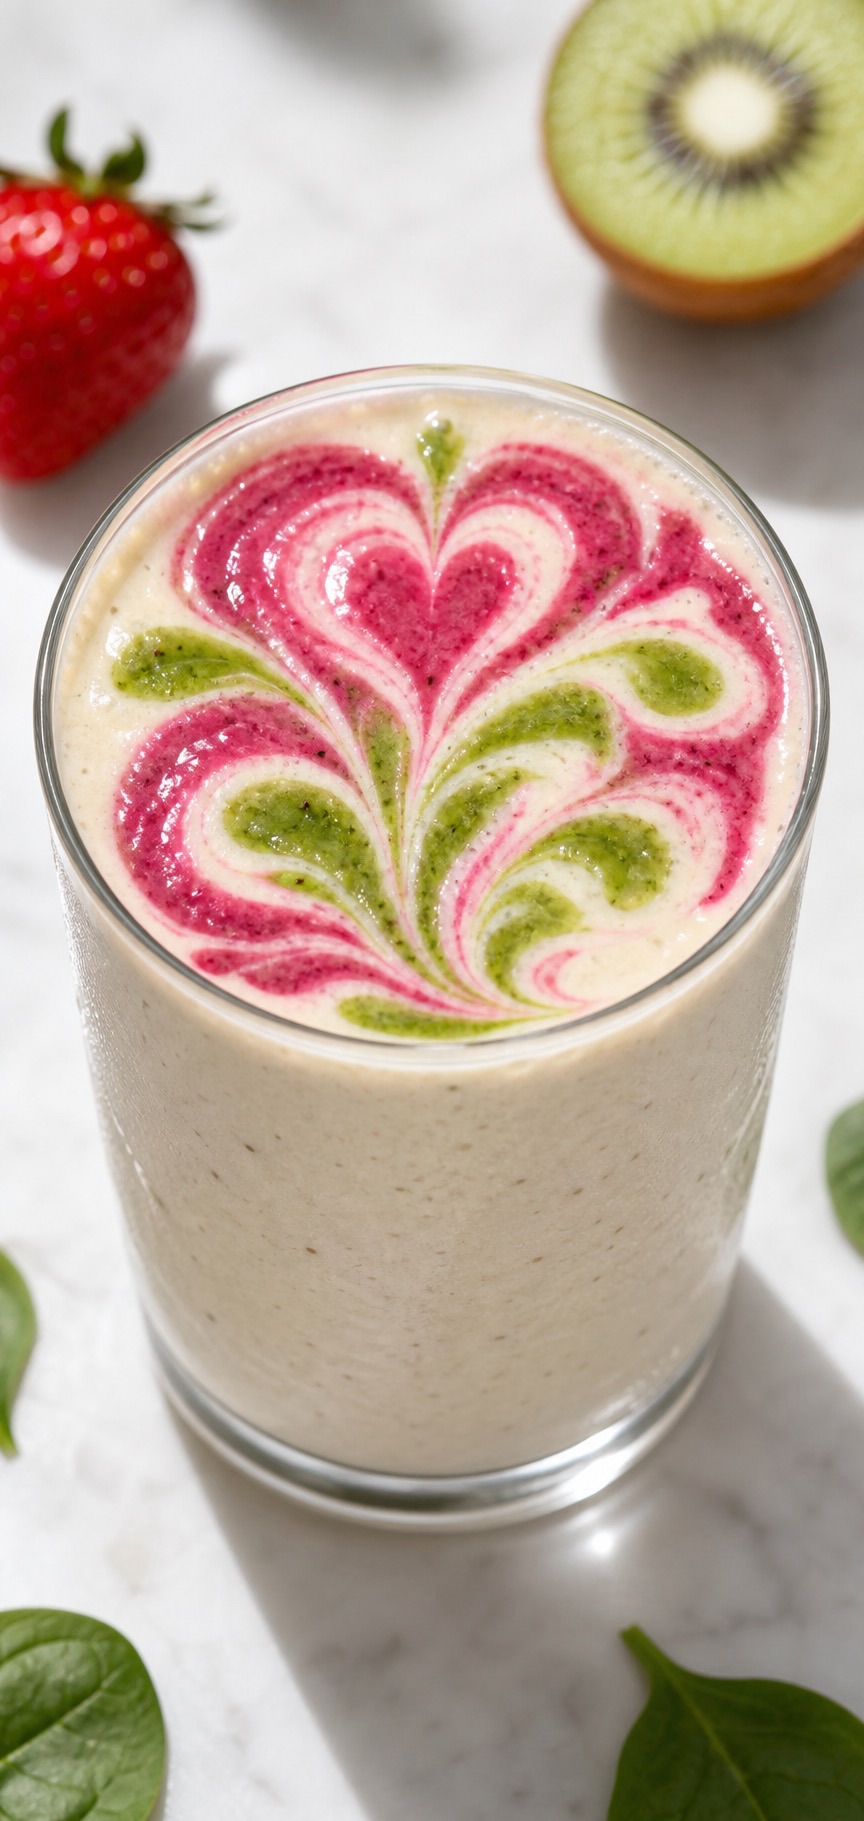
    The Secret to the Ultimate Creamy Strawberry Smoothie (TikTok’s Favorite Hack)

    If you’ve been scrolling through your feed lately, you’ve probably seen a dozen different ways to make a fruit smoothie. But let’s be honest—half the time, they either turn out too icy, too watery, or just plain bland.

    That stops today. This ultra-creamy strawberry smoothie tastes less like health food and more like a decadent milkshake, but it’s packed with clean ingredients to fuel your morning.

    The secret? A tiny splash of fresh lemon juice. It sounds simple, but it completely cuts through the richness and makes the strawberry flavor absolutely explode.

    🛒 The Ingredient Breakdown

    Here is everything you need to grab from your kitchen:

     Frozen Strawberries (2 cups): Essential for keeping the smoothie thick and frosty without needing to add ice (which just dilutes the flavor).

     Greek Yogurt (½ cup): Go for whole milk Greek yogurt if you want maximum creaminess and a solid protein boost.

     Frozen Banana (½): Just half a banana adds the perfect natural sweetness and velvet texture without overpowering the strawberry flavor.

     Honey or Maple Syrup (1 tbsp): For a touch of natural, unrefined sweetness.

     Fresh Lemon Juice (1 tsp): The game-changer. Don’t skip it!

    🥛 The Great Milk Debate: Which One is Best?

    The beauty of this recipe is its flexibility. Depending on what you pour into your blender, you can completely customize the vibe of your breakfast:

    Whole Milk: The undisputed champion for the richest, most milkshake-like texture.

    Oat Milk: The absolute best plant-based option. It has a naturally thick consistency and a slight sweetness that pairs perfectly with berries.

    Almond Milk: Your go-to if you want to keep things light, crisp, and low-calorie.

    🌪️ How to Make It

    1 Layer the Blender: Put your liquid in first (this helps the blades spin smoothly), followed by the yogurt, honey, lemon juice, and finally the frozen fruit.

    2 Blend on High: Whirl it all together until completely smooth. If it’s looking a little too thick to move, don’t panic—just add an extra splash of milk a tablespoon at a time.

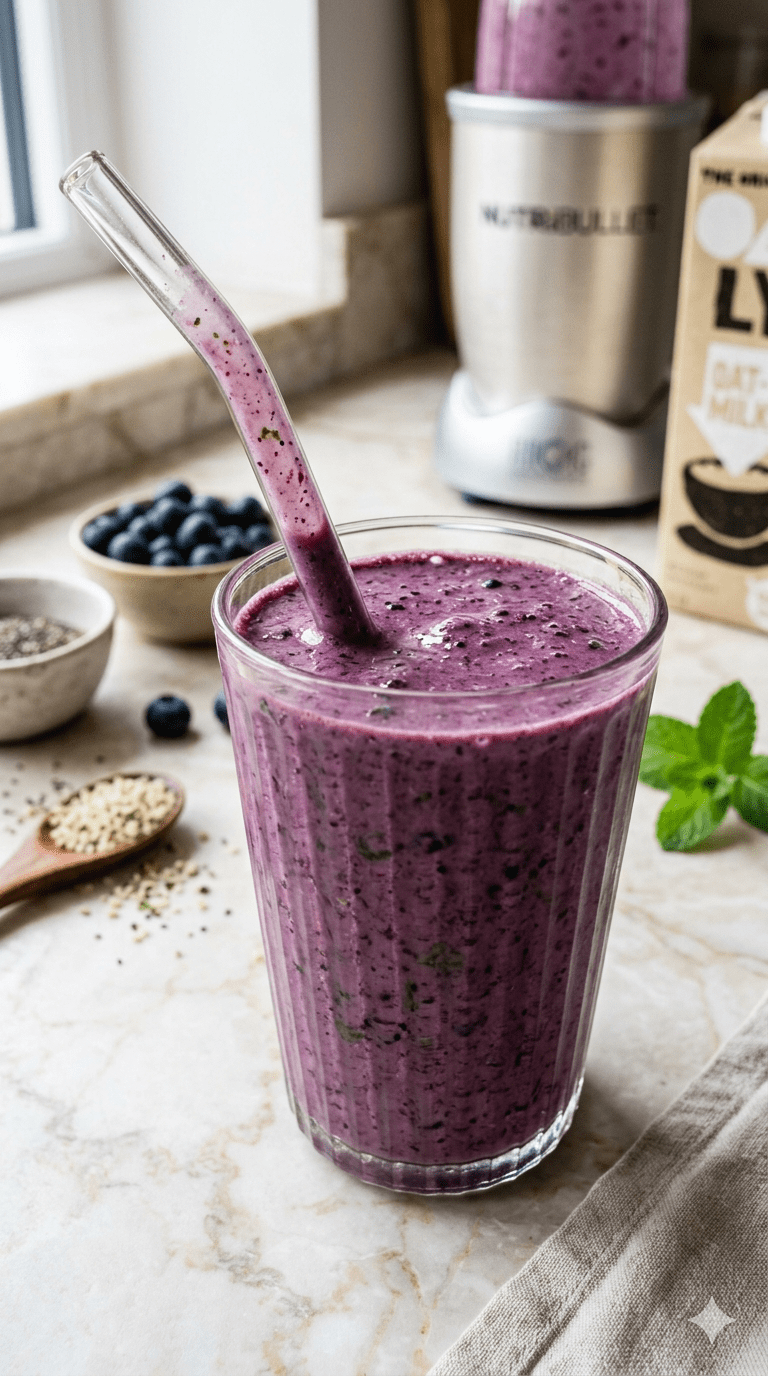
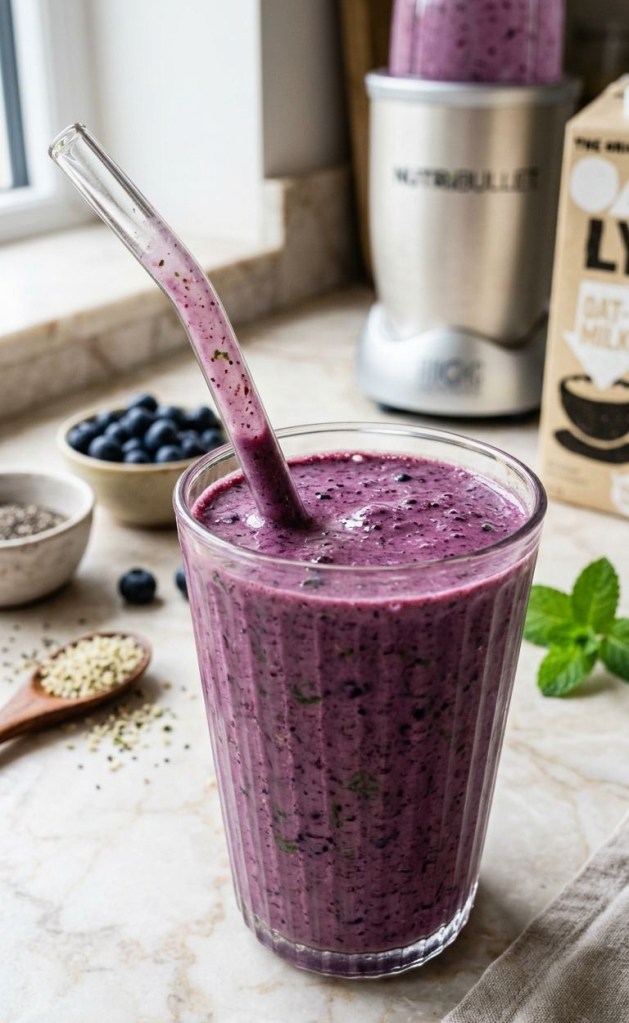
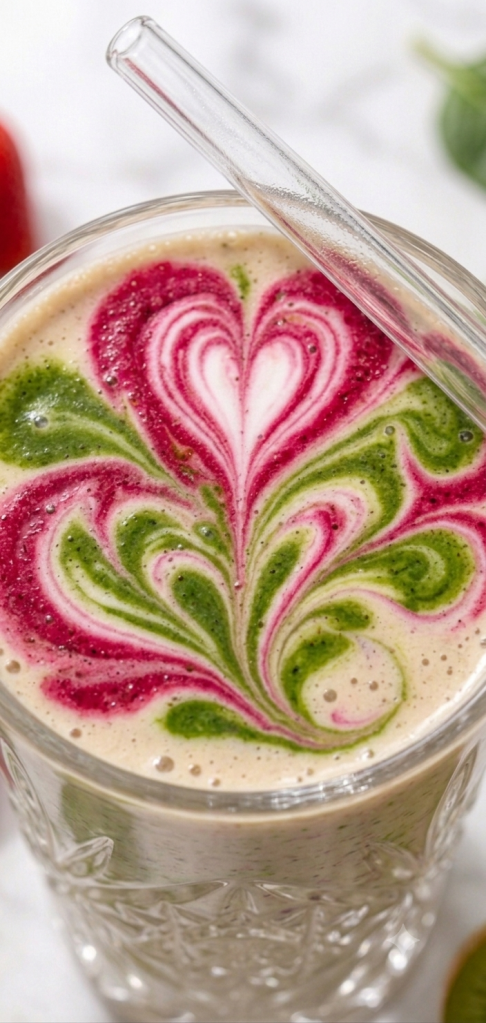
    3 Garnish and Serve: Pour it into a tall glass, pop in a reusable glass straw, and top with a few fresh strawberry slices if you’re feeling fancy.

    📝 Prep Ahead: Meal Prep Smoothie Packs

    Love this recipe but short on time in the morning? You can prep your ingredients ahead of time!

    Method:

    1 Grab a reusable silicone freezer bag or a heavy-duty freezer Ziploc.

    2 Place the frozen strawberries and frozen banana (the core frozen components) directly in the bag.

    3 Add the optional honey if you prefer it pre-frozen (though it blends fine fresh).

    4 Squeeze out as much air as possible, seal, and store in the freezer.

    5 In the morning: Grab your pre-packed bag, dump it into the blender, add the milk, Greek yogurt, and the key teaspoon of fresh lemon juice. Blend and go!

    This saves valuable minutes and ensures you have a thick, cold base every time.

    📊 Nutritional Breakdown (Estimated, per serving)

    This breakdown assumes you are using whole milk Greek yogurt and whole dairy milk, and that the recipe makes one large or two moderate-sized servings.

     Calories: ~350 – 450 kcal

     Protein: ~18g – 22g (great for muscle recovery)

     Carbohydrates: ~45g – 55g

     Total Fat: ~10g – 14g (from the whole dairy and yogurt)

     Sugars: ~30g – 35g (mostly natural from fruit, plus 1 tbsp honey)

     Dietary Fiber: ~6g – 8g (keeps you full longer)

     Vitamin C: High (from strawberries and lemon)

     Calcium: Good source (from milk and yogurt)

    ✨ Final Thoughts

    Whether you’re blending this up for a quick weekday breakfast or treating yourself on a lazy Sunday morning, this creamy strawberry smoothie is bound to become a permanent staple in your routine. It’s fast, incredibly satisfying, and that simple lemon juice trick will make you feel like an absolute blending genius. Give it a try, experiment with your favorite milk combo, and leave a comment below to let me know how yours turned out. Happy blending!

  • The Ultimate 5-Minute Breakfast: Creamy Peanut Butter Banana Smoothie

    The Ultimate 5-Minute Breakfast: Creamy Peanut Butter Banana Smoothie

    Struggling to find time for breakfast in the morning? We’ve all been there. You want something that actually keeps you full until lunch, doesn’t taste like cardboard, and—most importantly—doesn’t require a masterclass in culinary arts to prepare.

    Enter the Peanut Butter Banana Smoothie. It’s the perfect blend of creamy, sweet, and satisfying, and it takes less than five minutes to whip up.

    Why You’ll Love It

     The Texture: Using a frozen banana creates a thick, “milkshake-like” consistency without needing a ton of dairy.

     The Staying Power: Thanks to the whole rolled oats, this isn’t just a sugar spike; it’s a balanced breakfast that keeps your energy steady.

     The Versatility: This recipe is essentially a blank canvas. Whether you want to add a scoop of protein powder, a shot of espresso for a morning buzz, or some cocoa powder for a “dessert for breakfast” vibe, it works every single time.

    What You’ll Need

     1 Frozen Banana: Pro-tip: Wait until your bananas have spots before freezing them for maximum sweetness. Peel them first, then store in an airtight bag for up to 3 months.

     ⅓ Cup Whole Rolled Oats: These provide fiber and help thicken the smoothie.

     3 Tbsp Natural Peanut Butter: Creamy works best for a smooth finish.

     ¾ Cup Unsweetened Almond Milk: Or any milk you have on hand.

     A Handful of Ice: For that frosty, refreshing temperature.

     Optional Toppings: A sprinkle of chocolate chips or a drizzle of peanut butter.

    The Simple Process

    1 Prep the Base: Add your banana, oats, peanut butter, and milk into the blender. Blend on high until the oats are fully broken down and the mixture is smooth.

    2 Add the Chill: Throw in your handful of ice (and any extras like protein powder or cocoa). Pulse until you reach that perfect, creamy consistency.

    3 Pour & Enjoy: Pour into a glass, top with your favorite extras, and head out the door!

    Make It Your Own (Optional Add-ins)

    Don’t be afraid to experiment with these boosters:

     Protein Boost: One scoop of vanilla protein powder.

     Morning Perk: A splash of cold brew coffee.

     Superfood Kick: A teaspoon of maca powder.

     Chocolate Fix: A tablespoon of cacao or cocoa powder.

    Whether you’re meal-prepping for a busy week or just need a quick win before work, this smoothie is about to become your new morning go-to. Give it a try and let me know your favorite way to customize it in the comments below!

    What’s your go-to ingredient for making a smoothie feel like a complete meal?