Category: Main meals

  • Easy Peasy Red Lentil and aubergine  Moussaka (Feeds 4)

    Easy Peasy Red Lentil and aubergine Moussaka (Feeds 4)


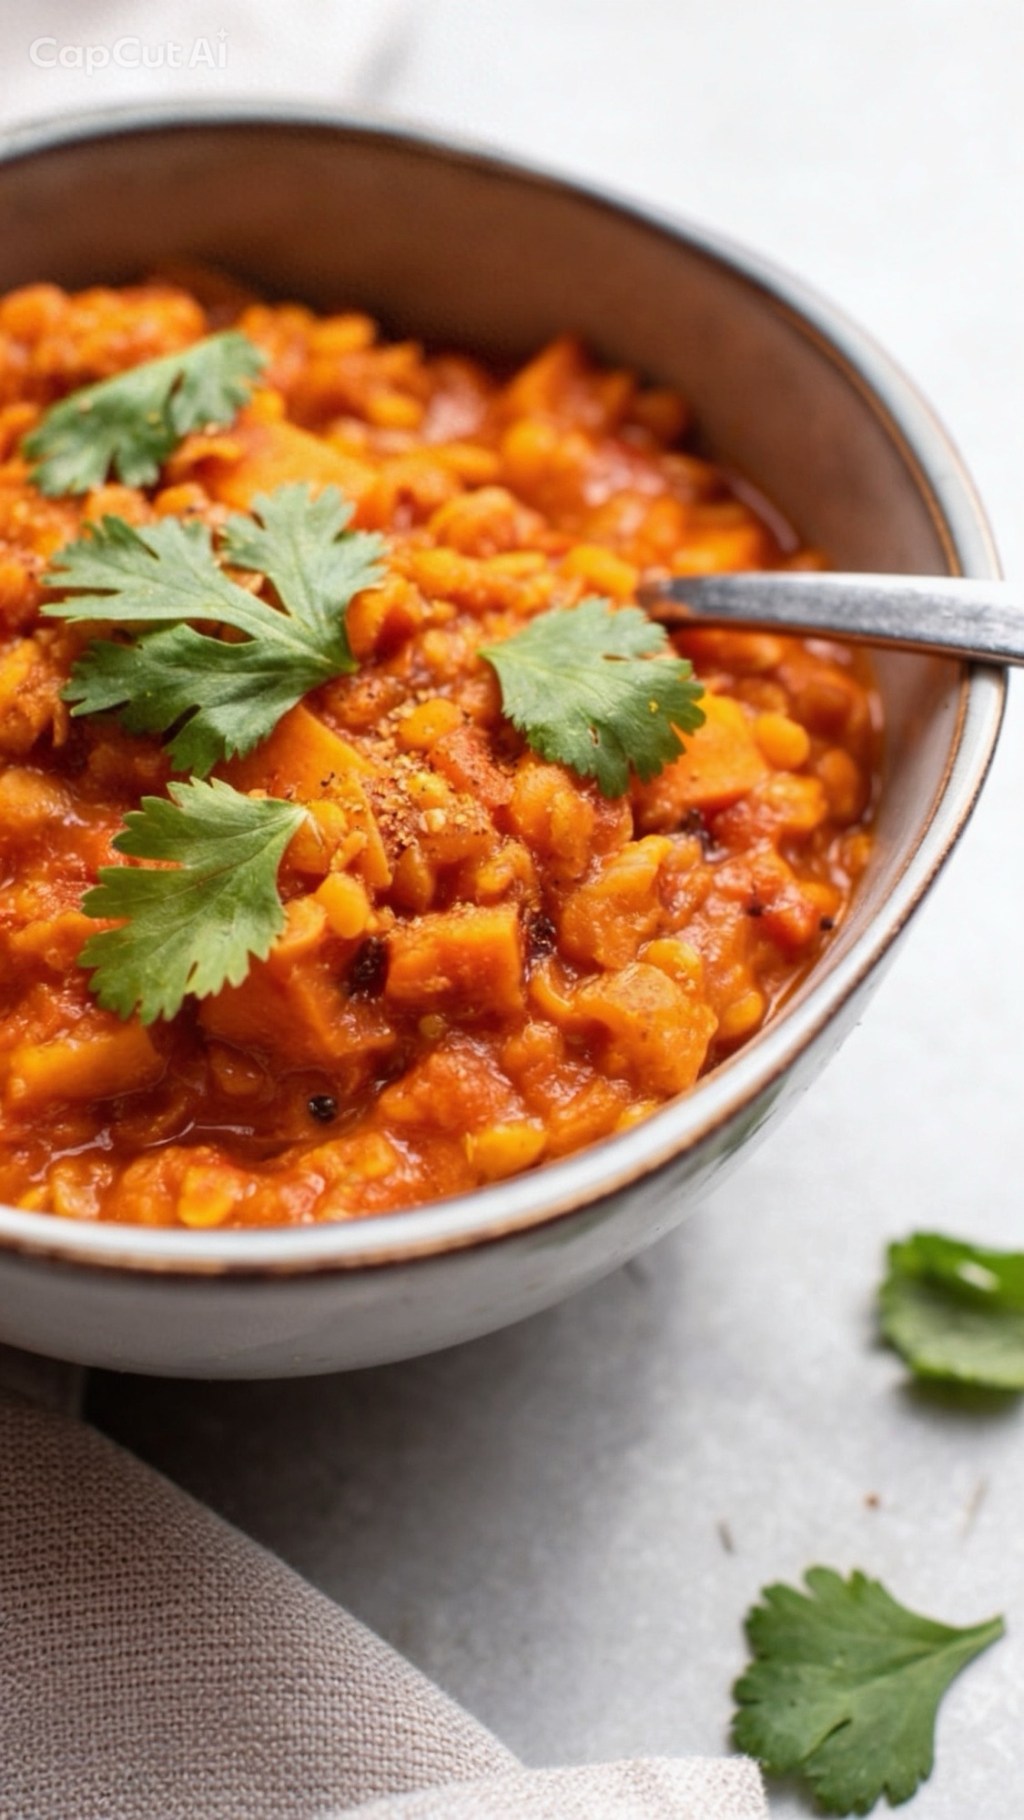
    If you love proper comfort food but don’t want to faff around with loads of ingredients, this Easy Red Lentil Moussaka is for you. It’s rich, cosy, uses simple store‑cupboard bits, and still feels a bit “special” when it comes out of the oven. Think soft layers of aubergine, a gently spiced red lentil base, and a creamy, golden top – but all very doable on a weeknight.
    Below is everything you need: ingredients, method, and a few little tips so it comes out perfect first time.

    Ingredients (serves 4)
    For the aubergine
    • 2 large aubergines, sliced into 1 cm rounds
    • 2 tbsp olive oil (for brushing)
    • Salt and pepper
    For the lentil layer
    • 2 tbsp olive oil
    • 4 garlic cloves, finely grated or crushed
    • 2 tsp dried oregano
    • 2 tsp ground cinnamon
    • 150 g dried red split lentils, rinsed
    • 2 tsp Worcestershire sauce (or a vegan alternative)
    • 20 g vegetable stock paste or 2 vegetable stock cubes
    • 2 × 400 g tins chopped tomatoes
    • 2 tsp sugar
    • 150 ml water – more if lentils look dry
    • Salt and pepper, to taste

    Method

    Get the aubergine going
    Preheat your oven to 220°C / 200°C fan / gas 7. Line one or two baking trays with baking paper if you want easier washing up. Lay the aubergine slices out in a single layer, brush (or drizzle and rub) with olive oil on both sides, and season with salt and pepper.
    Roast for about 20–25 minutes, turning halfway, until the slices are soft, lightly golden and just starting to catch at the edges. You want them cooked through because they won’t get much more time in the oven later.

    Start the lentil base
    While the aubergine is roasting, heat 2 tbsp olive oil in a large pan over medium–high heat. Add the dried oregano, ground cinnamon and about half of your garlic. Cook for around 1 minute, stirring, just until everything smells fragrant – you don’t want the garlic to brown.
    This little step – toasting the herbs and spices – makes the whole dish taste warmer and more “slow‑cooked” than it really is.

    Add lentils and liquids
    Tip in the rinsed red lentils, Worcestershire sauce, stock paste or cubes, chopped tomatoes, sugar and the water. Give it all a good stir, scraping up anything that’s stuck to the bottom of the pan.
    Bring it up to the boil, then turn the heat down so it’s gently simmering. Leave it to bubble away for about 20–25 minutes, stirring occasionally. Red lentils break down and thicken as they cook; you’re aiming for a thick, spoonable sauce – not soupy, not dry.
    If it starts to look too thick before the lentils are soft, add a splash more water. If it’s still a bit runny at the end, just let it simmer with the lid off for a few extra minutes.

    Season properly
    When the lentils are soft and the sauce is nice and thick, stir in the remaining garlic and season really well with salt and pepper. Taste it – this is your moment to get the flavour right. The lentils should taste rich, tomatoey and slightly warm from the cinnamon, not flat or bland.
    Turn off the heat and set aside for a moment while you sort the topping.

    Mix the creamy topping
    In a small bowl, stir together the crème fraîche and most of the grated cheese, keeping a little cheese back for sprinkling on top. Add a good grind of black pepper. You don’t need to overthink this – just mix until it’s smooth and combined.
    If you prefer a slightly looser topping, you can add a tablespoon or two of water or milk to loosen it slightly.

    Build your moussaka
    Tip the lentil mixture into a medium–large ovenproof dish and spread it out evenly. You want a reasonably thick layer, not too shallow.
    Lay the roasted aubergine slices over the lentils in a single layer, overlapping them slightly like roof tiles.

    Spoon the crème fraîche and cheese mixture over the top and gently spread it right to the edges. Sprinkle over the remaining cheese.

    You should now have three layers: lentils, aubergine, creamy top.

    Bake until golden
    Pop the dish under a hot grill or back into the oven (still at 220°C / 200°C fan) for about 5–8 minutes, just until the top is bubbling and golden in patches.

    Keep an eye on it – it can go from perfect to very dark quite quickly.

    Once it looks lovely and golden, take it out and let it sit for 5–10 minutes. This resting time helps it firm up so it’s easier to scoop or slice.

    Optional: quick garlic bread
    If you’re making the garlic bread, you can do this while the moussaka is having its little rest.

    Mix the grated garlic with olive oil and a pinch of oregano or za’atar. Spread the mixture onto your ciabatta slices. Grill or bake for a few minutes until crisp and lightly golden at the edges. Serve on the side to mop up all the lentil sauce.

    Little tips and swaps
    • Want it lighter? Use half crème fraîche and half fat‑free Greek yoghurt, or swap entirely to a thick yoghurt if you don’t mind a slightly tangier top.
    • Make it vegan: Use a plant‑based yoghurt instead of crème fraîche, a vegan cheese, and a vegan Worcestershire or a splash of soy sauce.
    • Spice it up: Add a pinch of chilli flakes when you add the cinnamon if you like a bit of warmth.
    • Prep‑ahead friendly: You can assemble the whole thing earlier in the day, keep it in the fridge, then bake until hot and golden when you’re ready to eat. Just give it a few extra minutes in the oven if it’s going in cold.

    This dish really feels like “home” to me – simple ingredients, nothing fancy, but so much love in the layers. I love that you can make it on a normal weeknight and it still feels like a little moment of care, whether you’re cooking just for yourself or feeding a full table. If you do make it, I hope it becomes one of those recipes you come back to on the days you need something warm, comforting and uncomplicated – the kind of meal that quietly looks after you while you get on with life.

  • Beet Risotto with Goat’s Cheese, Honey & Truffle Oil — My Budapest-Inspired Favourite

    Beet Risotto with Goat’s Cheese, Honey & Truffle Oil — My Budapest-Inspired Favourite


    You know those dishes that instantly transport you back to a special place? For me, this gorgeous beet risotto does exactly that. The first time I tried it was on a freezing cold December day in Budapest, tucked away in a fabulous little restaurant down a side street.

    I still remember the deep ruby colour, the velvety texture, and that perfect mix of earthy beetroot, creamy goat’s cheese and just a hint of truffle oil. Outside the wind was bitter, but inside it was all warmth, candlelight and that heavenly aroma. Ever since that night, it’s been a firm favourite in my kitchen — indulgent, comforting, and just that bit fancy without actually being hard to make.

    Quick beetroot tip
    Before we start — wear gloves! Either rubber or disposable plastic ones. Beetroot is a beautiful thing but it will stain absolutely everything — hands, chopping boards, worktops, you name it. I always pop a sheet of greaseproof paper over my chopping board before peeling or grating the beetroot, which completely saves it from turning pink. A bit of prep makes all the difference (and saves on scrubbing later!).
    What you’ll need
    • 2 medium raw beetroot, peeled and coarsely grated
    • 1 small onion, finely chopped
    • 1 ½ cups (around 300 g) Arborio risotto rice
    • 1 litre hot vegetable stock (keep it simmering on low)
    • 2 tablespoons olive oil
    • 1 tablespoon butter
    • 100 ml dry white wine (optional but lovely)
    • Salt and pepper to taste
    • 1 tablespoon runny honey
    • 75 g soft goat’s cheese (use the creamy kind – sliced neatly for topping)
    • A drizzle of truffle oil (or olive oil if you don’t have truffle)
    Method

    Have your grated beetroot ready (gloves and greaseproof paper at the ready so you don’t stain everything)

    In a large pan, heat the olive oil over a medium heat. Add the chopped shallot and garlic and let it soften gently — you want it translucent, not browned

    Tip in the Arborio rice and grated beetroot and stir for a minute or two so everything gets coated, glossy and lightly toasted. The rice will start to take on that gorgeous pink colour straight away

    Pour in the white wine (if using) and stir until most of it’s absorbed. Then start adding your hot stock, one ladle at a time, stirring often and waiting until each bit has soaked in before adding more.

    Keep going with the stock, stirring regularly, until the rice is tender but still has a tiny bite — about 20–25 minutes in total.

    Season with salt and pepper, then stir through the honey for that touch of mellow sweetness that balances the earthy beetroot beautifully.

    To serve, spoon the risotto into bowls, top with blobs of soft goat’s cheese, and finish with a drizzle of truffle oil and a little more honey


    The heat from the risotto just melts the cheese so it goes soft and creamy — and that mix of colours, the pink beetroot with a swirl of white goat’s cheese on top, looks absolutely stunning on the plate. It’s cozy, comforting and a little bit indulgent — perfect for creating a taste of Budapest magic right at home.


    Serving suggestions
    I love serving this on a chilly evening with something light and fresh on the side, just to balance all that creamy, cosy loveliness. A simple green salad with peppery rocket, a squeeze of lemon and a few toasted nuts works brilliantly with the earthy beetroot and tangy goat’s cheese. Warm crusty bread or a baguette is perfect for scooping up every last bit from the bowl — nothing goes to waste in this house.


    If you fancy a glass of wine with it, a crisp sauvignon blanc or dry riesling works really well with the sweetness of the beetroot and the creaminess of the risotto. If you’re more of a red wine person, go for something light and elegant like a pinot noir or Beaujolais so it doesn’t overpower the dish. To be honest though, it’s one of those dishes that feels special even with just a chilled glass of fizzy water and a candle on the table — proper Budapest winter vibes at home.

  • Stuffed Peppers With Mince – My Cosy Fakeaway Night Dinner

    Stuffed Peppers With Mince – My Cosy Fakeaway Night Dinner


    There is something so comforting about a tray of stuffed peppers bubbling away in the oven. On those nights when I want “proper food” but can’t be bothered with loads of faff, this is exactly what I throw together. It looks impressive, uses simple ingredients, and it’s perfect for using up that tub of leftover rice sitting in the fridge.
    I love serving these on a lazy evening with the cats snoring nearby, a cosy TV show on, and zero intention of going anywhere. You can keep it simple with a side salad, or go full comfort mode with garlic bread on the side.

    INGREDIENTS (SERVES 4)
    • 4 large bell peppers (any colours you like)
    • A drizzle of olive oil
    • 500 g beef mince
    • 1 medium onion, finely chopped
    • 2 cloves garlic, crushed or finely chopped
    • 1 x 400 g tin chopped tomatoes
    • 150–200 g cooked rice (about 1–1½ cups – leftover rice is perfect)
    • 1 tsp dried mixed herbs or Italian herbs
    • ½–1 tsp salt (to taste)
    • ½ tsp black pepper
    • ½ tsp chilli flakes (optional, for a little kick)
    • 100–150 g grated cheese (cheddar, mozzarella, or a mix)
    • Fresh parsley or chives to sprinkle on top (optional)

    METHOD

    Prep the peppers
    Slice the tops off the peppers and pull out the seeds and white bits inside.


    Give them a quick rinse if you like, then place them upright in an ovenproof dish.
    Drizzle with a little olive oil and sprinkle with salt and pepper.
    Pop them into a preheated oven at 180°C (fan 160°C) for about 10–15 minutes to start softening while you make the filling.

    Cook the mince
    Heat a tablespoon of olive oil in a large frying pan over medium heat.
    Add the chopped onion and cook for a few minutes until it starts to soften.
    Add the beef mince, break it up with a spoon, and cook until it’s browned all over and no pink remains.

    Stir in the garlic and cook for another minute.

    Add flavour and rice
    Pour in the tinned chopped tomatoes.
    Add the dried herbs, salt, pepper, and chilli flakes if you’re using them.
    Let this bubble away for 5–10 minutes until slightly thickened and smelling amazing.
    Stir in the cooked rice so everything is well combined

    Turn off the heat and mix in a small handful of grated cheese – this helps the filling stick together and makes it lovely and cheesy.

    Stuff the peppers
    Take the peppers out of the oven.
    Spoon the mince and rice mixture into each pepper, packing it down gently with the back of the spoon.
    Don’t be afraid to overfill them slightly – a little mound on top looks so good once the cheese melts.

    Add cheese and bake
    Sprinkle the remaining grated cheese generously over the tops of the stuffed peppers.
    Put the dish back into the oven and bake for another 15–20 minutes, or until the peppers are tender and the cheese is melted and golden on top.

    Serve and enjoy
    Let the peppers sit for about 5 minutes so they’re easier to handle.
    Sprinkle with chopped parsley or chives if you like.
    Serve one pepper per person (or two if they’re smaller), with salad, veggies, or garlic bread on the side.

    WHY THIS RECIPE WORKS SO WELL
    • It’s a brilliant “use up what you’ve got” dinner – especially leftover rice.
    • You can easily swap the beef mince for turkey, pork, chicken, or a veggie mince.
    • It’s a full meal in one – protein, carbs, and veg all in a neat little pepper.
    • They reheat well, so they’re great for packed lunches or next‑day dinners.

    If you try these stuffed peppers, I’d love to know how you get on – come back and tell me what tweaks you made and whether you went extra cheesy, added more spice, or snuck in extra veggies.


    Save this recipe for your next cosy fakeaway night, and if you share a photo or TikTok of your peppers, tag me so I can have a nosey and cheer you on in the comments.

  • The Easiest Ever Creamy Chicken Pasta Bake (Proper Comfort Food!)

    The Easiest Ever Creamy Chicken Pasta Bake (Proper Comfort Food!)

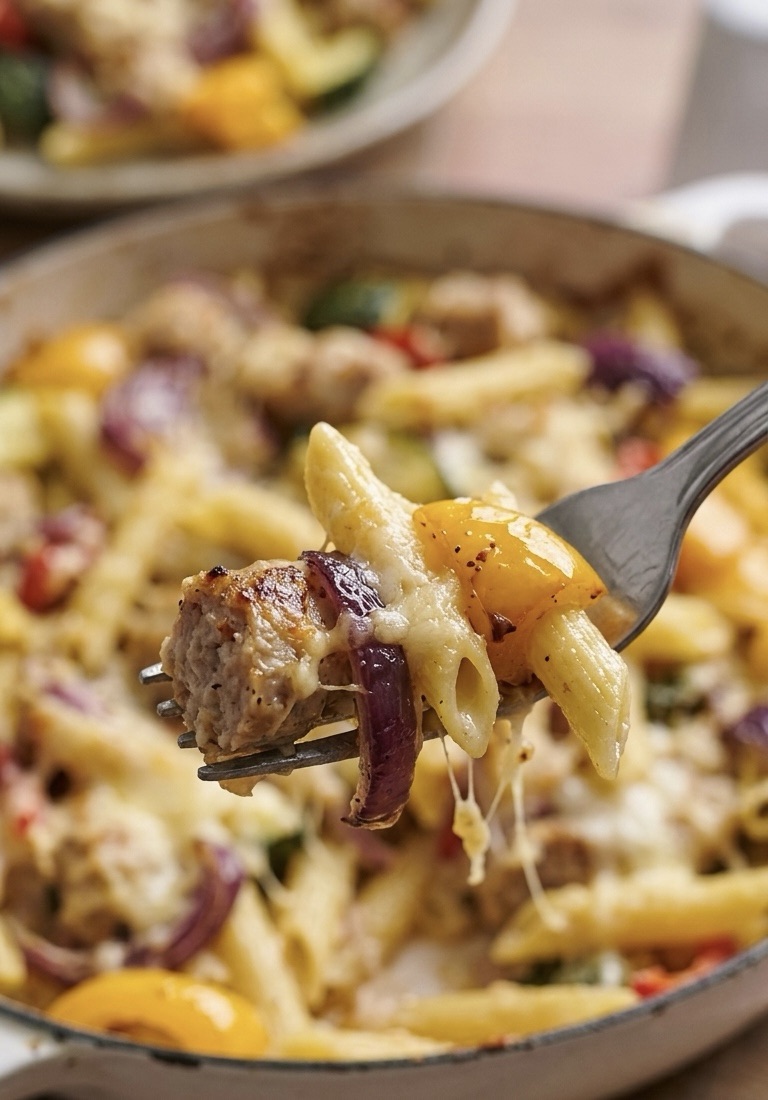
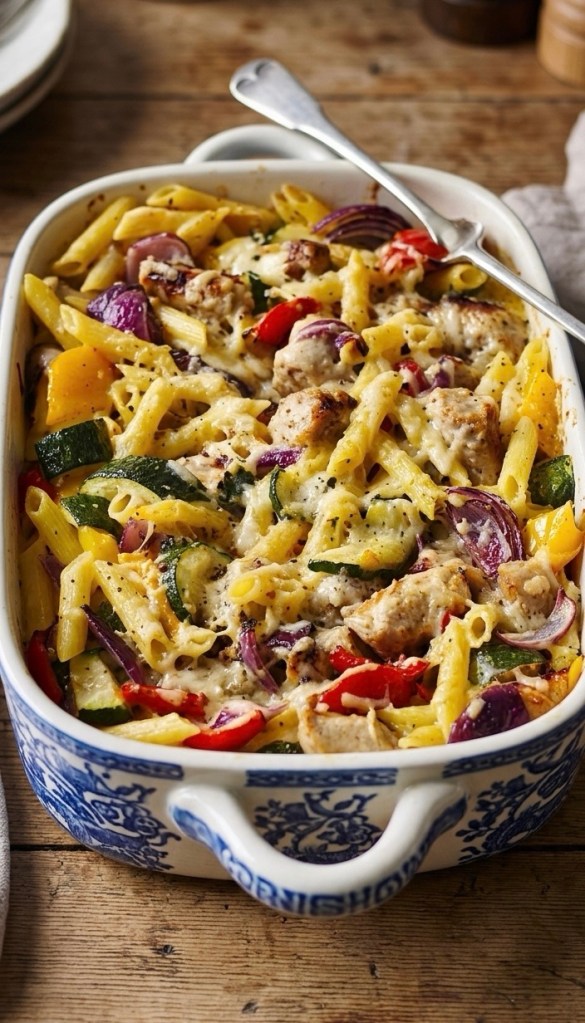
    If there was ever a guaranteed crowd‑pleaser, this creamy chicken pasta bake is it. Think tender strips of chicken, al dente pasta, a rich tomato and mascarpone sauce, and a golden, bubbling cheese crust on top. It’s the kind of dish you put in the middle of the table and everyone just helps themselves – perfect for busy weeknights, Sunday evenings on the sofa, or when you’ve got friends coming over and you want something easy but impressive.
    I’m using UK measurements and completely standard supermarket ingredients, so you can grab everything in one quick shop. No faff, no fancy equipment – just a big pan, a frying pan, and an oven dish.

    What You’ll Need (Serves 4 Generously)

    • 4 tbsp olive oil
    • 1 medium onion, finely chopped
    • 2 garlic cloves, crushed or very finely chopped
    • ¼ tsp dried chilli flakes (use less if you’re spice‑shy, more if you like a kick)
    • 2 × 400g tins chopped tomatoes
    • 1 tsp caster sugar (helps balance the tomatoes)
    • Salt & freshly ground black pepper, to taste
    • 6 tbsp mascarpone cheese (roughly 90g, but no need to be exact)
    Protein, pasta & cheese
    • 4 skinless chicken breasts, sliced into thin strips
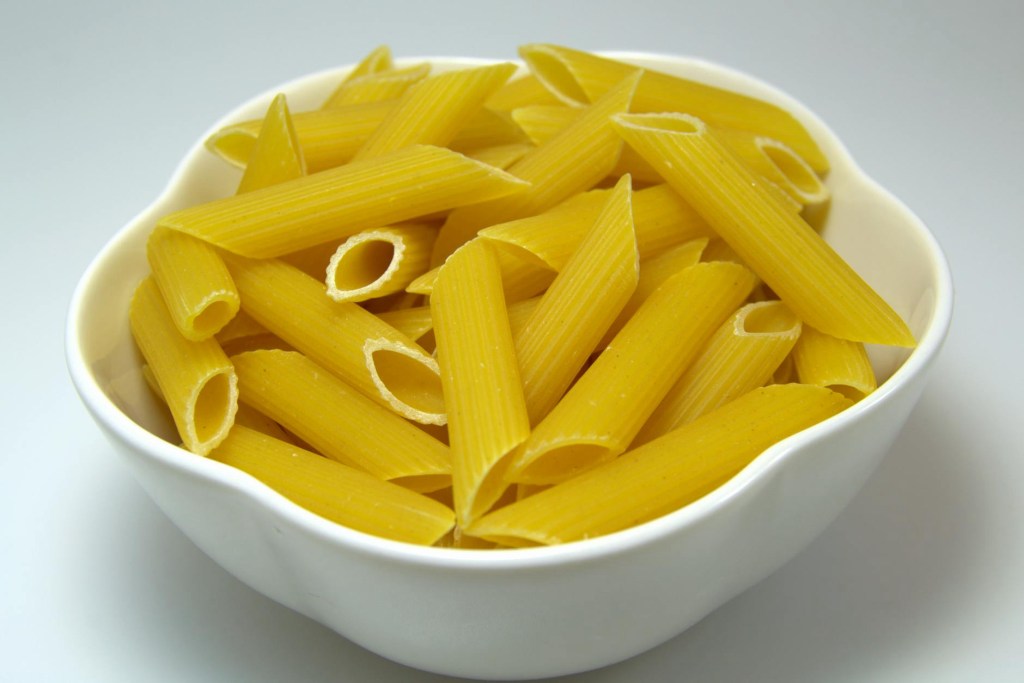
    • 300g penne pasta (or another short pasta like rigatoni or fusilli)
    • 70g mature cheddar, grated
    • 50g mozzarella, grated or torn
    Fresh bits
    • ½ small bunch fresh parsley, finely chopped (leaves only)

    Prep Before You Start


    A tiny bit of organisation makes this recipe very stress‑free:

    Pre‑chop and measure
    • Dice the onion.
    • Crush or finely chop the garlic.
    • Slice the chicken breasts into even strips – this helps them cook quickly and stay juicy.
    • Grate the cheddar and mozzarella if you’re not using ready‑grated.
    • Finely chop the parsley.

    Preheat your oven
    • Set it to 220°C / 200°C fan / gas 7 so it’s properly hot when we’re ready to bake.

    Pre‑chop and measure
    • You’ll want a large frying pan for the sauce, another non‑stick pan for the chicken, a big saucepan for pasta and a medium ovenproof dish (roughly 2L capacity – anything that would hold a standard lasagne).

    Step 1 – Slow‑Cooked Tomato & Mascarpone Sauce

    Gently cook the onion
    • Add 2 tbsp olive oil to a large frying pan over medium heat.
    • Tip in the chopped onion and a pinch of salt.
    • Cook for 10–12 minutes, stirring occasionally, until the onion is soft, translucent and just starting to turn golden at the edges.

    Add garlic & chilli
    • Stir in the garlic and ¼ tsp chilli flakes.
    • Fry for about 1 minute until fragrant, keeping the heat gentle so nothing burns.

    Tomatoes & seasoning
    • Pour in the 2 tins of chopped tomatoes.
    • Add 1 tsp caster sugar, a good pinch of salt and a few grinds of black pepper.
    • Stir everything together and bring it to a gentle simmer.

    Reduce the sauce
    • Let the sauce simmer uncovered for about 20 minutes, stirring now and then, until it has thickened and reduced a little. It should look glossy and rich, not watery.

    Stir in the mascarpone
    • Turn the heat down low and spoon in the mascarpone.
    • Stir until it melts into the tomatoes and the sauce turns creamy and orange‑pink.
    • Taste and adjust the seasoning – add more salt, pepper or a pinch more sugar if needed.

    Step 2 – Juicy Pan‑Fried Chicken

    Heat the pan
    • Add 1 tbsp olive oil to a non‑stick frying pan over medium‑high heat.

    Season & fry
    • Season the chicken strips with salt and pepper.
    • Fry them in the hot pan for 5–7 minutes, turning occasionally, until they’re lightly golden on the outside and cooked through in the middle.

    Rest briefly
    • Once cooked, take the chicken off the heat.
    • Scrape any tasty juices from the pan into the sauce for extra flavour.

    Step 3 – Perfect Pasta

    Boil the pasta
    • Fill a large saucepan with water, bring to the boil and add a good handful of salt.
    • Add the 300g penne and cook according to the packet instructions, but stop when it’s just al dente – usually about a minute less than the packet says.

    Drain & coat
    • Drain the pasta in a colander.
    • Toss with the remaining 1 tbsp olive oil so it doesn’t stick together while you assemble everything.

    Step 4 – Bring It All Together

    Layer in the oven dish
    • Tip the drained pasta into your ovenproof dish.
    • Add the cooked chicken and any resting juices.
    • Pour over the creamy tomato mascarpone sauce.

    Mix well
    • Gently stir everything together so the pasta and chicken are evenly coated in the sauce and there are no dry patches.

    Cheese & herbs
    • Sprinkle over the grated cheddar in an even layer.
    • Follow with the mozzarella.
    • Finish with the chopped parsley scattered across the top.
    At this point you can cover and chill the dish if you want to make it ahead – it will sit happily in the fridge for up to a day. Just bring it out while the oven heats and add an extra 5–10 minutes to the baking time.

    Step 5 – Bake Until Golden & Bubbling

    Into the oven
    • Place the dish on the middle shelf of your preheated oven.
    • Bake for about 20 minutes, or until the top is deep golden, the cheese is bubbling, and you can see the sauce just starting to peek round the edges.

    Rest before serving
    • Take the pasta bake out of the oven and leave it to sit for 5 minutes.
    • This helps it set slightly, so it’s easier to scoop out neat portions (and saves your mouth from molten cheese burns).

    Serve
    • Spoon generous helpings into warm bowls.
    • Add a little extra parsley on top if you like and serve with a green salad, garlic bread, or just a glass of whatever you fancy.

    Variations & Swaps
    • More veg – Stir a couple of handfuls of spinach into the sauce at the end, or throw some peas or sweetcorn into the pasta water for the last few minutes.
    Different cheeses – Swap mozzarella for Gruyère or Emmental; go for extra‑mature cheddar if you like a strong flavour.


    Leftovers –

    Use leftover roast chicken instead of fresh; shred and stir into the sauce. Leftover portions reheat well with a splash of water or milk to loosen the sauce.
    • Meat‑free – Skip the chicken and add roasted veg (courgettes, peppers, red onion) or a tin of cannellini beans for extra protein.

    Once you’ve made this creamy chicken pasta bake once, I honestly think it’ll sneak its way into your regular weeknight rotation. It’s one of those recipes that looks like you’ve made a real effort, but in reality you’ve mostly just stirred a few pans and let the oven do all the hard work – my favourite kind of cooking.
    What I love most is how forgiving it is. Running late? It’ll sit happily in the oven on a low heat. Got odds and ends of veg lurking in the fridge? Chuck them in. Cooking for extra people? Just scale everything up and grab a bigger dish. Nobody ever complains when there’s too much pasta, do they?
    It’s also a brilliant option for busy days when you want to get ahead. You can build the whole thing earlier in the day, park it in the fridge, then just bake it when you’re ready to eat. Future you will be very smug when all that’s left to do is turn the oven on and pour yourself a drink.


    If you do give this a go, I’d absolutely love to see it – tag me in your photos or videos and let me know how you got on. Did you add extra chilli? More cheese? Garlic bread on the side? (Strongly encouraged.) Don’t forget to save or pin this recipe so you’ve got it handy for the next time you need a proper cosy, comforting dinner without any drama.

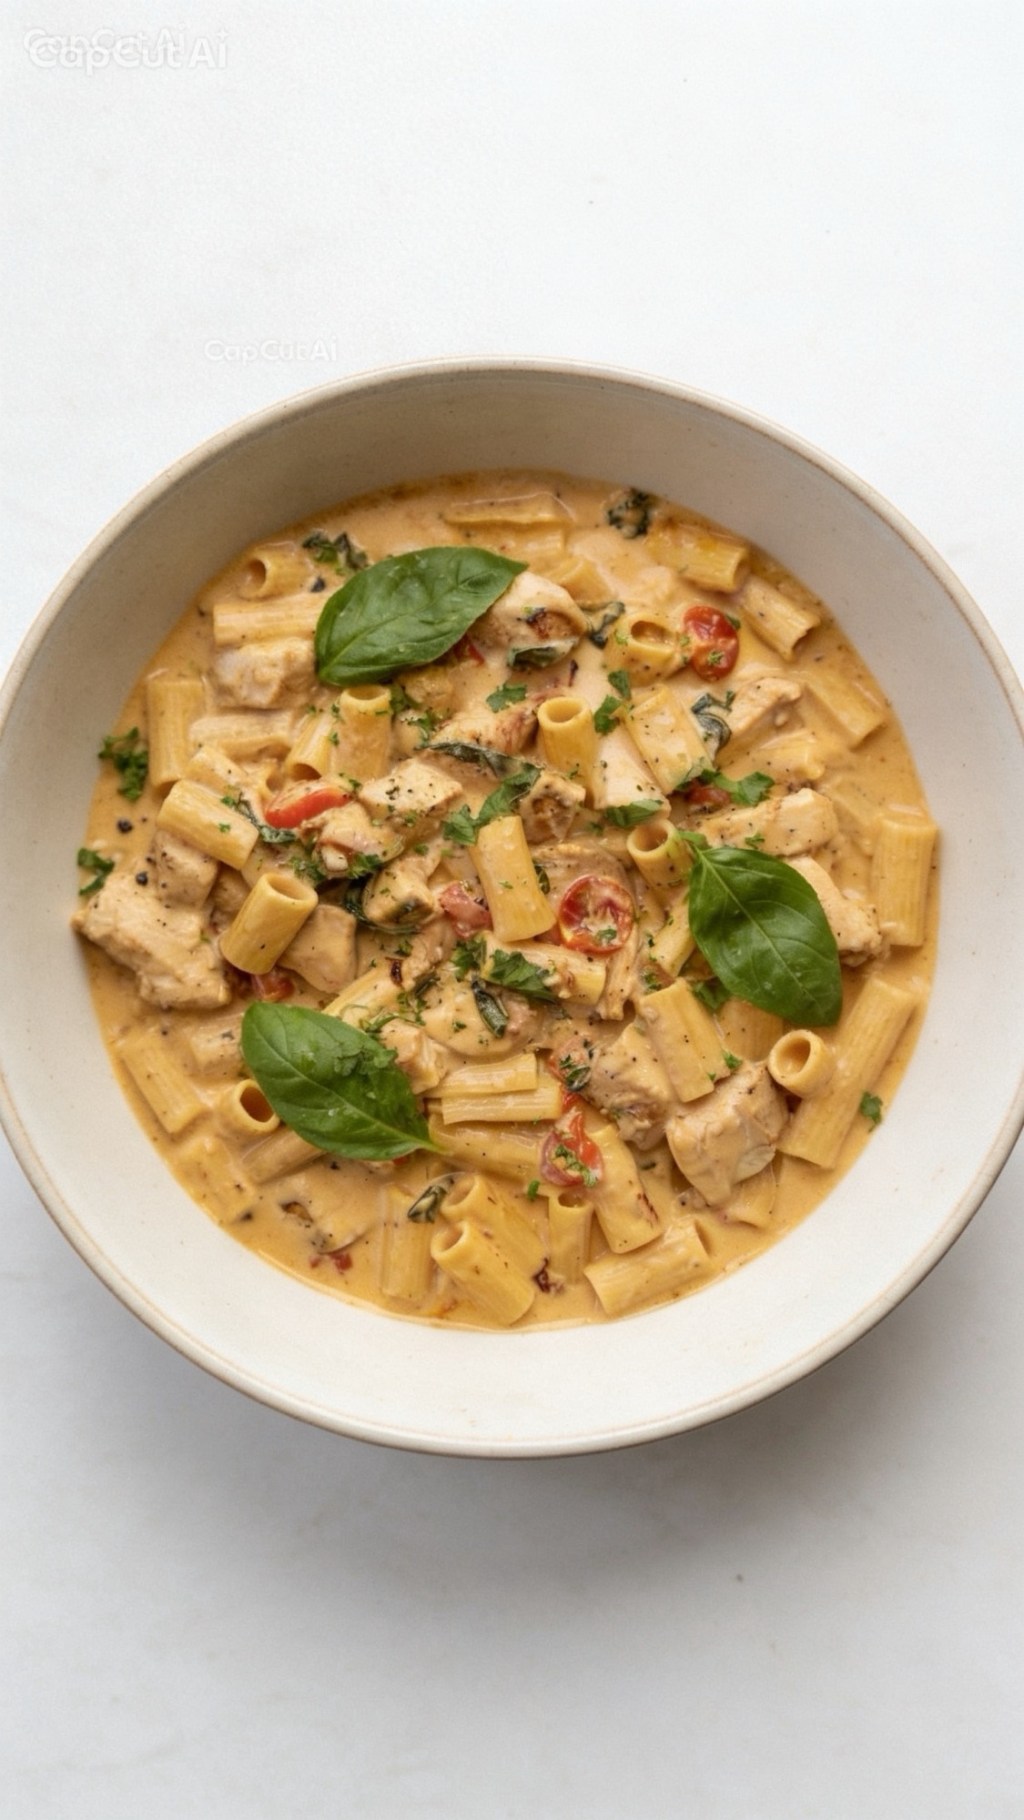
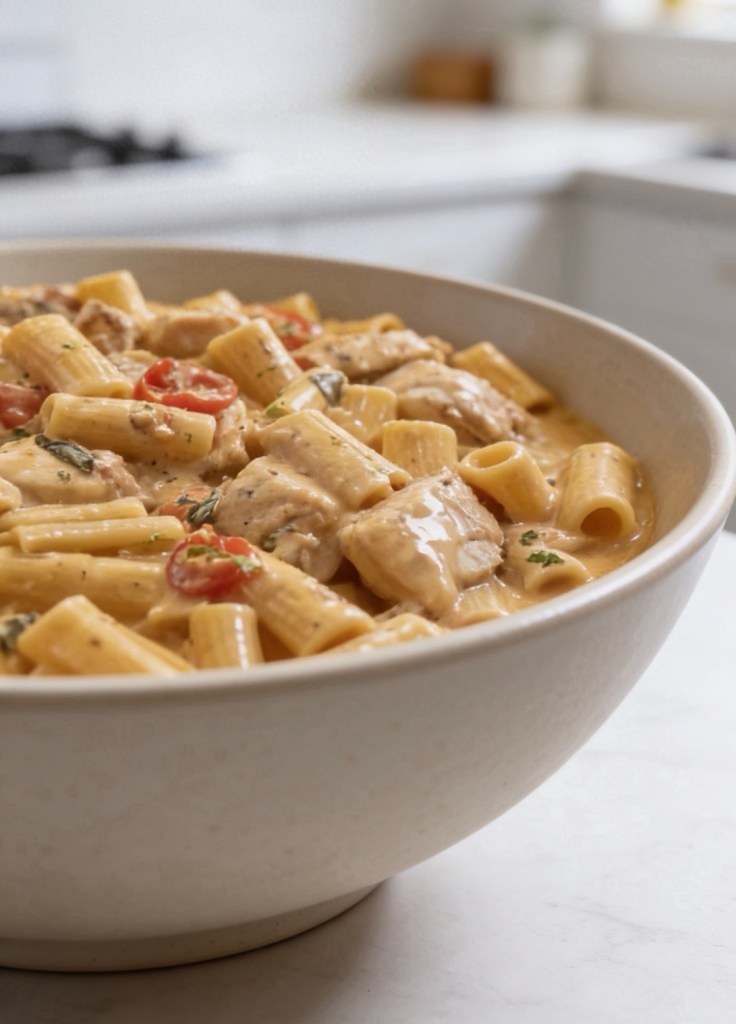
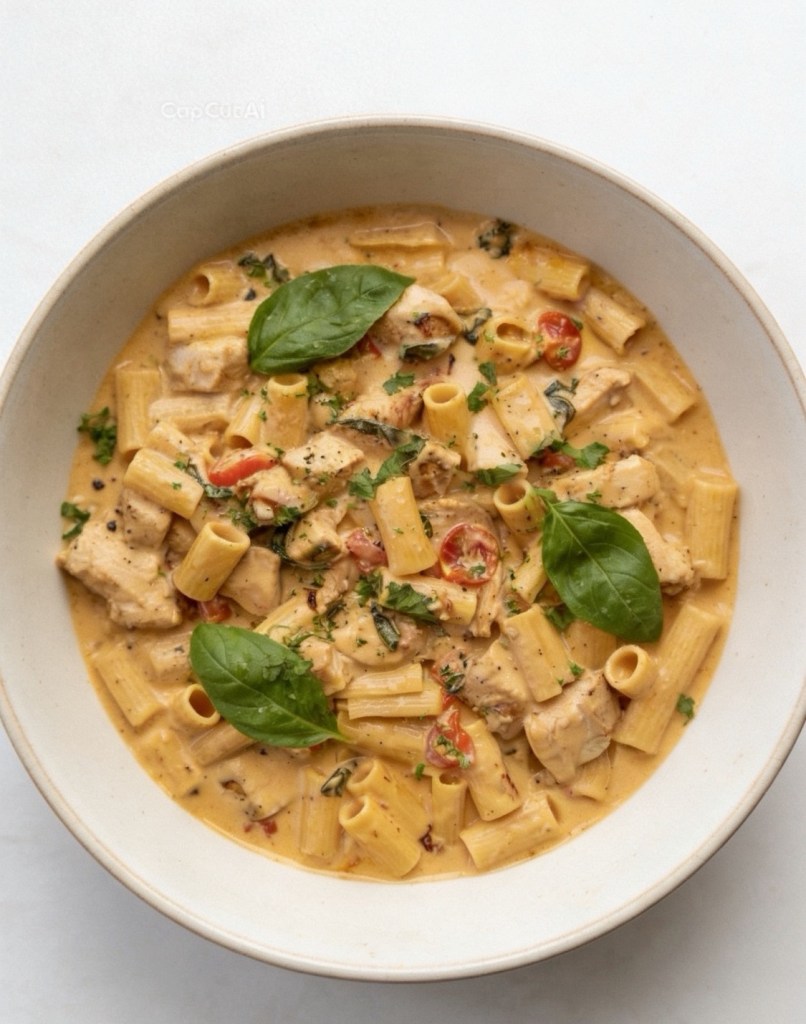
  • One-Pan “Marry Me” Chicken Rigatoni (The Pasta They’ll Never Forget)

    One-Pan “Marry Me” Chicken Rigatoni (The Pasta They’ll Never Forget)

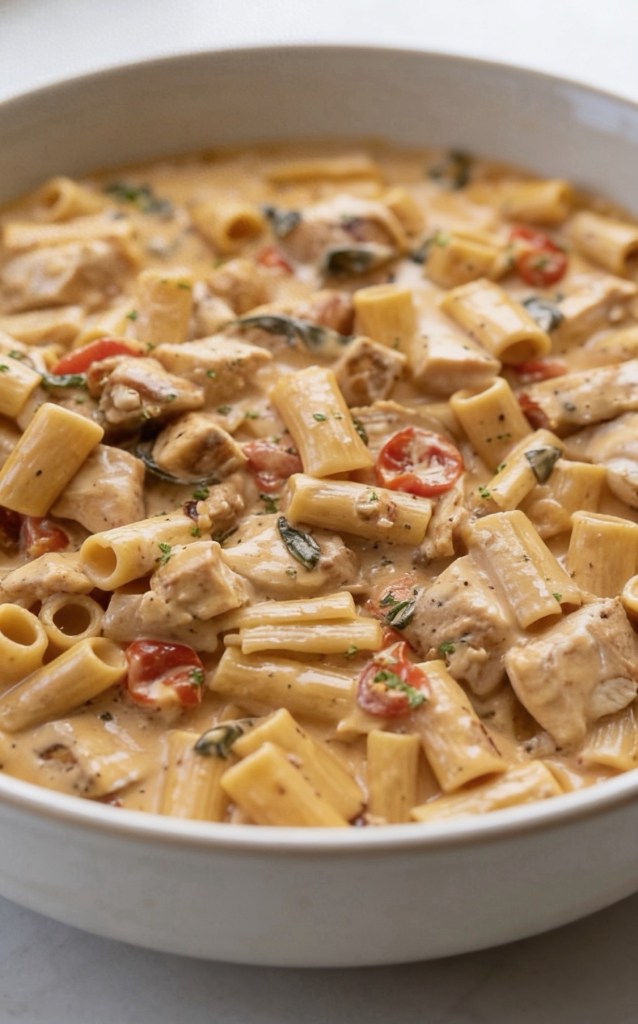
    You know those pastas that are so good they go a bit quiet at the table because everyone’s too busy eating? That’s exactly the vibe with this Marry Me Chicken Rigatoni. It’s rich and creamy, but still bright and tangy, with juicy chicken, sun-dried tomatoes, garlic and Parmesan all wrapped around chunky rigatoni that catches every last bit of sauce. It looks like something you’d order out, but it’s actually just a big cosy one-pan pasta that you can absolutely pull off on a weeknight.
    This is the kind of recipe that quickly becomes a “signature dish” – perfect for at-home date nights, having friends round, or just spoiling yourself after a long day. The sauce comes together in the same pan you cook the chicken in, which means all those golden, flavour-packed bits on the bottom get whisked into the sauce. The rigatoni is important: the ridges and tubes hold the sauce beautifully so you’re never stuck with dry pasta and a puddle of sauce at the bottom of the bowl. Add some garlic bread and a glass of something nice and you’re fully in “fakeaway Italian restaurant” territory.

    This is a proper cosy one‑pan pasta, so once you start, everything happens in the same dish – minimal effort, maximum comfort.

    Prep time: 10 minutes
    Cook time: 20 minutes
    Serves: 3–4

    Ingredients

    2 large chicken breasts

    • Salt and black pepper
    • 1 tbsp olive oil
    • 3 garlic cloves, finely chopped
    • 60–80 g sun‑dried tomatoes in oil, drained and finely chopped
    • 1 tsp dried oregano
    • 1 tsp paprika
    • 250 g dried pasta (penne/spirals/rigatoni all good)
    • 600–650 ml chicken stock
    • 150 ml double cream
    • 40–50 g grated Parmesan cheese
    • Optional: pinch of chilli flakes, handful of fresh basil, squeeze of lemon

    1. Season and brown the chicken
      Season your chicken pieces generously with salt and pepper. Heat the olive oil in a large deep frying pan or casserole over medium–high heat, then add the chicken and fry for about 5 minutes until it’s starting to colour on all sides. You don’t need it fully cooked yet, just nicely sealed and golden in places.
    2. Build the flavour base
      Reduce the heat slightly so nothing burns. Add the chopped garlic, sun‑dried tomatoes, dried oregano and paprika straight into the pan with the chicken. Stir everything together and let it cook for 2–3 minutes until it smells amazing, the garlic has softened and the spices are toasty and fragrant.
    1. Add dry pasta and stock
      Tip the dry rigatoni straight into the pan with the chicken and flavour base. Pour in the chicken stock and stir well so the pasta is mixed through and everything is mostly submerged. Bring it up to a gentle boil, then lower the heat to a steady simmer.
    2. Let the pasta cook in the pan
      Pop a lid on and cook for about 10–12 minutes, stirring occasionally so the pasta doesn’t stick to the bottom. The rigatoni will slowly soak up the stock and all those garlicky, tomato‑y flavours. You’re aiming for the pasta to be al dente and most of the liquid to be absorbed.

    5. Add the cream and thicken the sauce
    Pour in the double cream and stir it through. Simmer for a further 2–3 minutes, lid off, until the sauce turns thick, silky and glossy, coating the pasta and chicken. If it looks too thick at any point, splash in a bit more stock or water to loosen it.

    6. Finish with Parmesan, chilli and basil
    Take the pan off the heat and stir in the grated Parmesan until it melts into the sauce. Add chilli flakes for a gentle kick, then stir through the fresh basil. If you like a bit of brightness against the richness, squeeze in a little lemon juice and give it all a good mix.

    Taste, tweak and serve
    Taste and adjust the seasoning – a little more salt, pepper or chilli if you think it needs it. Serve straight from the pan into warm bowls, topping each portion with extra Parmesan and a few basil leaves for that “wow” moment.

    Little tips and serving ideas
    • A simple green salad or some steamed greens on the side balances the richness really nicely.
    • Garlic bread or crusty bread is perfect for mopping up any leftover sauce in the pan.
    • Leftovers reheat well – just add a splash of water or cream when you warm it through so the sauce loosens up again.
    Make this once and it’s very likely to become your signature pasta – the one people ask for again and again, and the one you know you can always rely on when you want maximum flavour with minimum faff.

    If you make this One‑Pan Marry Me Chicken Rigatoni, let me know how it goes – I love hearing if it got any “marry me” reactions at the table! Save or pin this recipe so you’ve got it ready for your next cosy pasta night, and if you share it on social, tag me so I can see your version. And if creamy, one‑pan comfort food is your thing, stick around – there are plenty more easy, feel‑good dinners coming your way.

    Shopping links – a small commission may be paid to me

    utensils set https://amzn.to/3PC7lbJ

    chopping board .. later edition to mine https://amzn.to/4v42HDh

    pan set .. https://amzn.to/41aNToV

    kitchen scales https://amzn.to/4bNL17G

  • Ultimate Comfort Cottage Pie

    Ultimate Comfort Cottage Pie

    This the cottage pie you make when you want the house to smell amazing and everyone gathered around the table, waiting for that first spoonful. It’s rich, cosy and full of flavour, with a proper savoury mince base and a thick layer of cheesy mash that crisps up beautifully in the oven.

    Ingredients


    For the filling
    • 3 tbsp olive oil
    • 1¼kg beef mince
    • 2 onions, finely chopped
    • 3 carrots, chopped
    • 3 celery sticks, chopped
    • 2 garlic cloves, finely chopped
    • 3 tbsp plain flour
    • 1 tbsp tomato purée
    • 1 large glass red wine
    • (or red wine stock if you prefer)
    • 850ml beef stock
    • 4 tbsp Worcestershire sauce
    • A few thyme sprigs
    • 2 bay leaves
    • Salt and black pepper, to taste
    For the mash
    • 1.8kg potatoes, peeled and chopped
    • 225ml milk (I use double cream for a more luxurious feel)
    • 25g butter
    • 200g strong cheddar, grated
    • Freshly grated nutmeg (optional)
    • Salt and black pepper, to taste

    Method
    Make the filling

    Brown the mince
    Heat 1 tbsp of the olive oil in a large saucepan over medium–high heat. Add some of the beef mince and cook until nicely browned, then scoop it out onto a plate. Repeat with the rest of the mince, adding a little more oil if you need to. Taking the time to brown it in batches gives you that deep, savoury flavour that makes this pie so satisfying

    Soften the vegetables
    Once all the mince is browned and set aside, add the remaining 2 tbsp olive oil to the same pan. Tip in the chopped onions, carrots and celery with a pinch of salt. Cook them gently for about 20 minutes, stirring now and then, until they’re soft and starting to turn lightly golden. This is a lovely, low‑effort stage – you can potter about the kitchen while the veg quietly do their thing.

    Add garlic, flour and tomato
    Stir in the finely chopped garlic, then sprinkle over the plain flour and add the tomato purée. Turn the heat up slightly and cook for 2–3 minutes, stirring, so the flour can cook out. The mixture will look a bit thick and clumpy at this stage, but that’s exactly what you want – it will help thicken the gravy later.

    Deglaze and add the liquids
    Return all the browned mince (and any juices on the plate) to the pan. Pour in the large glass of red wine or red wine stock. Let it bubble for a minute or two, scraping up any tasty browned bits from the bottom of the pan as you go.

    Build the gravy
    Add the beef stock, Worcestershire sauce, thyme sprigs and bay leaves. Give everything a good stir, bring it up to a gentle simmer, then turn the heat down low. Leave it to cook uncovered for about 45 minutes, stirring occasionally.

    Thicken and season
    After around 30 minutes, have a look at the consistency. If the liquid still looks quite thin, turn the heat up just a touch and let it reduce until you have a thick, glossy gravy that coats the mince. Fish out the bay leaves and thyme stalks, then taste and season well with salt and black pepper. Set the filling aside while you make the mash.

    Make the cheesy mash

    Cook the potatoes
    Put the peeled, chopped potatoes into a large pan and cover with salted cold water. Bring to the boil, then reduce to a simmer and cook until the potatoes are tender when you poke them with a knife.

    Steam‑dry and mash
    Drain the potatoes really well, then leave them in the hot pan for a couple of minutes to steam‑dry – this helps keep the mash fluffy. Add the milk, butter and about three‑quarters of the grated cheddar. Mash until smooth and creamy.

    Season the mash
    Season with a little freshly grated nutmeg if you like, plus salt and black pepper to taste. The mash should taste delicious on its own – that’s your sign it’s ready to top the pie.

    Assemble and bake

    Preheat the oven
    Heat your oven to 220°C / 200°C fan / Gas 7.

    Layer up the pie
    Spoon the beef filling into two ovenproof dishes, spreading it out in an even layer. Carefully spoon or pipe the mash over the top, making sure you cover all the meat so the gravy stays tucked underneath

    Add the cheese
    Scatter the remaining grated cheddar over the top of the mash. Little peaks and swirls will catch and go extra golden and crispy in the oven.

    Bake until golden
    Bake for 25–30 minutes, or until the top is beautifully golden, crisp in places and the filling is bubbling around the edges. Let it sit for a few minutes before serving so it’s easier to scoop.

    Slow cooker option
    If you want to make life easier, you can let the filling bubble away in the slow cooker:

    1. Brown the mince in batches as above, then tip it into your slow cooker.
    2. Soften the onions, carrots and celery in a pan, then add the garlic, flour and tomato purée and cook for 2–3 minutes.
    3. Add the red wine or red wine stock, beef stock, Worcestershire sauce, thyme, bay leaves, salt and pepper. Bring to a simmer, then pour everything into the slow cooker over the mince.
    4. Cook on High for 4–5 hours until rich and thick.
    5. Make the mash as above, spoon the filling into an ovenproof dish, top with mash and cheese, then bake at 220°C / 200°C fan / Gas 7 for 20–25 minutes until golden.

    This is one of those recipes that quietly becomes “your” cottage pie – the one people ask for when they’re coming over, or the one you keep a spare of in the freezer for those days when you just need something warm and familiar. It’s not fancy food, but that’s exactly why it feels so special: it’s simple, generous and made to be eaten in big, cosy scoops.
    Serve it with a pile of peas, some buttery greens or just on its own in a big bowl, curled up on the sofa. If you tweak it – add peas to the mince, swap the cheddar, skip the wine – make a note of what you did. Over time, this will turn into your own little family version, with all its tiny changes and stories attached.
    If you try it, I’d love to know: are you here mostly for the rich mince, or are you team “all about the cheesy mash”?

    Links .. small commission paid

    Cheese grater https://amzn.to/4tbQTgx

    Pan set (in cream ) https://amzn.to/3O7cUOQ

    hand mixer https://amzn.to/3PDll4W